Categories
Guide

t shirt size guide

Discover the ultimate t-shirt size guide to ensure a perfect fit. Learn how chest measurements, fabric type, and fit styles impact your choice. Avoid common mistakes and find your ideal size effortlessly with this comprehensive guide.

Understanding the Importance of Proper Fit

A proper-fitting t-shirt is essential for both comfort and style. Ill-fitting shirts can cause discomfort, restrict movement, or appear unflattering. A shirt that is too tight may feel restrictive, while one that is too loose can look sloppy. Proper fit ensures optimal comfort, allowing you to move freely and maintain a polished appearance. It also enhances confidence, as a well-fitting t-shirt complements your body type. Understanding the importance of proper fit helps you make informed decisions when selecting sizes, ensuring a balance of style and comfort.

Overview of T-Shirt Sizing Charts

T-shirt sizing charts provide a standardized guide to help determine the best fit. These charts typically include measurements for chest, waist, and shirt length, varying by brand and style. While some brands use numeric sizes (S, M, L), others offer detailed measurements in inches or centimeters. International sizing differences, such as US, European, and Asian standards, also play a role. Understanding these charts is crucial for selecting the right size, ensuring comfort, and achieving the desired fit, whether you prefer a regular, slim, or tall style.

How to Measure Yourself for the Perfect Fit

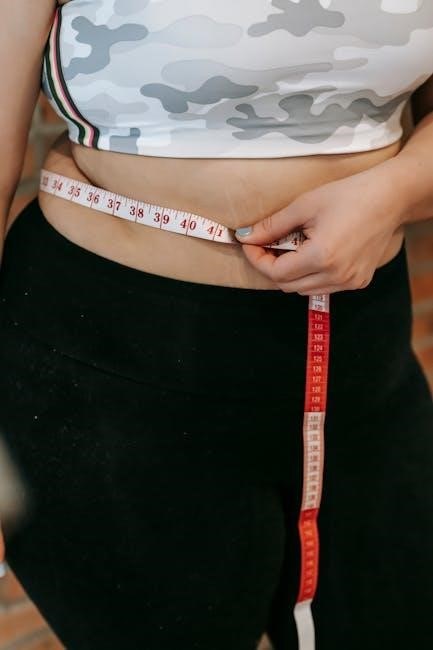
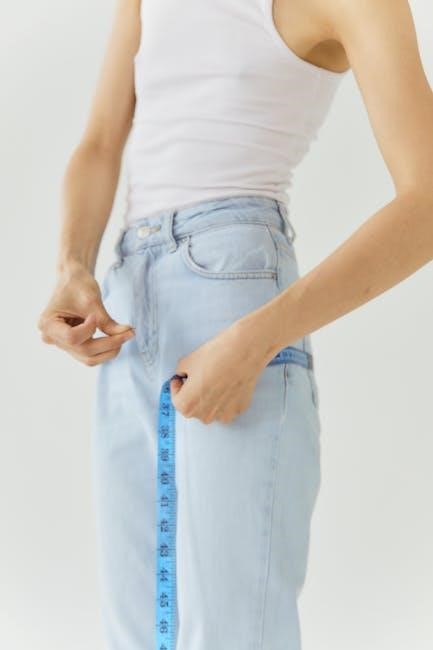
Measure your chest, waist, and hips with a flexible tape measure. Ensure the tape is level and not too tight for accurate sizing.

Chest Measurement: The Key to Choosing the Right Size

Accurate chest measurement is essential for selecting the perfect t-shirt size. Measure around the fullest part of your chest, just under the armpits, with a flexible tape measure. Ensure the tape is level and not too tight. This measurement directly corresponds to the sizing chart, helping you determine whether a small, medium, large, or other size is best. Remember, fabric type and stretch may affect fit, so always refer to the brand’s specific guidelines for precise sizing.

  • Measure under the armpits for the most accurate reading.
  • Fabric stretch and fit style (slim, regular, or tall) can impact size choice.

Waist and Hip Measurements: Additional Factors for Accuracy

While chest measurements are primary, waist and hip measurements add precision to your t-shirt size selection. Measure your waist at its narrowest point and hips at their widest to ensure a balanced fit. These measurements help determine the shirt’s comfort around the midsection, especially for styles like slim or tall fits. Combining these with chest size ensures a more accurate fit, avoiding overly tight or loose clothing. Always measure with a straight, horizontal tape measure for the best results.

  • Waist: Measure at the narrowest point, typically where trousers sit.
  • Hips: Measure at the widest part, keeping feet close together.

Popular T-Shirt Fit Styles

Explore the main t-shirt fit styles, including regular, slim, and tall fits, each catering to different body types and fashion preferences for a personalized look.

Regular Fit: The Classic T-Shirt Style

The regular fit is a timeless choice, offering a comfortable, relaxed silhouette that isn’t too tight or boxy. Perfect for everyday wear, it suits most body types and preferences, providing ease of movement while maintaining a classic look. This style is ideal for those who prefer a traditional fit that’s neither slim nor oversized. Its universal appeal makes it a popular choice for casual outings and layering. Whether you’re looking for versatility or simplicity, the regular fit remains a wardrobe staple for its balanced comfort and style.

Slim Fit: Tailored for a Modern Look

The slim fit T-shirt offers a contemporary, tailored appearance that skims the body without being overly tight. Designed for a modern aesthetic, it’s perfect for those seeking a stylish, form-fitting option. This fit is slightly narrower in the chest and sleeves compared to the regular fit, creating a sleek, streamlined look. Ideal for layering or making a fashion statement, the slim fit is a great choice for individuals who prefer a more polished, trendy silhouette while maintaining comfort and flexibility.

Tall Fit: Designed for Longer Length and Sleeve Adjustments

The tall fit T-shirt is specifically crafted for individuals with a taller frame, featuring extended length and proportionally longer sleeves. This style ensures coverage and comfort, eliminating the need for alterations. Designed to accommodate longer torsos, the tall fit maintains a flattering silhouette without compromising on style. It’s ideal for those seeking a more tailored look while addressing the unique needs of taller body types, offering both functionality and modern aesthetics in one design.

Brand-Specific Sizing Charts

Brand-specific sizing charts vary by manufacturer, such as Gildan and Bella Canvas, offering unique measurements. Always consult the brand’s chart for precise sizing to ensure the best fit.

Gildan and Bella Canvas: Common Measurements and Differences

Gildan and Bella Canvas offer distinct sizing approaches. Gildan’s unisex shirts often feature broader chest measurements, while Bella Canvas focuses on a tailored fit with precise chest and body length. Both brands provide detailed charts, but Gildan’s sizes tend to run larger. Bella Canvas emphasizes a slimmer cut, making it ideal for a modern look. Understanding these differences helps in selecting the right size for a comfortable and stylish fit. Always refer to the specific brand’s chart for accurate measurements.

International Sizing: Comparing US, European, and Asian Standards

Understanding international sizing standards is crucial for a perfect fit. US sizes often run larger than European and Asian sizes, with differences in chest and waist measurements. For example, a US Medium may equate to an EU Medium but fit differently due to regional sizing norms. Asian sizes tend to be more fitted, while European sizes may have longer lengths. Always consult brand-specific charts, as global sizing variations can significantly affect the fit of your t-shirt.

How to Choose the Right T-Shirt Size

Ensure a perfect fit by matching your chest measurements to sizing charts and considering your preferred fit style; Check brand-specific charts and fabric stretch for accuracy.

Using Body Measurements to Match Sizing Charts

Accurate body measurements are key to selecting the right t-shirt size. Measure your chest around the fullest part, ensuring the tape is horizontal. For men, this typically determines the size, while women should also consider waist and hip measurements. Compare these measurements to brand-specific sizing charts, as sizes can vary between brands. Pay attention to international sizing differences, such as US, European, or Asian standards. Using a t-shirt size calculator or comparing your measurements to a favorite fitting shirt can also help ensure accuracy and comfort.

Fabric Type and Stretch: Factors Affecting Fit

Fabric type and stretch significantly impact how a t-shirt fits. Cotton, polyester, and blended fabrics offer varying levels of breathability and elasticity. Stretchy materials like elastane provide a snug fit, while 100% cotton may shrink slightly after washing. Heavier fabrics, such as those used in tall or athletic fits, offer durability but less drape. Consider the fabric’s weight and stretch when choosing a size, as these factors influence comfort and how the shirt molds to your body. This ensures a flattering and comfortable fit tailored to your preferences.

Common Mistakes When Selecting T-Shirt Sizes

Common mistakes include ignoring body type and fit preferences, leading to ill-fitting shirts. Many also fail to account for fabric shrinkage or differences in brand sizing standards.

Ignoring Body Type and Fit Preferences

One major mistake is neglecting your body type and fit preferences. Petite individuals may find regular fits too bulky, while tall or athletic builds might struggle with insufficient length or tightness. Ignoring these factors can lead to shirts that are either too tight or too loose, compromising both comfort and style. Understanding your body type and how it aligns with fit styles (e.g., slim, regular, or tall) is crucial for a flattering and comfortable fit. Always consider these elements when selecting sizes.

Not Considering Shrinkage of Fabrics

Overlooking fabric shrinkage is a common error that can ruin the fit of your t-shirt. Natural fibers like cotton often shrink after washing, especially if not preshrunk. This can cause a shirt that initially fits perfectly to become too tight or short. Always check care labels for shrinkage information and consider sizing up if the fabric is prone to shrinking. Ignoring this factor may lead to discomfort and alterations, so it’s essential to account for potential shrinkage when choosing your size.

T-Shirt Size Guide for Specific Body Types

Find the perfect fit for petite, tall, or athletic builds. Petite frames may prefer shorter lengths, while tall individuals need longer shirts. Athletic builds often require broader chest measurements. Use sizing charts to match your body type for optimal comfort and style.

Petite, Tall, and Athletic Builds: Finding the Best Fit

For petite frames, opt for shorter lengths and slim-fit styles to avoid overwhelming your silhouette. Tall individuals benefit from longer shirts with proportionally adjusted sleeve lengths. Athletic builds require broader chest measurements and slightly longer shirts to accommodate muscle mass. Consider body type-specific sizing charts to ensure comfort and style. Measure chest, waist, and hip to match your body type with the ideal fit. This tailored approach ensures your t-shirt looks great and feels comfortable all day long.

Creating Your Own T-Shirt Size Chart

Use body measurements to craft a custom t-shirt size chart. Measure chest, waist, and hip, then compare with standard sizes. Tools like Placeit templates simplify the process, ensuring a perfect fit tailored to your needs.

Using Placeit Templates for Custom Measurements

Placeit templates offer a convenient way to create custom t-shirt size charts. Simply input your measurements, such as chest, waist, and hip, and the template generates a personalized chart. This tool is ideal for ensuring a precise fit, especially for unique body types or specific styles. With user-friendly interfaces and real-time previews, Placeit simplifies the process of designing a tailored size guide. It’s perfect for individuals or businesses looking to provide accurate sizing options, saving time and reducing errors in measurement calculations.

Caring for Your T-Shirt to Maintain Fit

Proper care ensures your t-shirt retains its shape and size; Wash inside out in cold water, avoid hot dryers, and don’t over-dry to prevent shrinkage and fabric wear.

Washing and Drying Tips to Prevent Shrinkage

To maintain your t-shirt’s fit, wash it inside out in cold water using a gentle detergent. Avoid fabric softeners, as they can affect breathability. Gently reshape the garment while damp to preserve its dimensions. Air-dry by laying it flat or hanging it, avoiding direct sunlight. Never use hot water or dryers, as heat causes shrinkage. If ironing is necessary, use a low setting and avoid the neckline or logos. Proper care ensures your t-shirt stays comfortable and retains its size.

Finding the perfect t-shirt fit ensures comfort and style. Use size charts, consider fabric type, and measure accurately for confidence. Your ideal t-shirt is a wardrobe staple. Happy shopping!

Final Tips for Ensuring a Comfortable and Stylish Fit

For a seamless shopping experience, always measure yourself accurately and consider fabric stretch. Avoid sizing mistakes by checking brand-specific charts and reading reviews. Opt for styles that flatter your body type, whether petite, tall, or athletic. Don’t forget to account for potential shrinkage and choose high-quality materials for durability. By combining these strategies, you’ll find a t-shirt that offers both comfort and style, making it a timeless addition to your wardrobe.

Categories
PDF

childrens sewing patterns pdf free

Discover the convenience of free children’s sewing patterns in PDF format, offering a wide range of adorable and practical designs for all skill levels. Perfect for sewing unique outfits and accessories for kids, these patterns inspire creativity and accessibility for all occasions.

Types of Sewing Patterns Available

Explore a variety of free sewing patterns for children, including dresses, tops, pants, and accessories. These designs cater to casual, formal, and seasonal needs, offering step-by-step tutorials for all skill levels.

Dresses for Girls

Free sewing patterns for girls’ dresses offer a wide range of styles, from simple sundresses to elegant occasion wear. Many designs are available in multiple sizes, catering to babies, toddlers, and older children. Popular options include the Jasmine Child Dress, featuring adjustable straps and a floral-inspired design, and the Pillowcase Dress, a quick and easy project perfect for beginners. A-line dresses, tiered dresses, and vintage-inspired patterns are also favorites, providing versatility for casual and formal events. These patterns often include step-by-step tutorials and video guides, making them accessible for sewists of all skill levels. With options for customizable details like ribbon ties, pockets, and embroidery, you can create unique, personalized outfits for your child. The best part? These PDF sewing patterns are free to download, print, and sew, allowing you to craft beautiful dresses without breaking the bank. Whether it’s a birthday party, a special occasion, or everyday wear, these free patterns ensure your child stays stylish and comfortable year-round.

Tops and Bottoms for Boys and Girls

Free sewing patterns for tops and bottoms offer versatile and practical solutions for children’s wardrobes. From trendy graphic tees to comfortable leggings, these designs cater to both boys and girls. Popular patterns include the Bow Back Top, a stylish and school-friendly option, and the Apple Berry Tee, a cozy choice for everyday wear. Bottoms range from simple shorts to elastic-waist skirts, ensuring comfort and ease. Many patterns feature adjustable waistbands and customizable lengths, making them suitable for various sizes and preferences. Tutorials often include step-by-step instructions, perfect for sewists of all skill levels. With these PDF sewing patterns, you can create matching sets or mix-and-match pieces, ensuring your child’s wardrobe is both functional and fashionable. The best part? These patterns are free to download, allowing you to create high-quality, custom clothing at home.

Popular Sources for Free PDF Sewing Patterns

Explore popular sources like Fleece Fun and Mood Fabrics for a variety of free PDF sewing patterns designed for children. These websites offer easy-to-download designs, fostering creativity for all skill levels.

Recommended Websites

Several websites are renowned for offering high-quality, free PDF sewing patterns for children. Fleece Fun provides an extensive collection of patterns, including dresses, tops, and accessories, all with step-by-step tutorials. Melly Sews is another excellent resource, featuring versatile designs like the popular Bow Back Top pattern, perfect for school or casual wear. Craft World offers a variety of print-at-home PDF patterns, such as hooded sweatshirts and adorable bloomers, ensuring accuracy with their 1×1 square test. These platforms cater to all skill levels, making it easy for parents or sewists to create stylish, handmade garments for kids. By exploring these sites, you can access a wealth of free patterns, inspiration, and guidance to sew beautiful outfits for children of all ages.

Tips for Using Free Sewing Patterns Effectively

Always print patterns at 100% scale and verify the 1×1 inch test square for accuracy. Pre-shrink fabric and follow included tutorials for successful sewing outcomes every time.

Printing and Scaling Patterns

When working with free children’s sewing patterns, accurate printing and scaling are essential. Always print patterns at 100% scale to ensure proper sizing. Before cutting fabric, verify the 1×1 inch test square included in most PDFs to confirm accuracy. If the square measures incorrectly, adjust your printer settings and reprint. Patterns are typically designed for standard home printers and may require assembling multiple pages. Use a ruler or tape to align edges precisely. Avoid resizing patterns, as this can distort measurements. For large patterns, consider using a large-format printer or tiling pages. Pre-shrink fabric before cutting to prevent sewing errors. Follow instructions for printing landscape or portrait orientation, depending on the pattern design. Proper scaling ensures garments fit well and reduces fabric waste, making your sewing projects enjoyable and successful.

Common Mistakes to Avoid

When using free children’s sewing patterns, avoid common pitfalls that can lead to disappointing results. One frequent error is failing to pre-shrink fabric, causing garments to shrink after sewing. Another mistake is ignoring seam allowances, which can result in ill-fitting clothes. Always read the pattern instructions thoroughly and check the size chart to ensure the best fit. Misaligning pattern pieces during cutting is another oversight that can affect the final outcome. Additionally, neglecting to test the pattern on scrap fabric before sewing the actual garment can lead to wasted time and materials. Avoid skipping crucial steps like stay-stitching or interfacing where required, as these ensure stability and structure. Lastly, don’t rush the process—take your time to ensure accuracy, especially when working with PDF patterns that require precise assembly and scaling. Attention to detail and patience are key to achieving professional-looking results.

Benefits of Using Free Sewing Patterns

Using free children’s sewing patterns offers numerous advantages for crafty parents and sewists. These patterns provide an affordable way to create custom, unique outfits for kids without the expense of purchased patterns. They are perfect for beginners, allowing them to practice and build confidence in their sewing skills. Free PDF patterns are easily accessible and downloadable, saving time and effort. Many designs are specifically tailored for children, ensuring a great fit and comfort. Additionally, free patterns encourage creativity and personalization, as they can be adapted to suit different styles, fabrics, and occasions. They also promote sustainability by reducing waste and allowing the use of leftover fabric. Moreover, sewing with free patterns fosters a sense of accomplishment and provides a fun, engaging activity for parents and kids to enjoy together. Overall, free sewing patterns are a practical and rewarding choice for sewing enthusiasts.

Getting Started with Sewing for Children

Starting your sewing journey for children is an exciting and rewarding endeavor. Begin by selecting a simple, free PDF pattern designed for beginners, such as a basic t-shirt or skirt. Gather essential materials like fabric, thread, and a sewing machine. Many free patterns include step-by-step tutorials and video guides, making it easier to follow along. Print the pattern at 100% scale and ensure the 1×1 inch test square is accurate for proper sizing. Choose fabrics suitable for your project, such as soft cotton for dresses or durable denim for bottoms. Practice on scrap fabric to familiarize yourself with the pattern and sewing techniques. Don’t hesitate to adapt patterns to suit your child’s preferences or needs. Sewing for children is a great way to create personalized, unique outfits while honing your skills and enjoying a fulfilling hobby.

Seasonal and Special Occasion Patterns

Free children’s sewing patterns are available for every season and special occasion, making it easy to create outfits for holidays, birthdays, or unique events. From lightweight summer dresses to cozy winter coats, these patterns cater to diverse needs. Halloween costumes, Christmas outfits, and Easter dresses are popular choices, often designed with festive details. Many patterns include tutorials for accessories like hats, scarves, and bags, adding a personalized touch. Special occasion patterns, such as flower girl dresses or party wear, are also available, offering elegant and stylish options. These designs are perfect for celebrating milestones or creating memorable looks for your child. With customizable sizes and step-by-step instructions, seasonal and special occasion patterns make sewing for children both fun and rewarding year-round.

Accessories and Additional Sewing Projects

Free children’s sewing patterns extend beyond clothing to include a variety of accessories and projects that complement outfits. Hats, scarves, bags, and hair bows are popular choices, offering practical and stylish additions. Patterns for baby accessories, such as bibs, burp cloths, and baby blankets, are also widely available. Additionally, projects like stuffed animals, dolls, and toy bags provide fun ways to engage kids. Many patterns include step-by-step tutorials, making it easy for sewists of all levels to create these items. These accessories and projects are perfect for personal use or as gifts, allowing for customization and personalization. With free PDF patterns, you can explore a range of creative possibilities while teaching children about handmade crafts. These small but meaningful projects add a special touch to any child’s wardrobe or playtime.

Current Trends in Children’s Sewing Patterns

Current trends in children’s sewing patterns emphasize modern, minimalist designs with a focus on comfort and versatility. Many free PDF patterns now feature gender-neutral options, sustainable fabric recommendations, and eco-friendly sewing tips. Seasonal themes, such as holiday dresses or summer shorts, remain popular, while DIY projects like upcycled clothing and reusable accessories gain traction. Bright colors, playful prints, and functional details like adjustable straps and pockets are in high demand. Additionally, patterns for sensory-friendly clothing and adaptive designs are becoming more accessible. These trends reflect a growing interest in handmade, ethical fashion for kids, encouraging creativity and practicality. With free sewing patterns, crafters can easily stay on-trend while teaching children the value of sustainable and personalized clothing.

Categories
Guide

blundstones size guide

Discover the perfect fit with Blundstone’s comprehensive size guide. Explore conversion charts, sizing tips, and expert advice to ensure comfort and confidence in your boot choice.

Why Sizing is Important for Blundstone Boots

Proper sizing is crucial for Blundstone boots to ensure comfort, durability, and optimal performance. Ill-fitting boots can lead to discomfort, blisters, or even early wear and tear. Blundstone boots are designed with precise measurements, but their fit can vary due to materials and boot shapes. Incorrect sizing may result in returns or exchanges, which can be inconvenient. Understanding the size guide helps you make informed decisions, ensuring your boots provide the support and comfort you need. Accurate sizing also extends the lifespan of your boots, as they are less likely to be stretched or damaged from poor fit. Measure carefully for the best experience.

Overview of Blundstone Size Chart

Blundstone’s size chart offers a clear, standardized guide to help determine the perfect fit. The chart includes UK/AU, US, and EU sizes, ensuring compatibility across regions. It features measurements in millimeters, focusing on foot length, which is crucial for accurate sizing. The chart also addresses unisex sizing, applicable to most styles, with specific considerations for women’s and kids’ ranges. Half sizes are included, differing in width rather than length, catering to those needing extra space. This comprehensive tool simplifies the selection process, reducing the likelihood of sizing errors and ensuring a comfortable, tailored fit for every wearer.

Understanding Blundstone Sizing

Blundstone sizing uses UK/AU standards, with half sizes offering wider fits. Boots generally fit true to size, while materials and shapes may slightly affect comfort and sizing accuracy.

Blundstone Size Chart: UK/AU vs. US/EU Conversions

Blundstone boots are sized using the UK/AU system, but most retailers provide US/EU conversions for easier selection. For example, a UK size 3 corresponds to a US men’s size 4 and a EU size 34.5. Understanding these conversions is essential for international customers to ensure the right fit.

The size chart typically includes measurements in millimeters, reflecting the boot’s internal length. Half sizes in Blundstone boots increase width, not length, making them ideal for those with wider feet. Referencing the official conversion chart is crucial for accurate sizing, especially for unisex styles that use men’s UK sizes but cater to women’s fits as well.

How Blundstone Boots Fit: True to Size or Not?

Blundstone boots generally fit true to size for most wearers, offering a consistent and reliable fit based on standard UK/AU sizing. However, the fit can vary slightly depending on the boot’s material and design. For example, leather boots may stretch over time, while Chelsea boots with elastic sides provide a snug, flexible fit. If you prefer a roomier fit, considering a half size up is recommended, especially for wider feet. This ensures comfort without sacrificing support.

Ultimately, Blundstone boots are designed to feel comfortable right out of the box, with their anatomical shape hugging the foot naturally. While personal preference plays a role, most users find their usual size works perfectly.

Half Sizes: What They Mean for Fit

Half sizes in Blundstone boots are designed to provide additional width without increasing the length of the footbed. This means the boot’s overall length remains consistent with the full size, but the upper part of the boot features more leather, offering extra space for wider feet. For those who find their foot slightly wider than average, a half size can enhance comfort. However, if you prefer a snug fit, sticking to the full size is recommended. Half sizes are particularly beneficial for achieving a balanced fit without compromising support or length. They cater to individual foot shapes, ensuring a more personalized comfort experience.

How to Measure Your Foot for Blundstone Boots

Measure your foot length in millimeters from the heel to the big toe. Use the larger measurement to find your size using Blundstone’s size chart for the best fit.

Step-by-Step Guide to Measuring Foot Length

To measure your foot length accurately, stand on a flat, hard surface with your foot flat. Use a ruler or Brannock device to measure from the back of your heel to the tip of your longest toe. Ensure your foot is not angled or arched. Take measurements for both feet, as they may differ slightly. Record the larger measurement in millimeters to ensure the best fit. This method aligns with Blundstone’s sizing chart, which is based on the length of the foot. For optimal accuracy, measure later in the day, as feet tend to swell slightly. Use this measurement to find your perfect Blundstone size for comfort and support;

Using the Rule of Toe for Proper Sizing

The Rule of Toe ensures optimal comfort by allowing a small gap between your toes and the boot’s end. When standing, your toes should wiggle freely without pressure. Approximately 1/2 to 1 inch (1.3 to 2.5 cm) of space is ideal. This rule helps prevent tightness and discomfort, especially during long wear. It also accounts for the natural swelling of feet throughout the day. By applying this guideline, you can select a Blundstone size that offers both support and flexibility, ensuring a comfortable fit whether you’re walking, working, or enjoying outdoor activities.

Fitting Tips for Blundstone Boots

Blundstone boots fit true to size, but consider afternoon try-ons as feet swell. Half sizes offer more width, not length. Choose based on comfort and intended use.

How Blundstone Boots Should Feel

Blundstone boots should feel snug but comfortable, with enough room for your toes to wiggle slightly. The boot’s anatomical design provides excellent support, hugging your foot naturally. When first tried on, they should feel firm but not overly tight, as the high-quality leather will mold to your feet over time. Half sizes offer a wider fit without adding length, making them ideal for those with broader feet. Your boots should not feel too loose or restrictive; instead, they should provide a secure, balanced fit that allows for comfort during extended wear. Properly fitted Blundstone boots should feel like a second skin, blending durability with everyday comfort.

Adjusting Fit with Insoles

Using insoles is an excellent way to customize the fit of your Blundstone boots. If your boots feel slightly too roomy or tight, insoles can help adjust the fit to your liking. They can compensate for a boot that feels too snug by reducing internal space or add cushioning for extra comfort. Additionally, insoles can provide arch support or better foot positioning, enhancing overall comfort. Switching out the standard insole with one that suits your foot shape can make a significant difference. This is especially useful if you find your boots almost perfect but need a little extra customization for the ideal fit.

Blundstone Size Guide for Specific Needs

Blundstone offers tailored sizing solutions for men, women, and kids, ensuring comfort for every foot shape and preference. Use conversion charts and specific fit recommendations for accuracy.

Men’s/Unisex Sizing: Key Considerations

Men’s and unisex Blundstone boots are designed with versatility in mind, fitting a wide range of foot shapes. They typically follow UK sizing, which may require converting from US or EU sizes. For those with wider feet, half sizes offer additional space without extra length. The anatomical design provides excellent support and comfort, making them ideal for both casual and work environments. To ensure the best fit, measure your foot length and refer to the official size chart. Consider the boot’s material and shape, as these can influence how they feel. Proper sizing ensures all-day comfort and durability.

Women’s Sizing: Differences and Recommendations

Blundstone offers tailored sizing for women, with specific styles designed to accommodate feminine foot shapes. While most boots are unisex, women’s sizes are converted from the UK/AU chart. For the best fit, women may need to size down by one to two sizes compared to their US size. Measure your foot length and refer to the official size chart for accuracy. Half sizes provide additional width without extra length, ideal for wider feet. Consider the boot’s material and shape, as these can influence comfort. Proper sizing ensures all-day comfort and durability, making Blundstone boots a versatile choice for any occasion.

Kids’ Sizing: Ensuring the Right Fit

Blundstone offers a range of sizes for kids, ensuring a comfortable and supportive fit. Their boots are designed to accommodate growing feet, with sizes based on the UK/AU chart. To determine the right size, measure your child’s foot length and compare it to the size chart. Blundstone boots fit true to size, but consider future growth when selecting. Half sizes provide additional width, which can be beneficial for wider feet. Proper sizing is crucial for comfort and support. Refer to the official size guide for accurate measurements and ensure the best fit for your child’s active lifestyle with Blundstone boots.

Common Mistakes to Avoid

Common mistakes include ignoring boot shape, material differences, and width. Not using the size chart or assuming unisex sizes fit all without checking can lead to poor fit.

Not Considering Boot Shape and Material

One common mistake is not accounting for boot shape and material differences. Blundstone boots come in various styles, from Chelsea boots to lace-up designs, each fitting differently. The material, such as leather type, can affect how the boot molds to your foot. Ignoring these factors may lead to a poor fit. For instance, a softer leather may stretch more, while a stiffer material might require a slightly larger size. Always check the specific boot’s features and consider trying them on or consulting the size chart for the best fit. This ensures comfort and prevents the need for returns or adjustments. Proper consideration of these elements is key to finding your ideal pair.

Ignoring the Importance of Width

Overlooking boot width can lead to discomfort and poor fit. Blundstone offers half sizes, which increase width without adding length, ideal for those with wider feet. Neglecting width may result in tightness or pressure points, especially in styles with structured uppers. Always consider your foot’s width when choosing a size. If unsure, opt for a half size to accommodate a broader fit. Proper width ensures all-day comfort and prevents blisters or discomfort. Don’t compromise on width—prioritize it for the best fit and long-lasting wear. This attention to detail makes a significant difference in the overall comfort of your Blundstone boots.

Finding your perfect Blundstone fit ensures comfort and confidence. Use this guide’s tips to make informed choices and enjoy your boots to the fullest.

Final Tips for Finding Your Perfect Blundstone Fit

Ensure a comfortable and precise fit by following these essential tips: measure your foot accurately, consider the boot’s shape and material, and refer to the official size chart. Remember, Blundstone boots are true to size but may vary slightly due to material stretch. If between sizes, opt for a half size for a wider fit. Don’t hesitate to use insoles for adjustment and consider virtual fittings for expert advice. Prioritize your foot’s comfort to enjoy the durability and style Blundstone boots offer. Happy shopping and enjoy your perfect pair!

Categories
Guide

tv guide bozeman mt

Discover the ultimate Bozeman‚ MT TV Guide‚ offering detailed listings for local channels‚ major networks‚ and streaming services. Find your favorite shows and optimize your viewing experience with our comprehensive guide.

1.1 Overview of TV Listings in Bozeman‚ Montana

Bozeman‚ Montana‚ offers a diverse range of TV listings catering to various viewer preferences. Residents can access local channels‚ major networks‚ and streaming services‚ ensuring a wide selection of entertainment‚ news‚ and sports. Over-the-air broadcasts provide free access to channels like ABC‚ Fox‚ and PBS‚ while cable and satellite providers such as Montana Opticom and DirecTV offer expanded channel lineups. Streaming services like Hulu and fuboTV also enable viewers to watch their favorite shows on-demand. With detailed TV guides available online and through mobile apps‚ users can easily navigate schedules‚ set reminders‚ and plan their viewing experience. Whether you’re a fan of local news‚ sports‚ or primetime series‚ Bozeman’s TV listings have something for everyone‚ making it simple to stay entertained and informed.

1.2 Importance of TV Guides for Local Viewers

TV guides play a crucial role for viewers in Bozeman‚ Montana‚ by providing essential information to navigate the vast array of channels and programs. They help users discover new shows‚ track favorite series‚ and stay updated on local news and events. With the rise of streaming services‚ TV guides also assist in managing content across multiple platforms‚ ensuring viewers never miss an episode. Additionally‚ TV guides enable users to optimize their viewing experience by highlighting popular and trending shows‚ making it easier to plan their entertainment schedule. For local audiences‚ these guides are indispensable‚ offering a centralized resource to explore and enjoy the diverse range of available programming.

TV Service Providers in Bozeman‚ MT

Explore top TV service providers in Bozeman‚ MT‚ including over-the-air‚ cable‚ satellite‚ and streaming services. Choose the best option for your entertainment needs and budget.

2.1 Over-the-Air TV Providers

Over-the-air (OTA) TV providers in Bozeman‚ MT‚ offer free access to local channels using an antenna. Popular options include TVGuide.com and AntennaWeb.org for channel lineups. Residents can enjoy major networks like ABC‚ CBS‚ and FOX‚ as well as local stations such as CH 7.1‚ 7.2‚ 7.3‚ and 7.4‚ which broadcast shows like Suits LA and Wild Kratts. OTA TV is a cost-effective way to watch live programming without subscription fees. Ensure optimal reception by choosing the right antenna and periodically rescanning for available channels. This method is ideal for viewers seeking free‚ high-definition content and local news updates.

2.2 Cable TV Providers

In Bozeman‚ MT‚ cable TV providers such as Montana Opticom offer a wide range of channels and services. These providers deliver both local and national programming‚ including sports‚ news‚ and entertainment. Cable TV packages often include HD channels‚ premium networks‚ and on-demand content. Viewers can access popular shows‚ live events‚ and exclusive series through these services. For example‚ Montana Opticom provides digital cable options tailored to different viewer preferences. With cable TV‚ residents can enjoy reliable access to their favorite programs without the need for an antenna. It’s a convenient option for those seeking a diverse channel lineup and advanced features like DVR capabilities. Always check the provider’s channel lineup to ensure it includes your preferred networks and shows.

2.3 Satellite TV Providers

Satellite TV providers like DirecTV and DISH Network are popular choices for viewers in Bozeman‚ MT. These services offer a wide range of channels‚ including local networks‚ sports‚ movies‚ and premium content. Satellite TV is ideal for residents in areas where cable or fiber-optic services may be limited. Providers often include features like HD programming‚ DVR capabilities‚ and flexible package options. For example‚ DirecTV in Bozeman offers access to major networks such as ABC‚ CBS‚ and NBC‚ along with sports and entertainment channels. Satellite TV ensures reliable access to a diverse channel lineup‚ even in rural areas. Check with providers for specific packages and promotions available in your region to enhance your viewing experience with a variety of content options.

2.4 Streaming Services Available in Bozeman

Streaming services have become a popular choice for viewers in Bozeman‚ offering flexible and cost-effective entertainment options. Platforms like Hulu‚ fuboTV‚ and Amazon Prime Video provide access to live TV‚ on-demand content‚ and exclusive series. These services often include local channels‚ sports‚ and news‚ catering to diverse viewer preferences. For instance‚ Hulu offers a range of TV shows‚ movies‚ and live sports‚ while fuboTV focuses on sports and live events. Amazon Prime Video includes original content and add-on channels for additional programming. Streaming services in Bozeman allow users to customize their viewing experience without the need for traditional cable or satellite equipment; With reliable internet access‚ residents can enjoy their favorite shows and movies anytime‚ making streaming a convenient and modern choice for entertainment.

Popular TV Channels in Bozeman‚ MT

Bozeman viewers enjoy a variety of channels‚ including ABC‚ Fox‚ CBS‚ and NBC affiliates‚ plus local stations like KBZK and KWYB‚ offering news‚ sports‚ and entertainment for all interests.

3.1 Major Broadcast Channels

Bozeman‚ Montana‚ offers a diverse range of major broadcast channels‚ ensuring a wide variety of programming for viewers. These include ABC‚ CBS‚ NBC‚ and Fox affiliates‚ which provide national news‚ popular TV shows‚ and live sports events. Additionally‚ PBS is available‚ offering educational and cultural content. Local stations like KBZK (CBS affiliate) and KWYB (ABC/Fox affiliate) cater to regional interests‚ delivering local news‚ weather updates‚ and community-focused programs. These channels are accessible through various service providers‚ including over-the-air antennas‚ cable TV‚ and satellite services. With such a robust lineup‚ residents and visitors in Bozeman can enjoy a rich television experience tailored to their preferences and needs.

3.2 Local News and Weather Channels

Stay informed with Bozeman’s local news and weather channels‚ which provide essential updates for the community. Channels like KBZK and KWYB offer comprehensive local news coverage‚ including current events‚ sports‚ and community stories. For weather updates‚ stations such as MTN News deliver accurate forecasts and severe weather alerts‚ crucial for outdoor enthusiasts and commuters. These channels ensure viewers stay connected to what’s happening in Bozeman and surrounding areas. Their programming is accessible via over-the-air broadcasts‚ cable‚ and streaming services‚ making it easy to stay informed wherever you are.

How to Access TV Listings in Bozeman‚ MT

Access Bozeman’s TV listings through online guides‚ mobile apps‚ or provider websites‚ ensuring you never miss your favorite shows with real-time updates and schedules.

4.1 Online TV Guides and Websites

Online TV guides and websites are the primary sources for accessing TV listings in Bozeman‚ Montana. Websites like TVGuide.com and Channel Master provide detailed schedules for local channels‚ including both over-the-air and cable networks. These platforms allow users to filter listings by zip code‚ ensuring accurate and personalized results. For instance‚ residents in Bozeman can input zip codes like 59715 or 59718 to view specific channel lineups and showtimes. Many sites also offer features like program reminders and the ability to customize viewing preferences. Additionally‚ online guides often include links to streaming services‚ making it easier to switch between traditional TV and digital platforms. With real-time updates and user-friendly interfaces‚ online TV guides are an essential tool for staying informed about Bozeman’s television offerings.

4.2 Mobile Apps for TV Listings

Mobile apps are a convenient way to access TV listings on the go in Bozeman‚ Montana. Popular apps like TV Guide and Channel Master offer personalized TV schedules based on your location. By entering your zip code‚ such as 59715 or 59718‚ you can view channel lineups‚ set reminders for favorite shows‚ and even stream content directly. These apps often include features like customizable watchlists and real-time updates‚ ensuring you never miss your favorite programs. Additionally‚ many apps provide details about upcoming episodes‚ cast information‚ and ratings‚ making it easier to plan your viewing experience. Whether you’re using an iOS or Android device‚ mobile apps are a reliable and user-friendly option for staying connected to Bozeman’s TV listings wherever you are.

Tips for Optimizing TV Viewing Experience

Enhance your viewing pleasure by choosing the right antenna and performing regular channel rescans to ensure access to all available channels in Bozeman‚ MT;

5.1 Choosing the Right Antenna for Over-the-Air TV

Choosing the right antenna is crucial for optimal over-the-air TV viewing in Bozeman‚ MT. Consider your location and the strength of local signals. Indoor antennas are convenient but may struggle with weak signals‚ while outdoor antennas offer better reception but require installation. Amplified antennas can boost signal strength for clearer channels. Check local broadcast listings to ensure your antenna supports the frequencies used by Bozeman’s stations. Rescan for channels regularly to update your TV’s list of available stations. Use tools like TVGuide.com to identify the best channels and antennas for your area. Proper antenna selection ensures access to free HD content‚ including major networks like ABC and Fox‚ and local news channels.

5.2 Rescan for Available Channels

Rescanning for available channels is essential to ensure you receive all over-the-air TV stations in Bozeman‚ MT. This process updates your TV’s channel lineup‚ reflecting any changes or new stations. Rescan regularly‚ such as monthly‚ to maintain access to local broadcasts like ABC‚ Fox‚ and SWX. Changes in broadcast frequencies or new channel additions can require a rescan. To do this‚ go to your TV’s settings‚ select the channel menu‚ and choose “rescan” or “auto-tune.” This quick process is free and ensures you enjoy all available HD content. If you encounter issues‚ consult your TV’s user manual or online guides for assistance. Rescanning keeps your channel lineup current and enhances your viewing experience in Bozeman.

Categories
United Kingdom

prowarm thermostat manual pdf download

Welcome to the ProWarm Thermostat Manual, your comprehensive guide to optimal heating control.

This manual ensures easy installation, operation, and customization of your thermostat for enhanced comfort and energy efficiency.

1.1 Overview of the ProWarm Thermostat

The ProWarm Thermostat is a cutting-edge, user-friendly device designed to optimize heating control and energy efficiency.

It offers dual-mode operation, allowing users to switch between manual and auto modes for flexible temperature management.

The thermostat supports remote control via a smart app, enabling convenient adjustments from anywhere.

With features like frost protection and energy-saving functions, it ensures optimal performance while reducing energy consumption;

The device is compatible with various underfloor heating systems and comes with detailed installation guides.

ProWarm provides comprehensive customer support and downloadable manuals for seamless setup and operation.

Whether for residential or commercial use, the ProWarm Thermostat delivers precision, comfort, and efficiency.

For assistance, contact ProWarm support at 01268 567019 or visit their official website for resources.

  • Remote app connectivity for smart control.
  • Manual and auto operating modes.
  • Frost protection and energy-saving capabilities.
  • Compatibility with underfloor heating systems.
  • Detailed installation and user guides available.

1.2 Importance of the Manual for Proper Usage

The ProWarm Thermostat Manual is essential for ensuring proper installation, operation, and troubleshooting of your device.

It provides detailed instructions to help users understand the thermostat’s features, such as manual and auto modes, remote control, and energy-saving functions.

The manual also includes step-by-step guides for wiring, programming, and resolving common issues, ensuring safe and efficient usage.

By following the manual, users can optimize their heating system’s performance and extend its lifespan.

Downloading the PDF version allows easy access to the guide anytime, making it a valuable resource for both beginners and experienced users.

ProWarm customer support is available for additional assistance, ensuring a seamless experience with your thermostat.

  • Ensures correct installation and wiring.
  • Provides troubleshooting solutions.
  • Explains advanced features for optimal use.
  • Available in PDF for easy reference.
  • Supports energy efficiency and safety.

Downloading the ProWarm Thermostat Manual

The ProWarm Thermostat Manual PDF is available for download on the official ProWarm website. Visit ProWarm.com and navigate to the support section to access the manual. For assistance, contact support at 01268 567019.

2.1 Where to Find the ProWarm Thermostat Manual PDF

The ProWarm Thermostat Manual PDF is readily available on the official ProWarm website. Visit ProWarm.com and navigate to the “Support” or “Downloads” section. Here, you can easily access the manual for free. Additionally, some third-party websites, such as BuyBrandTools, offer ProWarm instruction manuals for download.

Ensure you download the correct version of the manual, as different models (e.g., TR3100 or ProDigital) may have specific guides. For further assistance, contact ProWarm customer support at 01268 567019 or via their website.

2.2 Steps to Download the Manual

To download the ProWarm Thermostat Manual, visit the official ProWarm website at ProWarm.com. Navigate to the “Support” section, where you’ll find a dedicated area for manuals and guides. Select your specific thermostat model (e.g., TR3100 or ProDigital) from the list. Click the download link provided, and the PDF will be saved to your device. Ensure you have a PDF reader installed to open the file. If you encounter any issues, contact ProWarm customer support at 01268 567019 for assistance.

Installation and Wiring Instructions

Loosen fixing screws, connect the thermostat according to wiring instructions, and insert the back panel into a 35mm deep wall box. Secure with provided screws.

3.1 Pre-Installation Requirements

Before installing your ProWarm thermostat, ensure you have a 35mm deep single gang wall box. Verify compatibility with your heating system and power supply. Turn off the power supply at the mains to avoid electrical hazards. Gather all necessary tools and components, including screws and wiring connectors. Ensure the thermostat is suitable for your underfloor heating system type, whether electric or hydronic. Check the thermostat’s voltage rating matches your system’s requirements. Familiarize yourself with the wiring diagram provided in the manual to avoid errors. Wear protective gear, such as insulated gloves, when handling electrical components. Ensure the area is clear and well-lit for safe installation.

3.2 Step-by-Step Wiring Guide

Start by loosening the fixing screw at the bottom of the thermostat to access the wiring terminals. Connect the live, neutral, and earth wires according to the wiring diagram provided in the manual. Ensure all connections are secure and properly tightened. For systems with a floor sensor, connect the sensor wires to the designated terminals. Once wired, attach the back panel to the wall box using the provided screws. Align the front panel with the back panel and secure it firmly. Double-check all connections for safety and accuracy. Turn the power supply back on and test the thermostat to ensure proper functionality. Refer to the wiring diagram for specific configurations.

Operating Modes of the ProWarm Thermostat

The ProWarm Thermostat offers two primary operating modes: Auto and Manual. Auto mode executes pre-programmed schedules, while Manual mode maintains a constant temperature set by the user. Both modes ensure efficient heating control and comfort.

4.1 Understanding Auto and Manual Modes

The ProWarm Thermostat operates in two distinct modes: Auto and Manual. In Auto mode, the thermostat follows pre-programmed temperature schedules, ideal for maintaining comfort throughout the day without manual adjustments. This mode is perfect for users with consistent daily routines, as it automatically switches between heating periods based on set times. On the other hand, Manual mode allows users to set a constant temperature, which the thermostat maintains continuously until changed. This mode is useful for flexibility, enabling users to override schedules or maintain a specific temperature for extended periods. Both modes ensure efficient energy use and personalized heating control.

4.2 Setting Up and Adjusting Temperature Schedules

Setting up temperature schedules on your ProWarm Thermostat allows you to customize your heating preferences for different times of the day. The thermostat offers flexible programming options, including Weekday/Weekend, 7 Day, and 24 Hour schedules. To create a schedule, navigate to the menu, select the desired program type, and set your preferred temperatures for each time period. You can also adjust existing schedules by pressing the menu button and selecting the “Edit Program” option. Temporary overrides are available by pressing the temperature adjustment buttons, allowing you to modify the current setting without changing the entire schedule. This feature ensures optimal comfort while maintaining energy efficiency.

Advanced Features of the ProWarm Thermostat

The ProWarm Thermostat offers advanced features like remote control via the ProTouch App, smart connectivity for WiFi control, and frost protection to prevent pipe damage.

5.1 Remote Control and Smart App Connectivity

The ProWarm Thermostat offers seamless remote control and smart app connectivity, allowing users to manage their heating systems effortlessly from their smartphones.

By downloading the ProTouch App, users can adjust temperatures, set schedules, and monitor energy usage remotely. This feature ensures convenience and energy efficiency.

Key features include:

  • WiFi connectivity for smart home integration.
  • Real-time temperature monitoring and adjustments.
  • Smart scheduling to optimize heating usage.
  • Energy reports to track consumption patterns.

This advanced functionality enhances user experience, providing flexibility and control over heating systems from anywhere, anytime.

5.2 Frost Protection and Energy-Saving Functions

The ProWarm Thermostat includes advanced frost protection and energy-saving functions to ensure optimal performance and efficiency.

Frost protection activates automatically when the system is off, maintaining a minimum temperature to prevent pipe damage. This feature is especially useful in unoccupied spaces.

Energy-saving modes optimize heating usage by learning your schedule and preferences, reducing unnecessary energy consumption. The thermostat also offers:

  • Adaptive learning to anticipate heating needs.
  • Smart scheduling for tailored temperature control.
  • Key lock to prevent accidental changes.

These features ensure your system runs efficiently while protecting your home from potential damage.

Troubleshooting Common Issues

Identify and resolve common errors such as error messages, connectivity issues, or malfunctioning modes. The manual provides detailed solutions and reset options for optimal functionality.

6.1 Resolving Common Errors and Malfunctions

Common issues with the ProWarm thermostat include error messages, connectivity problems, or malfunctioning modes. Check the display for specific error codes, which guide troubleshooting steps. Ensure all wiring connections are secure and correct. Restart the thermostat by turning it off and on again. For connectivity issues, verify WiFi settings and app connections. If the thermostat fails to respond, perform a factory reset by holding the menu button for 10 seconds. Refer to the manual for detailed reset instructions. Addressing these issues promptly ensures optimal performance and prevents further complications. Always consult the manual or contact support for unresolved problems.

6.2 Resetting the Thermostat

To reset the ProWarm thermostat, press and hold the menu button for 10-15 seconds until the display resets. This restores factory settings, clearing all custom schedules and preferences. Ensure the thermostat is powered on during the reset process. After resetting, the device will reboot, and you’ll need to reconfigure settings like temperature, mode, and WiFi connection. Note that resetting erases all programmed schedules, so it’s advisable to back up settings beforehand. If issues persist after resetting, consult the manual or contact ProWarm customer support for further assistance. Resetting is a useful troubleshooting step for unresolved malfunctions or errors.

Additional Resources and Support

Visit ProWarm.com for comprehensive resources, including downloadable manuals, troubleshooting guides, and video tutorials to help you master your thermostat’s features and settings effectively.

7.1 ProWarm Customer Support Contact Information

For any inquiries or assistance, ProWarm’s dedicated customer support team is available to help. You can reach them at ProWarm.com or by calling 01268 567019. Their friendly and knowledgeable advisors, led by Scott, ensure your questions about the thermostat manual, installation, or operation are answered promptly. Whether you need troubleshooting guidance or clarification on specific features, ProWarm’s support team is committed to providing reliable assistance. Feel free to contact them for any concerns or to access additional resources, ensuring your heating system operates efficiently and effectively.

7.2 Accessing Video Guides and Tutorials

ProWarm provides an extensive library of video guides and tutorials to help users master their thermostat’s features. These resources are available on the ProWarm website and cover topics like installation, wiring, and operating modes. Videos also demonstrate how to use the smart app, set temperature schedules, and troubleshoot common issues. Additionally, tutorials on advanced features like frost protection and energy-saving functions are included. These visual guides complement the manual, offering step-by-step instructions for optimal thermostat performance. Visit the ProWarm website or download the ProTouch App to access these helpful resources and ensure your heating system runs smoothly and efficiently.

Categories
Manuals

noco gen5x2 manual

Welcome to the NOCO GEN5X2 manual, your comprehensive guide to understanding and using this advanced 2-bank 10A onboard battery charger. This manual covers installation, safety, features, and troubleshooting to ensure optimal performance and safety.

Overview of the NOCO GEN5X2 Charger

The NOCO GEN5X2 is a 2-bank, 10A onboard battery charger designed for efficient charging and maintenance of two batteries simultaneously. It supports various battery types, including Gel, AGM, Lithium, and Flooded, making it versatile for marine, RV, and automotive applications. The charger features automatic charging, maintenance modes, and desulfation to extend battery life. Its advanced diagnostics and user-friendly interface ensure safe and reliable operation. Compact and powerful, the GEN5X2 is ideal for 12V systems, providing high-performance charging while protecting against overcharge and electrical hazards.

Importance of Reading the Manual

Importance of Reading the Manual

Reading the NOCO GEN5X2 manual is crucial for safe and effective use of the charger. It provides essential safety precautions, installation guidelines, and operating instructions to prevent electrical shock, explosions, or property damage. The manual details proper handling of batteries, eye protection, and emergency procedures. Understanding the charger’s features, such as charge modes and error codes, ensures optimal performance and extends battery life. Failure to follow the manual’s instructions may result in serious injury or damage, emphasizing its importance for both novice and experienced users.

Key Features and Specifications

The NOCO GEN5X2 is a 2-bank 10A onboard battery charger, compatible with lithium, AGM, and gel batteries. It features advanced diagnostics, repair mode, and high-voltage protection for safe charging.

2-Bank 10A On-Board Battery Charger

The NOCO GEN5X2 is a versatile 2-bank 10A onboard battery charger designed for dual battery systems. It simultaneously charges and maintains two batteries, ensuring optimal performance. With a compact design, it’s ideal for marine, RV, and automotive applications. The charger supports 12V lithium-ion, AGM, gel, and flooded batteries, making it compatible with various setups. Its advanced technology includes automatic charging and maintenance modes, preventing overcharging and extending battery life. The GEN5X2 also features high-voltage diagnostics and repair mode for troubleshooting and restoring batteries efficiently. This makes it a reliable choice for users seeking a powerful and intelligent charging solution.

Compatibility with Various Battery Types

The NOCO GEN5X2 charger is designed to work seamlessly with a wide range of battery types, including 12V lithium-ion (like lithium iron phosphate), AGM, gel, and flooded batteries. It is also compatible with batteries equipped with Battery Management Systems (BMS), ensuring safe and efficient charging. This versatility makes it ideal for marine, automotive, RV, and deep-cycle applications. The charger automatically detects battery type and adjusts charging parameters accordingly, providing optimal performance and extending battery life. Its compatibility ensures it can be used across various vehicles and systems, making it a reliable choice for diverse power needs.

Safety Precautions and Guidelines

Always read the manual to ensure safe operation. Wear eye protection, as batteries can emit explosive gases. Failure to follow instructions may cause electrical shock, explosion, or fire.

General Safety Information

Reading the manual is crucial for safe operation. Batteries produce explosive gases; ensure good ventilation. Wear eye protection to avoid injury from debris or acid. Never modify the charger or bypass safety features. Failure to follow instructions can cause electrical shock, explosion, or fire, leading to serious injury, death, or property damage. Keep the area clear of flammable materials. Avoid short circuits and improper connections. Handle batteries with care, as they contain corrosive acid. Always follow safety guidelines to prevent accidents and ensure reliable performance of the NOCO GEN5X2 charger.

Eye Protection and Battery Handling

Always wear safety glasses or goggles when working with batteries to protect against flying debris or acid splashes. Batteries can explode, releasing harmful chemicals and causing severe injury. Handle batteries carefully to avoid spills or drops. Inspect batteries for damage before charging and ensure terminals are clean. Keep the charging area well-ventilated to prevent the accumulation of explosive gases. Never lean over batteries during charging or maintenance. Proper eye protection and cautious handling are essential for safe operation of the NOCO GEN5X2 charger and overall battery maintenance.

Installation and Setup

Ensure proper installation and setup of the NOCO GEN5X2 by following system requirements and safety guidelines for secure and efficient battery charging operation.

Preparation for Installation

Before installing the NOCO GEN5X2, ensure you have a suitable location with adequate ventilation. Disconnect the battery to prevent any accidental power surges. Gather all necessary tools and hardware, including self-tapping screws provided. Read the manual thoroughly to understand the installation process and safety precautions. Wear protective eyewear and ensure the area is clear of flammable materials. Verify compatibility with your battery type and system voltage to avoid any potential issues during setup. Proper preparation ensures a safe and efficient installation process.

Physical Installation Steps

Mount the GEN5X2 charger in a well-ventilated area using the provided self-tapping screws. Ensure the unit is securely fastened to prevent vibration. Connect the positive and negative terminals to the respective battery posts, starting with the battery closest to the charger. Route the cables neatly to avoid interference. Plug in the charger and power it on. Test the charger to confirm proper operation. Double-check all connections for tightness and accuracy. Follow the manual’s wiring diagram for precise installation. Ensure all safety guidelines are adhered to for a reliable and efficient setup.

Operating the Charger

The NOCO GEN5X2 operates automatically, detecting battery type and charge level. It supports maintenance, desulfation, and high-voltage diagnostics for optimal performance. Always follow safety instructions.

Understanding Charge Modes

The NOCO GEN5X2 features multiple charge modes tailored for different battery needs. The maintenance mode ensures long-term battery health by providing a trickle charge. The desulfation mode helps recover deeply discharged batteries by reversing sulfation. Additionally, the charger includes a high-voltage diagnostics feature to detect irregularities. Each mode is automatically selected based on the battery’s condition, ensuring optimal charging. Proper understanding of these modes enhances battery performance and longevity, making the GEN5X2 a versatile choice for various applications.

Monitoring the Charging Process

The NOCO GEN5X2 features an intuitive LCD display and status LEDs for real-time monitoring. The display shows battery voltage, charge current, and selected mode, while LEDs indicate charging phases. Advanced diagnostics provide detailed feedback, ensuring accurate monitoring. The charger is compatible with various battery types, including lithium-ion and lead-acid. Error codes help identify issues promptly. Regular monitoring ensures safe and efficient charging, while the automatic shut-off prevents overcharging. Always wear eye protection during monitoring, as batteries can emit explosive gases. This advanced system simplifies battery maintenance for both novice and experienced users.

Troubleshooting Common Issues

This section helps identify and resolve common issues with the NOCO GEN5X2. Refer to error codes, diagnostic tools, and step-by-step solutions to ensure optimal performance and safety.

Identifying Common Problems

The NOCO GEN5X2 may encounter issues such as error codes, high voltage warnings, or battery incompatibility. Users should check connections, ensure correct battery type selection, and verify voltage levels. If the charger detects irregularities, it may display specific error messages. Refer to the troubleshooting guide for detailed solutions. Always consult the manual for accurate diagnoses and repair steps to maintain safety and performance. Proper identification of issues ensures effective resolution and prevents further complications. Regular maintenance and adherence to guidelines can minimize common problems and extend the charger’s lifespan.

Interpreting Error Codes

The NOCO GEN5X2 displays error codes to indicate specific issues, such as high voltage, incorrect battery type, or system malfunctions. These codes are designed to help users quickly identify and address problems. For example, a high voltage warning suggests the battery voltage exceeds safe levels for the selected mode. Refer to the error code list in the manual for detailed explanations and recommended solutions. Proper interpretation ensures timely resolution, preventing damage to the charger or battery. Always consult the manual for accurate diagnoses and follow safety guidelines when troubleshooting to avoid potential risks. This ensures optimal performance and longevity of the charger and batteries.

Warranty and Support Information

The NOCO GEN5X2 is backed by a comprehensive warranty, ensuring protection against defects in materials and workmanship. For support, refer to the user manual or contact NOCO directly through their official website for assistance, ensuring optimal performance and troubleshooting.

Warranty Coverage Details

The NOCO GEN5X2 is protected by a limited warranty that covers defects in materials and workmanship for a specified period. The warranty ensures that any faulty components are repaired or replaced free of charge, provided the product has been used in accordance with the instructions. For detailed warranty terms, refer to the user manual or contact NOCO’s customer support team. Proper registration and adherence to usage guidelines are essential to maintain warranty validity. Exclusions may apply for misuse, improper installation, or unauthorized modifications.

Accessing Customer Support

For assistance with the NOCO GEN5X2, visit the official NOCO website or contact their customer support team directly. Support options include phone, email, and live chat, available during business hours. The website also offers a comprehensive resource section with manuals, FAQs, and troubleshooting guides. For warranty-related inquiries or technical issues, reach out to the support team, who are trained to provide detailed assistance. Additional support materials, such as datasheets and user guides, can be downloaded from the NOCO website, ensuring easy access to the information you need to maintain your charger effectively.

Advanced Diagnostics and Features

Explore the NOCO GEN5X2’s advanced diagnostics and features, including high voltage detection, repair mode, and smart charging technology for enhanced safety and efficiency.

High Voltage Diagnostics

The NOCO GEN5X2 features advanced high voltage diagnostics to ensure safe and efficient charging. It detects irregularities in battery voltage, alerting users to potential issues. The charger monitors voltage levels during charging, automatically adjusting settings for compatibility with various battery types, including lithium-ion and lead-acid. If the voltage exceeds safe limits, the device triggers an error message, prompting corrective action. This diagnostic capability enhances safety, preventing overcharging or damage to the battery. Regular use of this feature ensures optimal battery health and longevity, making it essential for maintaining your charging system. Always refer to the manual for detailed troubleshooting guidance.

Using Repair Mode

The NOCO GEN5X2 features a Repair Mode designed to address specific battery issues. This mode is particularly effective for 12V lithium-ion batteries equipped with a Battery Management System (BMS). It helps restore capacity and balance cells, ensuring optimal performance. To activate Repair Mode, follow the manual’s detailed instructions, which outline the conditions under which this feature should be used. Proper use of Repair Mode can extend battery life and resolve common maintenance challenges. Always refer to the user guide for specific guidelines to avoid misuse and potential damage to your battery system.

The NOCO GEN5X2 manual provides a detailed guide to unlocking the full potential of this advanced 2-bank 10A onboard battery charger. By following the instructions and safety precautions outlined, users can ensure optimal charging, maintenance, and troubleshooting. The GEN5X2’s innovative features, such as Repair Mode and high voltage diagnostics, make it a versatile solution for various battery types. Proper use of this charger extends battery life and enhances performance. Refer to this manual regularly for guidance, and explore NOCO’s customer support for additional assistance. Safe and effective charging begins with understanding and applying the principles outlined here.

Categories
PDF

conscious discipline breathing techniques pdf

Conscious Discipline breathing techniques empower individuals to manage stress and emotions effectively. These methods, detailed in various PDF resources, improve focus and emotional well-being, suitable for all ages.

What is Conscious Discipline?

Conscious Discipline is a comprehensive approach to emotional regulation and self-management. It integrates breathing techniques, social skills, and emotional awareness to help individuals, especially children, manage stress and develop self-control. The four core active calming techniques—S.T.A.R., Drain, Balloon, and Pretzel—shut off the body’s fight-or-flight response, promoting relaxation and focus. These methods, detailed in PDF resources, empower users to regulate emotions and respond thoughtfully to challenges. Conscious Discipline fosters a safe, supportive environment, encouraging self-awareness, resilience, and lifelong emotional well-being. By teaching these skills, it equips individuals to navigate life’s difficulties with confidence and composure.

The Importance of Breathing in Self-Regulation

Breathing is a foundational element in self-regulation, playing a crucial role in managing emotions and stress. Conscious breathing techniques, as outlined in PDF resources, help calm the nervous system by shifting focus away from stressors. By practicing deep, intentional breaths, individuals can deactivate the body’s fight-or-flight response, fostering relaxation and clarity. This connection between the breath and brain allows for better emotional control, making it easier to respond thoughtfully rather than react impulsively. Regular breathing exercises enhance self-awareness, enabling individuals to recognize and manage their emotions more effectively. These techniques are universal, benefiting both children and adults in maintaining emotional balance and well-being.

S.T.A.R. (Smile, Take a Breath, and Relax)

The S.T.A.R. technique is a simple yet powerful breathing exercise designed to promote calm and self-regulation. It begins with a smile, which instantly triggers a positive emotional response. Next, individuals take a deep breath in through the nose, engaging the diaphragm to ensure a full, relaxing breath. Finally, they exhale slowly while relaxing all muscles, releasing tension and stress. This method, detailed in various PDF resources, is accessible to both children and adults, making it a versatile tool for managing emotions in various situations. Regular practice of S.T.A.R; helps individuals develop greater control over their emotional responses, fostering a sense of calm and focus.

Drain (Exhale Slowly with a Sssshhh Sound)

The Drain technique involves exhaling slowly while making a gentle “ssssh” sound, mimicking the release of air from a deflating balloon. This method encourages deep relaxation by focusing on the slow, controlled exhalation, which helps calm the nervous system. The auditory feedback from the “ssssh” sound enhances the sensory experience, making it easier to let go of tension. As described in PDF resources, this technique is particularly effective for releasing stress and promoting emotional regulation. It can be practiced anywhere, making it a practical tool for both children and adults to manage overwhelming emotions and return to a state of calm focus.

Balloon Breathing Technique

The Balloon Breathing Technique is a powerful tool for relaxation and focus. As outlined in PDF resources, this method involves imagining the abdomen as a balloon inflating and deflating with each breath. Inhale deeply through the nose, allowing the “balloon” to expand, and exhale slowly, imagining the balloon deflating. This visualization helps regulate breathing and calms the mind. The technique is particularly effective for children, as the imagery makes it engaging and easy to follow. Regular practice enhances self-regulation and emotional stability, making it a valuable addition to daily routines for both kids and adults seeking to manage stress and improve concentration. It fosters a sense of control and calm, promoting overall well-being.

Pretzel Breathing Technique

The Pretzel Breathing Technique is a unique method that combines physical posture with controlled breathing to promote relaxation and focus. As described in PDF resources, this technique involves crossing the arms and legs to create a “pretzel” shape while breathing deeply. The process encourages slow, intentional inhalation and exhalation, helping to calm the body and mind. The physical constraint of the pretzel position enhances focus, making it easier to concentrate on the breathing rhythm. This method is particularly effective for teaching self-regulation, as the visualization and physicality of the exercise make it engaging and memorable. Regular practice of the Pretzel Breathing Technique can improve emotional resilience and reduce stress, fostering a sense of calm and control in both children and adults.

Additional Breathing Strategies for Emotional Regulation

Beyond core techniques, strategies like Belly Breathing and the Safe Place Concept enhance emotional regulation. These methods, detailed in PDF guides, promote deep relaxation and focus, grounding individuals in calmness and clarity.

Belly Breathing for Deep Relaxation

Belly breathing, also known as diaphragmatic breathing, is a powerful technique for deep relaxation. It involves inhaling deeply through the nose, allowing the abdomen to rise, and exhaling slowly, feeling the body release tension. This method, detailed in Conscious Discipline PDF resources, helps activate the parasympathetic nervous system, promoting calmness. By focusing on the breath, individuals can let go of stress and anxiety, creating a sense of inner peace. Regular practice enhances emotional regulation and overall well-being, making it an essential tool for both children and adults in managing daily challenges effectively and maintaining a balanced mindset.

The Safe Place Concept and Breathing

The Safe Place concept, paired with breathing techniques, helps individuals create a mental refuge for relaxation. Visualizing a calm, secure environment enhances the effectiveness of breathing exercises, such as Belly Breathing or S.T.A.R., by reducing stress and anxiety. This method, detailed in Conscious Discipline PDF resources, encourages users to imagine their safe space while focusing on slow, deliberate breaths. The combination of visualization and breathing promotes emotional regulation and self-calming, making it easier to manage overwhelming emotions. Free Safe Place breathing icons are available for download, providing visual aids to guide practice and reinforce the technique’s benefits for both children and adults.

Implementing Breathing Techniques in Daily Life

Conscious Discipline breathing techniques can be seamlessly integrated into daily routines using visual aids and structured exercises, making them a consistent practice for emotional regulation and calmness.

Using Visual Aids for Teaching Breathing Techniques

Visual aids, such as Safe Place Breathing Icons, are powerful tools for teaching breathing techniques. These images provide a multi-sensory approach, helping individuals, especially children, focus and understand the steps. Icons for techniques like S.T.A.R. and Drain guide users through actions, making the process intuitive. Educators and parents can display these visuals in classrooms or at home, reinforcing consistent practice. The availability of these resources in PDF formats ensures easy access and printing, making it simple to integrate them into daily routines. By pairing visual cues with breathing exercises, learners can better grasp and apply these calming strategies effectively.

Integrating Breathing Exercises into Classroom Routines

Integrating breathing exercises into classroom routines fosters a calm and focused learning environment. Teachers can incorporate techniques like S.T.A.R. and Balloon Breathing at the start of the day or during transitions. Using PDF guides, educators can access step-by-step instructions and visual aids to lead these exercises. Regular practice helps students develop self-regulation skills, reducing stress and improving concentration. By making breathing exercises a consistent part of the daily routine, classrooms become spaces where emotional well-being and academic success go hand in hand. This proactive approach ensures that all students have the tools they need to manage their emotions effectively throughout the day.

Benefits of Conscious Discipline Breathing Techniques

Conscious Discipline breathing techniques enhance emotional health, improve focus, and boost self-awareness. They provide practical tools for managing stress and fostering a calm, composed mindset in individuals.

Emotional Health and Calming Strategies

Conscious Discipline breathing techniques promote emotional health by teaching individuals to manage stress and anxiety. These methods, outlined in PDF resources, activate calming responses, reducing emotional reactivity. Techniques like S.T.A.R. and Drain help shut off the fight-or-flight response, fostering relaxation. By practicing these exercises, individuals develop self-regulation skills, improving emotional resilience. Visual aids and worksheets further enhance learning, making these strategies accessible to both children and adults. Regular practice of these breathing exercises leads to better emotional balance, enabling individuals to respond to challenges calmly and thoughtfully. These tools are essential for creating a foundation of emotional well-being and long-term mental health.

Improving Focus and Concentration

Conscious Discipline breathing techniques enhance focus and concentration by calming the mind and reducing distractions. Techniques like S.T.A.R. and Balloon Breathing promote mental clarity, helping individuals stay present and engaged. Regular practice of these exercises strengthens cognitive function, improving task completion and academic performance. By teaching the brain to focus on the breath, these methods reduce mind-wandering and increase productivity. Visual aids and worksheets from PDF resources guide educators in implementing these strategies, ensuring students and professionals alike can benefit. Consistent practice fosters a calm, focused state of mind, essential for achieving goals and excelling in both academic and professional settings.

Enhancing Self-Awareness and Self-Regulation

Conscious Discipline breathing techniques foster self-awareness by helping individuals recognize their emotional states and physical responses to stress. These exercises encourage introspection, allowing users to identify triggers and develop strategies to manage them. By practicing techniques like S.T.A.R. and Balloon Breathing, individuals gain control over their reactions, enhancing self-regulation. These methods, detailed in PDF resources, promote mindfulness and emotional resilience. Regular practice strengthens the ability to pause, reflect, and respond thoughtfully, rather than react impulsively. This awareness and control empower individuals to navigate challenges with greater confidence and emotional stability, leading to improved decision-making and personal growth.

Resources for Learning Conscious Discipline Breathing Techniques

Access PDF guides, workshops, and free Safe Place Breathing Icons to master Conscious Discipline techniques. These resources offer practical tools for teaching and practicing breathing exercises effectively.

Downloading Free Safe Place Breathing Icons

Downloading free Safe Place Breathing Icons is a great way to visually guide breathing techniques. These icons, available in various sizes, are designed to help educators and parents teach calming strategies. They provide a multi-sensory tool for children to associate breathing exercises with emotional regulation. The icons can be printed or displayed digitally, making them versatile for classroom or home use. By using these visual aids, individuals can better understand and practice techniques like S.T.A.R. and Drain, promoting self-calming and focus. These resources are part of the broader Conscious Discipline toolkit, offering practical support for teaching emotional regulation skills to both children and adults.

Workshops and Worksheets for Effective Practice

Workshops and worksheets are essential tools for mastering Conscious Discipline breathing techniques. These resources, available in PDF formats like ‘Conscious-Discipline-Presentation-PDF’ and ‘Exercises-Worksheets-and-Activities-To-Nurture-Developing-Minds-Pesi-Publishing-Amp-Media-Compress-PDF’, offer structured learning opportunities. Workshops provide interactive environments where participants can practice techniques such as S.T.A.R., Drain, Balloon, and Pretzel under guidance. Worksheets complement these sessions by giving practical exercises for daily use. Both resources are designed to assist educators and parents in teaching breathing exercises effectively. By utilizing these materials, individuals can enhance their emotional health, improve focus, and boost self-awareness. This comprehensive approach ensures that breathing techniques are learned and applied consistently for long-term benefits.

Conscious Discipline breathing techniques, as detailed in PDF resources, empower individuals to manage stress and emotions effectively, fostering a lifetime of emotional well-being and self-regulation.

The Impact of Conscious Discipline on Overall Well-Being

Conscious Discipline breathing techniques have a transformative impact on emotional and mental health. By incorporating methods like S.T.A.R., Drain, Balloon, and Pretzel breathing, individuals can effectively manage stress and anxiety, fostering calm and clarity. These techniques empower both children and adults to regulate emotions, leading to improved focus and overall well-being. Regular practice enhances self-awareness and resilience, creating a foundation for a balanced and fulfilling life. The integration of these strategies promotes long-term emotional health, enabling individuals to navigate life’s challenges with confidence and composure, while cultivating a deeper connection to their inner selves for sustained well-being.

Encouraging Lifelong Use of Breathing Techniques

Encouraging the lifelong use of Conscious Discipline breathing techniques fosters resilience and emotional balance. By teaching these methods early, individuals develop healthy coping strategies that last a lifetime. Consistency is key; regular practice helps integrate breathing exercises into daily routines, improving focus and emotional well-being. Parents and educators play a vital role in modeling these techniques, showing their value in real-life situations. The downloadable PDF resources, including Safe Place Icons, provide visual reminders to practice breathing exercises. Over time, these techniques become second nature, empowering individuals to manage stress and maintain calm in all aspects of life, leading to a more centered and fulfilling existence.

Categories
PDF

quantum theory for dummies pdf

Quantum physics explores the behavior of matter and energy at atomic and subatomic levels‚ revealing fascinating phenomena like wave-particle duality and uncertainty. Quantum Physics For Dummies simplifies complex concepts‚ making them accessible to beginners. This guide covers essential topics‚ from Schrödinger’s equation to quantum tunneling‚ providing a clear foundation for understanding the quantum world.

What is Quantum Physics?

Quantum physics is the study of matter and energy at the smallest scales‚ such as atoms and subatomic particles. It explores how particles behave in ways that defy classical physics‚ like wave-particle duality and superposition. Quantum Physics For Dummies explains these concepts in simple terms‚ making the subject accessible to beginners. The book covers foundational ideas‚ such as the uncertainty principle and quantum tunneling‚ while providing practical examples to help readers grasp complex theories.

The Importance of Quantum Physics in Modern Science

Quantum physics is foundational to modern technology‚ enabling advancements like semiconductors‚ MRI machines‚ and laser technology. It underpins quantum computing and cryptography‚ promising revolutionary changes in data processing and security. The principles of quantum mechanics also guide research in materials science‚ nanotechnology‚ and particle physics. By understanding quantum behavior‚ scientists can develop innovative solutions and explore the cosmos more deeply. Resources like Quantum Physics For Dummies make these complex ideas accessible‚ fostering a broader understanding of their significance in shaping the future.

Key Principles of Quantum Theory

Quantum theory introduces principles like wave-particle duality‚ uncertainty‚ and tunneling‚ explaining the micro world. Quantum Physics For Dummies simplifies these concepts for easier understanding.

The Wave-Particle Duality

In quantum physics‚ the wave-particle duality states that particles like electrons can behave as both waves and particles. This concept‚ explored in Quantum Physics For Dummies‚ challenges classical notions of matter. Experiments‚ such as the double-slit experiment‚ demonstrate this duality‚ showing that particles create interference patterns like waves. This fundamental idea revolutionized our understanding of the microscopic world‚ revealing that particles exhibit properties of both waves and particles depending on how they are observed. This duality is central to quantum theory and its applications.

The Uncertainty Principle

The uncertainty principle‚ formulated by Werner Heisenberg‚ states that it is impossible to simultaneously know both the position and momentum of a particle with absolute precision. This fundamental concept‚ discussed in Quantum Physics For Dummies‚ highlights the inherent probabilistic nature of quantum mechanics. The more precisely one property is measured‚ the less precisely the other can be determined. This principle has profound implications for understanding the behavior of particles at the quantum level and challenges classical notions of determinism and precision.

Quantum Tunneling and Its Implications

Quantum tunneling is a phenomenon where particles pass through energy barriers that they classically shouldn’t overcome. This process‚ explained in Quantum Physics For Dummies‚ defies classical physics but is essential in modern technology like scanning tunneling microscopes. Tunneling demonstrates the probabilistic nature of quantum mechanics‚ showing particles can exist temporarily in classically forbidden regions. This concept has significant implications for fields like electronics and medicine‚ enabling technologies such as flash memory and nuclear fusion research.

Quantum Mechanics Basics

Quantum mechanics introduces wave functions to describe particle behavior‚ enabling probability calculations. Schrödinger’s equation governs these probabilities over time‚ forming the foundation of quantum systems. Understanding these basics simplifies complex phenomena.

Schrödinger’s Equation and Its Role

Schrödinger’s equation is a fundamental equation in quantum mechanics that describes how the quantum state of a physical system changes over time. It is a partial differential equation that relates the wave function of a system to its energy. The time-dependent form of the equation is widely used to study dynamic systems‚ while the time-independent form applies to stationary states. Solving Schrödinger’s equation yields the wave functions and energy levels of particles in various potentials‚ such as the Coulomb potential in atoms or the square well in solids. This equation is central to understanding quantum systems‚ from electrons in atoms to photons in fields‚ and forms the basis of modern quantum theory. Its applications extend to fields like electronics‚ chemistry‚ and quantum computing‚ making it indispensable in theoretical and applied physics.

Understanding Wave Functions and Probabilities

Wave functions are mathematical representations of quantum states‚ containing all possible information about a particle. The square of the wave function’s amplitude gives the probability of finding a particle in a specific location. Probability density is crucial for predicting measurement outcomes‚ as particles don’t have definite positions until observed. This probabilistic nature contrasts with classical physics‚ introducing inherent uncertainty and randomness to quantum phenomena. Understanding wave functions is key to grasping quantum mechanics‚ as they form the foundation for calculating probabilities and predicting system behaviors.

Applications of Quantum Theory

Quantum theory revolutionizes technology through quantum computing‚ enabling faster processing‚ and quantum cryptography‚ enhancing security. These innovations transform industries‚ driving advancements in science and everyday applications.

Quantum Computing and Its Potential

Quantum computing leverages qubits‚ enabling exponential scaling in processing power. It solves complex problems in cryptography‚ optimization‚ and drug discovery faster than classical computers. By harnessing superposition and entanglement‚ quantum computers promise breakthroughs in AI‚ material science‚ and finance. Quantum Physics For Dummies explains how qubits outperform traditional bits‚ making quantum computing a revolutionary tool for future technologies. This emerging field has the potential to transform industries‚ offering unparalleled computational capabilities.

Quantum Cryptography and Security

Quantum cryptography uses quantum mechanics to secure communication‚ ensuring data integrity and privacy. By exploiting photon polarization and entanglement‚ protocols like Quantum Key Distribution (QKD) create unbreakable encryption keys. Quantum Physics For Dummies highlights how any eavesdropping attempt disrupts the quantum state‚ making it detectable. This technology promises ultra-secure networks‚ safeguarding sensitive information in banking‚ healthcare‚ and government sectors. Quantum cryptography represents a leap forward in data protection‚ leveraging the principles of quantum theory for robust security solutions.

Famous Quantum Physics Experiments

The Double-Slit Experiment demonstrates wave-particle duality‚ while Schrödinger’s Cat illustrates quantum superposition. These iconic experiments‚ explained in Quantum Physics For Dummies‚ reveal the strange nature of quantum reality.

The Double-Slit Experiment

The Double-Slit Experiment demonstrates wave-particle duality‚ a cornerstone of quantum physics. When particles like electrons pass through two slits‚ they create an interference pattern‚ indicating wave-like behavior. However‚ observing the particles as they pass through the slits reveals particle-like behavior. This paradox challenges classical physics and highlights the strange nature of quantum mechanics. Explained in Quantum Physics For Dummies‚ this experiment is a key example of how quantum theory defies intuitive understanding‚ offering profound insights into the microscopic world.

Schrödinger’s Cat Thought Experiment

Schrödinger’s Cat is a famous thought experiment illustrating quantum superposition. It involves a cat in a box with a radioactive atom that‚ if decays‚ releases a poison‚ killing the cat. According to quantum mechanics‚ the atom is both decayed and undecayed until observed‚ meaning the cat is both alive and dead simultaneously. This paradox‚ explained in Quantum Physics For Dummies‚ highlights the strange implications of applying quantum principles to macroscopic objects‚ challenging our classical understanding of reality.

Quantum Physics for Beginners

Quantum Physics For Dummies provides an accessible introduction to quantum mechanics‚ explaining complex concepts in simple terms. It’s an ideal starting point for newcomers to the field.

How to Approach Learning Quantum Physics

Start by understanding basic concepts like wave-particle duality and the uncertainty principle. Use resources like Quantum Physics For Dummies to simplify complex ideas. Begin with classical mechanics to build a strong foundation. Practice solving equations and engage with visual aids to enhance comprehension. Join online forums or courses for structured learning. Stay curious and patient‚ as quantum physics requires time to grasp. Explore real-world applications to stay motivated and connect theory with practical examples.

Recommended Resources for Self-Study

For a comprehensive understanding‚ start with Quantum Physics For Dummies by Steven Holzner‚ offering clear explanations and practical examples. Free PDF downloads of this book are available online‚ providing easy access. Supplement your learning with online tutorials like Quantum Mechanics Tutorial and courses on platforms like Coursera or edX. Engage with visual aids and practice problems to reinforce concepts. Explore additional resources such as Grains of Mystique and Quantum Atom Tutorial for diverse perspectives and deeper insights into quantum theory.

The Future of Quantum Theory

Quantum theory’s future lies in unifying principles like quantum gravity and developing unified theories. Emerging technologies‚ such as quantum computing and advanced materials‚ promise groundbreaking applications‚ reshaping science and engineering.

Quantum Gravity and Unified Theories

Quantum gravity seeks to merge quantum mechanics with general relativity‚ resolving conflicts between the two. String theory and loop quantum gravity are leading approaches. These frameworks aim to describe how fundamental forces unify at microscopic scales. A successful theory could explain phenomena like black holes and the early universe‚ bridging the gap between the infinitesimally small and the cosmically large. This unified theory would revolutionize physics‚ offering a deeper understanding of spacetime and matter;

Emerging Technologies Based on Quantum Physics

Quantum physics is driving groundbreaking technologies like quantum computing‚ which leverages qubits for faster processing. Quantum cryptography enhances security through unbreakable encryption; Quantum sensors improve precision in navigation and materials science. These innovations‚ explored in guides like Quantum Physics For Dummies‚ promise to revolutionize industries‚ from healthcare to telecommunications‚ by harnessing the unique properties of quantum systems for practical applications.

Quantum physics reshapes our understanding of the universe‚ offering revolutionary insights. Resources like Quantum Physics For Dummies make complex concepts accessible‚ inspiring further exploration and discovery.

Summarizing the Key Concepts

Quantum physics introduces fundamental theories like wave-particle duality and the uncertainty principle‚ explaining the behavior of matter and energy at subatomic levels. Quantum Physics For Dummies simplifies these concepts‚ offering insights into Schrödinger’s equation and the probabilistic nature of quantum mechanics. The uncertainty principle highlights the limits of measurement‚ while quantum tunneling demonstrates particles passing through barriers. These ideas collectively redefine our understanding of reality‚ emphasizing the unique rules governing the quantum world and their profound implications for modern science and technology.

Motivation for Further Exploration

Quantum physics offers a fascinating glimpse into the fundamental nature of reality‚ challenging classical thinking and opening doors to revolutionary technologies. Exploring quantum theory reveals its transformative potential in fields like computing‚ cryptography‚ and materials science. Resources such as Quantum Physics For Dummies make complex concepts accessible‚ encouraging curiosity and deeper understanding. The journey into quantum mechanics not only enhances scientific knowledge but also inspires innovation and critical thinking‚ making it a rewarding adventure for learners of all levels.

Categories
Guide

guide railing

Guide railings are essential structures designed to provide support, balance, and safety in various environments. Commonly found in public spaces, staircases, and walkways, they ensure accessibility and prevent accidents. Made from durable materials, they offer stability and convenience, enhancing overall safety standards.

Importance of Guide Railings

Guide railings play a crucial role in ensuring safety, accessibility, and convenience in various settings. They provide structural support and balance, particularly for individuals with mobility challenges, elderly persons, or those navigating stairs or uneven surfaces. By preventing accidental falls and injuries, guide railings significantly enhance safety standards in public spaces, workplaces, and residential areas. Their presence also contributes to compliance with accessibility laws and building codes, ensuring that environments are inclusive for everyone. Additionally, guide railings act as protective barriers in high-traffic areas, such as pedestrian walkways, stadiums, or public transportation hubs, minimizing collisions and crowding. Their durability and reliability make them a vital component in maintaining order and safety in both indoor and outdoor environments. Overall, guide railings are indispensable for creating secure, user-friendly, and accessible spaces, making them a fundamental feature in modern infrastructure design.

Types of Guide Railings

Guide railings come in various types, each designed to suit specific environments and needs. Common types include metal railings, often made from stainless steel or aluminum, known for their durability and modern appearance. Wooden railings offer a traditional look and are frequently used in classic settings. Glass railings provide a sleek, contemporary option and are favored for their transparency. PVC or plastic railings are cost-effective and low-maintenance, commonly found in public areas like parks. Cable railings feature a minimalist design with cables between posts, popular in modern architecture. Additionally, wrought iron railings combine decorative elements with strength, and hybrid designs blend materials like metal and wood for both aesthetics and durability. The choice of railing type depends on factors such as location, weather conditions, and intended use, ensuring functionality and style are balanced effectively.

Materials Used in Guide Railings

Guide railings are constructed from a variety of materials, each offering unique benefits and suitability for different environments. Stainless steel and aluminum are popular choices due to their durability, corrosion resistance, and modern aesthetic appeal. Wood is another common material, often preferred for its classic look and ability to blend with traditional designs. Glass railings are favored for their transparency and sleek appearance, making them ideal for contemporary spaces. PVC or vinyl railings are cost-effective, low-maintenance, and resistant to weathering, often used in outdoor settings. Wrought iron railings combine strength with decorative elements, while concrete and stone railings provide a robust and timeless option. Composite materials, blending wood and synthetic components, offer enhanced durability and minimal upkeep. The choice of material depends on factors such as weather exposure, budget, and desired appearance, ensuring the railing system is both functional and visually appealing.

Installation and Maintenance

The installation of guide railings requires careful planning and precise execution to ensure safety and functionality. Professionals typically begin by assessing the site to determine the best placement and alignment of the railings. Anchoring systems, such as brackets or posts, are securely fastened to the ground or walls to provide stability. The materials chosen for the railings are then attached to these anchors, ensuring a sturdy and even surface. Proper alignment and level checking are critical to avoid tripping hazards.

Maintenance is equally important to prolong the lifespan of guide railings. Regular inspections are necessary to identify any damage, wear, or loosening of components. Cleaning the railings to remove dirt, grime, or corrosion ensures they remain durable and visually appealing. For materials like wood or metal, applying protective coatings or finishes can prevent degradation. In cases of damage, prompt repairs or replacements of faulty parts are essential to maintain safety standards. Additionally, lubricating moving parts, such as hinges or joints, can ensure smooth operation and prevent rust buildup.

By adhering to a consistent maintenance schedule, guide railings can continue to serve their purpose effectively, providing support and safety for years to come.

Safety Standards and Compliance

Safety standards and compliance are critical when installing and maintaining guide railings. These structures must adhere to local building codes, accessibility regulations, and safety guidelines to ensure they provide effective support and prevent accidents. Regulatory bodies, such as the International Building Code (IBC) and the Americans with Disabilities Act (ADA), outline specific requirements for railing height, spacing, and load-bearing capacity. For instance, handrails must be graspable, with a diameter between 1.25 and 2 inches, and they should be continuous along staircases and ramps.

Compliance also involves materials and construction; Railings must withstand specific weight limits to ensure durability and reliability. Regular inspections are essential to identify any wear or damage that could compromise safety. Non-compliance with these standards can lead to legal issues, financial penalties, and increased risk of accidents. Therefore, adhering to safety standards is not only a legal requirement but also a moral obligation to protect users.

By following established guidelines, guide railings can effectively serve their purpose while meeting the necessary safety and regulatory expectations. This ensures a safe and accessible environment for everyone. Regular updates to standards should also be monitored to maintain long-term compliance and safety.

Design Considerations

Design considerations for guide railings focus on functionality, aesthetics, and user experience. The primary goal is to create railings that are both visually appealing and highly functional, ensuring they blend seamlessly with their surroundings. Key factors include the height, shape, and material of the railings, which must align with the intended use and environment. Ergonomic design principles are crucial, such as ensuring handrails are easy to grip and provide adequate support for users of all ages and abilities.

Load-bearing capacity and structural integrity are also critical design elements. Railings must be designed to withstand expected weight and stress, particularly in high-traffic areas. Customization options, such as color, texture, and style, allow guide railings to complement architectural designs while maintaining safety standards. Additionally, integrating lighting or wayfinding elements can enhance both functionality and visual appeal.

Environmental factors, such as weather resistance and durability, must also be considered. Designers should select materials and finishes that can withstand harsh conditions, ensuring long-term performance. By balancing practicality with creativity, guide railings can serve as both functional safety features and attractive design elements. Regular maintenance and inspections further ensure their effectiveness over time.

Cost and Budgeting

When planning for guide railings, cost and budgeting are critical considerations. The total expense depends on factors such as materials, size, design complexity, and installation requirements. Materials like aluminum, steel, or wood vary in price, with aluminum being more affordable and durable, while wood may be chosen for aesthetic reasons but requires higher maintenance costs. Installation costs also vary based on the location, with labor fees differing by region and project complexity.

Budgeting tips include setting a clear financial plan and prioritizing essential features over decorative elements. Comparing quotes from multiple suppliers or contractors can help identify cost-effective options. Additionally, considering long-term maintenance and repair costs is crucial, as they can impact the overall budget. By balancing quality, functionality, and aesthetics, guide railings can be installed within a reasonable budget while meeting safety and design standards. Proper planning ensures that the investment provides lasting value and safety benefits.

Environmental Impact

Guide railings can have varying environmental impacts depending on their materials, manufacturing processes, and lifecycle. Sustainable materials, such as recycled metals or FSC-certified wood, are increasingly used to minimize ecological footprints. Aluminum, for instance, is highly recyclable, making it a popular choice for eco-conscious projects. Conversely, materials like PVC may pose environmental concerns due to their non-biodegradable nature and potential chemical emissions during production.

The manufacturing process also plays a role in determining environmental impact. Energy-efficient production methods and coatings that reduce chemical emissions can significantly lower the carbon footprint of guide railings. Maintenance practices, such as using durable, weather-resistant materials, can extend the lifespan of railings, reducing the need for frequent replacements and waste generation. At the end of their lifecycle, proper recycling or responsible disposal of materials is crucial to prevent environmental harm. By prioritizing sustainable materials and practices, guide railings can be designed and installed with minimal ecological disruption, aligning with modern environmental standards and promoting greener infrastructure.

Case Studies and Examples

Guide railings are widely implemented in various settings to enhance safety and accessibility. For instance, in a busy shopping mall, glass railings were installed along escalators and balconies to provide a modern aesthetic while ensuring customer safety. Similarly, metal railings were chosen for a train station to withstand heavy foot traffic and harsh weather conditions.

In a hospital setting, continuous railings were mounted along corridors to assist patients and staff with mobility challenges. The railings were designed with smooth, easy-grip surfaces to accommodate different user needs. Another example is a school where colorful, durable plastic railings were installed to match the playful environment while maintaining safety standards.

These examples demonstrate how guide railings adapt to different environments, materials, and purposes, showcasing their versatility and importance in ensuring safety and accessibility across various industries and public spaces.

The examples highlighted in this guide demonstrate the versatility of guide railings, showcasing how they adapt to different settings and needs. Whether in staircases, walkways, or public transportation, their role in enhancing safety and accessibility remains consistent. As safety standards and design innovation continue to evolve, guide railings will remain a fundamental component in promoting well-being and ease of movement for everyone.

Ultimately, guide railings are more than just structural elements; they are essential tools for creating environments that prioritize safety, accessibility, and user comfort. Their continued use and development ensure that spaces remain safe and functional for years to come.

Categories
Manuals

manual transmission torque converter

A manual transmission torque converter is a component that optimizes power delivery from the engine to the transmission, enhancing drivetrain efficiency and performance in vehicles with manual gear systems.

1.1 Definition and Purpose

A manual transmission torque converter is a mechanical device connecting the engine to the transmission, enabling smooth acceleration and torque multiplication. It decouples the engine from the transmission when idling, allowing the engine to run independently. This enhances drivability, reduces wear on components, and ensures consistent power transfer during gear shifts and acceleration.

1.2 Importance in Vehicle Performance

A manual transmission torque converter plays a crucial role in optimizing vehicle performance by smoothing power delivery and reducing drivetrain stress. It enhances acceleration, improves fuel efficiency, and minimizes wear on transmission components. This component ensures consistent power transfer, allowing drivers to maintain control during gear shifts and varying driving conditions, thereby improving overall vehicle responsiveness and reliability.

How a Manual Transmission Torque Converter Works

A manual transmission torque converter transfers power from the engine to the transmission using fluid dynamics. It relies on the turbine, stator, and impeller to facilitate smooth power delivery.

2.1 Basic Operating Principles

The manual transmission torque converter operates using fluid coupling between the engine and transmission. It employs a turbine, stator, and impeller to transfer torque, ensuring smooth power transition without mechanical connection, thus optimizing engine speed and gear engagement for efficient driving performance.

2.2 Role in the Clutch System

The torque converter plays a crucial role in the clutch system by facilitating smooth power transfer from the engine to the transmission. It minimizes wear on the clutch by absorbing sudden power changes, ensuring consistent engagement and disengagement of gears, thus enhancing overall driving efficiency and system durability.

2.3 Advantages Over Traditional Manual Transmissions

A manual transmission torque converter offers smoother power delivery, reduced clutch wear, and improved fuel efficiency. It enhances drivetrain responsiveness, handles high-torque situations effectively, and minimizes gear grinding, providing a more refined and comfortable driving experience compared to traditional manual transmissions.

Types of Manual Transmission Torque Converters

3.1 Single-Clutch Design

The single-clutch design is a basic and efficient configuration, offering simplicity and reduced wear. It is ideal for low-torque applications and provides smooth engagement, enhancing overall performance.

The single-clutch design is a straightforward and efficient configuration, reducing wear and tear. It is optimal for low-torque applications, offering smooth engagement and ease of maintenance. This design minimizes complexity, providing reliable performance in manual transmissions while maintaining simplicity and cost-effectiveness.

3.2 Multi-Clutch Design

The multi-clutch design offers enhanced performance and versatility, ideal for high-torque applications. By utilizing multiple clutches, it ensures smoother gear transitions and improved heat management. This configuration enhances durability and reduces wear, making it suitable for high-performance vehicles and heavy-duty use, thereby providing superior control and efficiency in manual transmissions.

3.3 Hybrid and Adaptive Designs

Hybrid and adaptive torque converters combine manual and automatic transmission elements, offering enhanced flexibility. These designs integrate electronic controls to optimize torque delivery and gear shifting, ensuring improved fuel efficiency and performance. They adapt to driving conditions, minimizing manual intervention while maintaining precise control, making them ideal for modern vehicles requiring versatility and efficiency.

Installation and Maintenance Tips

Proper installation requires bolting the torque converter securely, using Loctite or Nylock nuts to prevent loosening. Regular maintenance involves checking fluid levels and ensuring the converter is tightly fastened to the clutch system.

4.1 Step-by-Step Installation Guide

  1. Ensure the engine and transmission are properly prepared and aligned.
  2. Mount the torque converter to the bellhousing, ensuring it is securely fastened with bolts and Loctite or Nylock nuts.
  3. Align the converter correctly to prevent damage and ensure smooth operation.
  4. Double-check the installation for tightness and proper positioning before reconnecting other components.

4.2 Recommended Maintenance Practices

  • Regularly inspect the torque converter for wear or damage.
  • Ensure proper alignment during installation to prevent misalignment issues.
  • Use Loctite or Nylock nuts to secure the torque converter firmly.
  • Avoid over-tightening, as it may damage the component or surrounding parts.
  • Check transmission fluid levels and condition periodically for optimal performance.

4.3 Common Mistakes to Avoid

  • Ignoring proper alignment during installation can lead to premature wear.
  • Over-tightening bolts may damage the torque converter or surrounding components.
  • Neglecting bed-in period can result in reduced durability and performance.
  • Using incorrect torque specs can cause structural damage to the converter.
  • Improper clutch engagement can strain the torque converter and transmission system.

Troubleshooting Common Issues

Common issues include slipping, rough shifting, and unusual noises. Check fluid levels, inspect for worn components, and ensure proper alignment. Addressing these promptly prevents further damage and ensures smooth operation.

5.1 Symptoms of a Failing Torque Converter

Common symptoms include slipping gears, rough shifting, unusual noises, and delayed engagement. Drivers may notice vibrations during acceleration or deceleration. Monitoring these issues early can prevent further damage to the transmission system and ensure optimal vehicle performance.

5.2 Diagnosing Problems in the System

Diagnosing issues involves visual inspection for damage, using scan tools to check error codes, and monitoring system performance. Listen for unusual noises, check for slipping or vibration, and inspect the bellhousing area for proper installation and alignment. Early detection helps prevent further damage and ensures effective repairs.

5.3 Repair and Replacement Options

Repairing a manual transmission torque converter is often impractical due to its complexity. Replacement is typically recommended, involving removing the transmission, inspecting for internal damage, and ensuring proper alignment. Always use manufacturer-recommended torque converter kits and fluids. If inexperienced, consult a professional mechanic to avoid further system damage.

Bed-In Period and Its Importance

The bed-in period is crucial for new torque converters. Proper break-in ensures optimal performance, prevents wear, and maximizes longevity by allowing internal components to adapt smoothly.

6.1 Understanding the Bed-In Process

The bed-in process involves gradual and controlled operation of the torque converter to ensure proper mating of internal components. This prevents premature wear and ensures optimal performance. It typically involves light driving, avoiding high RPMs, and gradual acceleration to allow the converter to adapt without stress.

6.2 How to Properly Bed-In a New Torque Converter

Properly bedding in a new torque converter involves light driving for the first 500 miles, avoiding high RPMs and sudden acceleration. Use gradual throttle input and avoid riding the clutch. This allows the internal components to wear in evenly, ensuring optimal performance and longevity of the torque converter.

6.3 Consequences of Ignoring the Bed-In Period

Ignoring the bed-in period can lead to premature wear of the torque converter’s internal components, such as the clutch packs and bearings. This can result in reduced transmission performance, slippage, and eventual failure, requiring costly repairs and potentially damaging the transmission system as a whole.

Performance Enhancements and Upgrades

Performance enhancements for manual transmission torque converters include aftermarket upgrades, custom tuning, and high-performance materials to optimize power delivery and improve driving efficiency significantly.

7.1 Aftermarket Upgrades for Better Performance

Aftermarket upgrades like high-performance clutches, pressure plates, and custom torque converters enhance power delivery. Billet torque converters and lightweight components reduce wear and improve efficiency; Performance coatings and custom valve body tuning optimize fluid flow and heat management, ensuring smoother shifting and increased torque capacity for racing or daily driving applications.

7.2 Tuning the Torque Converter for Specific Driving Conditions

Tuning the torque converter involves adjusting stall speed, lock-up points, and clutch engagement for optimal performance in racing, towing, or city driving. This customization enhances acceleration, fuel efficiency, and heat management. Advanced software and mechanical modifications allow drivers to tailor the converter’s behavior to their driving style and conditions, ensuring peak performance and durability.

7.3 Balancing Performance and Fuel Efficiency

Balancing performance and fuel efficiency involves optimizing torque converter stall speed and lock-up points. Modern designs use advanced materials and clutch systems to reduce friction and heat, improving mileage without sacrificing power. Drivers can enjoy responsive acceleration and smooth shifting while maintaining fuel economy, making it ideal for both high-performance and daily driving scenarios.

Safety Precautions and Best Practices

Always wear protective gear, ensure the vehicle is securely supported, and follow manufacturer guidelines during installation and maintenance to prevent accidents and ensure safe operation.

8.1 Safety Measures During Installation and Maintenance

Always wear protective gear, including gloves and safety glasses. Ensure the vehicle is securely lifted using jack stands and follow proper torque specifications. Avoid over-tightening components, as this can damage the torque converter or transmission. Use Loctite or threadlocker on bolts to prevent loosening. Ensure the area is well-ventilated and free from hazards.

8.2 Operating the Vehicle Safely with a Manual Transmission Torque Converter

Operate the vehicle smoothly, avoiding abrupt acceleration or harsh gear shifts. Monitor clutch engagement and disengagement to prevent wear. Ensure passengers are secured and avoid distractions. Regularly inspect the torque converter for leaks or damage. Follow manufacturer guidelines for optimal performance and safety on the road.

8.3 Emergency Procedures in Case of Failure

If the torque converter fails, pull over safely, engage the parking brake, and turn on hazard lights. Avoid sudden movements and do not attempt to drive. Contact a professional for towing and repair. Ensure all passengers exit the vehicle safely and wait in a secure area until assistance arrives.

Cost and Warranty Considerations

The average cost of a manual transmission torque converter ranges from $300 to $1,000, depending on quality and brand. Warranties typically last 1-5 years, covering manufacturing defects.

9.1 Average Cost of a Manual Transmission Torque Converter

The average cost of a manual transmission torque converter ranges from $300 to $1,000, depending on the brand, quality, and vehicle type. High-performance or specialized converters may exceed this range, while basic models are more affordable. Costs can vary based on additional features or custom specifications.

9.2 Warranty Options and Manufacturer Support

Manual transmission torque converters typically come with warranties ranging from 1 to 5 years, depending on the manufacturer. High-quality models may offer extended coverage, while budget options provide basic protection. Manufacturer support varies, with some offering dedicated customer service and replacement options. Always check warranty terms before purchasing to ensure coverage aligns with your needs.

9.3 Long-Term Cost Benefits

Manual transmission torque converters offer long-term cost savings by improving fuel efficiency and reducing wear on the clutch and gearbox. Properly maintained units minimize repair costs and extend component lifespan, while upgraded models may provide enhanced durability, further lowering maintenance expenses over time.

The manual transmission torque converter enhances driving performance and efficiency, offering better control and fuel savings. Its proper maintenance ensures longevity, making it a valuable component for drivers seeking precision and reliability.

10.1 Summary of Key Points

The manual transmission torque converter plays a crucial role in optimizing power delivery, improving clutch performance, and reducing wear on transmission components. Proper installation, maintenance, and adherence to the bed-in period are essential for maximizing its efficiency and longevity, ensuring smooth and reliable operation of the vehicle.

10.2 Future Trends in Manual Transmission Technology

Advancements in manual transmission torque converter technology may include hybrid and adaptive designs, improved materials for durability, and integration with automated systems for enhanced performance. These innovations aim to balance efficiency, fuel economy, and driver control, ensuring manual transmissions remain relevant in an evolving automotive landscape focused on sustainability and technological progress.

10.3 Final Recommendations for Drivers

Drivers should understand the torque converter’s role in their manual transmission system, adhere to proper bed-in procedures, and practice smooth shifting techniques. Avoid aggressive driving, ensure regular maintenance, and address issues promptly; This will maximize performance, longevity, and safety, ensuring optimal functionality of the manual transmission torque converter in daily driving conditions.