Categories
Guide

spark plug color guide

Spark plug reading, a valuable diagnostic technique, involves visually inspecting the combustion residue on the porcelain insulator.
This practice offers insights into engine
performance and potential issues, aiding mechanics in pinpointing problems.

Analyzing spark plug color provides a crude, yet useful, determination of the fuel-air mixture’s condition within the engine.
Experienced professionals can quickly assess engine health, while charts assist others.

What is Spark Plug Reading?

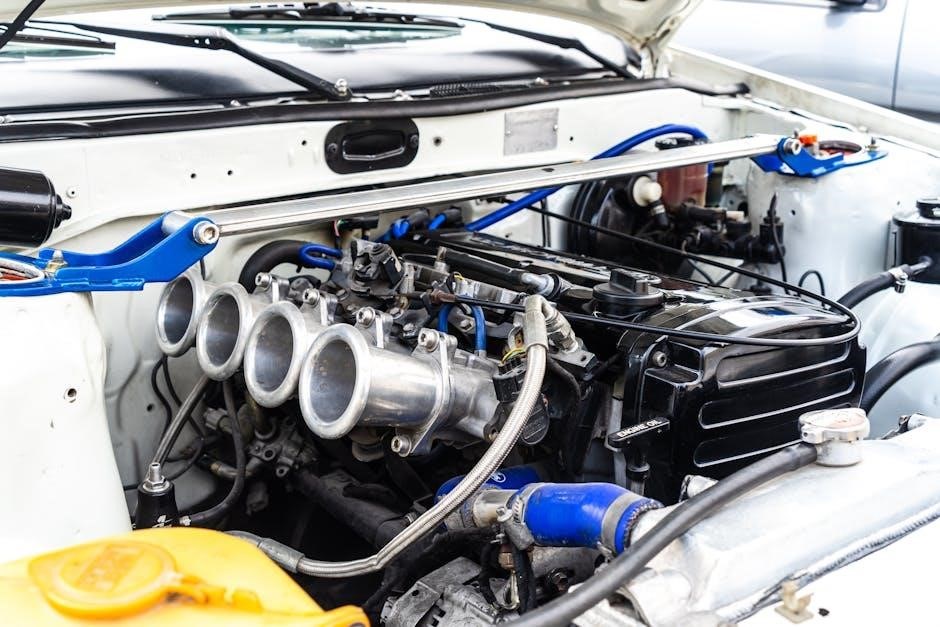
Spark plug reading is a diagnostic method centered around the meticulous examination of a spark plug’s condition. It’s the process of critically evaluating the deposits – or lack thereof – on the spark plug to understand what’s happening inside the engine’s combustion chambers. This isn’t simply about looking at color; it involves assessing the type, amount, and distribution of deposits.

Experienced mechanics can often glean significant information from a quick visual inspection, but for those less familiar, a spark plug reading chart becomes an invaluable tool. It’s a way to translate the visual clues into a potential diagnosis, offering a glimpse into the fuel-air mixture, oil consumption, and overall engine health. However, it’s crucial to remember it’s a limited method.

Why is Spark Plug Color Important?

Spark plug color serves as a direct indicator of the combustion process occurring within the engine. The color and type of deposits reveal whether the fuel-air mixture is too rich, too lean, or within the ideal range. This information is vital for diagnosing performance issues like misfires, reduced power, and poor fuel economy.

While a limited tuning method, it provides a “crude” determination of mixture conditions. Identifying abnormal colors – black, oily, white, or metallic – can signal underlying problems like oil leaks, detonation, or incorrect carburetor settings. It’s a quick, inexpensive initial assessment, though further investigation is almost always necessary to pinpoint the root cause.

Understanding Normal Spark Plug Colors

Normal spark plug colors indicate healthy combustion. Tan or light gray signifies an ideal fuel-air mixture, while light brown suggests a slightly rich condition, still within acceptable parameters.

Tan or Light Gray – Ideal Combustion

A tan or light gray coloration on the spark plug insulator is widely considered the hallmark of optimal engine combustion. This shade indicates that the fuel-air mixture is balanced correctly, providing efficient and complete burning within the combustion chamber. The engine is operating as designed, delivering appropriate power output without excessive fuel or lean conditions.

This ideal color suggests proper tuning and a healthy engine. It signifies that the catalytic converter is functioning effectively, minimizing harmful emissions. Consistent tan or light gray coloration across multiple spark plugs reinforces the diagnosis of a well-maintained and properly functioning engine.

Light Brown – Slightly Rich Mixture

A light brown deposit on the spark plug indicates a slightly rich fuel-air mixture. This means the engine is receiving marginally more fuel than is optimal for complete combustion. While not immediately detrimental, a consistently light brown color suggests a potential for reduced fuel efficiency and increased emissions.

This condition can sometimes be attributed to a slightly malfunctioning oxygen sensor or a minor carburetor adjustment issue. It’s generally less concerning than darker, sooty deposits, but should be monitored. Addressing a light brown coloration proactively can prevent the development of more severe fouling issues over time.

Interpreting Abnormal Spark Plug Colors

Abnormal spark plug colors – black, oily, white, or metallic – signal engine problems like rich mixtures, oil fouling, lean conditions, or detonation.

Black and Sooty – Rich Mixture

A black, sooty spark plug indicates an overly rich fuel-air mixture within the engine’s combustion chambers. This occurs when too much fuel is present relative to the available oxygen. The incomplete combustion leaves behind carbon deposits, coating the spark plug’s firing end.

Several factors can contribute to a rich mixture, including a faulty oxygen sensor, malfunctioning fuel injectors, or a carburetor issue. A rich condition reduces engine efficiency, increases emissions, and can lead to spark plug fouling, hindering ignition. Addressing the root cause is crucial for optimal engine performance.

Oily and Black – Oil Fouling

An oily, black spark plug signifies oil is entering the combustion chamber and fouling the plug. This isn’t simply a rich fuel mixture; it’s a distinct issue indicating oil consumption or leakage past piston rings, valve seals, or even a failing turbocharger. The oil mixes with combustion byproducts, creating a sticky, black residue.

Oil fouling prevents proper spark ignition, causing misfires and reduced engine power. Ignoring this condition can lead to more severe engine damage. Identifying and rectifying the source of oil intrusion is vital for restoring engine health and preventing further complications.

White or Blistered – Lean Mixture

A spark plug exhibiting a white or blistered appearance indicates a lean air-fuel mixture. This means the engine is receiving too much air and not enough fuel, causing excessively high combustion temperatures. The intense heat can actually melt the porcelain insulator, resulting in the blistering effect.

Lean mixtures can lead to detonation or pre-ignition, potentially causing significant engine damage. This condition often stems from fuel delivery issues, vacuum leaks, or a malfunctioning oxygen sensor. Addressing a lean mixture promptly is crucial to prevent catastrophic engine failure and maintain optimal performance.

Metallic or Broken – Detonation/Pre-Ignition

Spark plugs displaying a metallic sheen or physical damage, such as cracked insulators or broken electrodes, strongly suggest detonation or pre-ignition. These destructive combustion events occur when the air-fuel mixture ignites prematurely or uncontrollably. Detonation is caused by the end-gas auto-igniting, while pre-ignition happens before the spark.

These conditions generate extreme pressure spikes within the cylinders, exceeding the spark plug’s design limits. Addressing the root cause – often low octane fuel, excessive compression, or improper ignition timing – is vital to prevent further engine damage and restore reliable operation.

The Role of Heat Range

Spark plug heat range dictates how efficiently the plug dissipates heat. Selecting the correct range, based on engine conditions, is crucial for optimal combustion and preventing fouling.

What is Spark Plug Heat Range?

Spark plug heat range refers to the plug’s ability to transfer heat from the combustion chamber to the engine’s cooling system. It’s not about the plug making heat, but rather how quickly it removes it. Plugs are categorized as either “hot” or “cold,” based on their construction and heat dissipation characteristics.

A hot plug has a larger insulator tip and takes longer to transfer heat, ideal for lower-performance engines or those experiencing extended idling. Conversely, a cold plug features a smaller insulator tip, rapidly dissipating heat, suited for high-performance engines or those under heavy load. Using the incorrect heat range can lead to fouling (too cold) or detonation (too hot).

Matching Heat Range to Engine Conditions

Selecting the correct spark plug heat range is crucial for optimal engine performance and longevity. Factors like engine type, compression ratio, and operating conditions dictate the appropriate choice. High-performance or turbocharged engines generally require colder plugs to prevent pre-ignition and detonation due to increased combustion temperatures.

Conversely, engines with lower compression ratios or those used for primarily low-speed driving benefit from hotter plugs to maintain combustion chamber temperatures and avoid fouling. Incorrect heat range selection can manifest as abnormal spark plug colors – white/blistered (too cold) or oily/black (too hot) – signaling a mismatch needing correction.

Factors Influencing Spark Plug Color

Fuel-air ratio and oil consumption are primary determinants of spark plug color. A rich mixture causes black deposits, while oil burning leads to oily fouling, impacting readings.

Fuel-Air Ratio

The fuel-air ratio is arguably the most significant factor influencing spark plug color. A stoichiometric ratio – ideally around 14.7:1 for gasoline – promotes clean combustion and a tan or light gray deposit. However, deviations from this ideal dramatically alter the plug’s appearance.

A rich mixture, meaning too much fuel, results in incomplete combustion, leaving behind black, sooty deposits. Conversely, a lean mixture, with insufficient fuel, causes excessively high combustion temperatures, potentially leading to a white or blistered appearance.

Understanding that spark plug color only indicates a crude rich or lean condition is crucial; it doesn’t pinpoint the cause of the imbalance.

Oil Consumption

Oil consumption significantly impacts spark plug appearance, often manifesting as oil fouling. This presents as oily, black deposits on the plug’s insulator, indicating oil is entering the combustion chamber. Excessive oil consumption can stem from worn piston rings, valve stem seals, or a failing PCV valve.

While a slightly oily film might be acceptable in some engines, a heavy buildup signals a problem needing attention. It’s important to differentiate oil fouling from carbon buildup caused by a rich fuel mixture, as both can appear similar.

Addressing the root cause of oil consumption is vital, as simply replacing the plugs won’t resolve the underlying issue.

Using a Spark Plug Reading Chart

Spark plug reading charts are incredibly helpful tools for interpreting plug conditions, especially for those less experienced.
However, remember charts offer guidance, not definitive diagnoses.

Availability of Charts

Spark plug reading charts are widely accessible in various formats today, catering to both seasoned mechanics and enthusiastic DIYers. Numerous online resources host these charts, offering a convenient digital reference point for quick analysis.

Furthermore, many automotive repair manuals include dedicated sections with detailed spark plug charts, providing a physical copy for garage use. Online forums, like Honda-Tech and Grassroots Motorsports, frequently share and discuss these charts amongst their communities.

Reddit threads, such as those on r/MechanicAdvice and r/Dirtbikes, also showcase readily available charts, fostering collaborative learning and diagnostic support. These resources ensure that anyone can access the information needed to begin interpreting spark plug conditions.

Limitations of Charts

While spark plug reading charts are helpful, it’s crucial to acknowledge their inherent limitations as a diagnostic tool. Charts offer a generalized interpretation, providing only a crude determination of whether the mixture is rich or lean. They fail to pinpoint the cause of these conditions, such as specific RPM ranges or throttle settings.

As highlighted in Grassroots Motorsports forums, spark plug analysis is a limited tuning method, offering minimal information. Charts don’t account for forced induction or other engine modifications. Relying solely on color can lead to misdiagnosis, necessitating further, more comprehensive investigation.

Remember, a chart is a starting point, not a definitive answer.

Reading Spark Plugs: A Step-by-Step Guide

Visual inspection, ideally with a magnifying glass, is key. Ensure safety during preparation, then carefully examine the spark plug’s porcelain insulator for color and deposits.

Preparation and Safety

Before initiating spark plug analysis, ensure the engine is completely cool to prevent burns. Disconnect the spark plug wires carefully, noting their firing order for correct reinstallation. Use a spark plug socket to remove the plugs, avoiding cross-threading.

Clean the spark plugs of any loose carbon buildup with a wire brush, but avoid altering the deposit color you intend to analyze. Wear safety glasses to protect your eyes from debris. A well-lit workspace is crucial for accurate visual assessment, and gloves can keep your hands clean.

Remember, spark plug reading is a supplemental diagnostic step, not a definitive solution.

Visual Inspection Techniques (Magnifying Glass)

Employing a magnifying glass is paramount for detailed spark plug analysis, revealing subtle nuances in deposit color and texture. Focus on the porcelain insulator and electrode, observing the pattern and extent of any residue. Look for consistent coloration across all plugs for a reliable reading.

Examine the deposits closely – are they dry and powdery, oily, or metallic? Note any signs of erosion, melting, or breakage on the electrodes. A magnifying glass helps differentiate between normal combustion byproducts and abnormal conditions like detonation.

Photographing the spark plugs before and after inspection provides a valuable record for comparison and further diagnosis.

Spark Plug Color and Engine Performance

Spark plug color directly correlates with engine power output and efficiency; abnormal colors signal potential issues.
Analyzing plugs helps identify problems impacting performance and overall engine health.

Correlation with Power Output

Spark plug color provides valuable clues regarding an engine’s power output and combustion efficiency. An ideal tan or light gray color indicates optimal combustion, maximizing power. Conversely, black and sooty plugs suggest a rich mixture, reducing efficiency and potentially fouling the engine, leading to power loss.

A white or blistered plug signifies a lean mixture, which can cause detonation and decreased power. Oily fouling also diminishes performance. Therefore, consistent monitoring of spark plug color helps identify deviations from optimal combustion, allowing for timely adjustments to maintain peak power and prevent engine damage.

Identifying Potential Issues

Spark plug color serves as a crucial indicator of underlying engine problems. Black, sooty plugs often point to excessive fuel, potentially caused by a faulty fuel injector or a malfunctioning oxygen sensor. Oily deposits suggest worn piston rings or valve seals, leading to oil consumption.

White or blistered plugs signal a lean condition, possibly due to a vacuum leak or a failing fuel pump. Metallic or broken electrodes indicate severe detonation or pre-ignition, demanding immediate attention to prevent catastrophic engine failure. Careful observation aids in early detection and preventative maintenance.

Limitations of Spark Plug Reading as a Diagnostic Tool

Spark plug reading offers only a crude rich/lean determination and requires specific procedures for accuracy. It doesn’t reveal why the mixture is off, necessitating further investigation.

Crude Rich/Lean Determination

Spark plug analysis primarily provides a basic indication of whether the engine is running rich or lean, but it’s far from a definitive diagnostic tool. Observing the color of the porcelain insulator offers clues; black and sooty plugs suggest a rich mixture, while white or blistered plugs indicate a lean condition.

However, this assessment is considered “crude” because it doesn’t pinpoint the root cause. A rich or lean condition could stem from numerous factors – fuel pressure issues, vacuum leaks, faulty sensors, or incorrect timing. Therefore, relying solely on spark plug color for diagnosis is insufficient and can lead to misdirected repairs. It’s a starting point, not a conclusion.

Need for Further Investigation

Spark plug reading, while helpful, shouldn’t be the sole basis for engine repairs. Identifying a rich or lean condition through plug color merely flags a potential problem, demanding a more thorough investigation. Determining why the mixture is off requires utilizing advanced diagnostic tools and techniques.

This includes checking fuel pressure, inspecting for vacuum leaks, analyzing sensor data (O2 sensors, MAF sensors), and verifying ignition timing. Simply replacing spark plugs won’t resolve underlying issues. A comprehensive approach is crucial for accurate diagnosis and effective repairs, ensuring long-term engine health and optimal performance.

Categories
Guide

commercial checkride study guide

Preparation is key for success; resources like FLY8MA’s boot camp, ASA guides, and Hayes’ oral exam guides are invaluable.

I. Eligibility Requirements

Meeting the prerequisites is the crucial first step towards your commercial pilot certificate. Aspiring commercial pilots must be at least 18 years old to qualify for the checkride and subsequent certification. Furthermore, a demonstrable proficiency in the English language is non-negotiable; you must be able to read, speak, write, and understand English fluently.

Beyond age and language, a valid medical certificate is absolutely essential. The specific class of medical certificate required will depend on the type of commercial operation you intend to pursue, but generally, a First or Second-Class medical is necessary. Finally, accumulating the required flight time is paramount; ensure you’ve logged all necessary hours as outlined by the FAA regulations before scheduling your checkride.

Thorough preparation utilizing ACS standards, oral exam guides, and focused courses like FLY8MA’s will significantly boost your confidence and success rate.

Age and Language Proficiency

Meeting the foundational requirements is the crucial first step towards your commercial pilot certificate. According to established guidelines, applicants must be at least 18 years of age to qualify for the checkride process. This age requirement ensures a level of maturity and experience deemed necessary for the responsibilities associated with commercial operations.

Furthermore, proficiency in English is non-negotiable. You must demonstrate the ability to read, speak, write, and understand the English language fluently. This is paramount for effective communication with air traffic control, understanding aviation documentation, and ensuring safety within the National Airspace System. Clear and concise communication is vital for safe and efficient flight operations, making English language proficiency a fundamental prerequisite.

Medical Certification

A valid medical certificate is absolutely essential before undertaking a commercial checkride. Unlike recreational flying, commercial operations demand a higher standard of physical and mental fitness. You will need to hold at least a Second-Class Medical Certificate, issued by an FAA-authorized Aviation Medical Examiner (AME).

The AME will conduct a thorough examination to assess your overall health, including vision, hearing, cardiovascular function, and neurological status. Ensure your medical certificate is current throughout the entire checkride process; any lapse in validity will render you ineligible. It’s prudent to schedule your medical exam well in advance to allow time to address any potential issues that may arise during the evaluation. Maintaining a valid medical is a continuous responsibility for commercial pilots.

Flight Time Requirements

Meeting the FAA’s flight time requirements is a non-negotiable prerequisite for your commercial checkride. Aspiring commercial pilots must log a minimum of 250 hours of total time, encompassing specific categories of experience. This includes at least 100 hours in powered aircraft, 50 hours of cross-country flight time, 20 hours of training with an authorized instructor, and 10 hours of instrument training.

Furthermore, you’ll need 10 hours of solo flight time, including five hours of cross-country, one cross-country flight of at least 300 nautical miles total distance with full stop landings at three points, and three takeoffs and landings at an airport with an operating control tower. Accurate record-keeping of all flight time is crucial; maintain a detailed logbook to demonstrate compliance during your checkride.

II. Pre-Checkride Preparation

Thorough preparation is paramount; diligently review the ACS, utilize oral exam guides, consider prep courses, and meticulously examine all aircraft documentation beforehand.

Reviewing the Airman Certification Standards (ACS)

The FAA-S-ACS-7B document is foundational for commercial pilot checkride preparation. It outlines precisely what the examiner will evaluate, covering both knowledge and practical skills. A line-by-line review ensures comprehensive understanding of required competencies.

Focus on mastering the “Knowledge” and “Risk Management” elements within the ACS. These areas frequently form the basis of oral exam questions, probing your understanding of regulations, aerodynamics, and operational procedures. Don’t simply memorize; strive for a conceptual grasp of the material.

Understanding the ACS’s task lists allows you to anticipate maneuvers and performance standards expected during the flight portion. This proactive approach builds confidence and minimizes surprises on checkride day, ultimately leading to a more successful outcome. It’s the blueprint for success!

Utilizing Oral Exam Guides (ASA, Hayes)

Oral exam guides from ASA and Michael Hayes are essential supplements to the ACS. They present likely questions posed by examiners, mirroring the real checkride experience. These guides aren’t replacements for thorough study, but rather tools to anticipate and refine your responses.

ASA’s guide provides a broad spectrum of questions, while Hayes’ offers a more in-depth exploration of specific topics. Utilizing both provides a well-rounded preparation. Focus on understanding the why behind the answers, not just memorizing them.

Practice answering questions aloud, simulating the exam environment. This helps solidify knowledge and improve articulation. Remember, examiners assess not only what you know, but how you communicate it. These guides are invaluable for building confidence and preparedness.

Checkride Prep Courses (FLY8MA)

FLY8MA’s Commercial Pilot ASEL Checkride Prep Boot Camp is a focused, intensive course designed to maximize your readiness. It offers a unique advantage: observing complete Commercial Pilot oral exams, allowing you to understand the flow and types of questions asked by examiners. This provides invaluable insight into the checkride process.

The course also delivers a condensed “cheat sheet” for streamlined studying, simplifying complex information. Furthermore, FLY8MA demonstrates the maneuvers you’ll be expected to perform, ensuring proficiency. Crucially, it prepares you for the logistical aspects of checkride day itself.

By simulating the entire experience, FLY8MA aims to reduce anxiety and build confidence, ultimately increasing your chances of success. It’s a comprehensive approach to checkride preparation.

Aircraft Documentation Review

A thorough review of aircraft documentation is paramount before your commercial checkride. This includes the Aircraft Flight Manual (AFM), Weight and Balance information, and maintenance records. Understanding the AFM is critical for performance calculations and operating limitations.

Verify that all required inspections are current and properly documented. Pay close attention to Airworthiness Directives (ADs) and Service Bulletins, ensuring compliance. The examiner will likely ask about these items.

Familiarize yourself with the aircraft’s specific systems and emergency procedures as outlined in the documentation. Knowing where to find information quickly demonstrates professionalism and preparedness. Proper documentation review showcases a commitment to safety and regulatory compliance, vital for a commercial pilot.

III. Oral Exam – General Knowledge

Mastering regulations, aerodynamics, systems, and weather is crucial; utilize the ACS and resources like ASA’s guide for comprehensive preparation and success.

Regulations & FAR/AIM

A thorough understanding of Federal Aviation Regulations (FARs) and the Aeronautical Information Manual (AIM) is paramount for the commercial checkride. Examiners will probe your knowledge of Part 61, specifically concerning commercial pilot certification requirements, operational limitations, and responsibilities. Be prepared to discuss airspace regulations, including classifications, operating requirements, and associated visual meteorological conditions (VMC) and instrument meteorological conditions (IMC) minimums.

Expect questions regarding pilot incapacitation procedures, aircraft documentation requirements, and the proper use of the AIM for preflight planning. Demonstrate familiarity with recent regulatory changes and NOTAMs. Review sections pertaining to aircraft maintenance, preventative maintenance, and required inspections. The examiner will assess your ability to interpret and apply regulations to real-world scenarios, ensuring safe and compliant flight operations. Line-by-line study of the Airman Certification Standards (ACS) is highly recommended.

Aerodynamics

A solid grasp of aerodynamic principles is crucial for a successful commercial checkride. Be prepared to explain lift, drag, thrust, and weight, and how they interact during various flight maneuvers. Examiners will likely ask about the aerodynamic forces affecting aircraft performance, including stall characteristics, factors affecting stall speed, and the impact of weight and balance.

You should be able to discuss adverse yaw, slipstream effects, and the principles of turning flight. Expect questions regarding high-lift devices, ground effect, and the impact of density altitude on aircraft performance. Demonstrate understanding of wingtip vortices and their effect on induced drag. Be ready to explain how control surfaces manipulate airflow and affect aircraft attitude. A strong foundation in aerodynamics is essential for safe and efficient flight operations.

Aircraft Systems

Comprehensive knowledge of aircraft systems is paramount for the commercial checkride. Be prepared to detail the operation of the engine, fuel, electrical, hydraulic, and environmental control systems. Examiners will assess your understanding of how these systems function, interact, and potential failure modes;

You should be able to explain the pitot-static system, altimeter settings, and the impact of temperature and pressure on instrument readings. Expect questions about the operation of carburetors or fuel injection systems, magnetos, and the autopilot. Demonstrate understanding of de-icing and anti-icing systems, and their limitations. Be ready to discuss the function of various indicators and warnings, and appropriate responses to malfunctions. Thorough system knowledge ensures safe operation and effective troubleshooting.

Weather

A deep understanding of meteorology is crucial for commercial pilots. Be prepared to interpret weather charts, including surface analysis, prog charts, and winds aloft forecasts. Examiners will probe your knowledge of cloud formations, atmospheric stability, and the development of various weather phenomena like thunderstorms and icing conditions.

You must demonstrate proficiency in obtaining and analyzing METARs, TAFs, and PIREPs. Understand the significance of fronts, pressure systems, and their impact on flight conditions. Be ready to discuss the effects of temperature, humidity, and wind shear. Knowledge of aviation weather reports and forecasts is essential for safe flight planning and decision-making, ensuring you can avoid hazardous weather situations.

IV. Oral Exam – Operational Knowledge

Mastering practical applications of regulations is vital; expect detailed questioning on flight planning, performance calculations, and emergency protocols during the oral exam.

Flight Planning & Navigation

Comprehensive flight planning is paramount for a commercial pilot, demanding meticulous attention to detail and a thorough understanding of all relevant factors. Be prepared to discuss chart selection, weather briefings, route selection considering terrain and airspace, and performance calculations for various segments.

The examiner will likely probe your knowledge of navigation systems, including pilotage, dead reckoning, and the use of electronic navigation aids like GPS and VOR. Demonstrate proficiency in interpreting sectional charts, calculating headings and estimated times of arrival, and applying wind correction.

Furthermore, expect questions regarding alternate airport selection criteria, fuel requirements based on distance and wind, and the impact of weight and balance on aircraft performance. A solid grasp of these concepts is crucial for safe and efficient flight operations, showcasing your ability to make informed decisions as a professional pilot.

Performance & Weight & Balance

Mastering performance calculations and weight & balance is fundamental for commercial pilots, directly impacting flight safety and efficiency. Expect detailed questioning on aircraft performance charts, including takeoff and landing distances, climb performance, and cruise speed calculations under varying conditions.

Demonstrate a thorough understanding of how weight, balance, temperature, and altitude affect these parameters. Be prepared to calculate weight and balance manually, ensuring the aircraft remains within prescribed limits. The examiner will assess your ability to determine the critical weight, CG range, and the impact of loading on aircraft performance.

Furthermore, anticipate questions regarding the effects of icing, wind, and runway slope on takeoff and landing distances. A strong grasp of these concepts demonstrates your commitment to safe and responsible flight operations.

Emergency Procedures

Proficiency in emergency procedures is paramount for a commercial pilot, showcasing your ability to handle unexpected situations calmly and effectively; Expect a comprehensive evaluation of your knowledge regarding engine failures, system malfunctions, and other potential in-flight emergencies.

Be prepared to articulate the appropriate procedures for various scenarios, including forced landings, fires, and loss of control. The examiner will assess your understanding of emergency checklists and your ability to prioritize actions. Demonstrate a clear understanding of how to secure the aircraft and ensure passenger safety.

Furthermore, anticipate questions about emergency equipment, such as survival gear and first-aid kits. A thorough understanding of these procedures demonstrates your preparedness and commitment to passenger well-being.

Risk Management & Decision Making

Demonstrating sound judgment and proactive risk management is crucial during the commercial checkride. The examiner will evaluate your ability to identify potential hazards, assess their associated risks, and implement effective mitigation strategies. Expect scenario-based questions designed to test your decision-making skills in challenging situations.

Be prepared to discuss the IMSAFE checklist (Illness, Medication, Stress, Alcohol, Fatigue, Environment) and how it applies to pre-flight risk assessment. Articulate your understanding of how to make go/no-go decisions based on weather conditions, aircraft performance, and personal limitations.

Showcase your ability to prioritize safety and make informed choices, even under pressure. A strong grasp of risk management principles is essential for a safe and successful commercial pilot career.

V. Flight Portion – Maneuvers

Precise execution of maneuvers – takeoffs, landings, slow flight, stalls, steep turns, and emergency procedures – will be thoroughly evaluated for accuracy and safety.

Takeoffs & Landings

Demonstrating proficiency in various takeoff and landing scenarios is crucial. Expect scrutiny of short-field and soft-field techniques, showcasing precise control and adherence to published procedures. Examiners will assess your ability to consistently achieve stabilized approaches, accurate flare timing, and smooth touchdown execution.

Crosswind landings will be evaluated for effective control inputs and maintaining centerline alignment. Be prepared to discuss performance calculations related to takeoff and landing distances, factoring in weight, wind, and runway conditions.

Furthermore, anticipate questions regarding go-around procedures, emphasizing prompt and decisive action. A thorough understanding of the aircraft’s operating limitations and appropriate decision-making in challenging conditions is paramount for a successful evaluation during this critical phase of the checkride.

Slow Flight & Stalls

Mastering slow flight and stall recovery is fundamental to commercial pilot competency. Expect precise execution of slow flight maneuvers, maintaining a specific airspeed and demonstrating coordinated control inputs. Examiners will assess your ability to recognize and avoid exceeding the critical angle of attack.

Stall recognition and recovery will be thoroughly evaluated, including power-off and power-on stalls, as well as stalls in turns. Be prepared to accurately identify the stall warning signs and initiate a swift, effective recovery procedure.

A comprehensive understanding of stall theory, factors affecting stall speed, and the impact of load factor is essential. Demonstrating a calm, controlled response to these situations will showcase your proficiency and airmanship during the checkride.

Steep Turns

Precise and coordinated steep turns are a critical component of the commercial pilot checkride. Examiners will evaluate your ability to maintain altitude, heading, and airspeed while executing steep bank angles – typically 45 degrees, and potentially up to 60 degrees.

Smooth and accurate control inputs are paramount, demonstrating a thorough understanding of the forces acting on the aircraft during steep maneuvers. Be prepared to perform steep turns to both left and right, and to recover smoothly to level flight.

Understanding the effects of increased load factor and the associated increase in stall speed is crucial. A clear demonstration of airmanship and control will be key to a successful evaluation.

Emergency Operations (Engine Failure)

Demonstrating proficiency in simulated engine failure scenarios is a vital aspect of the commercial checkride, assessing your ability to react calmly and effectively under pressure. Examiners will likely task you with performing an engine failure after takeoff, or during a cruise phase of flight.

You must accurately execute the appropriate emergency procedures, including maintaining airspeed, identifying a suitable landing site, and completing the checklist.

A successful demonstration requires a clear understanding of the aircraft’s systems and performance limitations, coupled with precise aircraft control and sound judgment. Prioritize a safe landing, showcasing your ability to handle unexpected situations with professionalism and skill.

VI; Checkride Day Logistics

Bring all required documents, understand examiner expectations, and actively participate in the briefing and debriefing process for a smooth checkride experience.

Required Documents

Ensuring you have all necessary documentation is paramount for a successful checkride. This includes your pilot certificate, medical certificate (current and valid), a government-issued photo ID, and the original or certified copy of your FAA Knowledge Test report.

Furthermore, you’ll need to present your logbook, meticulously documenting all required flight time, endorsements, and training. Don’t forget aircraft documentation – the Aircraft Flight Manual (AFM), Weight and Balance information, and current airworthiness certificate are crucial.

Bring a plotter, sectional charts covering the checkride area, a flight computer (E6B), and any performance charts relevant to the aircraft. Finally, having a completed application for your commercial pilot certificate (FAA Form 8710-1) readily available will streamline the process and demonstrate your preparedness to the examiner.

Examiner Expectations

Examiners assess not just knowledge, but professional judgment and airmanship. Expect a thorough questioning of your understanding of regulations, aerodynamics, aircraft systems, and weather. They’ll probe your ability to apply this knowledge to real-world scenarios, emphasizing risk management and sound decision-making.

During the flight portion, examiners evaluate precise control, adherence to standards for maneuvers like steep turns and stalls, and proficiency in emergency procedures – particularly engine failure scenarios.

Demonstrate a calm, organized approach, clear communication, and a willingness to learn. Be prepared to explain why you’re doing something, not just how. A proactive attitude, coupled with a solid grasp of the ACS standards, will leave a positive impression and increase your chances of success.

Briefing and Debriefing

The checkride begins with a briefing where the examiner outlines the expected flow – oral exam, flight maneuvers, and any specific areas of focus. Pay close attention and ask clarifying questions if needed; understanding the plan reduces anxiety.

During the flight, the examiner will provide instructions and observe your performance. Maintain clear communication, acknowledging instructions and announcing maneuvers.

The debriefing is crucial. The examiner will discuss your strengths and weaknesses, providing constructive feedback. Listen attentively, ask questions to understand areas for improvement, and accept feedback gracefully. This isn’t just an evaluation; it’s a learning opportunity. A positive attitude during the debriefing demonstrates professionalism.

Post-Checkride Actions

Regardless of the outcome, a thorough self-assessment is vital. If you passed, celebrate your achievement but continue refining your skills; proficiency requires ongoing practice. Review the examiner’s feedback and identify areas for continued development.

If you failed, don’t be discouraged. Analyze the areas of deficiency highlighted by the examiner. Create a focused study plan addressing those weaknesses, utilizing resources like the ACS and oral exam guides.

Schedule a re-checkride once you’ve adequately prepared. Ensure all required documentation is current and readily available. Remember, a failed checkride is a learning experience, and perseverance is key to achieving your commercial pilot certificate.

Categories
Guide

the ultimate guide to rebuilding civilization pdf

The Ultimate Guide to Rebuilding Civilization

Navigating post-collapse scenarios demands a comprehensive approach, drawing lessons from historical precedents like the USSR’s dissolution and Somalia’s state-building efforts.

Understanding Societal Collapse

Societal collapse isn’t a singular event, but a complex process involving the decline of institutions, economic systems, and social cohesion. Examining historical instances, such as the post-Soviet transition, reveals recurring patterns. The disintegration of the USSR showcased profound political, economic, and social upheaval, highlighting vulnerabilities in centralized systems.

Factors contributing to collapse are multifaceted, ranging from resource depletion and environmental disasters to internal conflicts and external pressures. The recent coronavirus epidemic vividly illustrated how quickly societal structures can be strained under crisis conditions, impacting healthcare and daily life. Understanding these triggers is crucial for proactive resilience planning and mitigating future risks.

Historical Precedents of Civilizational Rebuilds

Examining past rebuilds offers invaluable insights. The post-Soviet reconstruction period in Russia, though tumultuous, provides lessons in navigating political and economic transitions. Similarly, Somalia’s state-building process, aided by international assistance – notably from Turkey – demonstrates the complexities of establishing governance in fragile states.

These examples reveal common threads: the importance of establishing law and order, restoring economic activity (trade and agriculture), and preserving cultural heritage. Reconstruction efforts following conflicts, like those in Dagestan, often involve restoring damaged infrastructure and abolishing military actions. Studying these precedents informs strategies for a more effective and sustainable rebuild.

Phase 1: Immediate Survival & Security

Initial efforts must prioritize basic needs. Securing access to essential resources – potable water, nutritious food, and adequate shelter – is paramount for immediate survival. Simultaneously, establishing a rudimentary system of law and order is crucial to prevent chaos and protect vulnerable populations.

This phase demands pragmatic solutions. Utilizing existing infrastructure, even in a damaged state, can expedite resource distribution. Community-based security initiatives, while imperfect, can fill the void left by collapsed state structures. Addressing public health concerns, potentially mirroring the challenges of a pandemic, is also vital during this critical period.

Securing Essential Resources (Food, Water, Shelter)

Rapid assessment of available resources is key. Identifying existing food stores, water sources, and habitable structures forms the initial step. Prioritizing purification methods for water and establishing localized food production – even small-scale gardening – are crucial. Shelter can be improvised using salvaged materials, focusing on protection from the elements.

Distribution networks must be established quickly. Utilizing any remaining transportation infrastructure, however limited, is vital. Community cooperation and equitable resource allocation are essential to prevent conflict. Long-term sustainability requires transitioning from emergency supplies to self-sufficient systems, mirroring post-Soviet reconstruction efforts.

Establishing Basic Law and Order

Initial order stems from community agreements. Establishing clear, simple rules addressing immediate concerns – safety, resource access, dispute resolution – is paramount. These rules should prioritize fairness and transparency to foster trust. Utilizing existing local leadership structures, where possible, can expedite the process.

A functional, albeit basic, legal framework is essential. This doesn’t necessitate complex legislation initially, but rather consistent enforcement of agreed-upon principles. Drawing lessons from Somalia’s state-building challenges highlights the importance of legitimacy and inclusivity. Civil resistance, as seen post-Cold War, can reinforce lawful structures.

Phase 2: Restoring Core Infrastructure

Rebuilding essential systems is crucial for societal recovery. Prioritization should focus on interconnected networks – communication, energy, and transportation – to maximize impact. Initial efforts might involve repairing existing infrastructure rather than constructing anew, leveraging salvaged materials and local expertise.

Lessons from post-Soviet reconstruction emphasize phased development. Re-establishing communication networks facilitates coordination and information dissemination. Reviving energy production, even on a small scale, powers essential services. Simultaneously, restoring transportation systems enables resource distribution and trade, mirroring Gomgaki bridge construction efforts.

Re-establishing Communication Networks

Rapid communication is paramount for coordination and disseminating vital information. Initial efforts should prioritize simple, robust technologies – shortwave radio, citizen band radio, and even messenger networks – bypassing reliance on potentially compromised digital infrastructure.

Focus on establishing local networks first, gradually expanding reach as resources allow. Repairing existing infrastructure, like telephone lines or radio towers, offers a quicker solution than complete reconstruction. Utilizing salvaged components and fostering community-based repair initiatives are essential. This mirrors the need for information flow during crises, like the coronavirus epidemic’s impact on media.

Rebuilding Energy Production & Distribution

Securing energy sources is fundamental to societal recovery. Prioritize decentralized, renewable options – solar, wind, and hydropower – reducing dependence on vulnerable centralized grids. Initial efforts should focus on localized power generation for essential services: hospitals, water purification, and communication hubs.

Salvaging existing infrastructure and repurposing materials is crucial. Repairing damaged power plants, even partially, can provide immediate relief. Simultaneously, invest in training local personnel for maintenance and repair. Lessons from post-Soviet reconstruction highlight the importance of adapting to available resources, mirroring the restoration efforts in Dagestan.

Reviving Transportation Systems

Re-establishing mobility is vital for trade, communication, and resource distribution. Focus initially on repairing existing road networks, prioritizing routes connecting key settlements and resource locations. Utilizing salvaged vehicles and promoting bicycle/foot traffic offers immediate, low-tech solutions.

Long-term strategies involve rebuilding rail lines and waterways, mirroring infrastructure projects like the Gomgaki elevated bridge construction. Localized production of essential vehicle parts and fuel sources will reduce reliance on external supply chains. Adapting to resource limitations, as seen post-Soviet Union, is paramount for sustainable transportation recovery.

Phase 3: Re-establishing Governance & Social Structures

Establishing legitimate governance is crucial for stability and long-term recovery. Initial forms may range from local councils to emergency committees, prioritizing basic service provision and dispute resolution. Drawing lessons from post-Soviet transitions, avoid replicating past systemic flaws.

Developing a new legal framework, rooted in principles of justice and fairness, is essential. This framework must address property rights, contracts, and criminal justice. Simultaneously, fostering social cohesion through community initiatives and cultural preservation will rebuild trust and shared identity, vital for a functioning society.

Forms of Post-Collapse Governance

Initial governance structures will likely be decentralized, emerging from local needs and capacities. Emergency committees, neighborhood councils, and mutual aid networks can provide immediate order. Transitioning towards more formal systems requires careful consideration of historical precedents, like post-Soviet experiences.

Potential models include direct democracy, representative councils, or federated systems. The key is inclusivity and responsiveness to the population. Avoiding centralized authoritarianism, mirroring past failures, is paramount. Successful models will prioritize transparency, accountability, and the rule of law, fostering trust and participation.

Developing a New Legal Framework

Establishing a just and effective legal system is crucial for long-term stability. This framework shouldn’t simply replicate pre-collapse laws, but address the root causes of societal failure. Initial focus should be on basic rights – security, property, and contract enforcement – ensuring fairness and predictability.

Drawing lessons from post-Soviet reconstruction, avoid overly complex or ideologically driven legal codes. Prioritize accessibility and understanding. Restorative justice practices, alongside traditional punitive measures, can aid social healing. A new legal framework must be adaptable, evolving with societal needs and values, fostering a culture of respect for the law.

Phase 4: Economic Revival

Economic recovery necessitates a phased approach, beginning with re-establishing basic trade networks. Initially, barter systems may prevail, gradually transitioning towards a stable currency – potentially a localized or digital solution; Rebuilding agricultural capacity is paramount, ensuring food security and reducing reliance on external aid.

Lessons from post-Soviet Russia highlight the dangers of rapid, unchecked privatization. A measured re-industrialization strategy, focusing on essential industries and local resources, is vital. Encouraging entrepreneurship and small businesses will foster innovation and create employment. Sustainable economic practices, avoiding past mistakes, are key to long-term prosperity.

Re-establishing Trade & Currency

Initial trade will likely revert to barter systems, exchanging essential goods and services directly due to the collapse of formal economies. Establishing a universally accepted medium of exchange is crucial, but complex. Localized currencies, backed by tangible assets or labor, offer a pragmatic starting point.

Digital currencies, if infrastructure allows, could bypass traditional banking systems, but require security and widespread access. Rebuilding trust in financial systems is paramount, avoiding the pitfalls of rapid privatization seen post-USSR. Facilitating regional trade agreements will foster interdependence and economic stability.

Rebuilding Agricultural Capacity

Immediate focus must be on securing existing seed stocks and establishing localized food production. Prioritizing resilient, diverse crops suited to the local climate is essential, moving away from monoculture vulnerabilities. Community gardens and small-scale farms will be vital for initial food security.

Re-establishing irrigation systems and soil health through sustainable practices is crucial for long-term productivity. Knowledge sharing of traditional farming techniques, combined with appropriate technology, will accelerate recovery. Avoiding centralized control, as seen in some post-Soviet transitions, will empower local communities.

Re-industrialization Strategies

Initial re-industrialization should prioritize essential goods production: tools, building materials, and basic medical supplies. Utilizing salvaged materials and decentralized manufacturing hubs minimizes reliance on complex supply chains. Focusing on labor-intensive industries provides employment and builds skills.

Avoiding the pitfalls of rapid, unsustainable growth – mirroring some post-Soviet experiences – is vital. Prioritizing local resource utilization and circular economy principles fosters resilience. Investment in renewable energy sources powers a sustainable industrial base, lessening dependence on potentially unavailable fossil fuels.

Phase 5: Knowledge Preservation & Education

Safeguarding accumulated knowledge is paramount for long-term recovery. Protecting and rebuilding libraries and archives – both physical and digital – ensures continuity with the past. Prioritizing the digitization of crucial texts and data mitigates loss from future disasters.

Establishing accessible educational systems for future generations is equally critical. Curricula should emphasize practical skills alongside core academic subjects, fostering self-sufficiency and innovation. A renewed focus on cultural preservation transmits values and identity, preventing societal fragmentation, learning from past mistakes.

Protecting and Rebuilding Libraries & Archives

Libraries and archives represent the collective memory of civilization; their protection is non-negotiable. Immediate steps involve securing existing collections from environmental damage and potential looting. Prioritize digitization efforts, creating redundant backups stored in geographically diverse locations.

Rebuilding requires a phased approach, starting with establishing secure, climate-controlled storage. Community involvement is vital – volunteer networks can assist with cataloging and preservation. Funding should be allocated for acquiring essential archival materials and training personnel in preservation techniques, ensuring knowledge endures.

Establishing Educational Systems for Future Generations

Education is the cornerstone of societal recovery, transmitting vital knowledge and skills. Initial efforts should focus on basic literacy and numeracy, utilizing salvaged materials and adaptable spaces. Prioritize training educators – even rudimentary instruction is crucial.

Curriculum development must balance practical skills (agriculture, construction, healthcare) with core academic subjects and cultural preservation. Leverage any remaining digital resources, but emphasize resilience and self-sufficiency. A decentralized, community-based approach fosters adaptability and ensures education reaches all, building a foundation for future progress.

The Role of Civil Resistance in Rebuilding

Civil resistance, a powerful force for change, can shape the post-collapse world order. Non-violent action, like protests and strikes, can challenge oppressive structures and advocate for equitable rebuilding processes. Drawing from post-Cold War examples, organized resistance can influence governance and ensure accountability.

Effective civil resistance requires strategic planning, broad-based participation, and a clear vision for the future. It’s vital to build coalitions, leverage communication networks, and maintain discipline in the face of adversity. Successful rebuilding hinges on empowering citizens to actively participate in shaping their new society.

International Aid & State Building (Lessons from Somalia)

Somalia offers crucial lessons regarding international aid and state building post-collapse. While aid is essential, its effectiveness is significantly impacted by the context and implementation. Uncoordinated aid can exacerbate existing conflicts and undermine local governance structures, hindering genuine recovery.

Successful state building requires a long-term commitment, focusing on strengthening institutions, promoting economic development, and fostering social cohesion. Turkish aid to Somalia demonstrates the importance of tailored assistance, addressing specific needs and respecting local ownership. A holistic approach, prioritizing local capacity, is paramount for sustainable rebuilding.

Addressing Public Health Crises Post-Collapse

Post-collapse scenarios invariably trigger public health crises, mirroring the strain witnessed during the coronavirus epidemic – overwhelmed hospitals and limited resources become commonplace. Immediate priorities include establishing basic sanitation, controlling infectious disease outbreaks, and providing emergency medical care.

Rebuilding healthcare infrastructure is crucial, but equally important is preventative care and public health education. Prioritizing access to clean water, food security, and mental health services are vital components of recovery. Effective response necessitates international collaboration, resource allocation, and a focus on vulnerable populations.

Psychological & Social Recovery After Trauma

Societal collapse inflicts deep psychological trauma on individuals and communities, necessitating comprehensive support systems. Addressing widespread grief, anxiety, and PTSD requires accessible mental health services, community-based healing initiatives, and fostering social cohesion.

Rebuilding trust and social bonds is paramount, alongside establishing safe spaces for processing trauma. Cultural preservation plays a vital role in restoring identity and meaning. Prioritizing empathy, compassion, and collective healing will be essential for long-term recovery and preventing cycles of violence and despair.

Long-Term Sustainability & Avoiding Past Mistakes

A successful rebuild necessitates learning from historical failures, including the tumultuous post-Soviet reconstruction period. Prioritizing ecological sustainability, resource management, and equitable distribution are crucial to avoid repeating past errors.

Resilient systems must be built on principles of decentralization, diversification, and local empowerment. Avoiding over-reliance on fragile global supply chains and fostering self-sufficiency are key. Furthermore, establishing robust governance structures that prioritize long-term planning and prevent corruption will be vital for enduring stability and prosperity.

The Impact of Technological Loss & Recovery

A significant challenge post-collapse will be the loss of complex technologies, demanding a phased recovery approach. Initial efforts must focus on rediscovering and replicating essential, simpler technologies – agriculture, basic medicine, and water purification – to address immediate needs.

Rebuilding advanced infrastructure requires careful consideration, prioritizing resilience and avoiding the pitfalls of over-dependence. Knowledge preservation, through protected archives and educational systems, is paramount. A balanced approach, integrating appropriate technologies with traditional skills, will be crucial for long-term sustainability and avoiding past mistakes.

Lessons from Post-Soviet Reconstruction

The post-Soviet period offers valuable insights into societal rebuilding, particularly regarding the challenges of transitioning from centralized control to new governance structures. Russia’s tumultuous experience highlights the importance of addressing political, economic, and social disruptions simultaneously.

Successful reconstruction necessitates a robust legal framework, coupled with economic revival strategies focused on trade and agricultural capacity. Understanding the complexities of cadre transitions – as studied in the Ukrainian SSR – is vital for establishing effective leadership. Avoiding radical shifts and fostering gradual evolution, as Bentham suggested, can promote stability.

The Importance of Cultural Preservation

Rebuilding civilization extends beyond infrastructure; it demands safeguarding cultural heritage. The experiences of Dagestan demonstrate the necessity of preserving classical literature and recognizing prominent cultural figures as foundational to societal identity.

Cultural preservation fosters social cohesion and provides a sense of continuity amidst upheaval. Restoring libraries and archives – protecting accumulated knowledge – is paramount. Furthermore, actively supporting artistic expression and traditional practices strengthens community bonds and offers resilience against trauma. Unprecedented measures to restore destroyed cultural objects, as seen in conflict zones, underscore this vital need.

Planning for Future Resilience

Effective rebuilding necessitates proactive planning to mitigate future disruptions. Learning from past mistakes – including those following the collapse of the Soviet Union – is crucial. This involves diversifying resource acquisition, establishing robust communication networks, and fostering adaptable governance structures.

Resilience isn’t solely about preventing collapse; it’s about rapid recovery. Developing contingency plans for public health crises, like pandemics, is essential, as demonstrated by recent global events. Investing in education and promoting civil resistance capabilities empowers communities to respond effectively to unforeseen challenges, ensuring long-term stability and avoiding repeating historical errors.

Categories
Guide

ground guide

Beginner gardeners, this comprehensive ground guide will demonstrate building a vegetable garden from scratch, directly in your backyard for bountiful harvests!

What is In-Ground Gardening?

In-ground gardening represents a traditional method of cultivating vegetables directly into the native soil, differing from raised beds or container gardening. Instead of isolated rows, consider condensing them into wider formations, utilizing pathways as new rows – a technique favored by market gardeners employing 30-inch rows spaced 18 inches apart.

For many home gardeners, adopting 3-foot by 5-foot beds offers an efficient and manageable system. This approach allows for greater scalability and economic viability compared to smaller-scale methods. It’s about working with the land, preparing it thoroughly, and establishing a thriving ecosystem directly within the earth itself, fostering a strong connection between plant and place.

Benefits of In-Ground vs. Other Methods

In-ground gardening offers distinct advantages, primarily stemming from increased space for larger-scale cultivation and economic efficiency. Unlike raised beds, it eliminates the cost of building materials and allows for more extensive root systems to develop unimpeded. The larger soil volume also provides greater buffering against temperature fluctuations and drought conditions.

Furthermore, in-ground gardens naturally integrate with the surrounding ecosystem, promoting beneficial soil microbes and insect life. While requiring initial soil preparation – potentially with a tractor or rototiller – the long-term benefits of a well-established in-ground garden often outweigh the upfront effort, yielding abundant harvests.

Planning Your In-Ground Garden

Strategic planning is key! Consider condensed rows, utilizing pathways as rows, and implementing 3-foot by 5-foot beds for optimal garden organization and yield.

Site Selection: Sunlight and Drainage

Choosing the right location is paramount for a thriving in-ground garden. Prioritize a flat, well-drained area to prevent waterlogging, which can damage roots and hinder growth. Adequate sunlight is equally crucial; most vegetables require at least six to eight hours of direct sunlight daily.

Observe your yard throughout the day to identify spots receiving sufficient sun exposure. Avoid areas shaded by trees or buildings. Proper drainage ensures excess water doesn’t accumulate, creating an unfavorable environment for plant development. Consider the soil composition as well – well-draining soil is essential. A simple test is to dig a hole and observe how quickly it fills with water after rainfall; if it drains slowly, amending the soil will be necessary.

Garden Size and Layout (3ft x 5ft Beds)

For manageable and efficient gardening, consider utilizing 3ft x 5ft beds. This size allows easy access for weeding, planting, and harvesting without excessive reaching or stepping into the garden. Instead of traditional rows, condense them into wider rows, utilizing pathways as new rows – a technique favored by market gardeners employing 30-inch rows with 18-inch spacing.

This bed size is ideal for both raised beds and in-ground square foot systems. It maximizes growing space while maintaining accessibility. Planning your layout with these dimensions in mind simplifies garden organization and promotes optimal plant growth. Remember to consider future expansion possibilities when initially determining your garden’s overall size.

Pathway Design (18-inch Spacing)

Strategic pathway design is crucial for an accessible and productive in-ground garden. Utilizing 18-inch spacing between beds provides ample room for maneuvering a wheelbarrow, comfortably walking, and performing maintenance tasks without compacting the soil within the growing areas. This spacing mirrors the practices of market gardeners who employ 30-inch rows with 18-inch pathways.

Well-defined pathways minimize soil compaction, ensuring healthy root development and efficient water absorption. Consider materials like wood chips, straw, or gravel for pathways to suppress weeds and improve drainage. Consistent pathway width throughout the garden creates a visually appealing and functional space, enhancing the overall gardening experience and maximizing efficiency.

Soil Preparation: The Foundation of Success

Proper soil preparation is paramount; test and analyze it, then till or rototill, enriching with compost and essential nutrients for thriving plants!

Soil Testing and Analysis

Before embarking on your in-ground garden, understanding your soil’s composition is crucial. Soil testing provides vital insights into pH levels, nutrient deficiencies, and potential contaminants. This analysis dictates the necessary amendments for optimal plant growth. A simple soil test kit from a garden center can offer a basic assessment, but for a comprehensive report, consider sending samples to a professional agricultural laboratory.

Knowing your soil type – sandy, silty, clayey, or loamy – influences water retention and drainage. Adjustments can then be made to improve these characteristics. For instance, clay soil benefits from organic matter to enhance drainage, while sandy soil requires amendments to improve water-holding capacity. Accurate soil analysis forms the bedrock of a successful and productive garden, ensuring your vegetables receive the nourishment they need.

Tilling or Rototilling the Ground

Preparing the ground for planting often involves tilling or rototilling, especially for new gardens or heavily compacted soil. This process loosens the soil, improving aeration, drainage, and root penetration. A tractor or large rototiller efficiently prepares larger areas, breaking up clumps and incorporating organic matter. However, excessive tilling can disrupt soil structure and harm beneficial organisms.

Consider “no-till” methods as an alternative, which minimize soil disturbance. If tilling, aim for a depth of 8-12 inches. Remove rocks, roots, and debris during the process. Following tilling, allow the soil to settle for a week or two before amending it. Proper ground preparation creates a favorable environment for seed germination and robust plant development, setting the stage for a thriving garden.

Amending the Soil: Compost and Nutrients

Enhancing soil fertility is crucial for successful in-ground gardening. Amending the soil with compost is a fantastic way to improve its structure, water retention, and nutrient content. Compost introduces beneficial microbes, fostering a healthy soil ecosystem. Incorporate several inches of well-rotted compost into the tilled soil, mixing it thoroughly.

Additionally, consider a soil test to determine specific nutrient deficiencies. Based on the results, add appropriate organic fertilizers like bone meal (phosphorus), blood meal (nitrogen), or kelp meal (potassium). Avoid synthetic fertilizers, which can harm soil life. Healthy, nutrient-rich ground provides the foundation for vigorous plant growth and abundant yields, ensuring a bountiful harvest.

Choosing What to Grow

Select vegetables suited to your local climate for optimal growth. Companion planting maximizes space and benefits plants, creating a thriving ground guide!

Vegetable Selection Based on Climate

Successful in-ground gardening hinges on selecting vegetables that thrive in your specific climate. Consider your region’s growing season length, average temperatures, and first/last frost dates. Cool-season crops like lettuce, spinach, and peas flourish in milder temperatures, ideal for spring and fall planting. Warm-season vegetables, including tomatoes, peppers, and cucumbers, require warmer conditions and a longer growing season.

Understanding your hardiness zone is crucial; it dictates which plants can survive winter; Local nurseries are excellent resources for climate-specific recommendations. Don’t overlook microclimates within your garden – areas sheltered from wind or receiving more sunlight. A well-planned selection, guided by your climate, ensures a bountiful harvest and a successful ground guide experience.

Companion Planting for Optimal Growth

Companion planting, a cornerstone of successful in-ground gardening, involves strategically pairing plants to benefit each other. Certain combinations deter pests, improve growth, or enhance flavor. For example, basil repels tomato hornworms, while carrots and onions mutually protect against carrot root flies and onion flies.

Legumes, like beans and peas, fix nitrogen in the soil, benefiting nitrogen-hungry plants like corn and leafy greens. Marigolds are renowned for repelling nematodes and other harmful soil pests. Utilizing this ground guide principle maximizes space, reduces reliance on pesticides, and fosters a healthier, more productive garden ecosystem. Researching compatible pairings is key to unlocking these synergistic benefits.

Planting Your Vegetables

Ground guide dictates choosing between direct sowing seeds or transplanting seedlings, considering proper planting depth and spacing for optimal growth and yields.

Direct Sowing vs. Transplanting

Ground guide considerations begin with understanding the difference between direct sowing and transplanting. Direct sowing involves planting seeds directly into the garden soil, ideal for root vegetables like carrots and radishes, which dislike root disturbance. This method requires patience, as germination and initial growth take time.

Transplanting, conversely, involves starting seeds indoors or purchasing seedlings and then moving them to the garden. This offers a head start, particularly beneficial for crops with longer growing seasons like tomatoes and peppers. However, transplanting can sometimes shock young plants, requiring careful acclimation.

Ultimately, the best method depends on the specific vegetable, your climate, and personal preference. Both techniques, when executed correctly, contribute to a thriving in-ground garden.

Planting Depth and Spacing

A crucial element of our ground guide involves understanding proper planting depth and spacing. Seed packets provide specific instructions, but a general rule is to plant seeds at a depth two to three times their diameter. Insufficient depth can lead to drying out, while excessive depth hinders emergence.

Spacing is equally vital. Overcrowding restricts airflow, increasing disease risk and reducing yields. Utilizing a 3ft x 5ft bed system, consider the mature size of each plant. Compact varieties allow for closer spacing, maximizing space utilization.

Following these guidelines ensures optimal growth conditions, allowing each vegetable to flourish and contribute to a bountiful harvest within your in-ground garden.

Garden Maintenance

Our ground guide emphasizes consistent care: water effectively (avoiding frozen ground), control weeds diligently, and proactively manage pests and diseases for success!

Watering Techniques (Avoiding Frozen Ground)

This ground guide stresses mindful watering practices for optimal vegetable growth. Consistent moisture is crucial, but avoid watering when the ground is frozen – plant roots simply cannot absorb water under those conditions. This prevents wasted effort and potential root damage. Focus on deep, less frequent watering to encourage strong root development, making plants more resilient.

Consider soaker hoses or drip irrigation for efficient water delivery directly to the root zone, minimizing water loss through evaporation. Regularly check soil moisture levels by sticking your finger a few inches into the ground; if it feels dry, it’s time to water. Remember, proper hydration is a cornerstone of a thriving in-ground garden!

Weed Control Strategies

This ground guide emphasizes proactive weed management for a healthy in-ground garden. Weeds compete with your vegetables for vital resources like sunlight, water, and nutrients. Regularly hand-pulling weeds, especially when they are young, is an effective method. Mulching – using organic materials like straw, wood chips, or compost – suppresses weed growth by blocking sunlight and retaining moisture.

Pathway design, with adequate spacing (like the recommended 18-inch pathways), also aids in weed control by providing clear boundaries. Avoid disturbing the soil more than necessary, as this can bring weed seeds to the surface. Consistent effort and a layered approach will keep your garden weed-free and productive!

Pest and Disease Management

This ground guide highlights integrated pest and disease management for a thriving in-ground garden. Regularly inspect plants for signs of pests or diseases – early detection is crucial! Encourage beneficial insects like ladybugs and lacewings, which prey on common garden pests. Companion planting, strategically grouping plants, can also deter pests.

Ensure good air circulation around plants to prevent fungal diseases. If problems arise, consider organic solutions like insecticidal soap or neem oil. Avoid overwatering, as this can create conditions favorable for disease. Maintaining healthy soil, through proper amending, strengthens plants’ natural defenses against pests and diseases, leading to a bountiful harvest.

Advanced Techniques

This ground guide explores electroculture, an experimental method aiming to enhance vegetable growth using energy fields within the garden environment.

Electroculture Experimentation

Ground guide enthusiasts often explore electroculture, a fascinating technique involving the potential of atmospheric energy to stimulate plant growth. This method utilizes copper or zinc structures – often pyramids or coils – placed in the garden to attract and channel energy. Recent four-month experiments have investigated whether electroculture can demonstrably yield larger and healthier vegetables.

The core idea centers around harnessing natural electrical fields, potentially boosting nutrient uptake and overall plant vitality. While still considered experimental, proponents believe electroculture offers a sustainable and chemical-free approach to gardening. Results from initial trials are promising, suggesting a potential for increased yields and improved plant health, warranting further investigation for the dedicated gardener.

Categories
Guide

oahu travel guide book

Oahu Travel Guidebook: An Overview

Discover Oahu with comprehensive guides like Lonely Planet Hawaii or Oahu Revealed‚ offering detailed insights into attractions‚ beaches‚ and cultural experiences for an unforgettable trip.

Oahu‚ known as “The Gathering Place‚” beckons with a vibrant blend of history‚ culture‚ and natural beauty. From the bustling city of Honolulu and iconic Waikiki Beach to the serene North Shore’s legendary surf‚ Oahu offers diverse experiences. Travel guides‚ such as Oahu Revealed‚ unlock hidden gems and provide essential information for navigating this captivating Hawaiian island‚ ensuring a memorable adventure for every visitor.

Planning Your Trip to Oahu

Effective trip planning utilizes resources like Frommer’s Hawaii and Oahu Revealed. Consider your interests – surfing‚ hiking‚ or cultural immersion – when scheduling activities. Guidebooks detail accommodation options‚ transportation methods‚ and potential day trips to Kualoa Ranch or the Byodo-In Temple‚ maximizing your Oahu experience and ensuring a smooth‚ enjoyable vacation.

Best Time to Visit Oahu

Guidebooks suggest considering weather patterns and peak/off-peak seasons for optimal planning; detailed resources help determine the ideal time for your Oahu adventure;

Weather Considerations

Travel guides emphasize Oahu’s consistently pleasant climate‚ with average highs around 80°F (27°C) and lows near 70°F (21°C). Winter months (November to March) bring slightly more rainfall and larger surf‚ ideal for experienced surfers. Summer (April to October) offers drier conditions and calmer seas‚ perfect for swimming and snorkeling. Guidebooks also note that microclimates exist‚ so be prepared for variations across the island.

Peak vs. Off-Peak Seasons

Oahu travel guides highlight December to April and June to August as peak seasons‚ drawing larger crowds and higher prices for accommodations and activities. Shoulder seasons – April/May and September/November – offer a balance of pleasant weather and fewer tourists. Guidebooks suggest booking in advance during peak times to secure preferred options and potentially save money.

Getting Around Oahu

Oahu travel guides detail options like rental cars for flexibility and “TheBus” public transportation‚ providing affordable access to island destinations and attractions.

Rental Cars

Oahu travel guidebooks consistently recommend rental cars for independent exploration‚ especially beyond Honolulu and Waikiki. Numerous agencies are available at the airport and in tourist areas‚ offering a range of vehicles to suit every budget and need. Booking in advance‚ particularly during peak season‚ is strongly advised to secure the best rates and availability. Consider a Jeep for accessing more remote beaches and hiking trails‚ enhancing your overall Oahu adventure.

Public Transportation (TheBus)

Oahu travel guidebooks highlight “TheBus” as an affordable and extensive public transportation option. Covering the entire island‚ it’s a viable alternative to rental cars‚ particularly for exploring Honolulu and Waikiki. Purchase a HOLO card for convenient fare payment and consider multi-day passes for cost savings. Schedules and route information are readily available online and via mobile apps‚ simplifying island navigation.

Accommodation Options on Oahu

Oahu travel guidebooks detail diverse lodging‚ from luxurious Waikiki hotels to charming North Shore vacation rentals‚ catering to varied budgets and preferences for a comfortable stay.

Waikiki Hotels

Oahu travel guidebooks extensively cover Waikiki’s hotels‚ ranging from iconic‚ high-end resorts offering ocean views and premium amenities to more affordable‚ yet comfortable‚ options. These guides provide detailed reviews‚ price ranges‚ and location specifics‚ helping travelers select accommodations suited to their needs. Guides often highlight hotels near key attractions‚ like the beach‚ shopping centers‚ and dining establishments‚ ensuring convenient access to Waikiki’s vibrant atmosphere.

North Shore Vacation Rentals

Oahu travel guidebooks dedicate sections to North Shore vacation rentals‚ showcasing a diverse array of options beyond traditional hotels – from cozy beachfront cottages to spacious family homes. These guides detail rental features‚ proximity to famous surf spots like Pipeline and Sunset Beach‚ and local amenities. They assist in finding rentals fitting various budgets and preferences‚ offering a more immersive‚ local experience.

Top Attractions in Honolulu & Waikiki

Oahu travel guidebooks highlight must-see attractions like Pearl Harbor‚ Diamond Head‚ and Iolani Palace‚ providing historical context and visitor information for exploration.

Pearl Harbor

Oahu travel guidebooks extensively cover Pearl Harbor‚ a profoundly moving historical site. They detail the visitor center‚ USS Arizona Memorial (reservations essential!)‚ and museums. Guides offer crucial background on the December 7th attack‚ providing context for a respectful visit. Expect security checks and allow ample time for exploration‚ as it’s a deeply impactful and significant destination‚ requiring thoughtful consideration.

Diamond Head

Oahu travel guidebooks highlight Diamond Head State Monument as a must-do hike. They detail the moderate 1.6-mile trail to the summit‚ offering panoramic views of Waikiki and the coastline. Guides advise arriving early to avoid crowds and heat‚ and to bring water and sunscreen. Reservations are now required for entry‚ as detailed in current editions.

Iolani Palace

Oahu travel guidebooks consistently recommend Iolani Palace‚ the only official residence of royalty in the United States. Guides detail its rich history as the home of Hawaii’s last monarchs. Tours are available‚ showcasing the palace’s restored grandeur and offering insights into Hawaiian monarchy. Guides suggest booking tours in advance for optimal access.

Exploring Oahu’s Beaches

Oahu travel guidebooks highlight Waikiki‚ North Shore (Pipeline‚ Sunset)‚ and Lanikai beaches as must-visits‚ detailing surf conditions and scenic beauty for every traveler.

Waikiki Beach

Oahu travel guidebooks consistently showcase Waikiki Beach as a premier destination‚ famed for its calm waters and iconic views of Diamond Head. These guides detail various activities‚ from surfing lessons and catamaran cruises to simply relaxing on the golden sands. They also provide insights into the best spots for sunset viewing and nearby dining options‚ ensuring visitors maximize their Waikiki experience. Expect crowds‚ but also a vibrant atmosphere and convenient access to hotels and amenities.

North Shore Beaches (Pipeline‚ Sunset Beach)

Oahu travel guidebooks highlight the North Shore’s legendary beaches‚ Pipeline and Sunset Beach‚ as surfing meccas‚ particularly during winter months. These guides detail the massive waves attracting professional surfers and the importance of ocean safety for spectators. They also cover calmer summer conditions‚ ideal for swimming and snorkeling‚ alongside local food trucks and laid-back vibes.

Lanikai Beach

Oahu travel guidebooks consistently rank Lanikai Beach among the world’s most beautiful. These resources detail its soft‚ white sand‚ turquoise waters‚ and the iconic Mokulua Islands just offshore. Guides emphasize limited parking and early arrival‚ plus kayak rental options for exploring the islets and enjoying stunning coastal views.

Oahu’s Culinary Scene

Oahu travel guides highlight diverse dining‚ from Hawaiian staples to Waikiki’s fine restaurants‚ offering detailed reviews and recommendations for every palate and budget.

Hawaiian Food Staples

Oahu travel guidebooks consistently emphasize experiencing authentic Hawaiian cuisine. Poi‚ made from taro root‚ is a traditional staple‚ alongside kalua pig‚ slow-roasted in an underground oven – an imu. Don’t miss lau lau (pork or fish wrapped in taro leaves)‚ and poke‚ a raw fish salad. Many guides detail where to find these dishes‚ ensuring a flavorful immersion into local culture.

Fine Dining in Waikiki

Oahu travel guidebooks highlight Waikiki’s diverse fine dining scene. Many recommend Alan Wong’s for innovative Hawaiian regional cuisine‚ and Roy’s Waikiki for Pacific Rim fusion. Orchids at the Halekulani offers elegant oceanfront dining. Guides often include reservation tips and price ranges‚ assisting visitors in planning memorable culinary experiences within this vibrant district.

Outdoor Activities & Adventures

Oahu travel guides detail thrilling adventures like surfing lessons and scenic hiking trails‚ promising unforgettable experiences amidst the island’s natural beauty and diverse landscapes.

Surfing Lessons

Oahu travel guidebooks consistently recommend Waikiki Beach as the premier location for beginner surfing lessons‚ thanks to its gentle waves and experienced instructors. Numerous surf schools offer group and private lessons catering to all skill levels. Guides highlight the importance of ocean safety and respecting local surf etiquette. Expect to pay around $80-$150 for a two-hour lesson‚ including board rental. Several guides also mention the North Shore for more advanced surfers during winter months‚ but caution against it for novices.

Hiking Trails

Oahu travel guidebooks detail a diverse range of hiking trails‚ from easy coastal walks to challenging mountain climbs. Diamond Head is a popular‚ though often crowded‚ choice offering panoramic views. Guides frequently recommend the Manoa Falls Trail for its lush rainforest scenery‚ but warn of muddy conditions. Always check trail closures and weather forecasts before heading out‚ and bring plenty of water‚ as emphasized in most guides.

Cultural Experiences on Oahu

Oahu travel guidebooks highlight the Polynesian Cultural Center and authentic luau experiences‚ offering immersive insights into Hawaiian traditions and island heritage.

Polynesian Cultural Center

Oahu travel guidebooks consistently recommend the Polynesian Cultural Center as a premier destination for understanding Pacific Island cultures. Explore authentic villages representing Samoa‚ Fiji‚ Tonga‚ Tahiti‚ and more‚ enjoying captivating performances‚ interactive exhibits‚ and traditional crafts. Guides emphasize the evening luau and the spectacular “Ha: Breath of Life” show‚ providing a truly immersive and unforgettable cultural experience‚ making it a cornerstone of any Oahu itinerary.

Luau Experiences

Oahu travel guidebooks highlight luaus as essential Hawaiian experiences‚ offering a feast of traditional food‚ music‚ and dance. Guides detail various luaus‚ from intimate gatherings to large-scale productions‚ often featuring captivating Polynesian performances and storytelling. Many guides recommend Germaine’s Luau or Paradise Cove Luau‚ emphasizing the immersive cultural atmosphere and delicious Hawaiian cuisine‚ creating lasting memories for visitors.

Shopping on Oahu

Oahu travel guidebooks recommend Ala Moana Center and local markets for diverse shopping experiences‚ ranging from luxury brands to unique Hawaiian crafts and souvenirs.

Ala Moana Center

Oahu travel guidebooks consistently highlight Ala Moana Center as a premier shopping destination‚ boasting a vast selection of retailers – from high-end luxury brands like Chanel and Gucci to department stores and local boutiques. This open-air mall offers a diverse range of options‚ alongside dining experiences and cultural events‚ making it a complete day-out destination for visitors seeking retail therapy and entertainment.

Local Markets

Oahu travel guidebooks often steer visitors toward experiencing authentic Hawaiian culture through its vibrant local markets. These markets offer unique handcrafted goods‚ fresh produce‚ and delicious local snacks‚ providing a glimpse into island life beyond the tourist hotspots. Exploring these markets is a fantastic way to support local artisans and discover one-of-a-kind souvenirs.

Day Trips from Honolulu

Oahu guidebooks suggest exciting day trips to Kualoa Ranch and the serene Byodo-In Temple‚ offering diverse landscapes and cultural immersion beyond Honolulu’s city limits.

Kualoa Ranch

Oahu travel guidebooks consistently highlight Kualoa Ranch as a premier day trip destination from Honolulu. This stunning location‚ famed for its breathtaking scenery‚ served as a backdrop for numerous Hollywood films. Visitors can enjoy diverse activities‚ including horseback riding‚ ATV tours‚ jungle expeditions‚ and movie site visits. Guides detail various tour options‚ catering to different interests and fitness levels‚ ensuring an unforgettable adventure amidst lush valleys and majestic mountains.

Byodo-In Temple

Oahu travel guidebooks frequently recommend a visit to the Byodo-In Temple‚ a serene and beautiful non-denominational temple nestled in the Valley of the Temples Memorial Park. Replicating a 900-year-old Japanese Buddhist temple‚ it offers a tranquil escape. Guides emphasize its stunning architecture‚ peaceful gardens‚ and resident monk statues‚ providing a culturally enriching experience for all visitors seeking serenity.

Oahu Travel Resources & Guidebooks

Explore Oahu with resources like Lonely Planet Hawaii‚ Oahu Revealed‚ and DK Eyewitness guides‚ offering detailed maps and expert travel advice.

Lonely Planet Hawaii

Lonely Planet offers a comprehensive Hawaii guide‚ providing broad coverage of all the islands‚ or dedicated guides focusing specifically on Oahu. These guides are renowned for their in-depth research‚ practical advice‚ and vibrant photography. They cover everything from accommodation and dining to cultural insights and outdoor adventures‚ making them an excellent resource for planning your trip.

Oahu Revealed

Oahu Revealed‚ authored by Andrew Doughty‚ is highly praised for its incredibly detailed and local perspective. This guidebook delves deep into hidden gems‚ off-the-beaten-path locations‚ and insider tips that other guides often miss. It’s known for its thorough coverage of beaches‚ hikes‚ and local eateries‚ providing an authentic Oahu experience.

DK Eyewitness Oahu

DK Eyewitness Oahu expertly blends vibrant photography with detailed descriptions‚ offering a visually engaging travel experience. This guidebook excels at presenting historical context alongside practical information about Honolulu and Waikiki’s best sights. It’s a fantastic choice for travelers who appreciate a visually rich and informative approach to exploring Oahu’s culture.

Safety Tips for Travelers

Prioritize ocean safety and general precautions while exploring Oahu; guidebooks often include vital advice for a secure and enjoyable Hawaiian vacation experience.

Ocean Safety

Oahu’s beautiful waters demand respect; heed all posted warnings regarding currents‚ waves‚ and marine life. Guidebooks like Oahu Revealed emphasize rip current awareness and safe swimming practices. Never turn your back on the ocean‚ and be mindful of shorebreaks. Understand flag warnings – red means dangerous conditions‚ while yellow indicates caution. Prioritize swimming at lifeguard-protected beaches for added security and assistance when needed‚ ensuring a safer aquatic adventure.

General Travel Precautions

Oahu is generally safe‚ but standard travel precautions apply; safeguard valuables‚ be aware of surroundings‚ and avoid isolated areas‚ especially at night. Guidebooks suggest keeping copies of important documents separate from originals. Utilize hotel safes for valuables and exercise caution with personal belongings in crowded areas. Stay hydrated‚ wear sunscreen‚ and be mindful of potential petty theft‚ ensuring a secure and enjoyable visit.

Budgeting for Your Oahu Trip

Guidebooks emphasize planning for accommodation‚ activities‚ and food; costs vary widely based on choices‚ impacting overall trip expenses for a memorable Oahu experience.

Accommodation Costs

Travel guides detail a broad range of lodging options on Oahu‚ significantly influencing your budget. Waikiki hotels generally command higher prices‚ especially during peak seasons‚ while North Shore vacation rentals can offer more affordable alternatives. Guidebooks suggest considering hostels or Airbnb for budget-conscious travelers. Expect to allocate a substantial portion of your funds towards accommodation‚ with costs varying based on location‚ amenities‚ and time of year – planning ahead is crucial!

Activity & Food Expenses

Oahu travel guides emphasize that activities like surfing lessons‚ luau experiences‚ and visits to Pearl Harbor contribute significantly to overall costs. Dining expenses also vary widely; fine dining in Waikiki is pricier than local eateries. Guidebooks recommend budgeting for both planned excursions and spontaneous adventures‚ alongside diverse culinary explorations‚ to fully enjoy Oahu’s offerings without overspending.

Categories
Guide

guided by nature

Guided by Nature: An Exploration of Biomimicry and its Applications

Biomimicry, inspired by VentureWell’s principles, represents a revolutionary approach to innovation․ It’s a practice that seeks sustainable solutions
by emulating nature’s time-tested patterns and strategies․ This field leverages biological designs and processes to address complex human challenges․

The core idea is that nature, having undergone 3․8 billion years of research and development, holds invaluable wisdom․ Biomimicry diagrams,
as seen on dishcuss․com, visually represent these interconnected principles, offering a blueprint for sustainable design;

Ultimately, biomimicry isn’t just about copying nature; it’s about learning from it․ It’s a shift in perspective, recognizing nature as a mentor,
model, and measure for creating a more harmonious and resilient world․

What is Biomimicry?

Biomimicry, at its heart, is an innovation method that seeks sustainable solutions by emulating nature’s time-tested patterns and strategies․ It’s a conscious effort to learn from the 3․8 billion years of evolution that have refined the natural world, as highlighted by resources like VentureWell․org․

Unlike simply mimicking the form of nature, biomimicry delves deeper, seeking to understand the underlying processes and functions that allow natural systems to thrive․ This involves studying how organisms and ecosystems solve problems – from structural integrity to energy efficiency – and applying those principles to human design challenges․

The term itself, coined by scientist Janine Benyus, combines “bios” (life) and “mimesis” (to imitate)․ It’s not about replicating nature exactly, but rather about abstracting the core principles and adapting them to create innovative and sustainable solutions․ Diagrams, such as those found on dishcuss․com, illustrate the interconnectedness of these principles․

Essentially, biomimicry recognizes nature as a mentor, model, and measure․ It’s a paradigm shift that moves away from a human-centric approach to design and embraces the wisdom embedded within the natural world, offering a pathway towards a more harmonious and resilient future․

The Core Principles of Biomimicry

Biomimicry operates on a foundation of several key principles, guiding designers and innovators towards truly sustainable solutions․ VentureWell․org outlines these principles, emphasizing a shift in perspective – viewing nature not as a source of materials, but as a source of wisdom․

Life Creates Conditions Conducive to Life: Natural systems are inherently regenerative, creating environments that support continued existence․ Biomimetic design aims to emulate this cyclical approach, minimizing waste and maximizing resource utilization․

Adapt to Local Conditions: Organisms thrive by adapting to their specific environments․ Biomimicry encourages designs tailored to local climates, materials, and needs, reducing reliance on energy-intensive processes․

Optimize Rather Than Maximize: Nature prioritizes efficiency over sheer scale․ Biomimetic designs focus on optimizing resource use, minimizing energy consumption, and maximizing performance with minimal materials․

Use Resources Locally: Natural systems rely on locally available resources․ Biomimicry promotes the use of regional materials and renewable energy sources, reducing transportation costs and environmental impact․ These principles, visually represented in biomimicry diagrams, offer a roadmap for sustainable innovation․

Why Nature? The Benefits of Biomimetic Design

Nature has been refining its designs for 3․8 billion years, resulting in remarkably efficient, resilient, and sustainable solutions․ Biomimetic design taps into this vast reservoir of knowledge, offering significant advantages over conventional approaches․ Embracing nature as a mentor, as championed by biomimicry principles from VentureWell, yields numerous benefits․

Sustainability: Nature operates within closed-loop systems, minimizing waste and maximizing resource utilization․ Biomimicry promotes designs that emulate these cycles, reducing environmental impact and fostering long-term sustainability․

Efficiency: Natural systems are optimized for performance with minimal energy expenditure․ Biomimetic designs often require less material and energy, leading to cost savings and reduced carbon footprints․

Resilience: Organisms adapt and thrive in dynamic environments․ Biomimicry inspires designs that are robust, adaptable, and capable of withstanding changing conditions․

Innovation: Studying nature can unlock novel solutions to complex problems, sparking creativity and leading to breakthrough innovations․ Biomimicry diagrams, like those found on dishcuss․com, illustrate the potential for nature-inspired design․

Biomimicry in Architecture and Construction

Architecture and construction are increasingly turning to nature for inspiration, embracing biomimicry to create more sustainable, efficient, and aesthetically pleasing structures․ This approach moves beyond simply mimicking natural forms to understanding the underlying principles that govern their function․

Termite mounds, for example, have inspired innovative ventilation systems․ These structures maintain a stable internal temperature despite external fluctuations, prompting architects to design buildings with passive cooling and heating strategies, reducing reliance on energy-intensive HVAC systems․

Structural designs are also benefiting from biomimicry․ The lightweight yet incredibly strong structure of bird bones and seashells informs the development of new building materials and construction techniques․ This leads to reduced material usage and increased structural integrity․

Furthermore, biomimicry encourages the use of self-healing materials, inspired by biological systems, to extend the lifespan of buildings and minimize maintenance․ The principles highlighted by VentureWell demonstrate a shift towards nature-integrated design․

Ultimately, biomimicry in architecture isn’t just about aesthetics; it’s about creating buildings that function harmoniously with the environment․

Structural Biomimicry: Learning from Natural Structures

Structural biomimicry delves into the ingenious designs found in nature to solve engineering challenges․ It’s about understanding how natural structures achieve strength, stability, and efficiency, and then applying those principles to human-made creations․

Honeycomb structures, renowned for their exceptional strength-to-weight ratio, serve as a prime example․ This hexagonal pattern, found in beehives, is now widely used in aerospace and automotive industries to create lightweight yet durable components․

Spider silk, possessing remarkable tensile strength and elasticity, inspires the development of new high-performance materials․ Researchers are attempting to replicate its properties for applications ranging from bulletproof vests to surgical sutures․

The skeletal systems of birds, optimized for flight, offer insights into lightweight structural design․ Their hollow bones, reinforced with internal struts, provide exceptional strength with minimal weight, influencing aircraft wing designs․

By meticulously studying these natural marvels, structural biomimicry unlocks innovative solutions, leading to more sustainable and resilient infrastructure, mirroring the efficiency found in nature’s designs․

Biomimicry in Materials Science

Biomimicry’s influence on materials science is transforming how we develop and manufacture new substances, moving beyond traditional methods․ It focuses on replicating the exceptional properties of natural materials, leading to groundbreaking innovations․

Self-healing materials, inspired by biological systems, represent a significant advancement․ Just as skin repairs itself, researchers are creating polymers and composites that can automatically mend cracks and damage, extending product lifecycles․

Gecko feet, renowned for their incredible adhesive capabilities, have spurred the development of novel adhesive technologies․ These adhesives, utilizing microscopic structures called setae, offer strong, residue-free bonding on various surfaces․

Nacre (mother-of-pearl), found in seashells, exhibits exceptional toughness and strength․ Its layered structure, composed of microscopic aragonite platelets, inspires the creation of high-performance composites for protective coatings and structural applications․

Ultimately, biomimicry in materials science isn’t simply about imitation; it’s about understanding the underlying principles that govern natural material properties, paving the way for sustainable and high-performance materials․

Self-Healing Materials Inspired by Biological Systems

The pursuit of self-healing materials draws direct inspiration from the remarkable regenerative abilities found throughout the natural world․ Biological systems, from skin to bone, possess inherent mechanisms for repairing damage, offering a compelling model for materials scientists․

Vascular networks, mimicking those in living organisms, are integrated into materials to deliver healing agents to damaged areas․ Microcapsules containing monomers or catalysts rupture upon cracking, releasing their contents to initiate polymerization and repair the fracture․

Intrinsic self-healing relies on reversible bonds within the material’s structure․ These bonds, like hydrogen bonds or metal-ligand interactions, can break and reform, allowing the material to “flow” and close cracks without external intervention․

Shape-memory polymers, triggered by stimuli like heat or light, can revert to their original shape, effectively closing gaps and restoring structural integrity․ This mimics the way certain plants respond to environmental changes․

The development of self-healing materials promises to revolutionize industries, extending product lifespans, reducing waste, and enhancing safety across diverse applications․

Adhesive Technologies Based on Gecko Feet

Gecko adhesion represents a pinnacle of natural engineering, inspiring revolutionary advancements in adhesive technology․ Unlike traditional adhesives relying on chemical bonding, geckos utilize van der Waals forces – weak intermolecular attractions – for remarkable sticking power․

Setae and spatulae, microscopic structures on gecko feet, maximize surface contact, creating countless adhesion points․ These structures conform to surfaces at the nanoscale, exploiting the cumulative effect of van der Waals forces․

Synthetic gecko adhesives aim to replicate this mechanism using microfabricated structures․ Polymers with high surface area and flexibility are engineered to mimic setae, enabling strong, residue-free adhesion․

Dry adhesives, inspired by geckos, offer advantages over conventional adhesives in various applications, including robotics, climbing equipment, and medical devices․ They function without the need for liquids or glues, maintaining cleanliness and reliability․

Ongoing research focuses on enhancing the durability, scalability, and performance of gecko-inspired adhesives, paving the way for innovative solutions across diverse industries and applications․

Biomimicry in Engineering and Robotics

Nature’s ingenuity profoundly influences modern engineering and robotics, offering solutions to complex challenges․ Observing animal locomotion, for instance, has spurred the development of more efficient and adaptable robotic systems․

Animal-inspired robots mimic the movements of creatures like cheetahs, snakes, and insects․ These designs prioritize agility, stability, and energy efficiency, surpassing the capabilities of traditional robots in specific terrains․

Fluid dynamics, observed in fish and whales, informs the design of underwater vehicles and propulsion systems․ Biomimetic fins and body shapes reduce drag and enhance maneuverability, improving performance in aquatic environments․

Swarm robotics draws inspiration from ant colonies and bee hives, utilizing decentralized control and collective intelligence․ These systems excel in tasks requiring coordination, adaptability, and resilience․

Biomimetic engineering extends beyond locomotion, encompassing structural designs, sensory systems, and control mechanisms․ By emulating nature’s strategies, engineers create innovative and sustainable solutions for a wide range of applications․

Robotics Inspired by Animal Locomotion

Animal locomotion serves as a rich source of inspiration for robotics, driving innovation in movement and adaptability․ Researchers meticulously study how animals navigate diverse terrains, optimizing for speed, efficiency, and stability․

Cheetah-inspired robots, for example, demonstrate remarkable speed and agility, utilizing flexible spines and powerful leg mechanisms․ These designs aim to replicate the cheetah’s bounding gait, achieving impressive acceleration and maneuverability․

Snake-like robots excel in confined spaces, employing undulating movements to navigate obstacles and explore complex environments․ Their adaptability makes them ideal for search and rescue operations, as well as inspection tasks․

Insect-inspired robots, often small and lightweight, showcase exceptional climbing abilities and maneuverability․ Mimicking the adhesive properties of insect feet allows these robots to scale vertical surfaces with ease․

Bio-inspired robotics isn’t merely about replicating appearance; it’s about understanding the underlying principles of animal movement․ This knowledge informs the development of more robust, efficient, and versatile robotic systems․

Fluid Dynamics Inspired by Fish and Whales

Fish and whales, masters of aquatic environments, offer invaluable insights into fluid dynamics, influencing advancements in engineering and design․ Their streamlined bodies and efficient propulsion systems minimize drag and maximize thrust․

Sharkskin-inspired surfaces, featuring microscopic riblets, reduce turbulence and friction, enhancing the performance of ships, aircraft, and pipelines․ These bio-inspired textures improve fuel efficiency and reduce drag by manipulating the boundary layer of fluid flow․

Whale-fin leading edges, characterized by bumpy protrusions, delay stall and improve lift generation in wind turbines and aircraft wings․ These tubercles disrupt the formation of vortices, enhancing aerodynamic performance at various angles of attack․

Fish schooling behavior inspires algorithms for optimizing the movement of autonomous underwater vehicles (AUVs)․ By mimicking the coordinated movements of fish, AUVs can navigate efficiently and avoid collisions․

Bio-inspired fluid dynamics extends beyond transportation, influencing the design of pumps, ventilation systems, and even medical devices․ Nature’s solutions provide a pathway towards more sustainable and efficient fluid handling technologies․

Biomimicry in Sustainable Design

Biomimicry fundamentally reshapes sustainable design, moving beyond simply reducing harm to actively creating systems that are regenerative and beneficial․ Nature offers a wealth of proven strategies for resource efficiency, waste reduction, and closed-loop systems․

Desert plant adaptations, like the Namib beetle’s ability to collect water from fog, inspire innovative water harvesting technologies for arid regions․ These designs mimic natural processes to provide sustainable water sources․

Termite mound ventilation systems, renowned for their passive cooling capabilities, inform the design of energy-efficient buildings․ Mimicking the mound’s structure reduces reliance on mechanical heating and cooling․

Spider silk’s strength and biodegradability inspire the development of sustainable materials for packaging, textiles, and construction․ These bio-based materials offer alternatives to conventional, polluting plastics․

Forest ecosystems, with their diverse and interconnected relationships, serve as models for creating resilient and regenerative urban environments․ Biomimicry promotes holistic design that integrates natural systems․

Water Conservation Inspired by Desert Plants

Desert plants showcase remarkable adaptations for surviving in arid environments, offering invaluable lessons for water conservation strategies․ These plants have evolved ingenious mechanisms to capture, store, and minimize water loss, providing blueprints for sustainable technologies․

The Namib desert beetle, a prime example, collects water from fog by condensing moisture on its textured back․ This biomimetic principle inspires the development of fog-harvesting systems for water-scarce regions, providing a sustainable water source․

Cacti, with their water-storing tissues and reduced leaf surface area, demonstrate efficient water storage and minimized transpiration․ These features inform the design of water-efficient landscaping and irrigation systems․

Root systems of desert plants often extend horizontally to maximize water absorption from infrequent rainfall․ This inspires innovative agricultural techniques focused on efficient water uptake and distribution․

Plant leaf structures, like the waxy coatings on succulent leaves, reduce water loss through evaporation․ These adaptations inspire the creation of water-repellent materials for various applications, conserving water resources․

Energy Efficiency Inspired by Termite Mounds

Termite mounds, particularly those built by African termites, represent sophisticated examples of natural ventilation and temperature regulation, offering profound insights into energy-efficient building design․ These structures maintain remarkably stable internal temperatures despite extreme external fluctuations․

The mound’s architecture incorporates a network of tunnels and chambers that facilitate airflow, drawing in cool air and expelling warm air through convection․ This passive cooling system minimizes the need for artificial climate control․

Eastgate Centre in Harare, Zimbabwe, famously emulates termite mound ventilation, reducing air conditioning costs by over 90%․ This demonstrates the practical application of biomimicry in architectural engineering․

The mound’s thermal mass, constructed from soil and saliva, absorbs and releases heat slowly, moderating temperature swings․ This principle inspires the use of sustainable building materials with high thermal capacity․

Studying termite mound construction reveals a deep understanding of airflow dynamics and heat transfer, providing valuable data for optimizing building designs and reducing energy consumption globally․

Biomimicry and Healthcare Innovations

Biomimicry’s influence on healthcare is rapidly expanding, offering innovative solutions inspired by the efficiency and elegance of biological systems․ Nature provides a rich source of inspiration for developing advanced medical technologies and treatments․

Drug delivery systems are being revolutionized by mimicking viruses, which naturally target and enter cells․ These bio-inspired carriers can deliver medication directly to diseased tissues, minimizing side effects and maximizing efficacy․

Medical devices are increasingly designed based on natural sensors․ For example, the lateral line system of fish, which detects water vibrations, inspires the development of highly sensitive pressure sensors for prosthetics․

Tissue engineering utilizes the principles of natural regeneration, mimicking the body’s ability to heal and rebuild damaged tissues․ Scaffolds mimicking the extracellular matrix promote cell growth and tissue formation․

Bio-inspired adhesives, modeled after gecko feet, are being developed for wound closure and surgical applications, offering strong, biocompatible alternatives to traditional sutures and staples․

Drug Delivery Systems Inspired by Viruses

Viruses, despite their pathogenic nature, possess remarkably efficient mechanisms for targeting and entering cells – a capability now inspiring revolutionary drug delivery systems․ Biomimicry leverages these natural processes to enhance therapeutic efficacy and minimize adverse effects․

Viral capsids, the protein shells surrounding viral genetic material, are being engineered to encapsulate drugs․ These bio-inspired carriers exhibit high specificity for target cells, ensuring precise drug delivery to diseased tissues, like cancerous tumors;

Surface modifications mimicking viral surface proteins enable the engineered capsids to evade the immune system and prolong circulation time, increasing the likelihood of reaching the intended target․

Self-assembly, a hallmark of viral construction, is utilized to create these drug-loaded carriers, offering a scalable and cost-effective manufacturing process․

Targeted therapies utilizing virus-inspired delivery systems promise to revolutionize cancer treatment, gene therapy, and the treatment of infectious diseases, offering a more precise and personalized approach to healthcare․

Medical Devices Inspired by Natural Sensors

Nature has evolved incredibly sensitive and sophisticated sensors over billions of years, offering a rich source of inspiration for medical device innovation․ Biomimicry seeks to replicate these natural sensing mechanisms to create more accurate, efficient, and biocompatible diagnostic and therapeutic tools․

Insect antennae, for example, inspire the development of highly sensitive chemical sensors capable of detecting minute concentrations of biomarkers for early disease diagnosis․ These bio-inspired sensors can detect volatile organic compounds associated with cancer or infection․

Spider slit sensilla, specialized mechanoreceptors, are being mimicked to create highly sensitive pressure sensors for prosthetic limbs, providing users with a more natural sense of touch and improved dexterity․

Electroreception in sharks and rays, the ability to detect electrical fields, inspires the development of non-invasive imaging techniques for detecting nerve activity and diagnosing neurological disorders․

Bio-integrated sensors, designed to seamlessly interface with biological tissues, promise to revolutionize personalized medicine, enabling real-time monitoring of physiological parameters and tailored treatment strategies․

Biomimicry in Computing and Artificial Intelligence

Nature provides elegant solutions to complex computational problems, inspiring advancements in artificial intelligence and computer science․ Biomimicry in this field focuses on replicating the efficiency, adaptability, and robustness of natural systems․

Neural networks, a cornerstone of modern AI, are directly inspired by the structure and function of the human brain․ These networks, composed of interconnected nodes, learn from data in a manner analogous to biological neurons․

Ant colony optimization (ACO) algorithms mimic the foraging behavior of ants to solve complex optimization problems, such as route planning and resource allocation․ Ants deposit pheromones to guide others, creating efficient pathways․

Genetic algorithms, inspired by natural selection, use principles of inheritance, mutation, and crossover to evolve solutions to complex problems․ These algorithms are particularly effective in exploring large search spaces․

Swarm intelligence, drawing inspiration from the collective behavior of social insects like bees and termites, enables the development of decentralized, self-organizing systems capable of tackling complex tasks․

Neural Networks Inspired by the Human Brain

The human brain, a marvel of biological engineering, serves as the ultimate inspiration for artificial neural networks (ANNs)․ These networks attempt to mimic the brain’s structure and function, enabling machines to learn, adapt, and solve complex problems․

Biological neurons, the fundamental units of the brain, receive, process, and transmit information via electrochemical signals․ ANNs replicate this process using interconnected nodes, or “artificial neurons,” that perform mathematical operations․

Synapses, the connections between neurons, are crucial for learning and memory․ In ANNs, these connections are represented by weighted links, which are adjusted during the learning process to strengthen or weaken signals․

Deep learning, a subset of machine learning, utilizes ANNs with multiple layers (deep neural networks) to extract hierarchical features from data, mirroring the brain’s layered processing of information․

Backpropagation, a key algorithm in training ANNs, adjusts the weights of connections based on the difference between the network’s output and the desired output, similar to how the brain refines its connections through experience․

Optimization Algorithms Inspired by Ant Colonies

Ant colonies, seemingly simple social insects, exhibit remarkable collective intelligence in solving complex optimization problems, particularly in foraging for food․ This behavior has inspired a powerful class of algorithms known as Ant Colony Optimization (ACO)․

Pheromone trails, deposited by ants as they search for food, serve as a form of indirect communication․ Other ants are more likely to follow trails with higher pheromone concentrations, creating a positive feedback loop․

ACO algorithms mimic this process by using artificial ants to explore a solution space․ These “ants” build solutions incrementally, depositing “pheromone” on promising paths․

Evaporation, the gradual decay of pheromone trails, prevents premature convergence to suboptimal solutions, encouraging exploration of diverse paths․

ACO is effectively applied to various optimization problems, including the traveling salesman problem, vehicle routing, and network routing, demonstrating nature’s efficiency in finding optimal solutions․

The algorithms leverage decentralized control and self-organization, mirroring the emergent intelligence observed in real ant colonies․

The Future of Biomimicry: Challenges and Opportunities

Biomimicry’s future hinges on overcoming several challenges while capitalizing on emerging opportunities․ A primary hurdle is the complexity of translating biological principles into practical engineering solutions․

Interdisciplinary collaboration is crucial, requiring biologists, engineers, designers, and ethicists to work in concert․ Deepening our understanding of biological systems, aided by advancements in fields like genomics and proteomics, is also essential․

Scaling up biomimetic designs from laboratory prototypes to mass production presents significant engineering and manufacturing challenges․ Material science breakthroughs are needed to replicate nature’s sophisticated materials․

Ethical considerations, ensuring responsible application and avoiding unintended consequences, are paramount․ Protecting biodiversity and respecting indigenous knowledge are vital․

Opportunities abound in areas like sustainable agriculture, climate change mitigation, and circular economy design․ Biomimicry offers a pathway towards a more resilient and harmonious relationship with the natural world․

Investment in biomimicry research and education will accelerate innovation and unlock nature’s vast potential for solving global challenges․

Ethical Considerations in Biomimicry

Biomimicry, while promising, necessitates careful ethical consideration․ Simply mimicking nature isn’t inherently sustainable or beneficial; context and impact matter profoundly․

Respect for biodiversity is paramount․ Extracting biological resources without considering ecosystem health or species preservation is unacceptable․ We must avoid “bio-prospecting” that exploits nature without equitable benefit-sharing․

Indigenous knowledge often holds invaluable insights into natural systems․ Utilizing this knowledge requires free, prior, and informed consent, ensuring communities benefit from innovations derived from their traditions․

Avoiding unintended consequences is crucial․ Introducing biomimetic technologies without thorough risk assessment could disrupt ecosystems or create new environmental problems․

The potential for “solutionism” – the belief that technology can solve all problems – must be guarded against․ Biomimicry should complement, not replace, broader systemic changes towards sustainability․

A holistic ethical framework, prioritizing ecological integrity and social justice, is essential for responsible biomimetic innovation․

Resources for Learning More About Biomimicry

VentureWell (venturewell․org) offers excellent tools and resources for exploring biomimicry principles, including detailed examples and design frameworks․ Their website provides a strong foundation for understanding the core concepts․

The Biomimicry Institute (biomimicry․org) is a leading organization dedicated to promoting biomimicry globally․ They offer courses, workshops, and a vast database of biological strategies – AskNature․

AskNature (asknature․org) is an invaluable online library cataloging how nature solves design challenges․ It’s a fantastic resource for inspiration and identifying relevant biological models․

Books like “Biomimicry: Innovation Inspired by Nature” by Janine Benyus provide comprehensive overviews of the field and its applications․ Further reading expands understanding․

Online courses on platforms like Coursera and edX offer structured learning opportunities, often taught by experts in biomimicry and related fields․

Exploring these resources will empower you to delve deeper into the fascinating world of biomimicry and its potential to create a more sustainable future․

Categories
Guide

cata classic tailoring guide

Cata Classic Tailoring is a popular profession in World of Warcraft‚ allowing players to craft cloth items like gear‚ bags‚ and other essentials. This guide provides a comprehensive overview of leveling‚ materials‚ and strategies to master Tailoring in Cataclysm Classic‚ helping you create powerful gear and enhance your in-game economy.

What is Tailoring in World of Warcraft?

Tailoring is a crafting profession in World of Warcraft that allows players to create cloth items such as armor‚ bags‚ and other textiles. It is one of the most versatile professions‚ enabling players to craft gear for themselves or others‚ as well as items that can be sold for gold. Tailors use cloth‚ thread‚ and other materials to produce goods that are essential for both new and experienced players. Unlike other professions‚ Tailoring does not require gathering materials directly from the environment‚ as cloth is typically obtained from humanoid mobs. This profession is particularly useful for classes that rely on cloth armor‚ such as Mages‚ Priests‚ and Warlocks‚ but its benefits extend to all players seeking to enhance their characters’ abilities and in-game economy.

The Importance of Tailoring in WoW

Tailoring is a highly valuable profession in World of Warcraft‚ offering players the ability to craft essential cloth items such as armor‚ bags‚ and linens. It is particularly beneficial for classes that rely on cloth armor‚ like Mages‚ Priests‚ and Warlocks‚ as it provides them with high-quality gear tailored to their needs. Additionally‚ Tailoring allows players to create bags‚ which are crucial for inventory management‚ and other utility items that can enhance gameplay. Crafting these items not only supports a player’s own progression but also provides opportunities to earn gold by selling excess goods at the Auction House. This profession is a cornerstone for both self-sufficiency and economic growth in the game‚ making it a strategic choice for many players.

Differences Between Classic and Cataclysm Tailoring

Cataclysm Tailoring differs significantly from Classic Tailoring‚ primarily in skill caps and material requirements. In Cataclysm‚ the maximum skill level is 525‚ compared to Classic’s 300‚ allowing for more intricate and powerful items. Additionally‚ Cataclysm introduced new materials like Embersilk and Dreamcloth‚ which are essential for high-end crafts. The expansion also added new recipes for gear and bags‚ making Tailoring more versatile. Furthermore‚ Cataclysm simplified some crafting processes and introduced new specialization options‚ enhancing efficiency. These changes make Cataclysm Tailoring more dynamic and rewarding‚ offering players more opportunities to craft advanced items and contribute to the in-game economy. Understanding these differences is key to maximizing the benefits of Tailoring in Cataclysm Classic.

Training in Tailoring

Training in Tailoring involves learning the profession from a qualified trainer‚ typically found in major cities like Stormwind or Orgrimmar. Players can begin by equipping a tailoring tool and progressing through ranks by crafting items‚ ensuring steady skill advancement.

Where to Find Tailoring Trainers

Tailoring trainers are conveniently located in major cities across Azeroth‚ making it easy for players to access training. In Stormwind‚ players can find the trainer near the Trade District‚ while in Orgrimmar‚ trainers are situated in the Valley of Honor. These locations ensure that both Alliance and Horde players have ample opportunities to learn and advance their Tailoring skills without extensive travel. Additionally‚ trainers are often near crafting supply vendors‚ streamlining the process of purchasing materials and leveling up the profession efficiently. This accessibility is a key feature of Cata Classic Tailoring‚ allowing players to focus on crafting and progression without unnecessary delays.

Apprentice‚ Journeyman‚ Expert‚ Artisan‚ and Master Ranks

The Tailoring profession in Cata Classic is divided into five distinct ranks: Apprentice‚ Journeyman‚ Expert‚ Artisan‚ and Master. Each rank unlocks new recipes and improves crafting efficiency. Starting as an Apprentice‚ players gain basic Tailoring skills‚ while progressing to Journeyman enhances their ability to craft intermediate items. Reaching Expert and Artisan ranks allows access to more complex patterns‚ including high-end gear and special items. Achieving Master rank signifies mastery of Tailoring‚ enabling the creation of top-tier items and expert-level crafting. These ranks not only reflect skill progression but also determine the quality and variety of items a player can craft‚ making each rank a milestone in the journey to becoming a skilled Tailor.

Unlearning and Relearning Tailoring

In Cata Classic‚ players can unlearn their Tailoring profession to switch to another‚ freeing up a profession slot. This process is irreversible without visiting a Tailoring trainer. To unlearn‚ simply open the profession window‚ select Tailoring‚ and choose “Unlearn.” All recipes and skill levels will be lost. Relearning requires finding a Tailoring trainer in major cities like Stormwind or Orgrimmar. You’ll need to pay a fee to reacquire the skill and relearn recipes‚ either from trainers or through discovery. This flexibility allows players to adapt their professions as needed‚ making it easier to explore different crafting paths without permanent commitment. However‚ be cautious‚ as losing high-level recipes can set back progression significantly.

Leveling Guide for Cata Classic Tailoring

This guide provides a comprehensive walkthrough to efficiently level your Tailoring skill from 1 to 525 in Cataclysm Classic‚ ensuring you master cloth crafting with ease and speed.

Level 1-75: The Basics of Tailoring

Starting your Tailoring journey in Cataclysm Classic‚ focus on crafting simple items like Bolts of Cloth‚ Mooncloth‚ and basic shirts. These recipes provide steady skill progression and are essential for building a foundation. Use readily available materials such as raw fabrics and threads‚ which can be purchased from vendors or crafted. Train with a Tailoring trainer in major cities like Stormwind or Orgrimmar to unlock new recipes as you level. Crafting in bulk is efficient‚ allowing you to quickly gain skill points. Additionally‚ consider using addons like Crafting Helper to streamline your workflow. This phase is crucial for mastering the fundamentals‚ ensuring a smooth transition to higher-level crafting.

Level 75-150: Intermediate Tailoring

At level 75-150‚ Tailoring shifts to crafting more complex items such as specialty cloths and mid-tier gear. Recipes like Silk Cloth‚ Mageweave‚ and high-quality bags become available‚ offering better skill gains. Continue using materials from vendors or drops‚ but focus on efficiency. Crafting multiple items at once can maximize skill progression. Consider disenchanting crafted gear for valuable materials. This phase is ideal for preparing for higher-level crafting and building a stockpile of essential items. Utilize addons like Auctionator to track material prices and optimize your crafting strategy for profit. Consistent crafting during this range ensures a solid foundation for advanced techniques in later levels.

Level 150-225: Advanced Tailoring Techniques

Reaching level 150-225 in Cata Classic Tailoring unlocks advanced recipes for high-end gear and specialized items. Focus on crafting Epic cloths like Frostweave and Embersilk‚ which are in demand for raid gear. Use rare materials such as Savage Leather to craft powerful gear. This phase emphasizes efficiency‚ so prioritize crafting items with high skill gains. Utilize disenchanting to convert crafted gear into valuable materials. Consider crafting multiple items at once to optimize skill progression. Addons like Craftomat can streamline your crafting process. Building a stockpile of advanced materials during this stage prepares you for the final push to 300. Stay consistent‚ and you’ll master the advanced techniques required for high-level Tailoring.

Level 225-300: Expert Tailoring Methods

Reaching level 225-300 in Cata Classic Tailoring introduces expert-level recipes for high-demand items like Illusionary Cloaks and Lightweave Cloths. These items are highly sought after for endgame content and raids. Focus on crafting rare materials such as Dreamcloth and Enchanting materials to optimize your progression. Crafting in bulk and using addons like Craftomat can significantly speed up your leveling. This phase emphasizes efficiency‚ so prioritize high-skill-gain recipes and manage your inventory wisely. Stockpiling rare materials during this stage will prepare you for the final push to 375. By mastering these expert techniques‚ you’ll be well-prepared for the challenges of high-level Tailoring in Cataclysm Classic.

Level 300-375: Artisan Tailoring Skills

Reaching level 300-375 in Cata Classic Tailoring unlocks Artisan tailoring‚ introducing complex recipes for high-end gear and specialty items like spellthread and tailoring-specific enchants. Crafting these requires rare materials such as Primal Mooncloth and Frostweave Cloth. Focus on optimizing your material usage‚ as these items often demand large quantities. Utilize patterns that yield the highest skill gains per craft. At this stage‚ consider farming specific dungeons or zones for rare drops to supplement your material supply. Efficient inventory management becomes crucial‚ as space and resources are often strained. Crafting in bulk and leveraging addons like Auctionator can help you manage materials and profits effectively. Mastering these Artisan techniques will prepare you for the final push to 375 and the demands of high-level content.

Level 375-525: Master Tailoring in Cataclysm

Reaching level 375-525 in Cata Classic Tailoring marks the pinnacle of your profession‚ unlocking master-level recipes for epic gear‚ including Cataclysm’s tier sets and high-stat cloaks. Crafting these items demands rare materials such as Embersilk Cloth‚ Dreamcloth‚ and Enchanting materials like Celestial Essence. Focus on optimizing your crafting order‚ prioritizing items with high skill gains and market demand. Utilize the Auction House to sell crafted epics for gold or disenchant them for valuable mats. At this stage‚ consider specializing in specific markets‚ such as raid gear or PvP items‚ to maximize profits. Efficient use of addons and market trends will ensure your tailoring remains lucrative and competitive in the endgame economy.

Materials and Supplies

Essential materials for Cata Classic Tailoring include various cloths‚ threads‚ and dyes. Farming cloth from mobs or purchasing from vendors ensures a steady supply. Manage inventory efficiently to avoid waste and maintain crafting momentum.

Where to Find Tailoring Materials

Obtaining materials for Cata Classic Tailoring involves several methods. Cloth can be looted from humanoid mobs across various zones‚ with higher-level zones yielding better materials. Vendors in major cities sell basic supplies like thread and dyes‚ though selection is limited. Auction Houses are a reliable source for rare or hard-to-find materials‚ especially during peak trading hours. Additionally‚ farming specific zones like Westfall‚ the Barrens‚ or later expansions’ areas ensures a steady supply. Crafting items from lower-level materials can also provide essential components for advanced recipes. Efficient material gathering is crucial for progressing through the Tailoring ranks and crafting high-demand items.

Essential Materials for Tailoring

In Cata Classic Tailoring‚ essential materials include various types of cloth‚ threads‚ and dyes. Cloth such as Linen‚ Wool‚ Silk‚ and Mageweave are fundamental for crafting armor‚ bags‚ and other items. Heavy Savage Leather is also crucial for certain high-level recipes. Threads like Gray Dye‚ Blue Dye‚ and Black Dye are used to enhance or customize crafted items. Bolts of cloth‚ created by combining smaller pieces‚ are required for advanced recipes. Additionally‚ materials like Runecloth and Felcloth become essential at higher skill levels for crafting epic gear and specialized items. Having a steady supply of these materials ensures efficient crafting and progression through the Tailoring skill ranks.

Managing Your Material Inventory

Effectively managing your material inventory is crucial for efficient Tailoring in Cata Classic. Start by organizing your materials into categories‚ such as cloth‚ threads‚ and dyes‚ using bank space or larger bags. Prioritize crafting items that use materials you have in abundance to avoid waste. Regularly sell or disenchant items you no longer need to free up space and generate gold. Consider using add-ons like Baggins to track your inventory more efficiently. Crafting in bulk and planning your recipes ahead of time can also help minimize material waste. Finally‚ ensure you have a steady supply of essential materials by regularly farming or purchasing them from the Auction House‚ keeping your inventory balanced and ready for crafting.

Equipment for Tailoring

Tailoring requires specific tools like a needle and thread‚ which are essential for crafting. Optional items like the Enchanted Sewing Kit can enhance crafting speed and efficiency‚ while larger bags help manage materials effectively for optimal productivity.

Tools Needed for Tailoring

The primary tools required for Tailoring are simple yet essential. A sewing needle and thread are the basics for crafting cloth items. Additionally‚ an Enchanted Sewing Kit can be used to increase crafting speed. While not mandatory‚ these items streamline the process. For efficiency‚ consider using larger bags to carry more materials. The Spellfire Tailoring Set from the TBC expansion also boosts crafting speed. Ensuring you have these tools will enhance your Tailoring experience‚ allowing you to craft items more effectively and manage your resources better. These tools are crucial for both casual crafting and advanced Tailoring in Cataclysm Classic‚ helping you achieve your goals faster and with less hassle.

Equipment That Enhances Tailoring Efficiency

Several pieces of equipment can significantly boost your Tailoring efficiency in Cataclysm Classic. The Enchanted Sewing Kit is a must-have‚ reducing the time spent on crafting. Additionally‚ the Spellfire Tailoring Set from TBC provides a set bonus that increases crafting speed. Equipping gloves with tailoring-specific enchants‚ such as Enchant Gloves -Tailoring‚ further enhances your efficiency. Other items like Spellfire Tailoring Pants and Spellfire Tailoring Boots can also provide bonuses. Using these equipment pieces ensures you spend less time crafting and more time progressing your skill. These items are highly recommended for serious Tailors aiming to maximize their productivity in Cataclysm Classic.

Upgrading Your Tailoring Gear

Upgrading your Tailoring gear is essential for maximizing efficiency and productivity. The Spellfire Tailoring Set from The Burning Crusade is highly recommended‚ as it provides a set bonus that increases crafting speed. Additionally‚ the Enchanted Sewing Kit is a valuable tool that reduces the time spent on crafting. Other items‚ such as cloak enchants or trinkets that boost haste or reduce material costs‚ can further enhance your Tailoring experience. Upgrading your gear ensures that you can craft items faster and with less downtime‚ making the leveling process smoother and more efficient. Investing in quality equipment is a key part of mastering Tailoring in Cataclysm Classic.

Crafting Strategies

Crafting strategies in Cata Classic Tailoring involve optimizing material use‚ focusing on high-demand items‚ and balancing skill progression with profitability. Crafting multiple items at once and using disenchanting for resource recovery are key tactics to enhance efficiency and gold-making potential. Add-ons like Tailoring Helper can also streamline the process‚ ensuring you craft smarter‚ not harder.

Crafting for Skill Points

Crafting for skill points is essential in Cata Classic Tailoring. To maximize efficiency‚ focus on creating items with the highest skill point yield per material. Start with basic recipes like Bolt of Linen Cloth and Light Leather Pants‚ which provide consistent skill gains early on. As you progress‚ switch to higher-tier items like Ember Silk Cloak and Frostweave Gloves‚ which offer better skill point returns; Always prioritize crafting in bulk to minimize material waste and ensure steady progress. Using add-ons like Skillet can help track recipes and optimize your crafting path. This strategy ensures you reach max skill level efficiently while maintaining a balanced inventory.

Disenchanting Crafted Items

Disenchanting crafted items is a valuable strategy in Cata Classic Tailoring‚ allowing you to break down unwanted gear into enchanting materials. This process helps recover crafting costs and provides resources for other professions. Start by crafting items with high disenchant value‚ such as rare cloaks or epic robes. Use an enchanter or hire one to disenchant these items‚ yielding materials like essences‚ dust‚ or shards. These can be sold on the Auction House or used for crafting powerful enchants. To optimize‚ focus on items with low material requirements but high disenchant returns. Add-ons like Auctionator can help you track market demand for disenchanting materials‚ maximizing your profit.

Crafting for Profit

Crafting for profit is a key aspect of Cata Classic Tailoring‚ enabling players to generate gold by creating high-demand items. Focus on crafting epic gear‚ rare cloaks‚ and specialized bags‚ which are sought after by raiders and PvPers. Use market trends from the Auction House to identify gaps and price opportunities. Low-level items like linen cloaks and woolen shirts are also profitable due to consistent demand from new players. To maximize returns‚ craft in bulk and list items during peak hours. Consider using add-ons like Auctionator or TSM to streamline listing and undercut competitors. By aligning your crafting with market needs‚ you can build a lucrative Tailoring empire in Cataclysm Classic.

Optimization Techniques

Enhance your Tailoring efficiency with strategic techniques. Use add-ons like TSM for bulk crafting and Auctionator for market tracking. Focus on multicrafting to save time and materials. Prioritize high-demand items and disenchant surplus gear for profitable mats. Regularly restock materials and organize your inventory to streamline crafting sessions. By optimizing your workflow‚ you can level faster and maximize profitability in Cataclysm Classic Tailoring.

Leveling Tailoring in Bulk

Leveling Tailoring in bulk is an efficient way to maximize your progress. By crafting large quantities of the same item‚ you can minimize downtime and streamline your workflow. Use add-ons like TSM or Auctionator to manage your crafting queue and automate repetitive tasks. Focus on crafting items with high material efficiency to reduce waste. Plan your material usage carefully to avoid shortages mid-session. Additionally‚ consider disenchanting crafted items for extra materials or profit. Bulk crafting also allows you to take advantage of market demand‚ ensuring you have a steady supply of items to sell. This method is particularly effective for reaching higher skill levels quickly and efficiently in Cata Classic Tailoring.

Crafting Multiple Items at Once

Crafting multiple items at once is a time-saving strategy in Cata Classic Tailoring. By queuing multiple crafts in your production list‚ you can minimize downtime and maximize efficiency. Use add-ons like TSM or Auctionator to manage bulk crafting and automate tasks. This method is especially useful for leveling‚ as it allows you to craft large quantities of similar items quickly. Additionally‚ crafting in bulk enables you to take advantage of material discounts when purchasing in large quantities. Always plan your crafting sessions to ensure you have enough materials on hand. This approach not only saves time but also helps you progress your Tailoring skill more efficiently in Cataclysm Classic.

Using Add-ons for Tailoring Efficiency

Add-ons play a crucial role in enhancing Tailoring efficiency in Cata Classic. Popular tools like TSM (TradeSkillMaster) and Auctionator streamline crafting processes‚ allowing you to manage recipes‚ track materials‚ and optimize production. These add-ons enable bulk crafting‚ reduce manual input‚ and help you identify profitable items to craft. Additionally‚ they provide real-time market data‚ ensuring you make informed decisions when selling your goods. By automating repetitive tasks‚ add-ons save time and help you focus on leveling your Tailoring skill or generating gold. They also offer features like inventory management and crafting queues‚ making your Tailoring experience more efficient and enjoyable in Cataclysm Classic.

Gold Making Opportunities

Tailoring offers numerous gold-making opportunities in Cata Classic. Crafting high-demand items like bags‚ gear‚ and enchants can yield significant profits at the Auction House. Additionally‚ disenchanting crafted items provides valuable materials for resale. By understanding market trends‚ players can maximize their gold income through strategic crafting and selling‚ making Tailoring a lucrative profession for both new and experienced players.

Selling Crafted Items at the Auction House

Selling crafted items at the Auction House is a cornerstone of gold-making in Cata Classic Tailoring. Players can craft high-demand items such as bags‚ robes‚ and enchants‚ which are sought after by other players for progression and convenience. By monitoring market trends‚ you can identify gaps in supply and price fluctuations‚ allowing you to list your items at competitive rates. Using add-ons like Auctioneer or TSM can streamline the process‚ helping you undercut competitors or set buyouts for quick sales. Regularly checking the Auction House ensures you stay updated on what’s in demand‚ maximizing your profit margins and making Tailoring a lucrative profession.

Using Disenchanting for Gold

Disenchanting crafted items is a savvy way to generate gold in Cata Classic Tailoring. By breaking down unwanted or duplicate items‚ you can extract valuable materials like essences‚ dust‚ and shards. These materials are highly sought after by enchanters and other crafters‚ making them lucrative for resale. To maximize profits‚ focus on disenchanting items with high demand‚ such as those used in popular enchants or raid gear. Additionally‚ timing your sales during peak demand periods‚ like raid nights or expansion releases‚ can significantly boost your earnings. This method not only helps declutter your inventory but also turns would-be wasted items into a steady gold income stream.

Creating a Gold-Making Strategy

A successful gold-making strategy in Cata Classic Tailoring involves understanding market demand‚ optimizing crafting‚ and managing resources effectively. Start by researching the auction house to identify high-demand items like bags‚ cloaks‚ and gear for specific classes or professions. Focus on crafting items with consistent demand‚ such as raid-specific gear or twink equipment. Timing your crafts and sales is crucial—aim to list items during peak hours or when materials are scarce. Diversify your production to avoid oversaturating the market with a single item type. Additionally‚ reinvest profits into acquiring rare materials or leveling complementary professions like Enchanting to enhance your earning potential. A well-planned strategy ensures steady gold income and maximizes your tailoring efforts.

Mastery of Cata Classic Tailoring requires patience‚ strategy‚ and dedication. By following this guide‚ you can unlock its full potential‚ craft exceptional gear‚ and thrive in Azeroth.

Final Tips for Mastering Tailoring

Mastering Cata Classic Tailoring demands consistent practice and smart resource management. Always prioritize crafting items that offer the highest skill gains and sell well on the Auction House. Keep an eye on material prices and restock efficiently to minimize costs. Experiment with different recipes to diversify your crafting options. Joining a guild can also provide access to shared materials and expertise. Regularly review your progress and adjust your strategy as you encounter new challenges. Staying organized and proactive will ensure steady skill progression and maximize your Tailoring success in Cataclysm Classic.

Looking Ahead to Future Expansions

While Cata Classic Tailoring focuses on the Cataclysm era‚ preparing for future expansions is essential. Expansions like Mists of Pandaria and Warlords of Draenor introduce new Tailoring recipes and higher skill caps. Building a strong foundation in Cata Classic ensures a smoother transition to these expansions. Additionally‚ expansions often bring new materials and crafting mechanics‚ making adaptability crucial. Gaining experience with current content and maintaining a well-stocked inventory will help you stay competitive. By mastering Cata Classic Tailoring‚ you’ll be well-prepared to embrace the challenges and opportunities of future expansions‚ ensuring your character remains a top crafter in Azeroth’s evolving landscape.

Categories
Guide

midi making guide

MIDI (Musical Instrument Digital Interface) is a digital communication protocol enabling electronic instruments, computers, and related devices to communicate. It revolutionizes music production by allowing precise control over musical elements like pitch, tempo, and dynamics, making it an essential tool for modern creators.

1.1 What is MIDI and Its Importance in Music Production

MIDI (Musical Instrument Digital Interface) is a protocol enabling electronic instruments, computers, and devices to communicate. It transmits musical data like pitch, tempo, and velocity, allowing precise control over performances. Unlike audio, MIDI doesn’t record sound but instructions, making it ideal for editing and tweaking. Its importance lies in its versatility, enabling creators to compose, edit, and enhance music efficiently. MIDI integrates seamlessly with virtual instruments and hardware, fostering creativity and streamlining production processes across genres and industries.

1.2 Brief History of MIDI Technology

MIDI (Musical Instrument Digital Interface) emerged in the 1980s as a revolutionary protocol for electronic music. Developed collaboratively by Roland, Yamaha, Korg, and Sequential Circuits, MIDI standardized communication between devices. Dave Smith and Ikutaro Kakehashi pioneered its creation, ensuring compatibility across manufacturers. MIDI transformed music production by enabling seamless interaction between synthesizers, drum machines, and computers. Its adoption democratized music creation, reducing costs and fostering creativity. Today, MIDI remains a cornerstone of digital music-making, integral to DAWs and modern instruments, proving its enduring legacy.

1.3 Benefits of Using MIDI in Modern Music Creation

MIDI offers unparalleled flexibility and precision in music production. It allows for non-destructive editing, enabling creators to tweak notes, timing, and dynamics without altering the original recording. MIDI’s lightweight file size facilitates easy sharing and collaboration. It also integrates seamlessly with virtual instruments, making it a cornerstone for composing and arranging. Additionally, MIDI’s adaptability across genres and production scales ensures it remains indispensable for both professional and amateur musicians, fostering creativity and efficiency in the digital age.

Essential Tools for MIDI Making

MIDI controllers, DAWs, and MIDI interfaces are fundamental for creating and editing MIDI files. They enable precise recording, editing, and seamless connectivity between devices, forming the core of MIDI production.

2.1 MIDI Controllers: Keyboards, Pads, and Other Devices

MIDI controllers are essential for creating and performing music. Keyboards and pads allow tactile interaction, translating gestures into digital data. Other devices, like drum pads and sliders, offer versatility. They connect to computers via USB or MIDI interfaces, enabling real-time recording and editing in DAWs. Popular models include the MIDI Fighter Twister, known for its customizable layouts, and devices with built-in banks for multiple presets. These tools enhance creativity, providing precise control over musical elements like pitch, tempo, and dynamics, making them indispensable for modern producers and performers.

2.2 DAWs (Digital Audio Workstations) for MIDI Production

DAWs are the backbone of MIDI production, offering tools for recording, editing, and arranging musical ideas. Popular options like Ableton Live, FL Studio, and Logic Pro provide advanced MIDI editing features. These platforms support virtual instruments, effects processing, and seamless integration with MIDI controllers. DAWs also enable precise control over timing, velocity, and dynamics, allowing for professional-grade productions. Whether you’re composing, arranging, or performing live, a DAW is essential for transforming MIDI data into polished, high-quality music.

2.3 MIDI Interfaces and Connectivity Options

MIDI interfaces are crucial for connecting MIDI controllers, synthesizers, and other devices to your computer. USB-to-MIDI interfaces are the most common, offering plug-and-play convenience. Traditional 5-pin DIN MIDI interfaces provide more ports for multiple devices. Some interfaces also support MIDI over Bluetooth or Wi-Fi for wireless connectivity. Ensuring stable connections and proper configuration is vital for low-latency performance. Troubleshooting common issues like driver conflicts or incorrect settings can help maintain seamless communication between devices, ensuring your MIDI setup operates flawlessly.

Setting Up Your MIDI Workspace

Organize your MIDI hardware, install necessary drivers, and configure settings in your DAW. Ensure proper connectivity, test MIDI signals, and optimize your workspace for creativity and efficiency.

3.1 Choosing the Right DAW for Your Needs

Selecting the right DAW is crucial for MIDI production. Popular options like Ableton Live, FL Studio, and Logic Pro offer robust MIDI tools. Consider your workflow, OS compatibility, and specific features needed. If you’re a beginner, FL Studio’s user-friendly interface might be ideal. For live performances, Ableton’s flexibility shines. Ensure the DAW supports your MIDI hardware and offers the editing capabilities you require for precision and creativity. This choice will significantly impact your efficiency and overall music-making experience.

3.2 Connecting MIDI Hardware to Your Computer

Connecting MIDI hardware to your computer is straightforward with the right setup. Use a MIDI interface or USB-to-MIDI cable for reliable communication. Install the latest drivers from the manufacturer’s website to ensure compatibility. For USB MIDI devices, plug-and-play functionality often simplifies the process. Once connected, your DAW should recognize the hardware automatically. If issues arise, consult the device manual or restart your system. Proper connectivity ensures low latency and seamless integration, essential for precise MIDI control and an efficient workflow.

3.3 Configuring MIDI Settings in Your DAW

To configure MIDI settings in your DAW, navigate to the MIDI preferences section. Select your MIDI interface and ensure it is properly recognized. Adjust the buffer size for optimal latency. Enable MIDI input and specify the correct input channels. Save your settings and test by recording a MIDI clip. If issues arise, restart your DAW or reinstall drivers. Proper MIDI setup ensures smooth communication between hardware and software, allowing precise control over your music production workflow.

Creating MIDI Files from Scratch

Start by opening a new project in your DAW, setting the tempo, and recording notes using a MIDI keyboard or controller. Experiment with virtual instruments, then refine your arrangement by editing and layering tracks. Export your final composition as a MIDI file for further collaboration or use in other projects, ensuring your creative vision is preserved and ready to share.

4.1 Step-by-Step Guide to Recording MIDI Notes

Open your DAW and create a new project. Select a virtual instrument or connect a MIDI controller. Arm the track for recording, set the tempo, and choose a time signature. Press record and play your melody or rhythm on the controller. Review your performance and edit any mistakes. Use quantization if needed. Add layers by recording additional tracks. Experiment with velocity adjustments for dynamics. Save your MIDI file for future use or export it for collaboration.

4.2 Using Virtual Instruments with MIDI

Virtual instruments expand your creative possibilities by allowing you to trigger high-quality sounds via MIDI. Load a virtual instrument in your DAW and assign it to a MIDI track. Play your MIDI controller to audition sounds in real-time. Adjust parameters like attack, decay, and reverb for customization. Use MIDI effects to enhance expression. Experiment with layering multiple instruments for depth. Virtual instruments offer flexibility and versatility, enabling you to achieve professional-grade sounds without physical hardware. They are a cornerstone of modern MIDI-based music production.

4.3 Editing MIDI Data for Precision and Creativity

Editing MIDI data allows for precise control over your music. Use your DAW’s MIDI editor to adjust note timing, velocity, and duration. Quantization helps align notes to a grid for a polished feel. Experiment with humanizing notes for a more natural sound. Apply MIDI effects like arpeggiation or randomization to add creativity. Edit velocity to enhance dynamics, making your tracks more expressive. Fine-tuning MIDI data ensures your music is both technically accurate and artistically compelling, giving you the flexibility to refine your vision.

Advanced MIDI Editing Techniques

Mastering advanced MIDI techniques enhances precision and creativity. Use quantization, velocity adjustments, and MIDI effects to refine tracks. Optimize performance and explore creative tools for professional results.

5.1 Quantization: Timing Correction for MIDI Notes

Quantization corrects MIDI note timing by aligning them to a grid, enhancing rhythmic precision. It adjusts notes to predetermined time values, improving sync and consistency. Use quantization to fix performance imperfections, ensuring tight grooves. Adjust strength settings to maintain human feel while correcting errors. Apply swing or shuffle feels for stylistic variations. Quantization tools in DAWs allow fine-tuning, preserving expression while perfecting timing. It’s essential for polished, professional-sounding tracks, balancing accuracy with creativity.

5.2 Velocity and Dynamics: Adding Expression

Velocity controls the intensity of MIDI notes, mimicking human performance. Adjusting velocity values adds dynamic range, making music more expressive. Use velocity to create subtle variations, from soft pianissimo to powerful fortissimo. Dynamics enhance emotional depth, with velocity edits allowing precise control over note accents and feel. Apply automation or manual adjustments to shape the sound. This technique ensures your tracks resonate with authenticity and feeling, elevating them beyond mechanical perfection into compelling musical experiences that engage listeners deeply.

5.3 Using MIDI Effects for Creative Processing

MIDI effects offer powerful tools for transforming and enhancing your creations. Arpeggiators, chord generators, and randomizers add complexity and interest. Use MIDI filters to modify specific note ranges or velocities, creating dynamic variations. Effects like humanizers introduce subtle timing imperfections for a more natural feel. MIDI effects can also generate new musical ideas, such as random melodies or rhythmic variations. These tools allow producers to experiment and push boundaries, turning simple ideas into intricate, professional-sounding compositions with ease and creativity.

MIDI and Audio Recording Integration

MIDI and audio integration enhances productions by combining digital control with organic sounds. This fusion allows precise editing and synchronization, offering endless creative possibilities for modern music-making workflows.

6;1 Combining MIDI and Audio Tracks in a Project

Combining MIDI and audio tracks enriches your project by blending digital precision with organic sound. Import audio files and align them with MIDI tracks for seamless synchronization. Use virtual instruments to enhance melodies or rhythms, ensuring both elements complement each other. Adjust timing and dynamics using quantization and velocity editing tools. This integration allows for creative layering, enabling you to craft cohesive and professional-sounding music productions. Proper synchronization ensures that MIDI and audio elements work together harmoniously, enhancing the overall quality and depth of your work.

6.2 Syncing MIDI with Live Recordings

Syncing MIDI with live recordings ensures tight integration between digital and organic elements. Use a DAW to align MIDI tracks with live audio, achieving precise timing and groove. Enable tempo and timecode features to lock both elements together. Adjust MIDI quantization to match the feel of live performances. This synchronization enhances the natural dynamics of live recordings while maintaining the versatility of MIDI. Proper alignment ensures a cohesive mix, blending the best of both worlds for polished and professional results in music production.

6.3 Exporting MIDI Files for Collaboration

Exporting MIDI files allows seamless collaboration with other musicians and producers. Most DAWs support MIDI file export in formats like .mid or .midi. These files contain note, timing, and controller data, enabling others to import and edit them using their preferred software. Ensure compatibility by selecting the correct file type and resolution. Organize your files clearly and include metadata for easy identification. Exporting MIDI files fosters creativity and efficiency in collaborative projects, making it a cornerstone of modern music production workflows.

MIDI Hardware and Software Setup Tips

Ensure stable connections by testing MIDI interfaces and updating drivers. Optimize DAW settings for low latency and organize MIDI files for easy access during sessions.

7.1 Troubleshooting Common MIDI Connection Issues

Identify and resolve MIDI connection problems by checking cable integrity and driver updates. Ensure MIDI interfaces are properly configured in your DAW. Restart devices and systems to eliminate glitches. Verify MIDI ports are correctly assigned and test with simple setups. If issues persist, consult user manuals or seek community support for specific hardware troubleshooting tips.

7.2 Optimizing MIDI Performance for Low Latency

To achieve low latency in MIDI performance, ensure your system is optimized. Use high-quality MIDI interfaces and updated drivers. Adjust buffer sizes in your DAW for real-time processing. Close unnecessary background applications to reduce CPU load. Consider using MIDI hubs or dedicated controllers for better connectivity. Test different setups to find the optimal balance between performance and stability. Regularly update firmware and software to maintain peak functionality and minimize delays during recording or live performances.

7.3 Backup and Organization Strategies for MIDI Files

Backing up and organizing MIDI files is crucial for efficient workflow. Use cloud storage services like Google Drive or Dropbox for secure backups. Create folders by project or date for easy access. Regularly save versions to track progress and avoid data loss. Consider external hard drives for local backups. Implement consistent naming conventions to quickly locate files. Ensure backups are automated or scheduled to maintain data integrity and accessibility across different devices and collaborations.

MIDI Making for Live Performances

MIDI enhances live shows by enabling real-time control of sounds, effects, and visuals. Organize MIDI files for quick access, ensure low latency, and sync seamlessly with lighting and visuals.

8.1 Preparing MIDI Files for Stage Use

Preparing MIDI files for live performances involves organizing and optimizing them for seamless execution. Ensure all MIDI data is clean and properly labeled. Use clear file naming conventions to quickly locate sounds or cues during a show. Normalize velocities and timing to maintain consistency across different devices. Test MIDI files on your performance setup to identify and fix any issues. Backup your files to avoid performance interruptions. Additionally, consider using setlists or scenes in your DAW to streamline transitions between songs or sections. This ensures a smooth and professional performance.

8.2 Using MIDI Controllers in Real-Time Performances

MIDI controllers are essential for real-time performances, offering dynamic control over sounds and effects. They allow artists to manipulate parameters like pitch, volume, and filters seamlessly. Customizable layouts enable performers to tailor controls to their needs, enhancing creativity. Wireless MIDI controllers provide portability and reduce cable clutter. Visual feedback through LED lights or screens aids in monitoring adjustments. Integrating MIDI controllers with DAWs or hardware synths creates a powerful setup for engaging live shows. They also support audience interaction, making performances more immersive and visually appealing.

8.3 Syncing MIDI with Lighting and Visual Effects

Syncing MIDI with lighting and visual effects enhances live performances by creating a unified audio-visual experience. MIDI signals can trigger lighting changes, video transitions, and visual effects in real-time. DMX controllers and software tools like Resolume or TouchDesigner bridge MIDI and lighting systems. This synchronization allows performers to program intricate shows, ensuring visuals align with musical beats and transitions. It adds a dynamic layer of engagement, making performances more immersive and visually captivating for audiences. Proper setup ensures seamless integration, transforming concerts into multi-sensory experiences.

Sharing and Collaborating with MIDI Files

MIDI files are versatile for sharing and collaboration. Export them across platforms, maintaining quality. Share with fellow musicians for creative input, enhancing your music projects effectively.

9.1 Exporting MIDI Files for Different Platforms

MIDI files are universally compatible across various platforms, making them ideal for sharing and collaboration. Exporting MIDI files ensures your music can be used on Windows, macOS, iOS, and Android devices. Most DAWs support MIDI file export, allowing you to maintain note accuracy and timing. When exporting, choose the correct format (Type 0 or Type 1) to suit your needs; Standard MIDI files (.mid) are widely supported, ensuring seamless integration across different software and hardware. Always test compatibility to ensure your files work as intended.

9.2 Collaborating with Other Musicians Using MIDI

MIDI files simplify collaboration by allowing musicians to share musical ideas without audio quality loss. Artists can exchange MIDI files, enabling seamless integration into different projects. Online platforms and cloud storage make sharing MIDI data effortless. MIDI’s flexibility lets collaborators modify notes, velocities, and timings independently. This fosters creativity and ensures everyone can contribute effectively. Using MIDI, producers and composers can work remotely, merging ideas into a cohesive piece. Version control and backups are crucial to track changes and avoid data loss during the collaborative process.

9.3 Uploading MIDI Files to Online Platforms

Sharing MIDI files online allows creators to showcase their work and receive feedback. Platforms like SoundCloud, MIDI hubs, and forums support MIDI uploads. Before uploading, ensure files are properly formatted and named. Use platform-specific upload tools or drag-and-drop features. Once live, others can download, remix, or collaborate on your tracks. This fosters community engagement and expands your audience. Regularly update your uploads to reflect your creative growth and connect with fellow musicians worldwide. This digital showcase is a powerful tool for networking and inspiration in the music production community.

Mastering MIDI production enhances creativity, precision, and collaboration. Continuous learning and experimentation are key to unlocking its full potential in music creation and innovation.

10.1 Final Tips for Mastering MIDI Production

Refine your MIDI skills by exploring advanced editing techniques like quantization and velocity adjustments. Practice regularly to enhance your workflow. Stay updated with new tools and software. Experiment with unique sounds and effects to innovate. Collaborate with other musicians to gain diverse perspectives and insights. Backup your files regularly to avoid data loss. Finally, embrace creativity and push boundaries to achieve exceptional results in your MIDI productions.

10.2 Resources for Further Learning

Explore official MIDI Association resources for in-depth guides and updates. Utilize tutorials on platforms like YouTube and Udemy for practical skills. Join forums like Gearslutz or Reddit communities to connect with producers. Check out books on MIDI programming for foundational knowledge. Experiment with free DAWs like GarageBand or FL Studio to apply concepts. Visit websites like MusicRadar or The Pro Audio Files for expert tips and industry insights to enhance your MIDI production skills continuously.

10.3 Encouragement to Experiment and Innovate

Embrace creativity and push boundaries in MIDI making by experimenting with unique sounds and techniques. Try layering MIDI tracks, exploring unconventional controller mappings, and integrating live performance elements. Innovation often arises from unexpected combinations, so don’t hesitate to explore new DAW features or collaborate with others to spark fresh ideas. Remember, MIDI is a versatile tool that thrives on imagination. Keep pushing the limits to create groundbreaking music and stay inspired by the endless possibilities MIDI offers.

Categories
Guide

guide for the solitary practitioner

1.1 The Importance of Solitary Practice

Solitary practice is a powerful and empowering path for witches who prefer to work independently. It allows for personal growth, flexibility, and a deep connection to Wicca without the need for a coven. This approach emphasizes self-reliance and the ability to create meaningful rituals and spells tailored to individual needs. Scott Cunningham’s Wicca: A Guide for the Solitary Practitioner highlights the accessibility of solitary Wicca, making it ideal for beginners and those seeking a personalized spiritual journey. By focusing on personal responsibility and intention, solitary practice fosters a strong foundation for magical and spiritual development. It is a testament to the diversity and inclusivity of Wicca, offering a fulfilling path for those who embrace autonomy in their practice.

1.2 Benefits of Solitary Practice

Solitary practice offers numerous benefits, including the freedom to tailor rituals and spells to personal needs and beliefs. It fosters self-reliance, allowing witches to develop a deeper connection with their craft and nature. This path encourages personal growth, as individuals take full responsibility for their magical and spiritual journeys. Solitary practice also provides flexibility, enabling witches to create schedules and rituals that fit their lifestyles. Without the need for group consensus, solitary witches can explore a wide range of practices and theories at their own pace. This autonomy makes solitary Wicca accessible to those who prefer privacy or have limited access to covens. Ultimately, solitary practice empowers individuals to embrace their unique path, making it a fulfilling and transformative experience.

1.3 Setting Intentions for Your Journey

Setting intentions is a vital step in solitary practice, providing clarity, focus, and purpose. Intentions guide your actions and decisions, helping you stay aligned with your spiritual and magical goals. Begin by reflecting on what you seek to achieve, whether it’s personal growth, harmony with nature, or mastery of specific skills. Write down your intentions, making them clear and meaningful. This act of defining your path ensures that your practice remains intentional and purposeful. Regularly revisiting your intentions allows you to track progress and adjust as needed. By setting clear intentions, you create a foundation for a meaningful and transformative solitary journey, ensuring that every ritual, spell, and meditation aligns with your deeper aspirations.

Understanding Wicca Basics

Wicca is a nature-based spirituality emphasizing harmony with the Earth, magic, and rituals. It combines personal growth, ethical living, and connection with the divine, offering a balanced path for solitary practitioners.

2.1 Key Principles of Wicca

Wicca is rooted in harmony with nature and the belief in a divine energy that flows through all life. Key principles include the Wiccan Rede, which advises “An it harm none, do what ye will,” promoting ethical living. The Threefold Law teaches that actions return threefold, encouraging responsibility and positivity. Wiccans honor the elements—Earth, Air, Fire, and Water—as sacred forces. Rituals and magic are central, focusing on intention, energy, and balance. Wicca emphasizes personal growth, spiritual connection, and living in tune with the natural world. These principles guide solitary practitioners in creating meaningful practices that align with their values and the world around them.

2.2 The Wiccan Rede and Threefold Law

The Wiccan Rede, “An it harm none, do what ye will,” is a cornerstone of Wiccan ethics, emphasizing freedom of action as long as no harm is caused. Complementing this is the Threefold Law, which states that every action—positive or negative—returns threefold. These principles guide solitary practitioners in making ethical decisions and practicing responsible magic. The Rede encourages mindfulness and compassion, while the Threefold Law fosters accountability and balance. Together, they provide a moral framework for Wiccans to live harmoniously with others and the environment. By embracing these principles, solitary practitioners can cultivate a meaningful and ethical spiritual path, ensuring their actions align with the greater good.

2.3 Essential Wiccan Theories

Understanding essential Wiccan theories is crucial for a solitary practitioner. These theories provide the foundational knowledge needed to practice effectively. The concept of magic as energy manipulation is central, emphasizing intention and willpower. The elements—Earth, Air, Fire, and Water—are considered sacred forces that balance and harmonize the universe. Another key theory is the wheel of the year, which represents the cyclical nature of life through seasonal Sabbats. Additionally, the principle of “As Above, So Below” highlights the interconnectedness of all things. These theories guide solitary practitioners in crafting rituals, spells, and daily practices, helping them align with natural laws and foster spiritual growth. Grasping these concepts deepens one’s connection to Wicca and enhances their ability to live magically and ethically.

Setting Up Your Practice Space

Creating a dedicated practice space is vital for solitary Wiccan rituals, requiring purification and organization of essential tools to foster focus and intention during ceremonies.

3.1 Creating a Sacred Space

Creating a sacred space is essential for solitary Wiccan practice, as it provides a dedicated area for rituals, meditation, and connecting with nature. Begin by choosing a quiet, clutter-free spot where you can focus without distractions. Purify the space using smudging, salt, or incense to remove negative energy. Consecrate the area by casting a circle, invoking protective forces, and setting clear intentions. This process ensures the space is spiritually charged and aligned with your practice. Maintaining a sacred space fosters a deeper connection to your craft and enhances the effectiveness of your rituals. Regular cleansing and dedication will keep the energy balanced and sacred, making it a powerful sanctuary for your journey.

3.2 Setting Up Your Altar

Setting up your altar is a foundational step in solitary Wiccan practice, creating a focal point for rituals and spellwork. Begin with a clean, sturdy surface, such as a wooden table or shelf. Place a central altar cloth, often in a symbolic color like white, green, or black, to represent purity, nature, or protection. Arrange essential tools like a pentacle, athame, chalice, and wand in a balanced layout. Incorporate elements like candles, incense, and seasonal items to reflect your intentions and the current sabbat. Personalize your altar with meaningful objects, such as crystals or herbs, to enhance its energy. Scott Cunningham’s Wicca: A Guide for the Solitary Practitioner suggests starting simple and adding complexity as you grow; Regular cleansing and consecration of your altar will keep its energy aligned with your practice, ensuring it remains a powerful sacred tool.

3.3 Essential Tools for Wiccan Practice

The essential tools for Wiccan practice are symbolic and functional, aiding in rituals, spellwork, and connecting with divine energy. The athame, a ritual knife, represents the element of air and is used to direct energy. The wand, often made of wood, channels energy and willpower. The pentacle, a five-pointed star symbol, embodies earth and protection. The chalice, representing water, is used for libations and rituals. Candles, incense, and herbs enhance the atmosphere and focus intentions. A besom, or ritual broom, is used for cleansing and consecrating space. Personalized tools, such as a journal or crystals, deepen practice. According to Scott Cunningham, these tools are not just objects but extensions of the practitioner’s will and spirit, making them vital for meaningful rituals and spellcasting.

Rituals and Spellcasting

Rituals and spellcasting are core practices for solitary Wiccans, involving intention, visualization, and energy work to manifest change and honor the divine. Tools like candles, herbs, and chants enhance rituals, creating a meaningful connection to magic and nature, as guided by Scott Cunningham’s teachings. Personalization and focus are key to effective spellwork, making it a powerful expression of faith and intent. Regular practice fosters spiritual growth and harmony with the universe, essential for a fulfilling solitary path. These practices are tailored to individual needs, ensuring a deeply personal and transformative experience. They are the heart of Wiccan spirituality, offering both magic and mindfulness. By mastering these skills, practitioners can live a life attuned to nature and guided by their beliefs. Rituals and spellcasting are not just acts of magic but a way to celebrate life and honor the divine within and around us. They provide a structured yet flexible framework for solitary practitioners to explore their spirituality and achieve their goals. Through consistent practice, one can deepen their understanding of Wicca and its principles, leading to a more balanced and meaningful life. Rituals and spellcasting are the cornerstone of solitary Wiccan practice, offering a pathway to personal empowerment and spiritual fulfillment. They allow individuals to connect with the universe, express their faith, and create positive change in their lives and the world around them.

4.1 Daily Rituals for Grounding

Daily rituals for grounding are essential for solitary practitioners to maintain balance and harmony. These practices help connect with the earth, center the mind, and prepare for spellwork or meditation. Simple acts like lighting a candle, burning sage, or saying a short prayer can create a sacred space. Grounding rituals may include touching the earth, visualizing roots extending from the body, or using elemental tools like a bowl of water or a handful of salt. These practices reduce stress, improve focus, and enhance magical effectiveness. Regular grounding fosters a deep sense of connection to nature and the divine, making it a cornerstone of Wiccan daily life; By incorporating these rituals, solitary practitioners can cultivate inner peace and maintain spiritual alignment in their busy lives. Consistency is key to reaping their transformative benefits and living a magically aware life.

4.2 Celebrating Sabbats and Seasons

Celebrating Sabbats and seasons is a vital part of Wiccan practice, even for solitary practitioners. The eight Sabbats—such as Samhain, Yule, and Ostara—mark the Wheel of the Year, reflecting nature’s cycles. Solitary witches can honor these days with personal rituals, decorating altars, or reflecting on seasonal themes. Celebrating connects practitioners to the earth’s rhythms, fostering a sense of harmony and spiritual renewal. Simple acts, like lighting candles, meditating, or performing a small rite, can deepen the experience. These observances provide structure and meaning, helping solitary practitioners align with nature and honor the divine. By embracing the Sabbats, witches cultivate mindfulness, gratitude, and a deeper connection to the ever-turning Wheel of the Year, enriching their spiritual journey and magical practice.

4.3 Effective Spellcasting Techniques

Effective spellcasting begins with clear intent and emotional investment. Solitary practitioners should focus on specific, achievable goals, ensuring their will aligns with ethical principles. Visualization and meditation are key tools to center the mind and connect with the desired outcome. Grounding and cleansing the space beforehand enhances the energy flow. Using simple tools like candles, herbs, or crystals can amplify intentions. The power of words, through chants or affirmations, channels energy effectively. Timing spells with natural cycles, such as moon phases, can strengthen results. Patience and trust in the process are crucial, as magic unfolds in its own time. Keeping a journal to track spells and reflect on outcomes fosters growth and refinement. Remember, magic is a personal journey, and confidence in one’s abilities is the foundation of successful spellcasting.

Ethics and Responsibility

Ethics and responsibility form the cornerstone of Wiccan practice, guiding solitary practitioners to act with integrity, respect, and harmony in their magical and spiritual journeys.

5.1 The Threefold Law Explained

The Threefold Law, a foundational ethical principle in Wicca, states that any energy or action you send out into the world returns to you three times over. This principle emphasizes the importance of intention, responsibility, and consequences in magical and everyday actions. Whether positive or negative, the energy you create will manifest back to you in a magnified form. This law encourages solitary practitioners to act with mindfulness and integrity, ensuring that their deeds align with ethical standards. By adhering to the Threefold Law, practitioners foster harmony and balance, both within themselves and in the world around them. It serves as a powerful reminder to think deeply before acting, especially in spellcasting and rituals;

5.2 Understanding the Wiccan Rede

The Wiccan Rede, a central ethical guideline in Wicca, is often summarized as, “An it harm none, do what ye will.” This principle encourages practitioners to act with freedom and responsibility, ensuring their actions cause no harm to others, including people, animals, or the environment; It emphasizes the importance of personal accountability and ethical decision-making. While it is not a strict law, the Rede serves as a moral compass, guiding solitary practitioners to align their intentions and actions with harmony and respect for all life. By embracing this principle, witches cultivate a mindful and compassionate approach to their craft, fostering balance and positivity in their spiritual journey and daily lives.

5.3 Ethical Considerations in Magic

Ethical considerations in magic are vital for solitary practitioners, ensuring their practices align with moral integrity and responsibility. The Wiccan Rede, “An it harm none, do what ye will,” serves as a foundational guideline, urging practitioners to avoid causing harm to others, including animals, the environment, and themselves. Additionally, the Threefold Law reminds witches that actions return threefold, emphasizing the importance of positive intent. Practitioners must reflect on the consequences of their spells and rituals, avoiding manipulation or coercion. Respect for free will and the balance of nature are central principles. By adhering to these ethical standards, solitary witches foster a practice rooted in compassion, wisdom, and harmony, ensuring their craft remains a force for good in the world.

Meditation and Divination

Meditation and divination are essential tools for solitary practitioners, enhancing focus, intuition, and spiritual connection. These practices help deepen self-awareness and harmony with nature.

6.1 Meditation Techniques for Focus

Meditation is a key practice for solitary practitioners, helping to center the mind and connect with inner energy. Start with grounding techniques like deep breathing or visualization to clear mental clutter. Focus on a mantra, candle flame, or natural element to enhance concentration. Regular practice improves mental clarity, enabling better spellcasting and ritual performance. For beginners, short sessions of 5-10 minutes can gradually increase as comfort grows. Scott Cunningham recommends using meditation to attune with nature and align with divine energy. This practice fosters self-awareness and strengthens intuition, essential for magical work. Consistency is crucial, making meditation a cornerstone of daily Wiccan practice for solitary witches seeking spiritual growth and balance.

Divination tools offer a powerful way for solitary practitioners to seek guidance, gain insight, and connect with the divine. Common tools include tarot cards, runes, pendulums, and scrying mirrors. Each tool serves as a bridge to subconscious wisdom and universal energy. Tarot cards, with their detailed imagery, provide layered meanings, while runes offer concise, symbolic messages. Pendulums are ideal for yes/no questions, allowing clear communication with one’s higher self. For beginners, starting with a single tool, like a pendulum or tarot deck, can build confidence and intuition. Scott Cunningham emphasizes the importance of trusting your inner voice when interpreting signs. Regular practice with these tools enhances intuition, making them invaluable for spellcasting and decision-making on your Wiccan journey.

6.3 Using Tarot for Guidance

Tarot cards serve as a powerful tool for solitary practitioners seeking guidance and self-reflection. Each card holds symbolic meanings, offering insights into past, present, and future circumstances. The deck consists of the Major Arcana, representing life’s major cycles, and the Minor Arcana, reflecting daily challenges and emotions. For beginners, starting with simple spreads like the three-card layout (past, present, future) can provide clarity. Trusting your intuition when interpreting cards is key, as tarot acts as a mirror to your inner wisdom. Scott Cunningham encourages practitioners to journal their readings, noting patterns and personal connections; Regular use of tarot fosters a deeper understanding of oneself and the universe, making it an invaluable asset for solitary witches on their spiritual journey.

Connecting with Nature

Connecting with nature bridges the spiritual and physical worlds, fostering harmony and balance. Outdoor practices like grounding and seasonal rituals deepen your bond with the earth.

7.1 Outdoor Practices for Harmony

Outdoor practices for harmony connect solitary practitioners with nature, fostering balance and spiritual growth. Techniques like grounding, where you visualize roots extending from your feet into the earth, help center your energy. Meditative walks in nature encourage mindfulness and observation of seasonal changes. Rituals under the full moon or during solstices and equinoxes deepen your connection to the earth’s cycles. These practices not only enhance magic but also promote emotional and spiritual well-being. By incorporating outdoor rituals, you honor the natural world and align your energy with its rhythms, creating a harmonious relationship between yourself and the environment.

7.2 Working with the Elements

Working with the elements is a cornerstone of Wiccan practice, allowing solitary practitioners to harness their energy for balance and harmony. The elements—Earth, Air, Fire, and Water—each hold unique properties and correspond to specific directions, colors, and tools. Earth, associated with the North, represents stability and grounding, often symbolized by green and pentacles. Air, linked to the East, embodies intellect and communication, typically represented by yellow and feathers. Fire, connected to the South, signifies passion and transformation, often symbolized by red and candles. Water, tied to the West, reflects emotions and intuition, represented by blue and bowls of water. By invoking and balancing these elements in rituals, practitioners align their energy with nature, fostering personal growth and magical effectiveness. This practice underscores the interconnectedness of all things and encourages ethical, responsible use of elemental power.

7.3 Honoring the Wheel of the Year

Honoring the Wheel of the Year is a vital aspect of Wiccan practice, connecting solitary practitioners to nature’s cycles and seasonal energies. The Wheel consists of eight Sabbats—Samhain, Yule, Imbolc, Ostara, Beltane, Litha, Lughnasadh, and Mabon—each marking pivotal moments in the Earth’s journey. These celebrations honor the interplay of light and dark, life and death, and renewal. For solitary practitioners, observing the Wheel provides a structured framework for rituals, reflections, and personal growth. By aligning with these natural rhythms, one fosters harmony with the environment and deepens their spiritual practice. Rituals may include seasonal altars, meditative reflections, or simple acts of gratitude, adapting traditions to suit individual needs and spaces. This practice reinforces the connection to the land and the cycles of existence, enriching the solitary journey.

Further Learning and Community

Further learning and community engagement enrich a solitary practitioner’s journey. Scott Cunningham’s “Wicca: A Guide for the Solitary Practitioner” is a foundational resource, offering practical wisdom and insights.

8.1 Recommended Reading for Growth

For solitary practitioners, Scott Cunningham’s Wicca: A Guide for the Solitary Practitioner is an essential resource, offering practical wisdom and insights into Wiccan theory and practice. Other notable books include works by Silver RavenWolf, such as The Complete Idiot’s Guide to Wicca and Witchcraft, which provides comprehensive guidance for modern witches. These texts cover topics like rituals, spellcasting, and ethical considerations, making them invaluable for personal growth. Additionally, exploring books on divination, meditation, and nature-based spirituality can deepen your understanding and connection to Wicca. Reading widely exposes you to diverse perspectives, enriching your solitary journey and fostering a well-rounded practice rooted in tradition and personal intuition.

8.2 Engaging with Online Resources

Engaging with online resources can significantly enhance your solitary Wiccan journey. Websites, forums, and social media groups dedicated to Wicca offer valuable insights, rituals, and communal support. Platforms like YouTube provide tutorials on spellcasting and meditation, while blogs share personal experiences and tips for solitary practice. Online courses and e-books by renowned authors, such as Scott Cunningham, are accessible and insightful. Additionally, virtual communities allow you to connect with fellow practitioners, fostering a sense of belonging and shared learning. These resources not only supplement your practice but also keep you informed about modern interpretations and diverse perspectives within Wicca. Embrace these tools to deepen your understanding and enrich your spiritual path while maintaining the freedom of solitary practice.

8.3 Finding or Creating a Community

Finding or creating a community as a solitary practitioner can enrich your Wiccan journey, offering support and shared learning. While solitude is central to many practices, connecting with like-minded individuals can provide camaraderie and inspiration. Online forums, social media groups, and local Wiccan meetups are excellent ways to build relationships. Attending workshops or rituals hosted by experienced practitioners can also deepen your understanding. For those in isolated areas, virtual communities offer a sense of belonging. Creating a community might involve organizing small gatherings or rituals, fostering a space for mutual growth. Remember, community involvement should complement, not replace, your solitary practice, allowing you to honor your personal path while embracing collective wisdom and shared experiences.

Embracing solitary practice empowers you to grow spiritually, connect with nature, and live magically. This journey fosters personal transformation, guiding you toward a harmonious, meaningful life aligned with Wiccan principles.

9.1 Embracing Your Wiccan Path

Embracing your Wiccan path as a solitary practitioner is a journey of self-discovery, empowerment, and spiritual growth. It allows you to connect deeply with nature, honor the divine, and live in harmony with the universe. Through solitary practice, you can tailor your rituals, spells, and celebrations to align with your personal beliefs and needs. This path encourages you to take ownership of your spiritual journey, fostering a sense of independence and responsibility. By living magically and mindfully, you can integrate Wiccan principles into your daily life, creating a meaningful and fulfilling practice. Remember, Wicca is a flexible and evolving journey, and embracing it as a solitary practitioner is a powerful way to deepen your connection to the craft and the world around you.

9.2 Commitment to Continuous Learning

A commitment to continuous learning is essential for any Wiccan practitioner, especially those walking the solitary path. Wicca is a dynamic and evolving spiritual practice, and staying open to new knowledge and perspectives ensures growth and deepening understanding. Scott Cunningham’s Wicca: A Guide for the Solitary Practitioner serves as a foundational text, offering insights into theory, rituals, and ethical practices. Beyond books, exploring online resources, attending workshops, and engaging with communities can enrich your journey. Continuous learning fosters adaptability and keeps your practice vibrant, allowing you to integrate new ideas and traditions while staying true to your personal path. Embrace curiosity and remain dedicated to expanding your wisdom, as this commitment will strengthen your connection to the craft and enhance your spiritual evolution.

9.3 Final Thoughts on Solitary Practice

Solitary practice offers a deeply personal and fulfilling journey, empowering individuals to craft a Wiccan path tailored to their unique needs and beliefs. It encourages self-discovery, introspection, and a strong connection with nature and the divine. While it may lack the communal support of a coven, solitary practice provides the freedom to explore and grow at one’s own pace. Resources like Scott Cunningham’s Wicca: A Guide for the Solitary Practitioner serve as invaluable companions, offering guidance and inspiration. Embrace the beauty of solitude, trust in your abilities, and remember that your practice is a reflection of your authentic self. With dedication and an open heart, solitary Wicca can lead to profound spiritual transformation and a lifelong journey of magic and harmony.

Categories
Guide

sunglasses lens size guide

Discover how to choose the perfect sunglasses with our comprehensive lens size guide. Proper fit ensures comfort‚ clarity‚ and style‚ making your eyewear experience exceptional and tailored to you.

Importance of Proper Fit

A proper fit is essential for both comfort and functionality in sunglasses. Ill-fitting frames can cause discomfort‚ slipping‚ or limited visibility‚ which can be frustrating. When sunglasses are too tight‚ they may leave marks or cause headaches‚ while frames that are too loose can slip down the nose‚ requiring constant adjustment. Properly sized lenses ensure optimal protection from UV rays‚ reducing glare and improving clarity. Additionally‚ a well-fitting frame complements your face shape‚ enhancing your style and confidence. Measuring your face accurately and understanding frame dimensions are crucial steps in achieving the perfect fit. This guide will help you navigate these details to find sunglasses that feel and look great.

Understanding Frame Measurements

Frame measurements are critical in determining the right sunglasses size. Typically‚ frames are marked with three numbers‚ such as 52-19-140‚ representing lens width‚ bridge size‚ and temple length. Lens width is the horizontal measurement of one lens‚ while the bridge size refers to the distance between the two lenses. Temple length measures the arms of the frame‚ ensuring they fit comfortably around your ears. These measurements‚ often found on the inside of the temple‚ help you compare your face dimensions to the frame. Accurate measurements ensure proper fit‚ preventing slipping or discomfort. Understanding these specs allows you to choose sunglasses that align with your face proportions‚ ensuring both comfort and functionality.

Factors Influencing Lens Size

Face shape‚ personal style‚ and activity-specific needs are key factors in choosing lens size. Proper fit ensures comfort and functionality‚ enhancing your sunglasses-wearing experience significantly.

Face Shape and Lens Compatibility

Face shape plays a crucial role in determining the ideal sunglasses lens size. Round faces benefit from angular or rectangular frames with slightly larger lenses to balance width. Square faces look best with soft‚ curved frames and medium-sized lenses to avoid exaggerating facial angles. Oval faces‚ being versatile‚ can pull off most lens sizes‚ but medium to large lenses complement their natural symmetry. Heart-shaped faces fare well with frames that are wider at the bottom‚ drawing attention downward. Proper lens size ensures a balanced‚ flattering look‚ while mismatched sizes can distort facial proportions. Matching lens size to face shape enhances both style and comfort‚ making it a key consideration in your selection process.

Personal Style and Preferences

Personal style and preferences significantly influence sunglasses lens size selection. Trendy‚ oversized lenses can make a bold fashion statement‚ while slim‚ minimalist designs offer a sleek‚ modern look. Some individuals prefer larger lenses for enhanced coverage and a glamorous appeal‚ while others opt for smaller‚ more delicate frames for a subtle‚ vintage vibe. Lens size should align with your aesthetic goals and lifestyle. For instance‚ those who value simplicity might choose medium-sized lenses‚ whereas fashion enthusiasts might lean toward statement-making sizes. Ultimately‚ your personal style dictates how you balance lens size with frame design‚ ensuring your sunglasses reflect your unique taste while meeting functional needs. This blend of fashion and functionality ensures your eyewear is both stylish and comfortable‚ catering to your individual preferences and enhancing your overall look. Comfort and visibility must also be considered to ensure the chosen size complements your lifestyle and activities‚ making it a crucial factor in your decision-making process.

Activity-Specific Lens Requirements

Different activities demand distinct lens sizes for optimal performance. For sports requiring a wide field of vision‚ such as skiing or motorcycling‚ larger lenses are preferable to enhance peripheral vision. Conversely‚ activities like cycling or running may favor smaller‚ more compact frames for reduced weight and improved mobility. Beachgoers often opt for larger lenses for enhanced UV protection and stylish appeal. It’s crucial to consider how lens size impacts functionality and comfort during specific activities‚ ensuring that your sunglasses meet the demands of your lifestyle while providing the necessary protection and visibility.

How to Measure Your Face

Measure your face using a millimeter ruler or cloth tape. Measure frame width‚ nose bridge‚ and temple length for accurate sunglass fit‚ ensuring the best fit.

Measuring Frame Width

Frame width is crucial for a comfortable fit. Measure horizontally across the temple tips to determine the total width. Ensure the frames align with your face width‚ avoiding excess overhang. Proper alignment prevents discomfort and ensures optimal visibility. Use a millimeter ruler or tape for accuracy‚ matching your face width to the frame size. This step is essential for selecting sunglasses that complement your features and provide a seamless wearing experience.

Measuring Nose Bridge

The nose bridge measurement ensures the sunglasses sit comfortably on your face. To measure‚ place a ruler or flexible measuring tape across the bridge of your nose. Gently press the ruler to find the narrowest point‚ typically between the eyes. Record the width in millimeters. This measurement helps determine the optimal frame fit‚ preventing slipping or discomfort. Most sunglasses have nose bridge sizes ranging from 14mm to 24mm. Match your measurement to the frame specifications for a secure and balanced fit. Proper alignment ensures the sunglasses stay in place‚ providing clear vision and all-day comfort.

Measuring Temple Length

Temple length is crucial for ensuring a secure and comfortable fit. Measure from the temple tip‚ located behind your ear‚ to the hinge near the frame’s front. Use a flexible measuring tape or ruler to gauge this distance accurately; Temple lengths typically range from 135mm to 150mm. Proper temple fit prevents the sunglasses from slipping down your nose or applying too much pressure behind your ears. Ensure the temples align with your natural ear shape for optimal comfort. This measurement‚ often found on the inside of the temple arm‚ helps you select frames that stay in place during various activities‚ ensuring both functionality and style.

Standard Sunglasses Lens Sizes

Sunglasses lenses come in small (40-50mm)‚ medium (50-60mm)‚ and large (60mm+) sizes. These measurements help choose frames that complement face shapes and personal styles effectively.

Small Lens Sizes (40-50mm)

Small lens sizes (40-50mm) are ideal for those with narrower face shapes or who prefer a more discreet look. These lenses are perfect for round or heart-shaped faces‚ as they don’t overpower facial features. Additionally‚ smaller lenses can reduce the “bug-eye” effect‚ creating a more balanced appearance. They are often favored for their sleek‚ minimalist aesthetic‚ which complements casual or formal outfits. However‚ ensure that small lenses provide adequate coverage for UV protection and clear vision. Proper fit is essential to avoid compromising comfort or functionality. Small lens sizes are versatile and suitable for everyday wear‚ offering both style and practicality for various activities.

Medium Lens Sizes (50-60mm)

Medium lens sizes (50-60mm) are the most versatile option‚ offering a balance between style and functionality. They suit a wide range of face shapes‚ including oval‚ square‚ and triangular faces‚ providing ample coverage without overwhelming smaller features. These lenses are ideal for everyday wear‚ offering excellent UV protection and clear vision. Medium sizes are popular for their ability to complement both casual and formal outfits. They are also a great choice for active individuals‚ as they provide sufficient coverage during outdoor activities. Many popular brands‚ like Oakley and Ray-Ban‚ feature medium lens sizes in their collections‚ ensuring a flattering fit for diverse preferences and needs.

Large Lens Sizes (60mm+)

Larger lens sizes (60mm+) are perfect for those seeking maximum coverage and a bold fashion statement. These lenses are ideal for individuals with wider faces‚ offering a proportional fit that enhances comfort and style. They provide excellent UV protection and are often preferred by people who spend extended periods outdoors‚ such as athletes or beachgoers. Large lenses can also serve as a trendy accessory‚ adding a dramatic flair to any outfit. However‚ they may not be suitable for smaller face shapes‚ as they can overwhelm features. Popular brands offer various styles in this range‚ ensuring a balance between functionality and aesthetic appeal for those who embrace larger frames. Proper fit is key to avoiding discomfort and ensuring optimal visibility with larger lenses.

How to Choose the Right Lens Size

Selecting the perfect lens size involves balancing face width‚ personal style‚ and activity needs. Proper fit enhances comfort‚ visibility‚ and functionality‚ ensuring your sunglasses meet your lifestyle demands effectively.

Balancing Lens Size with Face Width

Balancing lens size with face width ensures a flattering and functional fit. Measure your face width across the temples to determine the ideal lens size. For a harmonious look‚ choose lenses that are as wide or slightly wider than your face. For example‚ if your face width is 140mm‚ select lenses around 50-55mm. Avoid frames that extend beyond your temples‚ as they may appear oversized. Similarly‚ lenses that are too narrow can make your face seem broader. Consider your face shape: round faces benefit from angular frames‚ while square faces suit softer‚ wider lenses. Oval faces can accommodate most sizes. Proper balance ensures comfort‚ visibility‚ and a stylish appearance tailored to your features.

Ensuring Comfort and Visibility

Comfort and visibility are paramount when selecting sunglasses. The frame should align with your temple width‚ avoiding pressure points. A well-fitting nose bridge ensures stability without slipping. Ensure the lenses are proportional to your face width to prevent obstructing peripheral vision. Avoid overly large lenses that may cause discomfort or restrict movement. Lighter materials and adjustable temple tips enhance comfort for extended wear. Proper fit prevents sliding‚ ensuring lenses stay aligned with your eyes for optimal visibility. Measure your face dimensions accurately and compare with size charts to find frames that balance comfort and functionality seamlessly. This ensures a pleasant wearing experience while maintaining clear vision and style.

Activity-Based Lens Size Recommendations

When choosing sunglasses for specific activities‚ lens size plays a crucial role in performance. For sports like cycling or running‚ opt for medium to large lenses (55-65mm) to provide maximum coverage and reduce glare. These sizes offer enhanced peripheral vision‚ minimizing distractions. For water activities‚ such as sailing or fishing‚ polarized lenses in medium to large sizes reduce water glare and improve clarity. Casual‚ everyday wear often suits smaller to medium lenses (45-55mm)‚ blending style with functionality. Always consider the activity’s demands—larger lenses for high-intensity sports‚ smaller for casual use—to ensure optimal comfort and visibility. This tailored approach ensures your sunglasses meet your lifestyle needs effectively.

Popular Sunglasses Brands and Their Size Guides

Top brands like Oakley‚ Ray-Ban‚ and others offer detailed size charts to help you find the perfect fit. Use their guides for optimal comfort and style.

Oakley Sunglasses Size Chart

Oakley provides a detailed size chart to help users find the perfect fit. Their sunglasses feature measurements like lens width‚ bridge size‚ and temple length. The first two numbers‚ such as in 52-19‚ represent the lens width and bridge size‚ while the third number indicates the temple length. Oakley suggests using these measurements as a reference but allows for slight adjustments based on frame design. For optimal comfort‚ align the frame width with your face’s temples. Oakley’s chart also considers activity-specific needs‚ offering sport-inspired frames with enhanced grip. Their size guide ensures a balance between style‚ comfort‚ and functionality‚ catering to diverse preferences and face shapes. Visit Oakley’s official website for the full chart and enjoy free shipping on your orders.

Ray-Ban Sunglasses Size Chart

Ray-Ban offers a detailed size chart to help users find the perfect fit for their iconic styles. Their sunglasses‚ like the classic Aviator and Wayfarer‚ come in various sizes to suit different face shapes. The size chart typically includes lens width‚ bridge size‚ and temple length measurements. For example‚ the Aviator model often ranges from 58mm to 62mm in lens width‚ while the Wayfarer can be 54mm to 58mm. Ray-Ban recommends matching your face width to the frame width for optimal comfort and visibility. Use their chart to align your features with the ideal measurements‚ ensuring a balanced and stylish fit. Visit Ray-Ban’s official website for precise details and to explore their collection tailored to your needs.

Other Popular Brands

Beyond Oakley and Ray-Ban‚ other popular brands like Maui Jim‚ Persol‚ and Gucci offer detailed size charts tailored to their unique styles. Maui Jim‚ known for premium lenses‚ provides measurements for frames like the classic “Ho’okipa” model‚ ensuring a perfect fit. Persol‚ famous for its elegant designs‚ includes precise sizing for temples and nose bridges. Gucci‚ blending fashion with functionality‚ offers size guides for trendy frames. Each brand’s chart is designed to match your face shape and preferences‚ ensuring comfort and style. Visit their official websites to explore size options and find the ideal sunglasses for your needs‚ with guidance on lens width‚ bridge size‚ and temple length to enhance your eyewear experience.

Online Shopping Tips

Use virtual try-on tools to visualize frames on your face. Always check size charts for precise measurements. Read customer reviews for insights on fit and comfort.

Using Virtual Try-On Tools

Virtual try-on tools are a game-changer for online sunglasses shopping. These tools use augmented reality to overlay frames on your face‚ allowing you to see how they fit and look. By uploading a photo or using your device’s camera‚ you can experiment with different styles and sizes. This feature is especially useful for understanding how lens size complements your face shape. Many brands‚ like Oakley‚ offer detailed virtual try-ons that simulate the actual fit. This technology reduces the guesswork and helps you make informed decisions. Combine it with size charts and reviews for a seamless shopping experience. It’s a modern solution to the challenges of online eyewear shopping.

Checking Size Charts

Checking size charts is a crucial step in selecting the right sunglasses. Most brands provide detailed measurements‚ including lens width‚ bridge size‚ and temple length. These charts help ensure the frames align with your face dimensions. For instance‚ Oakley’s size guide often lists frames with measurements like 50mm-52mm lens width and 14mm-16mm nose bridge. By comparing these specs to your own measurements‚ you can avoid ill-fitting sunglasses. Look for charts that break down each frame’s dimensions to make an informed choice. This step‚ combined with virtual try-ons‚ significantly improves your chances of finding the perfect fit. Always prioritize brands that offer clear‚ detailed size information for the best results.

Reading Customer Reviews

Reading customer reviews is a valuable step in selecting the right sunglasses. Reviews often provide insights into how a particular frame fits different face shapes and sizes. Many users share details about comfort‚ lens visibility‚ and durability‚ which can help you make informed decisions. Look for feedback on specific features like lens width‚ nose bridge comfort‚ and temple length. Reviews can also highlight common issues‚ such as frames being too tight or lenses being too small. Pay attention to recurring themes and use them to narrow down your options. Additionally‚ reviews from users with similar face shapes or preferences can offer personalized recommendations‚ improving your chances of finding the perfect fit. This step complements size charts and virtual try-ons‚ ensuring a well-rounded decision-making process.

Finding the perfect sunglasses involves understanding your face shape‚ ensuring comfort‚ and using tools like size charts and reviews. This guide helps you make informed decisions for a flawless fit and enhanced style.

Final Tips for Finding the Perfect Fit

To ensure a seamless fit‚ align your sunglasses’ frame width with your face’s temples. Avoid frames that extend too far past your face for optimal comfort and visibility. Use virtual try-on tools to visualize the fit without physical trials. Consider your face shape—oval faces suit most styles‚ while round faces benefit from angular frames. For sports‚ opt for larger lenses with secure temple grips. Check size charts from brands like Oakley and Ray-Ban for reference. Read reviews to gain insights from others with similar features. Balance personal style with functionality‚ ensuring lenses are neither too small nor overly bulky. Measure accurately and prioritize comfort to enhance your eyewear experience.

Importance of Proper Lens Size for Comfort and Functionality

Proper lens size is crucial for both comfort and functionality. Ill-fitting sunglasses can cause discomfort‚ poor visibility‚ and even headaches. Frames that are too wide may slip down‚ while those too narrow can pinch. Ensuring the lens width aligns with your face’s temples prevents the frames from extending past your face‚ maintaining a natural look. Larger lenses offer better coverage for activities like sports‚ while smaller lenses suit casual wear. The nose bridge size must fit comfortably to avoid pressure. Proper sizing also enhances optical clarity‚ as lenses are designed to sit correctly in front of your eyes. Balancing these factors ensures your sunglasses are both stylish and functional‚ providing long-lasting comfort and protection for your eyes. Prioritize accurate measurements for the best experience.