Categories
Instructions

mcculloch steamer instructions

McCulloch Steamer Instructions: A Comprehensive Guide

Discover effortless cleaning with your McCulloch steamer! This guide details setup, operation, and maintenance for models like the MC1385, ensuring a chemical-free, effective clean.

Understanding Your McCulloch Steamer

Your McCulloch steamer harnesses the power of steam to sanitize and clean a multitude of surfaces, offering a chemical-free alternative to traditional cleaning methods. These versatile machines transform water into high-temperature steam, effectively dissolving dirt, grime, and bacteria. Understanding the core principles of steam cleaning is crucial for optimal performance and longevity of your unit.

McCulloch steamers aren’t simply about blasting hot water; they utilize pressurized steam, which penetrates deeply into pores and crevices, lifting away stubborn messes. Different models, such as the Deluxe Canister MC1385 and portable MC1270, offer varying features like runtime and accessory options. Familiarizing yourself with your specific model’s capabilities – detailed in the user manual (available as a PDF) – is paramount.

The effectiveness stems from the steam’s temperature and pressure, making it ideal for tile, carpet, furniture, and even car detailing. Proper operation, as outlined in this guide, ensures safe and efficient cleaning, maximizing the benefits of your McCulloch steamer.

Model Variations & Identifying Your Unit

McCulloch offers a diverse range of steam cleaners, each tailored to specific cleaning needs. From powerful canister models like the MC1385 Deluxe, boasting a 2-hour runtime and 23 accessories, to more portable options such as the MC1270, understanding the differences is key.

Identifying your specific unit is the first step towards accessing the correct instructions and support. Locate the model number – typically found on a sticker on the back or bottom of the steamer itself. This number is crucial when downloading the user manual (PDF format available online) or contacting customer support.

Variations exist in tank capacity, heating time, steam pressure, and included accessories. The MC1385, for example, is designed for larger areas and comes equipped with a mop head and various brushes. Referencing your model’s specifications ensures you utilize its features effectively and safely, maximizing cleaning performance.

Safety Precautions & Warnings

Prioritize safety when operating your McCulloch steamer. Steam is incredibly hot and can cause severe burns. Never direct steam towards people or pets. Always ensure the unit is stable on a level surface before use, preventing accidental tipping and scalding.

Before connecting to a power source, inspect the power cord for any damage. Do not use if damaged. Unplug the steamer when not in use and during maintenance, like descaling or accessory cleaning. Allow the unit to cool completely before refilling the water tank or storing.

California Proposition 65 warnings may apply – consult the product documentation for details. Use only distilled water to prevent mineral buildup and maintain optimal performance. Avoid using the steamer on live electrical outlets or flammable materials. Keep out of reach of children.

Component Overview: Parts List & Functionality

Your McCulloch steamer arrives with a variety of accessories designed for versatile cleaning. Key components include the main steamer unit housing the water tank and heating element, a power cord, and a selection of attachments.

Common accessories often feature a mop head for floor cleaning, various brushes for scrubbing surfaces, and specialized nozzles for targeted steam application. The canister style, like the MC1385, provides extended runtime and convenient storage. Understanding each part’s function is crucial.

The steam trigger controls steam release, while the pressure adjustment allows customization for different surfaces. The water tank capacity dictates cleaning duration. Regularly inspect all components for wear and tear, ensuring optimal performance and safety. Refer to the user manual for a detailed diagram and specific part identification.

Setting Up Your McCulloch Steamer

Before first use, carefully unpack your McCulloch steamer and inspect all components for any shipping damage. Place the steamer on a stable, level surface, ensuring adequate ventilation around the unit. Attach the desired accessory – a mop head or brush – securely to the steam nozzle, following the instructions in your user manual.

Connect the power cord to a grounded electrical outlet. It’s vital to avoid extension cords if possible, but if necessary, use a heavy-duty cord rated for the steamer’s wattage. Ensure the power switch is in the ‘off’ position before plugging in. Familiarize yourself with the location of the steam trigger and any pressure adjustment controls.

Proper setup is crucial for safe and effective operation. Always refer to the detailed diagrams in your user manual for specific model instructions.

Water Filling & Recommended Distilled Water Use

To fill your McCulloch steamer, always ensure the unit is unplugged and has cooled down completely. Locate the water tank, typically with a removable cap or access point. Carefully pour water into the tank, avoiding the maximum fill line indicated – overfilling can cause spitting or malfunction.

Crucially, McCulloch strongly recommends using distilled water. Tap water contains minerals that can cause scale buildup inside the steamer, reducing its efficiency and lifespan. Distilled water minimizes this buildup, ensuring optimal performance and extending the life of your appliance.

Regular use of distilled water will significantly reduce the frequency of descaling. Never add any chemicals, detergents, or fragrances to the water tank, as these can damage the unit and void the warranty.

Attaching Accessories: A Step-by-Step Guide

Begin by ensuring your McCulloch steamer is completely off and cooled down. Identify the accessory you wish to use – the MC1385 Deluxe model includes 23 options like mop heads and brushes. Locate the steamer’s attachment point, usually a nozzle or hose connection.

Gently push the accessory onto the connection point until you hear a click, confirming a secure fit. For some accessories, a slight twisting motion may be required. Always ensure the accessory is firmly attached before powering on the steamer to prevent leaks or disconnections during use.

Refer to your model’s specific user manual for detailed diagrams and instructions on attaching each accessory. Incorrect attachment can damage both the accessory and the steamer. Regularly inspect accessories for wear and tear, replacing them as needed for optimal cleaning performance.

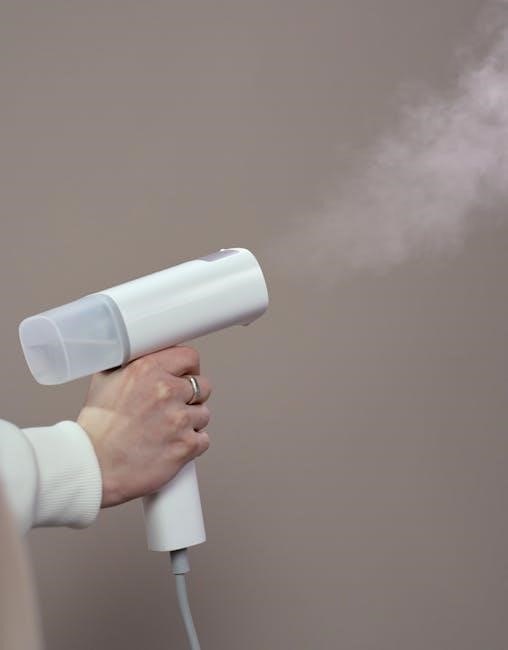
Powering On & Initial Steam Production

Before powering on your McCulloch steamer, double-check that the water tank is filled with distilled water and all accessories are securely attached. Plug the steamer into a grounded electrical outlet. The power indicator light should illuminate, signaling the unit is receiving power.

Turn the steamer on using the power switch. Initial steam production may take between two to three minutes, depending on the model. During this warm-up phase, you may hear gurgling sounds – this is normal as the water heats up.

Avoid touching the steam nozzle or any hot surfaces during this process. Once the steam is consistently flowing, you’re ready to begin cleaning. Start with a test area to familiarize yourself with the steam output and adjust accordingly. Refer to your user manual for specific instructions related to your model.

Operating Instructions: General Use

For optimal results, hold the steam nozzle a few inches away from the surface you’re cleaning. Utilize a slow, sweeping motion to allow the steam to penetrate and loosen dirt and grime effectively. Different accessories cater to various surfaces; select the appropriate one for the task at hand.

When cleaning floors, move the steamer forward and backward, overlapping each pass slightly. For vertical surfaces like tiles or upholstery, work from top to bottom to prevent streaking. Remember to maintain a consistent pace for even cleaning.

Avoid prolonged exposure of steam to any single area, as this could potentially cause damage. Regularly check the water level and refill as needed, ensuring the unit doesn’t run dry. Always unplug the steamer when not in use and allow it to cool completely before storing.

Steam Pressure Adjustment & Control

McCulloch steamers often feature adjustable steam settings, allowing you to tailor the cleaning power to the surface. Lower settings are ideal for delicate fabrics and surfaces, minimizing the risk of damage, while higher settings tackle stubborn grime on tile and grout.

Control is typically managed via a dial or button on the unit itself. Experiment with different settings to find the optimal balance between cleaning effectiveness and surface protection. Observe how the steam output changes with each adjustment.

Consistent steam pressure is crucial for efficient cleaning. Ensure the unit has reached full operating temperature before attempting to adjust the pressure. Avoid sudden or drastic changes in settings during operation, as this can affect performance. Regularly check for leaks or inconsistencies in steam flow.

Cleaning Different Surfaces: Tile, Carpet, & More

McCulloch steamers excel at cleaning a variety of surfaces, but proper technique is key. For tile and grout, utilize the jet nozzle or triangular brush attachment, applying direct steam to loosen dirt and grime. A firm scrubbing motion enhances the cleaning process.

Carpet cleaning requires the carpet glider attachment. Move slowly and steadily across the carpet fibers, allowing the steam to penetrate and lift stains. Avoid prolonged exposure to prevent over-saturation. Test a small, inconspicuous area first.

Hardwood floors benefit from a low steam setting and the floor mop attachment. Use a gentle sweeping motion, avoiding excessive moisture. Always follow manufacturer recommendations for your specific flooring type. Remember to prioritize surface-specific attachments for optimal results and to prevent damage.

Detailed Cleaning Techniques for Specific Areas

Targeted cleaning with your McCulloch steamer requires adapting techniques to each area. In the kitchen, steam effectively cuts grease on stovetops and ovens – use the angled nozzle for tight spaces. Sanitize countertops with the microfiber pad, ensuring thorough coverage.

Bathrooms benefit from the steamer’s ability to dissolve soap scum and mildew. Focus on grout lines with the jet nozzle, and steam shower doors for a sparkling clean. The detail brush is ideal for fixtures.

Upholstery and furniture require a gentle approach. Utilize the upholstery tool and a low steam setting to avoid damage. Test a hidden area first. Steam can refresh fabrics and eliminate odors, but avoid over-wetting. Always allow surfaces to dry completely after steaming.

Kitchen Cleaning with Your McCulloch Steamer

Transform your kitchen with the power of steam! Begin with stovetops, utilizing the angled nozzle to blast away baked-on food residue. The concentrated steam effortlessly lifts grease and grime, eliminating the need for harsh chemicals. For ovens, direct steam into corners and onto racks, then wipe clean.

Countertops and backsplashes are easily sanitized with the microfiber pad attachment. Steam dissolves everyday messes, leaving surfaces hygienic. Pay attention to grout lines between tiles – the jet nozzle provides focused cleaning power. Remember to always test a small, inconspicuous area first.

Dishwashers can also benefit; steam the interior to eliminate odors and loosen food particles. Ensure the unit is unplugged before cleaning internally. Your McCulloch steamer delivers a sparkling, chemical-free kitchen!

Bathroom Cleaning with Your McCulloch Steamer

Revitalize your bathroom with the deep-cleaning power of steam! Tackle stubborn soap scum and mildew on shower tiles and doors using the jet nozzle and appropriate brush attachment. The high temperature effectively breaks down these common bathroom issues, minimizing scrubbing.

Grout lines are notorious for harboring grime; the precision nozzle delivers targeted steam for a spotless finish. Mirrors and glass surfaces shine brilliantly after a quick steam cleaning with the squeegee attachment – no streaks guaranteed! Remember to avoid direct steam on sensitive surfaces.

Toilet cleaning is simplified; steam the bowl and exterior surfaces for hygienic sanitation. Your McCulloch steamer provides a chemical-free, effective solution for a sparkling clean bathroom environment, promoting a healthier home.

Upholstery & Furniture Cleaning

Refresh your furniture with the gentle yet powerful cleaning action of your McCulloch steamer! Utilize the upholstery tool to effectively sanitize and deodorize sofas, chairs, and other fabric surfaces. Steam penetrates deep into fibers, loosening dirt, dust mites, and allergens without harsh chemicals.

Always test a small, inconspicuous area first to ensure fabric compatibility. For delicate fabrics, maintain a safe distance and use a lower steam setting. The steamer can also revitalize wooden furniture, removing grime and restoring its natural luster – use the appropriate brush attachment.

Stubborn stains respond well to focused steam application followed by gentle blotting. Your McCulloch steamer offers a safe and effective way to maintain the beauty and hygiene of your upholstered furniture, extending its lifespan.

Maintenance & Care

Prolong the life and performance of your McCulloch steamer with regular maintenance. After each use, allow the unit to cool completely before emptying any remaining water. Wipe down the exterior with a soft, damp cloth to remove dirt and residue. Inspect the power cord for damage and avoid storing with the cord tightly wrapped.

Consistent descaling is crucial, especially with hard water. Mineral buildup can reduce steam output and damage internal components. Refer to the ‘Descaling Your McCulloch Steamer’ section for detailed instructions. Store accessories in a dry, organized manner to prevent mildew or damage.

Proper care ensures your McCulloch steamer remains a reliable cleaning companion for years to come, delivering consistent, chemical-free cleaning power throughout your home and beyond.

Descaling Your McCulloch Steamer

Regular descaling is vital to maintain optimal performance. Mineral deposits from water can clog steam pathways, reducing efficiency and potentially damaging the unit. McCulloch recommends using white vinegar diluted with distilled water as a descaling solution – a 1:1 ratio is generally effective.

To descale, pour the solution into the water tank and run the steamer until the tank is empty. Allow it to sit for 30-60 minutes to dissolve stubborn buildup. Repeat this process with fresh distilled water several times to thoroughly rinse the system, ensuring no vinegar residue remains.

Frequency depends on water hardness; monthly descaling is recommended for hard water areas. Ignoring descaling can void your warranty, so prioritize this essential maintenance step!

Accessory Cleaning & Storage

Maintaining your McCulloch steamer accessories ensures longevity and hygiene. After each use, detach all attachments and allow them to cool completely. Most accessories can be wiped clean with a damp cloth and mild detergent. For stubborn residue, a nylon brush can be helpful, but avoid abrasive cleaners that could damage surfaces.

Specifically, mop pads are often machine washable – check the care label for instructions. Brushes and nozzles should be inspected for clogs and cleared with a small wire or toothpick. Proper storage is crucial; keep accessories in a dry, well-ventilated area.

Organize them in a container or hang them to prevent damage. Avoid storing damp accessories, as this can lead to mildew. Consistent cleaning and careful storage will maximize the lifespan of your McCulloch steamer’s valuable attachments.

Troubleshooting Common Issues

Encountering problems with your McCulloch steamer? Here’s a quick guide. If the steamer isn’t producing steam, ensure the unit is properly filled with water and the power switch is on. Check for mineral buildup – descaling may be necessary. Leaking issues often stem from a loose connection between the unit and accessories; tighten all connections securely.

Another common issue is inconsistent steam pressure. This could indicate low water levels or a blocked steam outlet. Inspect the outlet for obstructions and refill the water tank. If the steamer shuts off prematurely, it might be overheating; allow it to cool down before restarting.

Always refer to your user manual for detailed troubleshooting steps and safety precautions. If problems persist, contact McCulloch’s customer support for assistance. Regular maintenance can prevent many of these issues.

Steamer Not Producing Steam

If your McCulloch steamer fails to produce steam, begin by verifying the water reservoir is adequately filled. Insufficient water is the most frequent cause. Next, confirm the unit is securely plugged in and the power switch is firmly in the ‘on’ position. Check the steam selector knob; ensure it’s not set to the ‘off’ or ‘low’ setting.

Mineral buildup within the steamer can obstruct steam flow. Descaling, as detailed in the maintenance section, is crucial for optimal performance. Inspect the steam outlet for any visible blockages – carefully remove any debris. A faulty heating element could also be the culprit, requiring professional repair.

Finally, ensure the safety lock is properly engaged. Some models won’t produce steam if the lock isn’t secured. If these steps don’t resolve the issue, consult the full user manual or contact McCulloch support.

Leaking Issues & Solutions

Experiencing leaks with your McCulloch steamer? First, ensure the water reservoir is not overfilled, as excess water can cause spillage. Check that the reservoir is correctly seated and securely locked into place; a loose fit is a common cause of leaks.

Inspect all hose connections and attachments for tightness. Hand-tighten connections, avoiding excessive force that could damage the fittings. Examine the steam nozzle and any accessories for cracks or damage – replace if necessary. Mineral buildup can also contribute to leaks; regular descaling is vital.

If leaking persists, verify the unit is positioned on a level surface. A tilted steamer may cause water to spill. For internal leaks, discontinue use and contact McCulloch customer support for assistance, as this may indicate a more serious issue requiring professional repair.

Warranty Information & Support Resources

McCulloch steamers are backed by a manufacturer’s warranty, protecting against defects in materials and workmanship. Warranty duration varies by model; consult your user manual or the McCulloch website for specific details regarding your unit’s coverage period. Proof of purchase is required for all warranty claims.

For warranty claims or general support, visit the official McCulloch website at Homedics.com (formerly McCulloch Steam). There, you’ll find a comprehensive FAQ section, downloadable user manuals (available in PDF format), and troubleshooting guides. You can also contact their customer support team via phone or email, details of which are provided on their website.

Amazon product pages often link directly to warranty information. Retain your purchase information and the user manual for easy access to warranty details and support resources when needed. Register your product online to streamline the warranty process.

Categories
Instructions

tekonsha voyager instruction manual

Tekonsha Voyager Instruction Manual: A Comprehensive Guide

This comprehensive manual details the Tekonsha Voyager brake controller‚ offering guidance for installation‚ operation‚ and troubleshooting‚ ensuring safe and effective trailer braking performance.

Explore features like proportional braking‚ manual override‚ and adjustable sensitivity‚ alongside wiring diagrams and compatibility information for various vehicle types and trailer setups.

The Tekonsha Voyager is a leading electric brake controller designed to provide safe and reliable braking control for trailers. This controller seamlessly integrates with your vehicle’s electrical system‚ allowing for synchronized braking between your tow vehicle and trailer.

Featuring advanced proportional braking technology‚ the Voyager accurately mirrors your vehicle’s braking intensity‚ ensuring smooth and controlled stops. It’s engineered for ease of use‚ offering intuitive adjustments for sensitivity and trailer weight.

This manual serves as a complete guide to understanding‚ installing‚ and operating your Tekonsha Voyager‚ maximizing its performance and ensuring a secure towing experience. Proper installation and adjustment are crucial for optimal functionality and safety.

Understanding Brake Controllers

Electric brake controllers are essential components for safely towing trailers equipped with electric brakes. They translate the driver’s braking input into a signal that activates the trailer’s brakes‚ ensuring synchronized stopping power. Proportional controllers‚ like the Voyager‚ apply braking force based on the vehicle’s deceleration‚ offering a smoother‚ more natural braking experience.

Without a functioning brake controller‚ the trailer’s brakes won’t engage effectively‚ potentially leading to dangerous situations. Understanding the controller’s settings – sensitivity‚ proportionality‚ and manual override – is vital for optimal performance.

Properly adjusted‚ a brake controller enhances stability‚ reduces stopping distances‚ and minimizes wear and tear on both the tow vehicle and trailer.

Voyager Features and Benefits

The Tekonsha Voyager boasts several key features designed for user convenience and enhanced safety. Its digital display provides clear‚ real-time feedback on brake activity and system status. Proportional braking ensures smooth‚ controlled stops‚ mirroring the vehicle’s deceleration. Adjustable sensitivity settings allow customization for different trailer weights and driving conditions.

The Voyager also includes a manual override function for situations requiring independent trailer brake control. Long and short haul modes optimize performance for varied towing distances. Easy-to-understand LED indicators quickly diagnose potential issues.

Ultimately‚ the Voyager delivers reliable‚ precise trailer braking‚ promoting safer towing experiences.

Installation Guide

Proper installation is crucial for optimal performance. This section provides detailed instructions for wiring‚ connecting to the vehicle’s electrical system‚ and grounding the Voyager controller.

Wiring the Voyager Brake Controller

Begin by disconnecting the vehicle’s negative battery terminal to prevent shorts during installation. Identify the vehicle’s brake light circuit – typically a brown wire – and connect it to the Voyager’s brake input wire.

The Voyager requires a 12-volt power source; connect the controller’s power wire (usually red) to a fused 12V supply. Ensure the fuse rating matches the controller’s specifications.

Connect the ground wire (typically white) to a clean‚ unpainted metal surface on the vehicle’s chassis. Use appropriate ring terminals and secure all connections tightly.

Finally‚ run the trailer wire to the Voyager’s trailer output connector‚ following the manufacturer’s wiring diagram for proper pin assignments. Double-check all connections before reconnecting the battery.

Connecting to the Vehicle’s Electrical System

Locate the vehicle’s wiring harness designated for trailer connections‚ often found under the dashboard or near the steering column. Utilize a wiring adapter specifically designed for your vehicle to simplify the process and avoid cutting factory wires.

Identify the brake light‚ turn signal‚ and running light circuits within the harness. Match these circuits to the corresponding wires on the Voyager’s wiring connector‚ ensuring correct functionality.

Securely connect the wires using butt connectors‚ solder‚ or crimp connectors‚ providing reliable and weatherproof connections. Insulate all connections with heat shrink tubing or electrical tape.

Verify the polarity of the connections to prevent damage to the Voyager or the vehicle’s electrical system. A wiring diagram is crucial for accurate connections.

Grounding and Power Connections

Establish a solid ground connection by attaching the Voyager’s ground wire to a clean‚ unpainted metal surface on the vehicle’s chassis. A secure ground is vital for proper operation and prevents electrical interference.

Connect the Voyager’s power wire to a 12-volt fused ignition source. This ensures the controller receives power only when the vehicle is running‚ preventing battery drain.

Use an appropriate fuse‚ typically 10-15 amps‚ to protect the Voyager and the vehicle’s electrical system from overloads. Locate the fuse close to the power source.

Double-check all connections for tightness and proper insulation. Loose or corroded connections can cause intermittent operation or damage to the controller.

Setting the Vehicle Type

The Tekonsha Voyager requires vehicle type configuration for optimal braking performance. Access the settings menu via the controller’s interface‚ typically through a series of button presses.

Select the appropriate vehicle type from the available options – often including options for domestic/import vehicles‚ or specific truck/SUV categories. This adjusts the controller’s internal algorithms.

Incorrect vehicle type selection can result in either weak or overly aggressive braking. Refer to the Voyager’s manual for guidance if unsure about the correct setting.

Some models offer advanced customization‚ allowing fine-tuning of braking parameters based on vehicle characteristics. Experiment cautiously to find the ideal setup.

Operation and Adjustments

The Tekonsha Voyager offers precise control over trailer brakes‚ featuring adjustable sensitivity‚ proportionality settings‚ and a manual override function for enhanced safety.

Adjusting Brake Sensitivity

The brake sensitivity adjustment on the Tekonsha Voyager is crucial for matching the controller’s response to your vehicle and trailer combination. Lower sensitivity settings are ideal for lighter trailers or slippery road conditions‚ providing a gentler braking action. Conversely‚ higher sensitivity settings are recommended for heavier loads or situations demanding more immediate braking power.

To adjust‚ use the sensitivity dial on the Voyager unit. Begin with a lower setting and gradually increase it during a test drive in a safe‚ open area. Pay attention to how the trailer brakes respond to your vehicle’s braking – you want a smooth‚ controlled stop without excessive trailer sway or abrupt braking. Fine-tune the sensitivity until you achieve optimal performance‚ ensuring the trailer brakes are synchronized with your vehicle’s braking system.

Proportionality Settings Explained

The Tekonsha Voyager’s proportionality feature synchronizes trailer braking with the vehicle’s deceleration. This means the trailer brakes apply with increasing intensity as the vehicle brakes harder‚ offering a more natural and controlled braking experience. Adjusting the proportionality setting dictates how much the trailer brakes respond to the vehicle’s braking input.

Higher proportionality settings result in more aggressive trailer braking‚ suitable for heavier loads or situations requiring quicker stops. Lower settings provide a smoother‚ less abrupt braking action‚ ideal for lighter trailers or sensitive cargo. Experiment with different settings during test drives to find the optimal balance between responsiveness and comfort‚ ensuring safe and predictable trailer control.

Manual Override Function

The Tekonsha Voyager incorporates a manual override function‚ providing the driver with independent control over the trailer brakes. This feature is crucial in emergency situations or when navigating challenging terrain where automated braking may be insufficient. Activating manual override bypasses the proportional circuitry‚ allowing direct application of the trailer brakes via a dedicated control;

Use the manual override cautiously and deliberately‚ as it can induce skidding if applied too aggressively. It’s particularly useful for descending steep grades or maintaining control when the trailer begins to sway. Remember to release the manual override once the situation stabilizes‚ returning to proportional braking for normal operation.

Adjusting for Different Trailer Weights

The Tekonsha Voyager excels with its adaptability to varying trailer weights. Proper adjustment is vital for optimal braking performance and safety. Begin by entering the trailer weight into the controller’s settings; this informs the proportional braking algorithm. For heavier trailers‚ increase the brake sensitivity and maximum braking power to ensure sufficient stopping force.

Conversely‚ lighter trailers require reduced sensitivity to prevent premature lockup. Experiment with the settings during a test drive in a safe‚ controlled environment. Monitor the trailer’s braking response and adjust accordingly. Regularly re-evaluate these settings whenever you change trailers or cargo loads.

Troubleshooting Common Issues

This section provides solutions for typical Voyager problems‚ including no brake engagement‚ erratic performance‚ power failures‚ and interpreting LED indicator light codes for quick fixes.

No Brakes Engaging

If your trailer brakes aren’t activating‚ begin by verifying the Voyager’s power and ground connections are secure and receiving the correct voltage. Check the vehicle’s brake light circuit – a faulty bulb or connection can prevent the controller from receiving the signal.

Inspect the trailer connector for corrosion or loose wiring‚ ensuring a solid connection between the vehicle and trailer. Confirm the trailer’s brakes are properly adjusted and not seized. Verify the brake gain setting on the Voyager isn’t set too low; gradually increase it while testing.

Finally‚ examine the trailer’s brake magnets or electric brakes themselves for any mechanical issues. A blown fuse in either the vehicle or trailer circuit could also be the culprit.

Erratic Brake Performance

Experiencing inconsistent or jerky trailer braking? First‚ check the trailer connector for a secure fit and clean connections‚ as intermittent signals can cause erratic behavior. Inspect the trailer wheel bearings; excessive play can affect brake performance. Verify proper grounding – a poor ground can introduce electrical noise.

Adjust the Voyager’s proportional gain setting; too high a setting can lead to over-braking and instability. Ensure the trailer brakes are evenly adjusted on all wheels. Consider the road surface; slippery conditions can amplify braking inconsistencies.

Finally‚ examine the brake controller’s internal wiring for any loose connections or damage.

Controller Not Powering On

If the Tekonsha Voyager fails to power on‚ begin by checking the vehicle’s fuse box for a blown fuse related to the trailer brake circuit. Verify the controller’s power and ground connections are secure and properly connected to the vehicle’s wiring harness. Confirm the ignition switch is providing power to the brake controller – it requires the ignition to be on.

Inspect the wiring harness for any damage‚ shorts‚ or open circuits. Use a multimeter to test for voltage at the controller’s power input. Ensure the vehicle’s battery is adequately charged‚ as low voltage can prevent the controller from functioning.

If issues persist‚ consult a qualified automotive electrician.

LED Indicator Light Codes

The Tekonsha Voyager utilizes LED indicator lights to communicate system status. A solid green light typically indicates normal operation‚ while a flashing green light suggests the controller is in learning mode. A red light often signifies a fault within the trailer wiring or brake system‚ requiring immediate attention.

Specific flash patterns can pinpoint the issue. For example‚ a rapid flashing red light may indicate a short circuit‚ while a slow flash could suggest an open circuit. Consult the full instruction manual for a detailed breakdown of each code and corresponding troubleshooting steps.

Understanding these codes is crucial for efficient diagnosis and repair.

Safety Precautions

Always disconnect the vehicle battery during installation. Ensure proper wiring connections to prevent shorts and overheating‚ and regularly inspect all components for damage.

Proper Wiring Practices

Employing correct wiring techniques is paramount for safe and reliable operation of the Tekonsha Voyager. Utilize appropriately sized wire gauges‚ as specified in the installation guide‚ to handle the current demands of the trailer brakes. Securely connect all wires‚ avoiding loose connections that can cause voltage drops or intermittent operation.

Protect wiring from abrasion and exposure to heat sources. Route wires away from moving parts and sharp edges‚ using wire loom or conduit where necessary. Ensure all connections are weatherproofed to prevent corrosion‚ especially in areas prone to moisture. Double-check polarity before connecting to the vehicle’s electrical system‚ and always disconnect the battery during wiring procedures to prevent accidental shorts.

Follow the color-coding conventions consistently throughout the installation process.

Avoiding Overheating

Preventing overheating is crucial for the longevity and performance of your Tekonsha Voyager brake controller. Ensure adequate ventilation around the unit‚ avoiding enclosure in tight spaces that restrict airflow. Regularly inspect the controller for signs of excessive heat‚ such as discoloration or melting of components.

Avoid prolonged use of the manual override function‚ as it generates significant heat. Verify that the trailer brakes are functioning correctly and are not dragging‚ which can strain the controller. Confirm proper wiring connections to minimize resistance and heat buildup.

If overheating occurs‚ immediately disconnect the power and allow the unit to cool before further inspection.

Regular Inspection and Maintenance

Consistent inspection and maintenance are vital for reliable Tekonsha Voyager operation. Periodically check all wiring connections‚ ensuring they remain secure and free from corrosion. Inspect the controller’s housing for any physical damage‚ such as cracks or loose components.

Test the brake controller’s functionality before each trip‚ verifying proper engagement and release of the trailer brakes. Clean the controller’s exterior with a soft‚ dry cloth to remove dust and debris.

Address any issues promptly to prevent further damage or safety hazards. Consider professional inspection annually for optimal performance and longevity.

Compatibility and Specifications

The Tekonsha Voyager is broadly compatible with many vehicles and trailer brake systems‚ operating on a 12-volt system with specific amperage requirements for optimal function.

Compatible Vehicle Types

The Tekonsha Voyager brake controller demonstrates excellent compatibility across a wide spectrum of vehicle types‚ including full-size trucks‚ SUVs‚ and even some cars equipped with a factory-installed trailer brake wiring harness. It’s generally suitable for vehicles utilizing either a 4-pin or 7-pin connector.

Specifically‚ the Voyager works seamlessly with domestic and many import vehicles‚ though verifying the vehicle’s electrical system is crucial before installation. Vehicles with CAN-BUS systems often require a specific adapter for proper integration‚ ensuring accurate brake signal transmission. Always consult the Tekonsha compatibility chart or a qualified installer to confirm suitability for your particular vehicle make and model‚ avoiding potential electrical conflicts or performance issues.

Trailer Brake Compatibility

The Tekonsha Voyager is designed for broad compatibility with most electrically operated trailer brakes‚ including those found on travel trailers‚ boat trailers‚ utility trailers‚ and horse trailers. It effectively supports both standard electromagnetic and electric-over-hydraulic (EOH) brake systems‚ offering versatile control.

However‚ ensuring proper voltage and amperage matching is vital. The Voyager typically operates on a 12-volt system‚ so compatibility with trailer brakes designed for this voltage is essential. For EOH systems‚ confirm the Voyager’s output amperage aligns with the requirements of the hydraulic pump. Always verify the trailer’s brake specifications before connecting to the Voyager‚ preventing damage or suboptimal braking performance.

Electrical Specifications (Voltage‚ Amperage)

The Tekonsha Voyager brake controller operates on a 12-volt DC electrical system‚ standard in most vehicles. Its input voltage range is typically 9-16 volts‚ accommodating slight variations in vehicle electrical systems. The controller’s maximum output amperage is generally around 30 amps‚ sufficient for controlling most trailer brake setups.

However‚ it’s crucial to verify your vehicle’s wiring can support the Voyager’s current draw. Fusing is essential; a 30-amp fuse is generally recommended on the power supply line. For electric-over-hydraulic (EOH) systems‚ ensure the Voyager’s output amperage is compatible with the hydraulic pump’s requirements to prevent damage or malfunction.

Advanced Features

The Tekonsha Voyager offers user-selectable brake modes‚ including Long Haul and Short Haul‚ optimizing performance for diverse towing scenarios and driver preferences.

User-Selectable Brake Modes

The Tekonsha Voyager distinguishes itself with adaptable braking profiles‚ offering drivers the flexibility to tailor the controller’s response to specific towing conditions. These user-selectable modes significantly enhance both safety and convenience. The primary options are typically ‘Long Haul’ and ‘Short Haul’ modes‚ each designed for distinct applications.

Long Haul mode is ideal for extended towing distances‚ providing a smoother‚ more gradual braking experience that minimizes trailer sway and enhances driver comfort during long journeys. Conversely‚ Short Haul mode delivers a more aggressive braking response‚ suited for frequent stops and starts‚ or when towing in congested areas. Selecting the appropriate mode ensures optimal control and responsiveness‚ maximizing the Voyager’s performance.

Long Haul Mode Explained

Long Haul mode on the Tekonsha Voyager is specifically engineered for extended towing scenarios‚ prioritizing a smooth and controlled braking experience over long distances. This mode utilizes a more gradual application of trailer brakes‚ minimizing abrupt stops and reducing the likelihood of trailer sway. It’s perfect for highway driving and situations where consistent speed is maintained.

The Voyager’s algorithm in Long Haul mode anticipates braking needs‚ applying the trailer brakes progressively as the vehicle slows down. This results in a more comfortable ride for both the occupants and the cargo. It’s the preferred setting for minimizing wear and tear on both the towing vehicle and the trailer brakes‚ enhancing longevity and reliability.

Short Haul Mode Explained

The Tekonsha Voyager’s Short Haul mode is optimized for frequent stops and lower speeds‚ making it ideal for city driving‚ stop-and-go traffic‚ or shorter towing distances. Unlike Long Haul‚ this mode delivers a quicker and more responsive brake application to the trailer. This heightened responsiveness ensures confident stopping power when navigating congested areas.

Short Haul mode prioritizes immediate braking force‚ reducing stopping distances in situations requiring rapid deceleration. The Voyager adjusts its sensitivity to provide a more assertive braking feel‚ enhancing control and safety. It’s the recommended setting for scenarios where quick reactions and precise braking are paramount‚ offering a secure towing experience.

Resideo VR8204A2266/B Gas Valve Relevance

While unrelated to trailer braking‚ understanding gas valve systems like the Resideo VR8204A2266/B highlights the importance of safety in all vehicle systems and maintenance.

Understanding Gas Valve Integration with Heating Systems

Gas valves‚ such as the Resideo VR8204A2266/B‚ are critical components within heating systems‚ regulating the flow of natural or propane gas to furnaces‚ boilers‚ and water heaters. They work in conjunction with a control system‚ typically a thermostat‚ to initiate and maintain combustion.

The intermittent pilot design features a standing pilot light that is ignited and extinguished as needed‚ enhancing safety and energy efficiency. These valves integrate with safety features like flame sensors‚ which shut off the gas supply if the pilot light is not detected. Proper functioning is paramount for safe and reliable heating‚ demanding regular inspection and maintenance.

Understanding this integration‚ though distinct from trailer braking systems‚ emphasizes the broader importance of vehicle and home system safety and proper component functionality.

VR8204A2266/B Specifications and Compatibility

The Resideo VR8204A2266/B gas valve operates at 24V AC‚ 60Hz‚ and maintains a consistent outlet pressure of 3.5 inches of water column. It features ½ inch NPT inlet and outlet connections‚ ensuring compatibility with standard gas piping. This valve is designed for use with natural gas‚ and conversion kits are available for propane applications.

Compatibility extends to a wide range of heating appliances‚ including furnaces and boilers from various manufacturers. However‚ verifying the voltage and gas type requirements of your specific appliance is crucial before installation. While unrelated to trailer braking‚ understanding component specifications is vital for safe and effective system operation.

Safety Considerations for Gas Valve Systems

When working with gas valve systems‚ prioritizing safety is paramount. Always shut off the gas supply before commencing any installation or maintenance procedures. Ensure proper ventilation to prevent the accumulation of combustible gases. Regular leak testing with a soap solution is essential to identify and address any potential hazards.

Qualified technicians should perform all gas line connections and adjustments‚ adhering to local codes and regulations. Never attempt to modify or repair the valve internally; replacement is the recommended course of action for malfunctions. Although unrelated to trailer brakes‚ these precautions are vital for preventing gas-related incidents.

Categories
Instructions

insect lore caterpillar instructions

Insect Lore Caterpillar Instructions: A Comprehensive Guide

Delve into the captivating world of metamorphosis with these instructions! Witness the incredible transformation of caterpillars into beautiful Painted Lady butterflies‚ a truly unforgettable experience.

Understanding Insect Lore and Caterpillar Kits

Insect Lore has been a trusted name in educational insect rearing for decades‚ providing families and classrooms with engaging‚ hands-on learning experiences. Their caterpillar kits offer a unique window into the fascinating life cycle of butterflies‚ specifically the Painted Lady (Vanessa cardui). These kits aren’t just about observing; they’re about understanding fundamental biological principles like metamorphosis‚ insect anatomy‚ and ecological roles.

Caterpillar kits are designed to simplify the process of raising butterflies‚ making it accessible even for beginners. They provide everything needed to successfully nurture caterpillars from tiny larvae to winged adults. Understanding that insects are hexapod invertebrates‚ belonging to the class Insecta and the phylum Arthropoda‚ enhances the learning experience. These kits highlight the insect’s three-part body – head‚ thorax‚ and abdomen – and their chitinous exoskeleton‚ crucial for growth through molting.

Ultimately‚ Insect Lore kits aim to foster appreciation for the natural world and the vital role insects play within it‚ from pollination to decomposition.

What is Included in the Insect Lore Caterpillar Kit?

Each Insect Lore Caterpillar Kit typically contains a pop-up habitat – a mesh enclosure providing ventilation and visibility for observing the caterpillars. You’ll receive a supply of nutritious caterpillar food‚ specifically formulated to support their growth through several instars (growth stages). A detailed instruction guide is included‚ offering step-by-step directions and educational information about the Painted Lady butterfly’s life cycle.

Importantly‚ the kit includes five caterpillars‚ ensuring a high probability of successful metamorphosis. These caterpillars‚ as members of the class Insecta‚ possess key characteristics like six legs and a segmented body. You’ll also find a chrysalis observation cup‚ designed to safely house the pupa during its transformation.

While not always included‚ some kits may feature a bonus activity guide or access to online resources‚ further enriching the learning experience and providing insights into the world of insects.

Choosing the Right Caterpillar Kit

When selecting an Insect Lore Caterpillar Kit‚ consider the age and learning style of the observer. Basic kits are excellent for younger children‚ offering a straightforward introduction to metamorphosis. More advanced kits might include additional features like magnified observation domes or detailed life cycle models.

Think about the number of caterpillars included; larger quantities increase the chances of observing the complete butterfly emergence process. Ensure the kit is specifically designed for Painted Lady butterflies (Vanessa cardui)‚ as their needs differ from other species within the Insecta class.

Review customer feedback regarding the quality of the habitat and the vitality of the caterpillars. A well-constructed habitat is crucial for maintaining optimal conditions‚ and healthy caterpillars are essential for a successful transformation. Prioritize kits from reputable brands known for their educational value and commitment to insect welfare.

Caterpillar Care: Setting Up the Habitat

Establish a secure‚ ventilated habitat for your caterpillars‚ mimicking their natural environment. Proper setup is vital for their growth and successful metamorphosis into butterflies.

Habitat Setup: Initial Considerations

Before your caterpillars arrive‚ ensure the habitat is fully prepared. The Insect Lore kit provides a mesh habitat‚ designed for optimal airflow and visibility. Place the habitat in a location away from direct sunlight and extreme temperatures – a consistent room temperature between 65-75°F (18-24°C) is ideal. Avoid placing it near drafts or loud noises‚ as these can stress the caterpillars.

Crucially‚ the habitat should be easily accessible for observation‚ but secure enough to prevent escapes. Caterpillars are surprisingly adept at climbing! Ensure the mesh is intact and properly sealed. Consider the eventual size of the butterflies; sufficient vertical space is needed for them to emerge and expand their wings. A clear view allows for detailed observation of the entire life cycle‚ from tiny larvae to magnificent butterflies. Remember‚ a stable and thoughtfully prepared environment is the foundation for a successful caterpillar rearing experience.

Food Source: Maintaining the Caterpillar Diet

The Insect Lore kit includes specially formulated caterpillar food‚ a vital component for healthy growth. This food is designed to provide all the necessary nutrients for the Painted Lady caterpillars. Initially‚ the food may appear dry; however‚ simply add a small amount of water – just enough to moisten it – to create a palatable consistency. Avoid overwatering‚ as this can lead to mold growth.

Regularly check the food level and replenish as needed. Caterpillars eat a lot and will quickly consume their supply! A fresh food source is crucial‚ especially during periods of rapid growth. Remove any uneaten‚ moldy food promptly to maintain a clean habitat. Do not introduce any other food sources‚ as these may be harmful to the caterpillars. Consistent access to the provided food ensures optimal development and a successful metamorphosis into beautiful butterflies.

Maintaining Optimal Habitat Conditions (Temperature & Humidity)

Maintaining a suitable environment is key to caterpillar health and successful development. The ideal temperature range for Painted Lady caterpillars is between 65°F and 75°F (18°C and 24°C). Avoid direct sunlight and drafts‚ as these can cause temperature fluctuations. Consistent warmth encourages active feeding and growth.

Humidity is also important‚ but generally‚ the provided habitat maintains adequate levels. However‚ if the habitat seems excessively dry‚ lightly mist the sides with water – avoid directly spraying the caterpillars or food. Conversely‚ excessive moisture can promote mold growth‚ so ensure good ventilation. A balanced environment‚ with consistent temperature and moderate humidity‚ will provide the best conditions for your caterpillars to thrive and complete their transformation.

Observing Caterpillar Development

Carefully monitor your caterpillars’ growth‚ noting changes in size and behavior! Witness their fascinating journey through distinct stages‚ including molting and preparation for pupation.

The Caterpillar Life Cycle: Stages of Growth

The Painted Lady butterfly undergoes complete metamorphosis‚ a remarkable transformation with four distinct stages: egg‚ larva (caterpillar)‚ pupa (chrysalis)‚ and adult. Initially‚ tiny eggs are laid on host plants. Upon hatching‚ the larva‚ or caterpillar‚ emerges with a primary focus – eating and growing! Caterpillars grow rapidly‚ shedding their exoskeleton multiple times through a process called molting to accommodate their increasing size.

Each stage between molts is known as an instar. You’ll observe significant changes in the caterpillar’s appearance with each instar‚ becoming larger and more vibrant. This growth phase is crucial for accumulating energy reserves needed for the pupal stage. Throughout these stages‚ providing a consistent food source and appropriate habitat conditions is vital for healthy development. Observing these changes provides a unique educational opportunity‚ showcasing nature’s incredible processes.

Molting: What it is and Why it Happens

Molting is a vital process for caterpillar growth‚ as their rigid exoskeleton doesn’t expand. As caterpillars consume vast amounts of food‚ they quickly outgrow their current skin. To continue growing‚ they shed this outer layer‚ revealing a new‚ larger exoskeleton underneath. This shedding process is called molting‚ or ecdysis.

Before molting‚ the caterpillar will often stop eating and become relatively still. You may notice its skin appearing stretched or dull. The caterpillar then wriggles and contorts to break free from the old exoskeleton. This can appear alarming‚ but it’s a natural and necessary part of their development. After molting‚ the new exoskeleton is soft and pliable‚ allowing the caterpillar to expand before it hardens. Caterpillars typically molt several times throughout their larval stage‚ each time growing significantly larger.

Identifying Common Caterpillar Species (Painted Lady Focus)

The Insect Lore kits primarily feature Painted Lady caterpillars (Vanessa cardui)‚ a globally distributed species known for its vibrant orange and black wings. Painted Lady caterpillars are easily recognizable by their striped pattern – a pale green or yellowish body adorned with longitudinal stripes of white‚ black‚ and sometimes orange or yellow. These stripes run along the sides of their body.

Young caterpillars are typically smaller and paler‚ becoming more vividly colored as they grow and molt. They possess prolegs – fleshy‚ stubby legs – in addition to their three pairs of true legs‚ aiding in gripping surfaces. Observing these characteristics will help you confidently identify the caterpillars in your kit. While other caterpillar species exist‚ the Insect Lore kits are specifically designed for the Painted Lady’s lifecycle‚ offering a predictable and rewarding experience.

Preparing for the Chrysalis Stage

Observe closely for hanging behavior and cessation of eating; these signal pupation! Ensure the habitat remains undisturbed‚ providing a safe space for transformation.

Recognizing Signs of Pupation

The transition to the pupa stage‚ or chrysalis‚ is a fascinating part of the butterfly life cycle. Several key behaviors indicate your caterpillar is preparing for this transformation. Most notably‚ the caterpillar will stop eating‚ demonstrating a clear loss of appetite. This is a crucial signal – it’s utilizing its stored energy for the upcoming metamorphosis.

You’ll also observe a change in the caterpillar’s appearance and behavior. It will begin to search for a suitable location within the habitat‚ often climbing to the lid or a twig. Once a spot is chosen‚ the caterpillar will hang upside down in a “J” shape. This is a very distinct pose!

Finally‚ the caterpillar’s skin will appear tighter and may even become translucent‚ revealing the developing chrysalis underneath. This indicates the shedding of the final larval skin is imminent. Careful observation during these stages is key to understanding and appreciating the butterfly’s incredible journey.

Maintaining the Habitat During Pupation

Once your caterpillar forms a chrysalis‚ minimal habitat disturbance is crucial for successful development. Avoid unnecessary handling or movement of the habitat‚ as vibrations can potentially harm the delicate pupa. Continue to lightly mist the habitat with water to maintain humidity‚ but avoid directly spraying the chrysalis itself.

Do not clean the habitat during this stage‚ as the frass (caterpillar waste) doesn’t pose a threat to the pupa. In fact‚ leaving it undisturbed can help maintain a stable environment. Ensure the habitat remains at a consistent room temperature‚ ideally between 70-85°F (21-29°C).

Resist the urge to open the habitat frequently to observe. Patience is key! The pupation stage can last anywhere from several days to a couple of weeks‚ depending on environmental conditions. Providing a stable and undisturbed environment significantly increases the chances of a healthy butterfly emergence.

Chrysalis Care: Ensuring a Successful Transformation

The chrysalis‚ or pupa‚ is a seemingly inactive stage‚ but profound changes are occurring within. Maintaining appropriate humidity is vital; lightly mist the habitat daily to prevent desiccation‚ but avoid over-saturation. A consistently warm temperature‚ between 70-85°F (21-29°C)‚ supports optimal development.

Observe the chrysalis for any signs of distress‚ such as discoloration or a collapsed appearance‚ though some color changes are normal as the butterfly develops. Avoid direct sunlight‚ which can overheat the pupa. Do not attempt to assist the butterfly during emergence; allow it to break free naturally.

Remember‚ the chrysalis is vulnerable. Minimize handling and vibrations. A stable‚ undisturbed environment is the most important factor in ensuring a successful and healthy butterfly transformation. Patience during this stage is paramount for a rewarding experience.

Butterfly Emergence and Release

Witness the magical eclosion! Provide a sugar-water solution for nourishment‚ then release your Painted Lady into a safe‚ flower-rich environment for continued life.

Butterfly Eclosion: The Emergence Process

The emergence of a butterfly‚ known as eclosion‚ is a breathtaking spectacle. Initially‚ the chrysalis will become transparent‚ revealing the butterfly’s wings within. This signals the impending transformation. A split will appear‚ and the butterfly will slowly begin to emerge‚ its wings crumpled and wet.

It’s crucial not to interfere during this process; allow the butterfly to fully emerge on its own. The butterfly pumps hemolymph (insect blood) into its wings‚ gradually expanding and drying them. This process can take several hours. Once the wings are fully extended and dry‚ the butterfly will be ready to fly. Observe this delicate process with patience and respect‚ understanding it’s a vital stage in the butterfly’s life cycle. Avoid touching the butterfly during emergence‚ as this can damage its fragile wings.

Remember‚ a fully emerged butterfly needs time to strengthen before release.

Feeding the Newly Emerged Butterfly

After eclosion‚ the butterfly requires nourishment to gain strength for flight and reproduction. Newly emerged butterflies typically don’t feed immediately‚ focusing first on wing expansion and drying. However‚ providing a food source is essential for their well-being.

The Insect Lore kit doesn’t usually include specific butterfly food‚ but a simple sugar solution works wonderfully. Mix one part sugar with four parts water – a shallow dish with a saturated sponge or cotton ball soaked in the solution is ideal. Place this near the butterfly‚ allowing it to easily access the liquid with its proboscis (feeding tube).

Observe the butterfly extending its proboscis to feed. If it doesn’t feed within a few hours‚ gently encourage it by touching its proboscis with the sugar solution. Providing this energy source ensures a healthy and successful release into the wild.

Releasing the Butterfly: Best Practices and Considerations

Releasing your Painted Lady butterfly is a rewarding culmination of observation! Choose a warm‚ sunny day with little to no wind for optimal flight conditions. Avoid releasing during rain or extreme temperatures‚ as these can hinder the butterfly’s chances of survival.

Select a location with abundant nectar-rich flowers – gardens‚ meadows‚ or parks are excellent choices. Gently open the habitat and allow the butterfly to emerge on its own. Avoid forcing it out‚ as this could damage its delicate wings.

Consider the butterfly’s natural habitat. Painted Ladies migrate‚ so releasing near open spaces allows for potential participation in their journey. Observe as it takes its first flight‚ contributing to pollination and the ecosystem. Remember‚ releasing is a gift to nature!

Troubleshooting Common Issues

Encountering problems? Don’t worry! Addressing issues like caterpillar inactivity‚ habitat mold‚ or pupal concerns ensures a successful butterfly emergence and a rewarding experience.

Caterpillar Not Eating

A caterpillar refusing to eat is a common concern for new Insect Lore enthusiasts. Several factors can contribute to this behavior. First‚ ensure the provided food source is fresh and hasn’t dried out; caterpillars prefer readily available‚ moist sustenance. Temperature plays a crucial role – if the habitat is too cold‚ caterpillars become sluggish and their appetite diminishes. Conversely‚ excessive heat can also deter them.

Inspect the caterpillars for signs of illness or injury‚ though these are rare. Sometimes‚ caterpillars simply enter a pre-molt state where they cease eating for a day or two as they prepare to shed their skin. Observe closely for any changes in behavior or appearance. If the issue persists beyond 24-48 hours‚ gently offer a fresh leaf directly to the caterpillar‚ ensuring it’s easily accessible. Avoid overcrowding‚ as competition for food can stress individuals. Maintaining optimal humidity levels is also vital for their well-being and feeding habits.

Mold or Mildew in the Habitat

The appearance of mold or mildew within the caterpillar habitat is a frequent issue‚ stemming from the humid environment necessary for caterpillar development. Proper ventilation is paramount; ensure the habitat has adequate airflow‚ but avoid drafts. Regularly inspect the habitat‚ particularly the food source and container walls‚ for any signs of fungal growth – typically appearing as fuzzy patches or discoloration.

If mold is detected‚ carefully remove the affected food and replace it with fresh provisions. Gently clean the habitat walls with a diluted solution of mild soap and water‚ ensuring it’s thoroughly rinsed and dried before reintroducing the caterpillars. Avoid using harsh chemicals or disinfectants. Reducing humidity by briefly opening the habitat (without exposing caterpillars to extreme temperatures) can help. Preventative measures include avoiding overwatering the food source and ensuring proper air circulation. Consistent monitoring is key to maintaining a healthy environment.

Chrysalis Issues and Concerns

During the pupation stage‚ observing the chrysalis is crucial‚ but intervention should be minimal. A healthy chrysalis is typically smooth and firmly attached to a secure surface. Discoloration‚ particularly darkening‚ is normal as the butterfly develops within. However‚ a collapsed or significantly damaged chrysalis is a cause for concern‚ potentially indicating a developmental issue.

If the chrysalis falls‚ do not attempt to reattach it unless the fall occurred very recently and the structure remains intact; Gently place it in a safe‚ undisturbed location within the habitat. Avoid handling the chrysalis excessively‚ as this can disrupt the delicate transformation process. If mold develops on the chrysalis‚ carefully isolate it‚ but intervention is often unsuccessful. Patience is key; the emergence process can vary in timing. Observe‚ document‚ and allow nature to take its course.

Categories
Instructions

whole foods pizza dough cooking instructions

Whole Foods pizza dough offers a convenient and delicious base for homemade pizzas, made with high-quality ingredients for a quick and satisfying meal preparation experience.

1.1 Overview of Whole Foods Pizza Dough

Whole Foods pizza dough is a pre-made, high-quality product designed for convenience and flavor. Made with wholesome ingredients, it provides a delicious base for homemade pizzas. Perfect for quick meals, it allows you to focus on adding your favorite toppings while ensuring a crispy, well-cooked crust every time, making it ideal for both novice and experienced home cooks.

1.2 Benefits of Using Pre-Made Dough

Using pre-made dough from Whole Foods offers convenience and time-saving benefits. It eliminates the need for mixing and rising, allowing for a quick start to your pizza-making process. The dough is made with high-quality ingredients, ensuring consistent flavor and texture. Perfect for busy schedules, it simplifies cooking while delivering a delicious, homemade pizza experience with minimal effort required.

Ingredients and Tools Needed

Whole Foods pizza dough requires minimal ingredients and tools. You’ll need the pre-made dough, baking sheets or stones, and your choice of toppings for a delicious meal.

2.1 Ingredients for Toppings

Choose your favorite toppings such as fresh vegetables, meats, or cheeses. Popular options include tomato sauce, mozzarella, pepperoni, spinach, mushrooms, and olives. For added flavor, herbs like oregano or basil can enhance your pizza. Pre-cooked ingredients like grilled chicken or caramelized onions also work well. Ensure toppings are prepared and balanced to avoid overwhelming the dough with excess moisture or weight.

2.2 Essential Baking Tools

Key tools include a preheated oven, baking sheet, or pizza stone for even cooking. A food processor or mixing bowl aids in preparing ingredients. Measuring cups and spoons ensure accurate proportions. A rolling pin helps shape the dough evenly. Optional tools like a pizza peel or cutter enhance the process. Preheat the oven to 450°F for optimal results, and lightly dust surfaces with flour to prevent sticking during shaping.

Preparing the Dough

Thaw the dough in the fridge or at room temperature. Let it rest to relax the gluten, then gently shape into desired form without overworking the dough.

3.1 Thawing the Dough

Thaw Whole Foods pizza dough in the fridge for 3-5 days or at room temperature for a few hours. Once thawed, let it rest to relax the gluten. Gently separate into desired portions and cover with a lightly damp cloth to prevent drying. Preheat the oven to 450°F and bake the naked dough for 7 minutes before adding toppings for a crispy base.

3.2 Kneading and Shaping

Gently knead the thawed dough on a lightly floured surface until smooth and elastic. Handle with care to avoid tearing. Shape into your desired pizza form, either by stretching or rolling. Cover with a lightly damp cloth and let rest for a few minutes before placing on a prepared baking surface for a perfectly formed crust.

Proofing the Dough

Allow the dough to rest at room temperature, covered lightly, until it relaxes and becomes easier to shape. This step ensures even proofing and a light crust texture.

4.1 Allowing the Dough to Rest

Place the dough on a lightly floured surface, cover it with plastic wrap or a damp cloth, and let it rest for 10-15 minutes. This allows the gluten to relax, making the dough easier to shape and ensuring a smooth, even texture when forming the crust. Resting is crucial for achieving the perfect pizza base.

4.2 Shaping the Dough into a Crust

Gently press the dough to release air bubbles, then use your hands or a rolling pin to shape it into a circle or rectangle. Place it on a floured surface or pizza peel, ensuring even thickness. Handle the dough lightly to avoid tearing. Aim for a uniform crust thickness to ensure it cooks evenly when baked.

Oven Preparation

Preheat your oven to 450°F (230°C) and ensure the baking surface, such as a pizza stone or steel, is inside to heat evenly. This step ensures a crispy crust.

5.1 Preheating the Oven

Preheat your oven to 450°F (230°C) and place a lightly floured pizza stone or steel inside to heat evenly. Allow the oven to preheat for at least 30 minutes to ensure optimal heat distribution. This step is crucial for achieving a crispy crust and even cooking. Proper preheating ensures the dough cooks quickly and evenly when placed inside.

5.2 Setting Up the Baking Surface

Place the dough on a lightly floured pizza peel or a parchment-lined baking sheet. Sprinkle a pinch of cornmeal or flour on the surface to prevent sticking. If using a pizza stone, position it in the oven during preheating. For a crispy crust, ensure the surface is evenly dusted and free of excess flour. This setup ensures smooth transfer and even cooking of the dough.

Baking the Dough

Bake the dough in a preheated oven at 425-450°F for 7-12 minutes, or until golden brown. Use a pizza stone for a crisper crust and even cooking.

6.1 Baking Time and Temperature

Preheat the oven to 425-450°F (220-230°C). Bake the dough for 7-12 minutes, or until the crust is golden brown and the edges are crispy. Monitor closely to avoid overcooking.

6.2 Checking for Crust Readiness

Check the crust by ensuring it’s golden brown and crispy. Look for a well-cooked edge and a firm base. Avoid overcooking, as it can make the crust dry. Use visual cues like a lightly charred bottom and bubbly cheese to confirm readiness. Rotate the pizza midway for even cooking and check the crust’s texture before removing it from the oven.

Adding Toppings

Add toppings to your Whole Foods pizza dough. Spread sauce evenly, layer cheese, and add your favorite toppings. Ensure toppings are balanced for flavor and texture.

7.1 Layering Toppings Effectively

Start with a thin layer of sauce, leaving a small border around the edges. Add a sprinkle of cheese for even melting, then top with vegetables, meats, or herbs. Avoid overloading, as this can make the crust soggy. Distribute toppings evenly to ensure balanced flavor and texture in every bite. Finish with a light sprinkle of cheese on top for extra flavor and moisture retention during baking.

7.2 Balancing Flavors and Textures

Combine savory ingredients like meats or olives with fresh herbs for brightness. Pair soft cheeses like mozzarella with crisp vegetables for texture contrast. Avoid clashing flavors by grouping toppings with complementary profiles. A light drizzle of olive oil or balsamic glaze can enhance the overall taste. Experiment with seasonal ingredients to create a well-rounded and satisfying flavor experience that complements the crust’s natural goodness.

Cooking the Topped Pizza

Preheat your oven to 450°F; Place the topped pizza on a baking sheet or stone. Bake for 8-12 minutes, until the crust is golden and cheese is bubbly. Remove and let cool slightly before slicing and serving.

8.1 Baking Time for Topped Pizza

Bake the topped pizza in a preheated oven at 425-450°F for 8-12 minutes. The crust should be golden, and the cheese should be bubbly and slightly browned. Keep an eye on the pizza during the last few minutes to ensure it doesn’t overcook. Proper baking time ensures a crispy crust and perfectly melted toppings for a delicious homemade pizza.

8.2 Monitoring the Pizza

Monitor the pizza closely while it bakes to ensure even cooking and prevent burning. Check the crust for a golden-brown color and the cheese for a bubbly, slightly browned texture. Rotate the pizza halfway through baking for consistent results. Proper monitoring ensures the pizza cooks evenly, avoiding hot spots and overcooking, resulting in a perfectly cooked crust and toppings every time;

Achieving a Well-Done Crust

Achieve a well-done crust by broiling for crispiness and ensuring even cooking. Check for a golden-brown crust and bubbly cheese, baking at 450°F for 7-12 minutes.

9.1 Broiling for Crispiness

Broiling enhances crust crispiness by exposing the dough to high heat. Place the pizza under the broiler for 1-2 minutes, watching closely to avoid burning. The crust should turn golden brown with a crunchy texture. This step adds a smoky flavor and ensures the base is well-done, complementing the toppings perfectly for a satisfying finish.

9.2 Ensuring Even Cooking

To achieve even cooking, rotate the pizza halfway through baking and use a baking steel or stone for consistent heat distribution. Monitor the oven temperature and ensure the crust is golden brown on all sides. This method ensures the dough cooks uniformly, delivering a crispy texture and well-cooked base for your toppings, enhancing both flavor and texture throughout the pizza.

Cooling and Serving

Let the pizza cool slightly before slicing to preserve crispiness. Serve warm, garnished with fresh herbs or a drizzle of olive oil for enhanced flavor and presentation.

10.1 Cooling the Pizza

Allow the pizza to cool for a few minutes on a wire rack to preserve crispiness. This prevents sogginess and ensures the crust stays firm. Letting it rest briefly enhances flavor distribution and texture.

10.2 Serving Suggestions

Once cooled slightly, slice the pizza and serve immediately; For a simple yet satisfying meal, pair it with a fresh green salad or garlic knots. Consider adding a drizzle of olive oil or balsamic glaze for extra flavor. You can also offer a variety of dips like marinara or ranch on the side for added enjoyment. This makes for a well-rounded and delicious dining experience.

Tips for Better Results

For better results, ensure the dough is at room temperature before shaping. Lightly flour your surface and avoid overloading with toppings for a crispy crust. Preheat your oven thoroughly and bake until golden brown.

11.1 Handling the Dough Gently

Handle the dough gently to avoid tearing and overworking. Let it rest after thawing to relax the gluten. Use a lightly floured surface for shaping, and avoid excessive stretching. This ensures a tender, even crust. Preheat your oven thoroughly and bake until golden brown for the best results.

11.2 Experimenting with Toppings

Experiment with toppings to create unique flavor combinations. Start with a light layer of sauce and cheese, then add meats, vegetables, or herbs. Balance flavors and textures to avoid sogginess. Try pairing classics like pepperoni with fresh arugula or prosciutto for a gourmet twist. Keep toppings simple to showcase the dough’s natural taste, ensuring a crispy crust every time.

Storage and Leftovers

Store leftover pizza in an airtight container in the refrigerator for up to 3 days; Freeze the dough for later use, ensuring it’s tightly wrapped to maintain freshness.

12.1 Storing Cooked Pizza

Cool the pizza completely before storing in an airtight container in the refrigerator for up to 3 days. For longer freshness, wrap slices tightly in plastic wrap or aluminum foil. Reheat gently in the oven or microwave when ready to serve. Always check for spoilage before consuming leftovers, ensuring the pizza remains fresh and safe to eat.

12.2 Freezing the Dough

Whole Foods pizza dough can be frozen for up to 3 months. Divide the dough into desired portions, wrap tightly in plastic wrap or aluminum foil, and place in a freezer-safe bag. When ready to use, thaw in the refrigerator overnight or at room temperature for a few hours. Freezing preserves freshness and ensures convenient future use for homemade pizza creations.

Whole Foods pizza dough simplifies homemade pizza creation, offering convenience and quality. Follow these steps for a delicious, customizable meal every time with minimal effort required.

13.1 Summary of Key Steps

Thaw the dough, knead gently, and let it rest before shaping into a crust. Preheat the oven, bake the dough, add toppings, and cook until crispy. Monitor for even cooking, ensure the crust is golden, and let the pizza cool slightly before serving. These steps ensure a delicious homemade pizza using Whole Foods dough efficiently and effectively every time.

13.2 Final Tips for Success

Always preheat the oven fully, handle dough gently to avoid tearing, and avoid overloading with toppings. Use a pizza stone for crispiness and monitor baking closely to prevent burning. Experiment with flavors but keep it balanced. Let the pizza cool slightly before slicing for clean cuts. These tips ensure a perfect, flavorful homemade pizza every time using Whole Foods dough.

Categories
Instructions

dolphin premier instruction manual

Welcome to the Dolphin Premier Instruction Manual, your comprehensive guide for the Maytronics Dolphin Premier robotic pool cleaner. This 78-page manual covers understanding features, proper usage, maintenance, troubleshooting, and essential safety guidelines.

1.1 Overview of the Dolphin Premier Robotic Pool Cleaner

The Dolphin Premier is a high-efficiency robotic pool cleaner designed for optimal performance. It features advanced navigation, robust construction, and eco-friendly operation, making it ideal for various pool surfaces and shapes. This device simplifies pool maintenance, ensuring a clean and safe swimming environment with minimal effort required from the user.

1.2 Importance of Following the Instruction Manual

Adhering to the Dolphin Premier Instruction Manual ensures safe and efficient operation, prevents damage, and prolongs the cleaner’s lifespan. It provides clear guidelines for assembly, maintenance, and troubleshooting, helping users avoid common mistakes. Following the manual also ensures compliance with safety standards and warranty terms, guaranteeing optimal performance and reliability.

Technical Specifications of the Dolphin Premier

The Dolphin Premier features advanced robotic technology with precise dimensions, optimal weight, and efficient power consumption, ensuring reliable and effective pool cleaning performance.

2.1 Key Features and Capabilities

The Dolphin Premier boasts advanced robotic technology, dual-motor power for quiet operation, and efficient 3D mapping for full pool coverage. It includes adjustable cycle times, multiple filtration options, and customizable cleaning modes to suit various pool sizes and shapes, ensuring thorough and efficient cleaning performance.

2.2 Dimensions, Weight, and Power Requirements

The Dolphin Premier measures 19.5 x 19 x 12 inches and weighs approximately 22 pounds, ensuring portability. It operates on 180W of power, making it energy-efficient. Designed for pools up to 50 feet in length, it balances performance with low energy consumption, suitable for various pool sizes while maintaining reliability and effectiveness in cleaning operations.

Assembly and Installation

This section guides you through unboxing, inventorying components, and step-by-step assembly. Proper installation ensures optimal performance and longevity of your Dolphin Premier cleaner.

3.1 Unboxing and Inventory of Components

Begin by carefully unboxing the Dolphin Premier and verifying all components. Ensure the robotic cleaner, power supply, cable, filters, and brushes are included. Refer to the provided inventory list to confirm completeness. Handle each part with care to avoid damage during assembly and installation. Proper organization ensures a smooth setup process for your pool cleaner.

3.2 Step-by-Step Assembly Process

Start by connecting the power supply to the robotic cleaner. Attach the cable to the device, ensuring a secure fit. Next, install the filters and brushes according to the manual’s guidelines. Finally, test the cleaner in a small area to ensure proper function. Follow all safety precautions during assembly to avoid damage or operational issues.

3.3 Initial Installation and Setup

Place the Dolphin Premier in the pool, ensuring the power supply is off. Connect the cable to the cleaner and plug it into a nearby outlet. Turn on the power and test the device in a small area to confirm proper function. Refer to the manual for detailed setup instructions to ensure optimal performance and safety during initial use.

Operating the Dolphin Premier

Understand the control panel, operation modes, and scheduling options. Learn to navigate various pool surfaces and shapes efficiently for optimal cleaning performance and convenience.

4.1 Understanding the Control Panel and Settings

Familiarize yourself with the Dolphin Premier’s control panel, featuring intuitive buttons for mode selection, timer settings, and navigation controls. Adjust settings to customize cleaning cycles, choose between manual or automatic modes, and optimize performance based on pool size and shape for efficient operation. Ensure proper functionality by following the manual’s guidelines carefully.

4.2 Operation Modes and Scheduling

The Dolphin Premier offers multiple operation modes, including quick clean, standard clean, and enhanced clean. Use the scheduling feature to set your preferred cleaning time, ensuring your pool remains spotless. Program daily or weekly cycles to maintain efficiency and convenience, allowing the cleaner to operate independently without constant monitoring. This feature enhances performance and prolongs the device’s lifespan. Follow manual guidelines for optimal scheduling.

4.3 Navigating Different Pool Surfaces and Shapes

The Dolphin Premier excels on various pool surfaces, including concrete, fiberglass, and vinyl. Its advanced navigation system adapts to diverse shapes, from rectangular to oval and irregular designs. Regularly inspect the pool floor for debris to ensure smooth operation. The cleaner’s intelligent algorithms optimize coverage, guaranteeing thorough cleaning regardless of pool complexity or surface type. Follow manual guidelines for surface preparation and maintenance. This ensures efficient performance across all configurations. Proper setup enhances navigation accuracy, maximizing cleaning efficiency. Regular maintenance extends the cleaner’s lifespan and ensures consistent results. Adjust settings as needed for unique pool layouts. This ensures optimal performance and longevity. Always refer to the manual for specific adjustments and recommendations. Proper care ensures the Dolphin Premier continues to deliver exceptional results. Regular inspections and maintenance are key to maintaining its effectiveness. By following these guidelines, you can enjoy a pristine pool with minimal effort. The Dolphin Premier’s versatility makes it suitable for a wide range of pool setups. Its advanced features ensure thorough cleaning, regardless of shape or size. Keep your pool clean and well-maintained with ease. The Dolphin Premier is designed to handle diverse pool environments effortlessly. Ensure your pool remains spotless with this reliable cleaner. Follow the manual’s instructions for optimal performance. The Dolphin Premier’s adaptability ensures it performs well in any pool setup. Regular maintenance and proper setup are crucial for its effectiveness. Enjoy a clean, well-maintained pool with the Dolphin Premier. Its advanced features and versatility make it an excellent choice for various pool types. Refer to the manual for detailed guidance on navigating different surfaces and shapes. This ensures the cleaner operates at its best. Proper care and maintenance will extend the life of your Dolphin Premier. Keep your pool clean and enjoy the benefits of this efficient cleaner. The Dolphin Premier is designed to handle diverse pool environments with ease. Follow the manual’s instructions for optimal performance. Regular maintenance ensures the cleaner continues to deliver exceptional results. Enjoy a pristine pool with minimal effort using the Dolphin Premier.

Maintenance and Cleaning

Regularly clean the filter and inspect wearable parts for optimal performance. Proper winterization ensures longevity. Follow the manual’s guidelines for effective maintenance and cleaning routines.

5.1 Regular Cleaning of the Filter and Brushes

Regularly clean the Dolphin Premier’s filter and brushes to ensure optimal performance. Remove and rinse debris from the filter cartridge weekly. Inspect and clean brushes, ensuring they rotate freely. This maintenance prevents clogs and enhances cleaning efficiency. Refer to the manual for detailed steps on disassembling and reassembling these components safely and effectively.

5.2 Checking and Replacing Wearable Parts

Regularly inspect wearable parts like brushes, tracks, and impeller for wear. Replace brushes every 6-12 months or when bristles are worn. Check tracks for damage and align them if misaligned. Clean or replace the impeller if clogged. Refer to the manual for part numbers and replacement procedures to ensure optimal performance and longevity of your Dolphin Premier cleaner.

5.3 Winterization and Storage Tips

Drain all water from the Dolphin Premier and clean the filter thoroughly. Store the unit in a dry, cool place away from direct sunlight. Ensure all parts are free from debris and moisture to prevent damage. Regularly inspect stored components for wear or mold. Consult the manual for specific winterization steps to maintain optimal condition during off-season storage.

Troubleshooting Common Issues

Troubleshoot by checking error codes, cleaning the filter, and ensuring proper power supply. Address blockages in the impeller and inspect wearable parts for damage or wear. Restart the cleaner after resolving issues.

6.1 Identifying and Resolving Error Codes

Consult the manual for specific error codes and their meanings. Check the power supply and ensure the cable is properly connected. Clear blockages in the impeller and clean the filter. Restart the cleaner after resolving issues. If problems persist, contact customer support for further assistance or potential service needs.

6.2 Addressing Performance Problems

Regularly clean the filter and brushes to ensure optimal performance. Check for blockages in the impeller and clear them as needed. Verify that the power supply and cable connections are secure. If issues persist, restart the cleaner or contact customer support for assistance or potential servicing.

Safety Precautions and Guidelines

Always ensure the power is off before cleaning or maintaining the Dolphin Premier. Keep children and pets away during operation. Avoid using in thunderstorms and ensure the area is clear of obstacles.

7.1 General Safety Tips for Users

Always disconnect the Dolphin Premier from power before handling. Ensure the pool area is obstacle-free to prevent damage. Avoid operating during thunderstorms. Regularly inspect the unit for wear and tear. Keep children and pets at a safe distance when the cleaner is active. Follow all guidelines to ensure safe and effective operation.

7.2 Precautions for Children and Pets

Ensure the power is off and the cable is unplugged before handling. Keep children and pets away while the Dolphin Premier operates. Avoid letting kids play with the cleaner or its parts. Supervise interactions and secure the pool area to prevent accidents. Prioritize their safety to avoid potential hazards.

Upgrades and Accessories

Enhance your Dolphin Premier with compatible upgrades like additional brushes and filters. Explore recommended accessories from Maytronics for optimized performance and longevity of your pool cleaner.

8.1 Compatible Upgrades for Enhanced Performance

Upgrade your Dolphin Premier with genuine Maytronics parts. Replace worn brushes or add a larger debris bag for improved efficiency. Additionally, advanced filtration systems and navigation upgrades are available to optimize cleaning performance for various pool sizes and shapes. These upgrades ensure your cleaner runs smoothly, extending its lifespan and effectiveness. Regularly check for compatible accessories to maintain peak functionality.

8.2 Recommended Accessories for Optimal Use

Enhance your Dolphin Premier experience with recommended accessories. These include replacement filters, cleaning kits, and Swivel Cord to prevent tangles. Use a transport caddy for easy mobility and storage. Additionally, consider a remote control for manual navigation and a screen filter to improve debris collection. These accessories ensure optimal performance and extend the longevity of your robotic pool cleaner.

Warranty and Customer Support

The Dolphin Premier is backed by a comprehensive warranty. For assistance, contact Maytronics customer service via phone or email. Refer to the manual for detailed warranty terms.

9.1 Understanding the Warranty Terms

The Dolphin Premier’s warranty offers coverage for defective parts and labor. The warranty period varies by component, with some parts covered up to three years. Proper registration and maintenance are required to uphold warranty validity. Refer to the manual for specific terms and conditions to ensure full coverage benefits are maintained effectively.

9.2 Contacting Customer Service

For assistance with your Dolphin Premier, contact Maytronics customer service via phone, email, or through their official website. Have your product serial number ready for efficient support. Visit the support page for contact details and troubleshooting resources to resolve issues quickly and effectively.

By following this manual, you’ll optimize your Dolphin Premier’s performance. Proper maintenance ensures longevity and efficiency, providing years of reliable pool cleaning and satisfaction.

10.1 Final Tips for Maximizing Dolphin Premier Efficiency

Regularly clean filters, inspect wearable parts, and schedule maintenance to ensure optimal performance. Avoid pool surface obstacles and store the cleaner properly during off-seasons for longevity and efficiency.

10.2 Encouragement for Proper Usage and Maintenance

Consistently follow the manual’s guidelines for optimal performance and longevity. Regularly maintain filters, inspect wearable parts, and store the cleaner properly. This ensures efficient cleaning and extends the product’s lifespan, providing years of trouble-free operation for your pool.

Categories
Instructions

knex instruction

Welcome to the world of Knex, where creativity meets precision! Knex instructions are essential guides for building intricate models, from roller coasters to animals, fostering problem-solving skills and imagination․

1․1 Overview of Knex Building Sets

Knex building sets are versatile construction toys that inspire creativity and problem-solving skills․ These sets consist of rods, connectors, and other components that allow users to build a wide variety of models, from simple structures to complex mechanisms․ With sets like the 70 Model Building Set or the Classic Amusement Park Rides, users can create up to 70 different models, including vehicles, animals, and even functional roller coasters․ Each set comes with detailed instructions, guiding builders through step-by-step assembly․ Whether you’re a beginner or an experienced builder, Knex sets cater to all skill levels, offering endless possibilities for imaginative and educational projects․

1․2 Importance of Instructions in Knex Projects

Knex instructions are indispensable for ensuring successful and enjoyable building experiences․ They provide clear, step-by-step guidance, helping users navigate complex constructions with precision․ Whether you’re assembling a simple model or a intricate roller coaster, instructions act as a blueprint, minimizing errors and frustration․ For beginners, they offer a foundational understanding of how Knex pieces interact, while experienced builders rely on them to refine their skills․ Instructions also enhance the educational value of Knex, teaching problem-solving, spatial reasoning, and mechanical principles․ By following these guides, builders can unlock their creativity and bring their visions to life, making instructions an essential tool for every Knex project․

Types of Knex Instructions

Knex instructions come in two primary forms: official manuals, offering detailed step-by-step guides for specific models, and user-created designs, providing unique building ideas and inspiration․

2․1 Official Knex Instruction Manuals

Official Knex instruction manuals are comprehensive guides designed to help users build specific models with precision․ These manuals are typically included with Knex sets and provide detailed, step-by-step instructions for assembling everything from simple structures to complex creations․ They often feature clear diagrams and visual aids to ensure clarity, making them accessible to both beginners and experienced builders․ Official manuals cover a wide range of Knex products, including roller coasters, amusement park rides, and vehicles․ Many manuals are also available for download from Knex’s official website or fan-created databases, ensuring users can easily access instructions for both new and discontinued sets․ These resources are invaluable for achieving professional-looking results and mastering Knex building techniques․

2․2 User-Created Knex Instructions

User-created Knex instructions offer a vibrant and diverse array of building guides crafted by enthusiasts worldwide․ These manuals often showcase unique, imaginative designs that go beyond official sets, such as custom roller coasters, intricate animals, and innovative vehicles․ Shared on forums, websites, and social media, these instructions provide step-by-step guidance for replicating fan-favorite models․ Many creators include photos, diagrams, and tips to enhance the building experience․ This collaborative spirit fosters a sense of community, encouraging builders to experiment and share their own creations․ User-created instructions are a testament to the creativity and ingenuity of the Knex fan base, offering endless inspiration for builders of all skill levels․ They also fill gaps for discontinued or hard-to-find official manuals, ensuring accessibility to a wide range of Knex projects․

Popular Knex Models and Their Instructions

Explore iconic Knex models like roller coasters, animals, and vehicles, each with detailed instructions․ From the Amazin8 Roller Coaster to the Knex Stingray, creativity knows no bounds․

3․1 Knex Roller Coasters and Amusement Park Rides

Knex roller coasters and amusement park rides are among the most popular and complex models to build․ The Amazin8 Roller Coaster and Serpents Spiral Coaster are fan favorites, offering detailed instructions for intricate designs․ These sets often include hundreds of pieces and multi-page manuals, guiding builders through loops, drops, and other thrilling features․ The instructions emphasize precision, ensuring that every track and support structure is perfectly aligned․ Building these models enhances problem-solving skills and patience, while the finished creations provide endless entertainment․ Whether you’re constructing a classic coaster or a futuristic themed ride, Knex instructions make it possible to bring your amusement park visions to life․ Start your next adventure with these step-by-step guides!

3․2 Knex Animals and Creatures

Knex animals and creatures offer a fun way to explore wildlife through building․ Models like the Knex Stingray and various creature kits provide detailed instructions for crafting lifelike designs․ These sets often feature movable parts, allowing for interactive creations․ The instructions guide users in constructing everything from simple animals to complex creatures with realistic details․ Building these models enhances creativity and fine motor skills while fostering an appreciation for nature․ Whether it’s a serpent, a bird, or a mammal, Knex instructions make it easy to bring animals to life․ This category is perfect for animal lovers and those looking to combine creativity with education․ Start building your wildlife collection today!

3․3 Knex Vehicles and Cars

Knex Vehicles and Cars provide an engaging platform for crafting detailed models, from sleek sports cars to vintage designs․ Popular sets include the Knex Lamborghini Sian, Knex F-22, and classic roadsters, each offering a unique building experience․ The instructions are designed to be user-friendly, guiding creators through assembling intricate parts like engines, wheels, and suspension systems․ These models promote STEM learning by introducing basic engineering principles․ Builders of all skill levels can enjoy constructing realistic vehicles, fostering creativity and enhancing fine motor skills․ Knex cars are a great way to explore automotive design while having fun․ With a variety of models available, there’s something for every car enthusiast to enjoy․

Educational Uses of Knex Instructions

Knex instructions enhance STEM learning by teaching engineering, math, and science concepts through hands-on building, fostering creativity and problem-solving skills in an engaging way․

4․1 Knex in STEM Education

Knex instructions play a vital role in STEM education by providing hands-on learning experiences․ Students can explore engineering principles, such as tension, compression, and balance, through structured builds․ Knex sets are widely used in classrooms to teach problem-solving and critical thinking․ By following detailed instructions, learners develop spatial awareness and understand how components interact․ These activities also introduce basic physics concepts, such as motion and forces, making complex ideas accessible․ Group projects with Knex foster collaboration, preparing students for real-world engineering challenges․ The step-by-step guidance in Knex instructions ensures that even complex models are achievable, building confidence and encouraging innovation․

4․2 Knex for Math and Science Projects

Knex instructions are a powerful tool for math and science education, offering hands-on projects that make abstract concepts tangible․ By following step-by-step guides, students can explore geometry through shape construction and mechanics by building moving parts․ Knex models, such as roller coasters, introduce principles of motion, forces, and energy․ Instructions for creating bridges or towers demonstrate structural integrity and stress distribution․ Math skills are reinforced through measurement and ratio applications, while science concepts like potential and kinetic energy are illustrated․ These projects encourage experimentation and critical thinking, making Knex a versatile resource for engaging students in practical, interactive learning experiences․

Knex instructions provide a comprehensive guide for creating intricate models, fostering creativity and problem-solving skills․ They cater to various interests, from roller coasters to animals, ensuring endless fun and learning․

5․1 Final Thoughts on Knex Instructions

Knex instructions are invaluable for both simple and complex projects, serving as a bridge between creativity and execution․ They cater to all skill levels, ensuring that users can bring their imaginative ideas to life with precision․ Whether you’re constructing a roller coaster, an animal, or a vehicle, these guides offer clear, step-by-step directions, making even the most daunting tasks manageable․ The availability of both official and user-created instructions adds versatility, allowing builders to explore diverse themes and models․ Knex instructions not only enhance the building experience but also foster learning, creativity, and problem-solving skills, making them an essential tool for enthusiasts and educators alike․

5․2 Encouragement to Explore Knex Building

Knex building is a rewarding and creative hobby that encourages imagination, problem-solving, and hands-on learning․ With a vast library of instructions available, both beginners and experienced builders can explore countless projects, from simple models to intricate designs․ Whether you’re interested in constructing roller coasters, animals, or vehicles, Knex provides endless opportunities for innovation․ The availability of official and user-created guides ensures that there’s always something new to discover․ Knex building is not just a pastime but also a valuable educational tool, fostering STEM skills and creativity․ So, dive into the world of Knex, experiment with different models, and let your imagination run wild․ Start building today and see where your creativity takes you!

Categories
Instructions

renpho massage gun instructions

Product Overview

The Renpho Massage Gun is a cordless, handheld device designed for muscle relief and recovery. It features multiple speed settings and interchangeable massage heads for targeted therapy, ensuring a customizable experience for users seeking to alleviate muscle tension and improve circulation.

1.1 Key Features of the Renpho Massage Gun

The Renpho Massage Gun boasts a sleek, ergonomic design with multiple speed settings, offering customizable massage experiences. It features interchangeable massage heads, including options for deep tissue, soft, and targeted relief. A built-in heating function enhances relaxation, while its cordless design ensures portability. The device is equipped with a powerful motor for effective percussion therapy, making it ideal for muscle recovery and pain relief. Its compact size and silent operation add to its versatility for home or travel use.

1.2 Included Accessories and Components

The Renpho Massage Gun comes with a variety of accessories to enhance its functionality. These include multiple interchangeable massage heads, such as the round head for full-body use, the flat head for larger areas, and the bullet head for deep tissue massage. Additionally, the package typically includes a Type-C charging cable, an adapter, a user manual, and a storage case for convenient travel. These components ensure a comprehensive and effective massage experience tailored to individual needs.

Safety Precautions

Use only the original charger and attachments provided. Avoid water exposure and consult a doctor before use if you have medical conditions. The device may overheat.

2.1 General Safety Guidelines

Read all instructions before use. The Renpho Massage Gun is for individuals aged 8 and above. Children should be supervised by adults. Avoid using near water or in humid environments. Do not use if you have a pacemaker or other implanted medical devices. Consult a doctor if you have severe injuries, fractures, or circulatory disorders. Use only the original charger and attachments provided. The device may automatically turn off if it overheats. Ensure the area is clean and dry before use. Always follow the recommended usage guidelines.

2.2 Contraindications for Use

The Renpho Massage Gun should not be used by individuals with certain medical conditions. Avoid using it over open wounds, fractures, or areas with severe inflammation. It is not recommended for use during pregnancy, on the abdomen, or near implanted medical devices like pacemakers. Individuals with circulatory disorders, deep vein thrombosis, or sensitive skin conditions should consult a healthcare professional before use. Additionally, it is not suitable for use on the neck or carotid artery area due to the risk of injury.

Assembly and Parts

The Renpho Massage Gun comes with a host device, multiple interchangeable massage heads, a Type-C charging cable, and a user manual. Attach the desired head by rotating it until it clicks securely into place.

3.1 How to Assemble the Massage Gun

To assemble the Renpho Massage Gun, start by ensuring all components are included in the package. Attach the desired massage head by aligning it with the host device and rotating it clockwise until it clicks securely into place. No additional tools are required. The device is designed for easy assembly, allowing users to switch between different massage heads effortlessly. Always refer to the user manual for specific guidance and ensure all parts are properly secured before use.

3;2 Understanding the Attachments and Heads

The Renpho Massage Gun comes with multiple interchangeable attachments designed for specific massage techniques. Common heads include a round head for large muscle groups, a bullet head for deep tissue massage, and a flat head for sensitive areas. Each attachment is detachable and easy to swap, allowing users to customize their massage experience based on the muscle group being targeted. The attachments are made from durable materials and are designed for optimal comfort and effectiveness during use.

Operating Instructions

Press the power button to turn on the Renpho Massage Gun. Select a massage head, attach it securely, and adjust speed settings for personalized therapy. Ensure proper technique for best results.

4.1 How to Turn On and Use the Device

To use the Renpho Massage Gun, press the power button to turn it on. Select a massage head, attach it securely by rotating until it clicks. Choose from multiple speed settings based on your preference. For optimal use, apply the device to the target muscle area with gentle pressure. Use it for 30 seconds pre-workout to activate muscles or 2 minutes post-workout to reduce soreness. Avoid bony areas or sensitive regions for comfort and safety. Regular use can enhance muscle recovery and relaxation.

4.2 Adjusting Speed Settings

Press the power button to cycle through the Renpho Massage Gun’s speed settings. Most models offer 3 to 5 adjustable speeds, catering to different muscle tension levels. Start with a lower setting for gentle massages and increase as needed. The device typically emits a beep or changes LED indicators when switching speeds. Use consistent, smooth strokes for optimal results. Adjusting the speed allows for a personalized massage experience, ensuring effective muscle relief and comfort during use.

Maintenance and Care

Regularly clean the Renpho Massage Gun with a damp cloth and avoid submerging it in water. Use only the original charger to prevent damage and store it in a dry place for optimal performance.

5.1 Cleaning the Massage Gun

To maintain the Renpho Massage Gun’s performance, clean it regularly with a soft, dry cloth. For tougher dirt, use a slightly damp cloth but avoid submerging the device in water. Never use harsh chemicals or abrasive cleaners, as they may damage the surface. Pay special attention to the massage heads and handle, ensuring no debris accumulates. Allow the gun to air dry after cleaning to prevent moisture buildup. Regular cleaning helps maintain hygiene and ensures optimal functionality.

5.2 Storage and Travel Tips

Store the Renpho Massage Gun in a cool, dry place, away from direct sunlight. Use the provided storage box to protect the device and its accessories. For travel, pack the gun in a protective case or bag to prevent scratches or damage. Avoid leaving the battery fully discharged for extended periods, as it may affect performance. When traveling, ensure the device is turned off and securely packed to avoid accidental activation. Proper storage and handling ensure longevity and maintain the device’s functionality during trips.

Troubleshooting Common Issues

Common issues include low battery, improper massage head attachment, and overheating. Ensure the device is fully charged, heads are securely attached, and allow it to cool if overheated.

6.1 Resolving Battery and Charging Problems

If the battery indicator flashes red, the device is in low battery mode. Charge using the original Renpho charger for 2-3 hours until the indicator turns blue. Ensure the charger is properly connected and avoid overcharging, as this can damage the battery. If issues persist, check for debris in the charging port or contact support. Always use Renpho-approved chargers to maintain optimal performance and safety.

Frequently Asked Questions

Common questions include how to use the device, compatible attachments, and battery life. Refer to the manual for detailed guidance on operation and maintenance.

7.1 General Usage and Functionality

The Renpho Massage Gun is designed for muscle relief and recovery through percussion therapy. It features multiple speed settings for customization and interchangeable massage heads for targeted therapy. Suitable for use on various muscle groups, the device is cordless and portable, making it ideal for home or travel. It is recommended to use the gun for 30 seconds pre-workout and up to 2 minutes post-workout for optimal results. Always use original chargers and attachments to ensure safety and functionality.

Advanced Features

The Renpho Massage Gun includes a built-in heating function for enhanced relaxation, multiple speed settings, and an ergonomic design for easy use on hard-to-reach areas.

8.1 Built-In Heating Function

The Renpho Massage Gun features a built-in heating function designed to enhance muscle relaxation and relieve tension. This advanced feature warms the massage head, providing soothing heat therapy that complements the percussion massage. To activate, press and hold the power button for 3 seconds until the indicator light changes color. The heating function works in conjunction with the selected speed setting, offering a deeper and more comforting massage experience. It automatically turns off after 10 minutes to prevent overheating, ensuring safe and efficient use. This feature is particularly beneficial for relieving chronic muscle pain and stiffness.

Battery and Charging

Renpho Massage Gun has a rechargeable lithium-ion battery with 2500mAh capacity. Use the provided 5V/2A charger for safe charging, avoiding third-party adapters to ensure longevity.

9.1 Charging Instructions

To charge your Renpho Massage Gun, use the provided Type-C charging cable and 5V/2A adapter. Plug the adapter into a power source and insert the cable into the device’s charging port. The LED indicator will light up to confirm charging. Avoid using third-party chargers to prevent damage. Charge for 2-3 hours until the indicator turns off. Do not overcharge, as this may reduce battery life. Store the device in a cool, dry place when not in use. Always charge when the battery level is low to maintain optimal performance.

Comparing Renpho Models

Renpho offers various models like RP-GM171, RF-GM168, and RP-ALM079, each differing in design, speed settings, and attachments, catering to diverse user preferences and massage needs effectively.

10.1 Popular Models and Their Differences

Renpho offers several popular models, each with unique features. The RP-GM171 boasts a built-in heating function for enhanced relaxation, while the RF-GM168 is praised for its quiet operation. The RP-ALM079 stands out with its lightweight design and extended battery life, making it ideal for travel. The RF-GM169 features a compact build and advanced speed controls, whereas the R-C007 includes an ergonomic extension handle for hard-to-reach areas. These models cater to different preferences, ensuring users can choose the best fit for their massage therapy needs.

Health Benefits

The Renpho Massage Gun promotes muscle recovery, alleviates pain, and enhances circulation. Regular use can reduce muscle tension and improve overall well-being through targeted therapy sessions.

11.1 Muscle Recovery and Pain Relief

The Renpho Massage Gun is designed to enhance muscle recovery and provide effective pain relief. Its percussion therapy stimulates blood flow, reducing muscle soreness and tension. Regular use can alleviate stiffness, improve flexibility, and accelerate post-workout recovery. The device’s targeted massage heads allow users to address specific areas, making it ideal for relieving chronic pain and promoting overall muscle well-being. It’s a versatile tool for both athletes and individuals seeking to manage daily muscle discomfort effectively.

The Renpho Massage Gun is a powerful, portable tool designed for muscle recovery and pain relief. With its multiple speed settings and interchangeable heads, it offers a customizable experience for users. Its ease of use, combined with its effectiveness in targeting muscle tension, makes it an excellent choice for both athletes and individuals seeking everyday relaxation. By following the provided instructions, users can maximize its benefits and enjoy improved muscle well-being. This device is a valuable investment for anyone prioritizing health and self-care.

Categories
Instructions

schedule a form 990 instructions

Schedule A (Form 990) is a required attachment for tax-exempt organizations filing Form 990‚ ensuring compliance with IRS regulations. It demonstrates public charity status‚ calculates public support percentages‚ and discloses related organizations. This form is essential for organizations classified under Section 501(c)(3) to maintain their tax-exempt status and transparency.

Overview of Schedule A

Schedule A (Form 990) is a critical attachment for tax-exempt organizations‚ particularly those classified as public charities under Section 501(c)(3). It provides detailed information about an organization’s public charity status‚ public support‚ and relationships with other entities. The schedule is divided into four main parts‚ covering public charity status‚ public support calculations‚ a support schedule‚ and supplemental information. Organizations must use consistent accounting methods and adhere to IRS guidelines when completing Schedule A. This form ensures transparency and compliance with IRS regulations‚ helping the public and the IRS assess an organization’s financial health and charitable purpose.

Purpose of Schedule A

The primary purpose of Schedule A (Form 990) is to establish and maintain an organization’s tax-exempt status as a public charity under Section 501(c)(3). It verifies an organization’s qualification for public support by calculating contributions‚ grants‚ and other revenues. Additionally‚ it discloses relationships with other organizations and ensures compliance with IRS regulations. Schedule A also provides transparency by detailing financial activities‚ helping the IRS and the public assess the organization’s operations and adherence to charitable goals. Accurate completion is vital for maintaining tax-exempt status and public trust.

Who Must File Schedule A?

Schedule A (Form 990) must be filed by tax-exempt organizations classified as public charities under Section 501(c)(3) of the Internal Revenue Code. This includes organizations that file Form 990 or Form 990-EZ and are required to demonstrate their public charity status. Private foundations‚ which are also under Section 501(c)(3)‚ do not file Schedule A. Churches‚ schools‚ hospitals‚ and other organizations automatically classified as public charities must file Schedule A. Additionally‚ supporting organizations that support public charities are required to file this schedule to comply with IRS regulations and maintain their tax-exempt status.

Understanding Public Charity Status

Public charity status is a classification under Section 501(c)(3) for organizations qualifying as public charities‚ essential for maintaining federal tax-exempt status and ensuring compliance with IRS Schedule A instructions.

Definition of Public Charity Status

Public charity status refers to tax-exempt organizations under Section 501(c)(3) that are broadly supported by the public‚ government‚ or other public charities. Unlike private foundations‚ public charities rely on diverse contributions‚ ensuring they serve a broad public benefit. This classification is crucial for maintaining tax-exempt status and meeting IRS requirements‚ as outlined in Schedule A instructions. It ensures transparency and accountability‚ distinguishing these organizations from private foundations. The definition emphasizes the organization’s reliance on public support rather than limited private funding‚ aligning with the IRS’s public support test for qualification.

Public Support Test

The public support test determines if an organization qualifies as a public charity under Section 501(c)(3). It requires demonstrating that a substantial portion of financial support comes from the public‚ government‚ or other public charities. Organizations must calculate public support percentages using Schedule A. Public support includes donations‚ memberships‚ and gross receipts from related activities. Investment income and unrelated business income are limited in this calculation. The test ensures organizations remain publicly supported‚ distinguishing them from private foundations. Meeting the 33.33% threshold is critical for maintaining public charity status and tax-exempt benefits‚ as outlined in IRS guidelines and Schedule A instructions.

Types of Public Charities

Public charities under Section 501(c)(3) include organizations like educational institutions‚ hospitals‚ churches‚ and charities that rely on public support. These entities qualify based on their mission and funding sources. For example‚ schools and hospitals serve broad communities‚ while churches and religious organizations are inherently public charities. Other types include organizations providing disaster relief‚ fostering amateur sports‚ or testing for public safety. Schedule A helps classify these charities by requiring detailed reporting on public support and activities. This ensures transparency and compliance with IRS regulations‚ maintaining their tax-exempt status and public trust.

Calculating Public Support Percentages

Public support percentages are calculated by dividing public support by total revenue‚ ensuring compliance with IRS regulations. Accuracy is crucial to maintain public charity status.

Public Support Calculation Methods

Public support is calculated by dividing public support by total revenue. Organizations must use either cash or accrual accounting methods consistently. Public support includes donations‚ grants‚ and membership fees‚ while total revenue encompasses all income sources. The IRS requires accurate reporting to ensure compliance with the public support test. Unusual grants exceeding 5% of total revenue must be reported separately to avoid distortion. Detailed records and consistent accounting practices are essential for precise calculations. This method ensures transparency and maintains public charity status‚ aligning with IRS guidelines for tax-exempt organizations. Proper documentation is crucial to avoid errors and potential penalties.

Reporting Public Support on Schedule A

Organizations must report public support on Schedule A by disclosing contributions‚ grants‚ and membership fees. Lines 1 through 12 detail public support sources‚ including donations and gross income from events. Total public support is calculated and compared to total revenue to determine public charity status. Unusual grants exceeding 5% of total revenue must be reported separately. Accurate documentation and consistent accounting methods are required to ensure compliance with IRS guidelines. This reporting demonstrates an organization’s financial transparency and adherence to public support test requirements‚ essential for maintaining tax-exempt status under Section 501(c)(3).

Investment Income Percentage

The investment income percentage on Schedule A is calculated by dividing investment income by total revenue. Organizations must report gross income from interest‚ dividends‚ and securities‚ as well as rents and royalties. This percentage is crucial for public support calculations‚ ensuring compliance with IRS guidelines. Consistent accounting methods are required to accurately reflect financial activities. Proper reporting of investment income helps maintain transparency and supports the organization’s tax-exempt status under Section 501(c)(3). Accurate documentation is essential to avoid discrepancies and ensure adherence to regulatory requirements. This section is vital for demonstrating financial accountability and public charity status.

Filing Instructions for Schedule A

Organizations must attach Schedule A to Form 990 or 990-EZ‚ ensuring accurate completion of all parts. Include the organization’s name‚ EIN‚ and required public support details. Submission must adhere to IRS guidelines and deadlines‚ with proper documentation to maintain tax-exempt status.

Part I: Public Charity Status

Part I of Schedule A requires organizations to establish their public charity status under Section 501(c)(3). They must indicate whether they are a Type I‚ Type II‚ or Type III supporting organization or qualify under the public support test. Organizations must report their public charity status accurately‚ ensuring compliance with IRS regulations. This section also requires disclosure of any related organizations and subsidiary information. Proper documentation and accurate reporting are essential to maintain tax-exempt status and avoid penalties. The information provided here must align with the organization’s determination letter and operational activities.

Part II: Public Support

Part II of Schedule A focuses on calculating an organization’s public support percentages. It requires reporting total support‚ including donations‚ grants‚ and other receipts‚ as well as gross income from unrelated businesses. Organizations must also list their five largest contributors‚ providing names‚ amounts‚ and addresses (except for individuals). Additionally‚ Part II includes a section for narrative explanations of unusual grants or contributions. This section ensures transparency and compliance with IRS public support test requirements‚ helping to verify an organization’s eligibility for public charity status. Accurate reporting is critical to maintain tax-exempt status and avoid penalties.

Part III: Support Schedule

Part III of Schedule A provides a detailed breakdown of an organization’s public support over a five-year period. It requires reporting total public support‚ including contributions‚ grants‚ and membership fees‚ as well as gross income from investment activities. The schedule also includes a section for narrative explanations of unusual grants or contributions. This part helps organizations demonstrate compliance with the public support test and maintain transparency in their financial operations. Accurate completion of Part III is essential for verifying public charity status and ensuring adherence to IRS guidelines. It complements the data reported in Part II‚ offering a comprehensive view of an organization’s financial health.

Part IV: Supplemental Information

Part IV of Schedule A provides an opportunity to include additional information or explanations that support the data reported in earlier sections. This section is optional but may be used to clarify unusual grants‚ explain specific financial entries‚ or provide context for the organization’s public support calculations. It allows organizations to address unique circumstances or elaborate on governance‚ policies‚ or other relevant details. While not required‚ Part IV can help ensure transparency and compliance‚ offering the IRS a more comprehensive understanding of the organization’s financial and operational structure. This section complements the numerical data with narrative insights.

Accounting Methods and Reporting

Organizations must use consistent accounting methods for reporting on Schedule A‚ ensuring accuracy in public support calculations and compliance with IRS guidelines and regulations.

Choosing the Correct Accounting Method

When completing Schedule A‚ organizations must select an accounting method that aligns with their financial reporting practices. The IRS requires consistency in the method used for reporting public support and expenses. Cash basis or accrual accounting can be used‚ but the chosen method must be applied uniformly across all sections of the form. Accrual accounting is often preferred for larger organizations‚ as it provides a more accurate picture of financial activities. The accounting method selected should be the same as the one reported on the organization’s Form 990 to ensure compliance and avoid discrepancies in financial disclosures.

Consistency in Reporting

Consistency in reporting is crucial when completing Schedule A (Form 990). Organizations must ensure that all financial data aligns with the accounting method chosen (cash or accrual) and is reported uniformly across the form. Discrepancies in reporting can lead to compliance issues and delays in processing. The IRS emphasizes the importance of maintaining consistency to accurately reflect an organization’s financial position and public support. Schedule A must align with the information reported on the primary Form 990‚ ensuring transparency and adherence to IRS guidelines. Proper documentation and clear explanations are essential to support the reported figures and maintain compliance.

Amending Schedule A

If errors or omissions are discovered‚ organizations must file an amended Form 990 with a corrected Schedule A. Attach Schedule O to explain the amendments made.

When to Amend Schedule A

Organizations must amend Schedule A if errors or omissions are discovered after filing. This includes inaccuracies in public support calculations‚ changes in public charity status‚ or incorrect disclosures. Amendments are also required if the IRS questions the information provided. The amended form should be filed as soon as the error is identified‚ ensuring compliance and avoiding penalties. Use Form 990 with the corrected Schedule A and attach Schedule O to explain the amendments made. Timely filing ensures transparency and maintains the organization’s tax-exempt status. Always follow IRS guidelines for amending returns to avoid further complications.

How to Amend Schedule A

To amend Schedule A‚ file a corrected Form 990 with the updated Schedule A. Include Schedule O to explain the changes made. Ensure the same accounting method used in the original filing is applied. Submit the amended form to the IRS address where the original return was filed. Clearly state the reason for the amendment and the date of the original filing. Organizations must ensure all parts of Form 990 are reviewed for accuracy during the amendment process. This ensures compliance and maintains the organization’s tax-exempt status. Always follow IRS guidelines for amended returns to avoid penalties or further scrutiny.

Additional Resources

Visit the IRS website for official guidelines‚ publications‚ and sample forms. Utilize IRS resources to ensure accurate completion of Schedule A and maintain compliance with regulations.

IRS Guidelines and Publications

The IRS provides comprehensive guidelines and publications to assist with completing Schedule A (Form 990). Visit the official IRS website for detailed instructions‚ including specific sections on public charity status and public support calculations. The IRS also offers sample forms and supplementary materials to help organizations understand the requirements. These resources include explanations of the Public Support Test‚ accounting methods‚ and reporting standards. Additionally‚ the IRS publishes updates and clarifications to ensure compliance with the latest regulations. Utilize these official resources to ensure accurate and timely filing of Schedule A.

Sample Forms and Instructions

The IRS provides sample forms and instructions to help organizations understand and complete Schedule A accurately. These resources are available on the IRS website and include filled-in examples of Schedule A for different types of organizations‚ such as churches‚ schools‚ and hospitals. The samples demonstrate how to report public support‚ calculate percentages‚ and disclose related organizations. Additionally‚ the IRS offers step-by-step guides and supplementary materials to clarify complex sections‚ ensuring compliance with filing requirements. These tools are invaluable for nonprofits and tax-exempt entities seeking to navigate the form successfully.

Categories
Instructions

science of reading small group instruction

Small group instruction in reading, guided by the Science of Reading, offers personalized learning opportunities. It allows educators to tailor teaching strategies to meet diverse student needs effectively, fostering improved literacy outcomes through targeted, evidence-based practices.

Defining the Science of Reading

The Science of Reading is an evidence-based approach to literacy instruction, focusing on how humans process written language. It emphasizes phonemic awareness, systematic phonics, fluency, and comprehension, grounded in cognitive and linguistic research. This framework prioritizes explicit teaching methods, ensuring all students develop the skills needed to read proficiently and access academic content effectively.

Understanding Small Group Instruction in Reading

Small group instruction in reading allows teachers to provide tailored support, addressing specific skill gaps and learning needs. It fosters active participation, enabling students to engage deeply with texts and strategies. This approach maximizes individualized attention, promoting accelerated progress and a stronger foundation in literacy skills through targeted, interactive lessons.

Key Principles of the Science of Reading

The Science of Reading emphasizes systematic phonics, phonemic awareness, and evidence-based instruction. It prioritizes decoding skills, vocabulary development, and comprehension strategies, ensuring all students master reading fundamentals effectively.

Systematic Phonics Instruction

Systematic phonics instruction is a cornerstone of the Science of Reading, teaching students to decode words by linking sounds to letters. It emphasizes explicit, sequential lessons on phonemic awareness, decoding, and encoding, enabling learners to read unfamiliar words confidently. This structured approach ensures all students, including struggling readers, build a strong foundation in reading, making it a critical component of effective literacy instruction.

The Role of Vocabulary in Reading Comprehension

Vocabulary knowledge is essential for reading comprehension, as it directly impacts a student’s ability to understand and interpret texts. Explicit instruction of high-frequency and domain-specific words, along with opportunities for application, enhances comprehension. Small group instruction allows teachers to model vocabulary use, provide context, and engage students in interactive activities, ensuring deeper understanding and retention of words critical to academic success and lifelong literacy.

Assessment and Data-Driven Small Group Instruction

Assessment identifies reading gaps, enabling targeted instruction. Data informs group formation and learning objectives, ensuring interventions are tailored to student needs for optimal progress and growth.

Using Assessments to Identify Reading Gaps

Assessments are crucial for pinpointing specific reading challenges. By analyzing results, educators can identify skill deficits, such as phonemic awareness or comprehension, and design targeted interventions. Regular evaluations ensure instruction aligns with student needs, fostering progress and preventing learning setbacks. Data-driven insights help create effective small group strategies, addressing gaps systematically for improved literacy outcomes.

Creating Targeted Learning Objectives for Small Groups

Targeted learning objectives are crafted using assessment data to address specific reading challenges. These objectives are clear, measurable, and aligned with individual student needs, ensuring focused instruction. By breaking down broader goals into manageable tasks, educators can tailor small group activities to build foundational skills and track progress effectively, fostering mastery and confidence in reading abilities.

Explicit Instruction in Small Group Settings

Explicit instruction involves clear explanations, modeling, and guided practice to build reading skills systematically. It ensures students understand concepts step-by-step, promoting active engagement and mastery in small groups.

Modeling Reading Strategies

Modeling reading strategies involves teachers explicitly demonstrating skills like comprehension, decoding, and fluency. Through think-aloud techniques, educators reveal their thought processes, helping students internalize these methods. Visual aids and gradual release of responsibility further enhance learning. This approach ensures students understand how to apply strategies independently, fostering confidence and proficiency in reading.

Guided and Independent Practice in Small Groups

Guided practice allows teachers to support students as they apply reading strategies, providing immediate feedback. Independent practice enables students to reinforce skills autonomously. This balanced approach ensures mastery, with small groups allowing for tailored instruction and fostering a collaborative learning environment that bridges guided support and self-directed application of reading skills.

Scaffolding Techniques for Small Group Instruction

Scaffolding provides temporary support to help students transition from teacher-led instruction to independent reading. It includes visual aids, modeling, and breaking tasks into manageable steps for better understanding.

Gradual Release of Responsibility

Gradual Release of Responsibility (GRR) is a scaffolding approach where teachers initially model reading strategies, then guide student practice with feedback, and finally allow independent application. This method ensures students build confidence and competence progressively, aligning with the Science of Reading principles to enhance literacy skills effectively in small group settings.

Using Visual Aids and Manipulatives

Visual aids and manipulatives, such as magnetic letters or phoneme cards, provide hands-on learning experiences. These tools help students visualize and interact with reading concepts, enhancing phonemic awareness and decoding skills. Interactive activities, like building words or sorting sounds, engage learners and reinforce teacher modeling, making abstract reading concepts tangible and accessible for small group instruction.

Differentiation in Small Group Instruction

Differentiation tailors reading instruction to meet varied learning needs, ensuring each student receives targeted support. It leverages diverse strategies to address individual abilities and promote equitable learning opportunities.

Addressing Diverse Learning Needs

Small group instruction allows educators to identify and cater to individual learning needs, ensuring all students receive tailored support. By incorporating evidence-based methods, teachers can address diverse abilities, learning styles, and challenges. This approach fosters an inclusive environment where every student can thrive, regardless of their unique requirements or skill levels. It emphasizes flexibility and adaptability in teaching strategies to meet the varied needs of learners effectively.

Integrating Multisensory Approaches

Integrating multisensory approaches enhances reading instruction by engaging students’ visual, auditory, and tactile learning pathways. Techniques such as using manipulatives, visual aids, and phonemic awareness activities help students connect sounds, symbols, and meanings. This method supports diverse learners, making complex concepts more accessible and fostering deeper understanding. Multisensory instruction aligns with the Science of Reading, promoting active participation and improved retention in small group settings.

Engagement and Motivation in Small Group Reading

Small group reading fosters engagement and motivation by allowing personalized interactions and tailored instruction. Students build confidence through active participation and meaningful discussions, enhancing their reading enthusiasm and progress.

Building Student Confidence

Building student confidence in small group reading involves creating a supportive environment where learners feel safe to take risks. Positive reinforcement, targeted feedback, and celebrating progress help students develop a growth mindset. Teachers foster confidence by providing opportunities for success, encouraging peer support, and ensuring each student feels valued and heard. This approach nurtures resilience and motivation, empowering students to embrace challenges and grow as readers.

Incorporating Collaborative Learning

Incorporating collaborative learning in small group reading fosters engagement and deeper comprehension. Students work together, sharing insights and strategies, which enhances critical thinking and communication skills. Peer discussions and shared reading tasks encourage active participation, while technology tools like Read Along in Classroom support collaborative practice. This approach not only strengthens reading abilities but also builds teamwork and mutual support, creating a dynamic and inclusive learning environment tailored to diverse needs.

Technology Integration in Small Group Reading Instruction

Technology enhances small group reading instruction by providing interactive digital tools and personalized learning opportunities, such as Read Along in Classroom, to support diverse learner needs effectively.

Digital Tools for Reading Practice

Digital tools, such as Read Along in Classroom, provide interactive reading experiences, enabling students to practice independently or in groups. These tools often include real-time feedback and progress tracking features, making them invaluable for personalized learning. They engage students with multimedia elements like audio support and interactive exercises, catering to diverse learning needs and fostering improved reading fluency and comprehension skills in small group settings.

Using EdTech for Personalized Learning

EdTech tools facilitate personalized learning by adapting to individual student needs, offering tailored reading experiences. These platforms use data to adjust difficulty levels and content, ensuring each learner receives relevant material. Multimedia elements, like videos and interactive exercises, enhance engagement. Teachers gain insights into student progress, enabling targeted support. This approach ensures effective, data-driven instruction, making learning more accessible and impactful for all students in small group settings.

Monitoring Progress and Adjusting Instruction

Regular formative assessments and data analysis enable teachers to track student progress and adjust instruction. This ensures tailored support, addressing specific needs and fostering continuous improvement in reading skills.

Formative Assessments in Small Groups

Formative assessments in small groups provide teachers with real-time insights into student progress. These brief, informal evaluations help identify reading gaps, allowing for immediate adjustments to instruction. Tools like exit tickets, reading checks, and observation notes enable targeted feedback. By regularly monitoring comprehension, fluency, and phonics skills, educators can refine lessons to meet individual needs, ensuring no student falls behind. This data-driven approach supports personalized learning and fosters academic growth effectively.

Reflecting on Instructional Effectiveness

Reflecting on instructional effectiveness involves analyzing teaching strategies and their impact on student learning. Teachers assess lesson outcomes, student engagement, and progress data to refine their methods. This reflection helps identify strengths and areas for improvement, ensuring instruction aligns with student needs. By evaluating what works and what doesn’t, educators can adjust their approaches, enhancing the overall quality of small group reading instruction and fostering better learning outcomes for all students.

Parent and Teacher Collaboration

Parent-teacher collaboration strengthens reading development by aligning home and school efforts. Open communication ensures consistent support, fostering a partnership that enhances students’ literacy growth and overall academic success.

Communicating Student Progress

Regular communication between parents and teachers is vital for tracking student progress in reading. Sharing updates on strengths, challenges, and growth ensures alignment in supporting each child’s literacy journey. Open dialogue helps parents understand their role in reinforcing reading skills at home, fostering a collaborative approach to education. Consistent updates also allow teachers to refine instruction based on individual student needs and progress.

Providing Resources for Home Practice

Equipping families with resources for home practice strengthens reading skills. Teachers can share phonics worksheets, digital reading apps, and guided reading materials. These tools help parents support learning consistently. Providing clear instructions and modeling activities ensures parents feel confident in assisting their children. Such collaboration bridges the gap between classroom and home, reinforcing literacy development and fostering a love for reading in a structured, supportive environment.

Case Studies and Success Stories

Real classroom implementations of the Science of Reading highlight transformative outcomes. Teachers share inspiring stories of improved literacy skills, showcasing effective small group instruction strategies and student progress.

Implementing Science of Reading in Real Classrooms

Educators have successfully applied the Science of Reading in diverse classrooms, demonstrating its effectiveness. One study highlighted a significant improvement in reading skills among students when systematic phonics and small group instruction were prioritized. Teachers reported enhanced engagement and comprehension, particularly for struggling readers. The approach emphasized explicit teaching, scaffolded learning, and data-driven adjustments, supported by professional development. These real-world applications underscore the transformative potential of evidence-based reading instruction.

Lessons Learned from Effective Small Group Instruction

Effective small group instruction emphasizes flexibility, differentiation, and teacher feedback. Educators have found success by tailoring lessons to students’ needs, using data to guide instruction, and fostering collaboration. Incorporating multisensory approaches and technology enhances engagement. Ongoing assessment and reflection ensure targeted support. These strategies highlight the importance of adaptability and student-centered teaching in maximizing reading growth and confidence.

Categories
Instructions

o pen instructions

Open instructions provide clear, standardized guidance across various fields, ensuring transparency and efficiency in tasks like AI training, research submissions, and technical operations, fostering better understanding and execution.

Definition and Purpose of Open Instructions

Open instructions refer to clear, structured guidelines provided to ensure tasks are performed consistently and effectively. Their purpose is to enhance understanding and execution, making complex processes accessible. These instructions are designed to break down tasks into manageable steps, reducing ambiguity and ensuring consistency. They are widely used in fields like AI training, academic submissions, and technical operations. By standardizing procedures, open instructions empower users to achieve desired outcomes efficiently, fostering transparency and collaboration across diverse applications.

Importance of Clear Guidelines in Various Fields

Clear guidelines are essential for ensuring consistency, efficiency, and accuracy across various domains. In AI and machine learning, they enable effective model training and reliable outcomes. For researchers, detailed submission instructions streamline the publishing process, reducing errors and improving quality. In Forex trading, well-defined steps help users navigate complex markets confidently. Similarly, in technical fields, precise instructions for tasks like the open system call ensure proper file handling and minimize errors. Clear guidelines also empower entrepreneurs to successfully open retail stores or online shops, guiding them through legal and operational requirements. They foster better understanding and execution, making complex processes more accessible and manageable.

Open Instruction Generalist (OIG) Dataset

The OIG Dataset is designed to train assistants, focusing on synthetic data to enable general-purpose task handling, from simple queries to complex operations, efficiently.

Overview of the OIG Dataset

The Open Instruction Generalist (OIG) Dataset is a comprehensive collection of synthetic data designed to train AI assistants. It focuses on enabling general-purpose task handling, from answering simple questions to executing complex operations. The dataset is part of the LAION-AIs family, aiming to create versatile assistants capable of addressing diverse user needs. By leveraging large-scale synthetic data, the OIG Dataset ensures robust performance across various domains, making it a valuable resource for developing adaptable AI systems.

Training Assistants with the OIG Dataset

Training assistants using the OIG Dataset involves leveraging its diverse, synthetic data to enhance AI capabilities. The dataset enables assistants to handle tasks requiring creativity, reasoning, and multi-step problem-solving. By exposing models to various instruction formats, the OIG Dataset ensures versatility in understanding user queries. This approach fosters assistants that can adapt to novel scenarios, improving responsiveness and accuracy. The dataset’s comprehensive nature supports continuous learning, making it an essential tool for advancing AI generalization and user satisfaction in dynamic environments.

Submission Guidelines for Open Research

Submissions must follow specific protocols, ensuring manuscripts are original, properly formatted, and comply with journal standards to facilitate a smooth peer-review and publication process.

Manuscript Submission Process

The manuscript submission process typically involves several structured steps to ensure efficiency and clarity. Authors are required to prepare their work according to specific formatting guidelines, which may include font style, spacing, and citation format. Submissions are usually made through online platforms like ScholarOne or other journal-specific systems. Once uploaded, authors fill out submission forms, providing details such as manuscript title, keywords, and contributor information. After submission, an acknowledgment is sent, and the manuscript enters the peer-review process. It is crucial to follow all provided instructions carefully to avoid delays or rejection.

Peer Review and Publication Criteria

The peer-review process ensures manuscripts meet rigorous academic standards, with reviewers evaluating originality, methodology, and relevance. Publications are selected based on scientific merit, ethical compliance, and alignment with journal scope. Editors assess submissions for clarity and adherence to guidelines, while reviewers provide constructive feedback. Manuscripts must be original, properly cited, and free from conflicts of interest. The final decision is made after revisions, ensuring high-quality content that contributes meaningfully to the field. This process maintains the integrity and credibility of published research, fostering trust among readers and the academic community.

Forex Account Opening Instructions

Opening a Forex account involves registration, verification, depositing funds, and completing trading setups. It allows traders to engage in global currency markets effectively.

Step-by-Step Registration Process

Opening a Forex account involves a straightforward registration process. Begin by selecting a reputable broker and visiting their official website. Click on the “Open Account” option, typically found at the top of the page. Fill in the required personal information, such as your name, email address, and phone number. Verify your account via email or SMS. Next, complete the Know Your Customer (KYC) process by uploading identification documents like a passport or ID card and proof of address. Set up security features like two-factor authentication. Finally, review and agree to the terms and conditions to complete your registration.

Deposit and Trading Guidelines

After completing the registration, deposit funds into your Forex account using accepted payment methods, such as credit/debit cards, bank transfers, or e-wallets. Ensure the deposit amount meets the minimum requirement set by your broker. Once funds are deposited, verify your account to unlock full trading features. Familiarize yourself with the trading platform, and set up necessary risk management tools like stop-loss orders. Leverage varies by broker, so review margin requirements carefully. Begin trading by selecting currency pairs, placing orders, and monitoring market movements. Always adhere to the broker’s guidelines and trading policies to maintain compliance and optimize your trading experience.

Open Ophthalmology Journal Instructions

The Open Ophthalmology Journal publishes original research, reviews, and letters in the field of eye care and vision sciences. Submissions must be original, in English, and adhere to the journal’s specific guidelines, which are detailed online.

Submission Requirements for Authors

Authors must submit original, unpublished manuscripts in English, following the journal’s specific guidelines. Submissions should include a title page, abstract, and main text, not exceeding . References must be properly formatted. Manuscripts are submitted online via the ScholarOne platform. Authors are responsible for ensuring compliance with ethical standards and copyright policies. Detailed instructions are provided on the journal’s website to guide authors through the submission process. Adherence to these requirements ensures efficient peer review and publication.

Journal Scope and Article Types

The journal focuses on publishing original research, review articles, letters, and themed issues across diverse fields, including clinical care, health policy, and global health. It accepts submissions from research, practice, and policy communities, offering a flexible format. Articles must be written in clear English, adhering to specific guidelines. The journal encourages interdisciplinary approaches, ensuring high-quality, peer-reviewed content. Themed issues highlight specialist areas, fostering global knowledge sharing. Authors are invited to submit innovative research that aligns with the journal’s scope, contributing to advancements in various disciplines.

Design and Business Open Instructions

These guidelines provide step-by-step processes for opening retail stores or internet shops, including choosing platforms, designing layouts, and registering businesses to ensure successful operations.

How to Open a Retail Store

To open a retail store, start by selecting a suitable location and choosing an organizational structure. Develop a business plan, secure funding, and obtain necessary permits. Identify your target market and select a product range that appeals to them. Hire trained staff and design an attractive store layout. Ensure proper inventory management and establish payment systems. Finally, promote your store through marketing campaigns to attract customers. Following these steps ensures a smooth and successful retail store launch, meeting customer needs effectively while maintaining profitability.

Creating an Internet Shop: Key Steps

Creating an internet shop involves selecting a platform, choosing a design, and securing hosting. Define your target audience and product range, then set up payment and shipping options. Optimize the site for user experience, ensuring mobile compatibility and secure transactions. Develop a marketing strategy, including SEO and social media promotion. Test the site thoroughly before launch and plan for ongoing maintenance. These steps ensure a functional and attractive online store, ready to attract and retain customers effectively in a competitive market.

Technical Open Instructions

Technical open instructions guide system operations, file management, and programming tasks. They ensure clarity and efficiency in executing commands, troubleshooting, and optimizing processes across various technical domains.

Using the Open System Call

The open system call is essential for file operations. It opens a file specified by its pathname, returning a file descriptor for further operations. If the file doesn’t exist, using O_CREAT creates it. This call is fundamental in programming for tasks like reading, writing, and modifying files. Proper usage requires specifying flags like O_RDONLY, O_WRONLY, or O_RDWR to define access modes. It’s crucial for managing file permissions and ensuring data integrity. Developers rely on it for efficient file handling in various applications and systems.

File Handling and Management

File handling and management are critical for efficient data operations. This involves opening, reading, writing, and closing files securely. Proper use of system calls like open and close ensures data integrity. Best practices include using appropriate permissions, handling errors, and avoiding file leaks. For instance, using try-with-resources in Java automatically closes files, preventing resource leaks. Effective file management also involves organizing directories and ensuring access control. These practices are essential for maintaining system stability, security, and performance, especially in applications requiring frequent file interactions. Proper file handling prevents unauthorized access and data corruption, ensuring reliable operations across systems.

Open instructions streamline processes, enhance clarity, and foster innovation across diverse fields, from AI training to technical operations, ensuring efficiency and adaptability in an evolving world.

Open instructions play a crucial role in various fields, offering clear guidance for tasks like AI training, research submissions, and technical operations. They ensure efficiency and innovation by providing standardized steps for processes such as Forex account registration, retail store setup, and manuscript submissions. Open instructions also facilitate the use of system calls like open and file management, enabling seamless operations across industries. Their adaptability and clarity make them indispensable for fostering understanding and execution in both technical and non-technical domains, ensuring consistency and progress in an ever-evolving world.

Future of Open Instructions in Various Fields

The future of open instructions lies in their evolution with AI and automation, enabling more dynamic and adaptive guidance. As industries like healthcare and education expand, open instructions will become integral to streamlining complex processes. Advances in machine learning will enhance their precision, making them indispensable in technical fields. Open-source communities will likely drive innovation, ensuring accessibility and continuous improvement. This evolution promises to simplify tasks, from Forex trading to scientific research, fostering efficiency and innovation across all sectors, making open instructions a cornerstone of progress in an increasingly interconnected world.