Categories
United Kingdom

vauxhall insignia workshop manual pdf free download

The Vauxhall Insignia Workshop Manual is a comprehensive guide for maintaining‚ repairing‚ and understanding your vehicle. It offers detailed procedures‚ troubleshooting tips‚ and technical specifications‚ empowering DIY enthusiasts and professionals alike. Available as a free PDF download‚ this manual ensures accessibility for all Vauxhall Insignia owners‚ providing essential information to keep your car in optimal condition.

1.1 Importance of the Workshop Manual for Vauxhall Insignia Owners

The Vauxhall Insignia Workshop Manual is an essential resource for owners‚ offering detailed guidance for maintenance‚ repairs‚ and troubleshooting. It empowers DIY enthusiasts to perform tasks confidently‚ saving costs and enhancing understanding of their vehicle. The manual ensures safety‚ proper procedures‚ and access to critical information‚ making it indispensable for optimal car care and longevity.

1.2 Overview of the Vauxhall Insignia Model and Its Variants

The Vauxhall Insignia is available in multiple variants‚ including Hatchback‚ Sports Tourer‚ and Country Tourer models. These options cater to diverse preferences‚ offering spacious interiors and advanced features. The Insignia is known for its reliable performance and stylish design‚ making it a popular choice among drivers seeking a blend of comfort and functionality on the road.

What is Included in the Vauxhall Insignia Workshop Manual?

The manual includes detailed maintenance‚ repair procedures‚ wiring diagrams‚ and technical specifications. It also covers troubleshooting and provides a comprehensive guide for DIY repairs and professional mechanics‚ ensuring all aspects of the vehicle are addressed.

2.1 Detailed Maintenance and Repair Procedures

The Vauxhall Insignia Workshop Manual provides step-by-step instructions for routine maintenance and complex repairs. From oil changes to engine overhauls‚ each procedure is detailed with diagrams and specifications‚ ensuring clarity and accuracy for both novice and experienced mechanics. This section is invaluable for maintaining your vehicle’s performance and longevity.

2.2 Wiring Diagrams and Technical Specifications

The manual includes detailed wiring diagrams and technical specifications to help users understand and repair electrical systems. These diagrams are clearly labeled and provide essential information for diagnosing and resolving electrical issues. They are indispensable for both professional mechanics and DIY enthusiasts‚ ensuring accurate and safe repairs.

2.3 Troubleshooting Common Issues

The manual provides a troubleshooting guide for common issues‚ helping users identify and resolve problems efficiently. It covers engine faults‚ electrical issues‚ and more‚ offering step-by-step solutions. This section empowers car owners to diagnose and repair problems confidently‚ reducing the need for professional assistance and saving time and money.

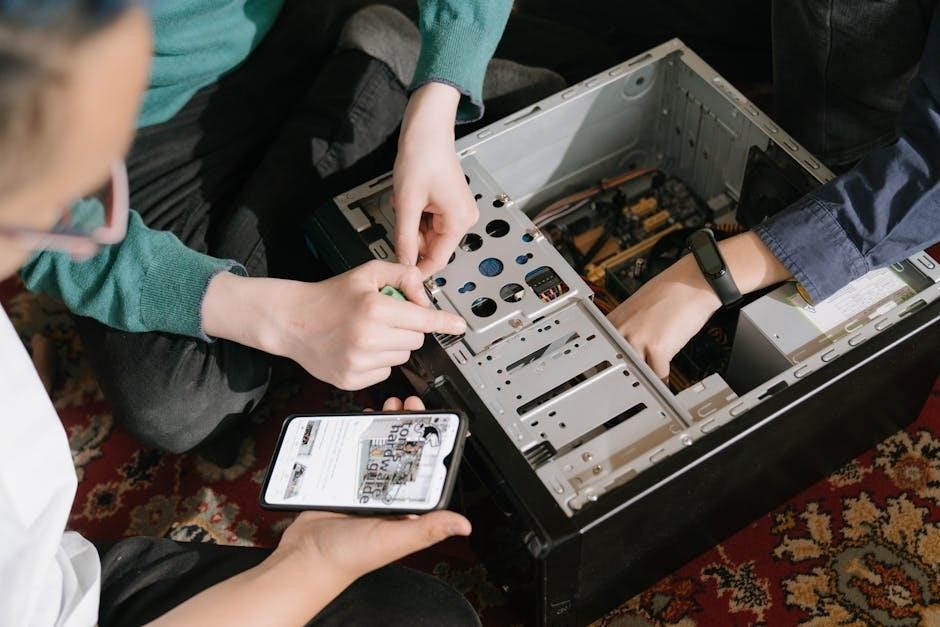
Benefits of Using a Workshop Manual for DIY Repairs

Using a workshop manual empowers car owners with knowledge‚ enabling cost-effective DIY repairs and access to detailed procedures‚ enhancing overall vehicle maintenance capabilities.

3.1 Cost Savings by Avoiding Professional Mechanics

Using a workshop manual allows car owners to save money by handling repairs themselves‚ avoiding costly labor fees from professional mechanics. The free PDF download provides detailed procedures‚ enabling DIY fixes and reducing reliance on paid services‚ thereby cutting overall maintenance expenses significantly while ensuring quality results.

3.2 Empowering Car Owners with Knowledge

The Vauxhall Insignia Workshop Manual empowers car owners by offering detailed repair procedures‚ wiring diagrams‚ and troubleshooting guides. This free PDF resource provides a thorough understanding of the vehicle‚ enabling DIY enthusiasts to perform maintenance and repairs confidently. It promotes self-sufficiency‚ reduces reliance on professionals‚ and enhances overall car maintenance skills effectively for all users.

3.3 Access to Comprehensive Repair Information

The Vauxhall Insignia Workshop Manual provides comprehensive repair information‚ including detailed procedures‚ wiring diagrams‚ and troubleshooting guides. This free PDF resource ensures car owners have access to everything needed for maintenance and repairs‚ from basic tasks like oil changes to advanced diagnostics and electrical system fixes‚ all in one organized document.

How to Download the Vauxhall Insignia Workshop Manual PDF for Free

Downloading the Vauxhall Insignia Workshop Manual PDF for free is easy. Visit reliable sources like CarManualsOnline.info‚ search by model year‚ and follow step-by-step guides to access the manual instantly.

4.1 Reliable Sources for Free PDF Downloads

Reputable websites like CarManualsOnline.info and OnlineRepairManuals.com offer free Vauxhall Insignia Workshop Manual PDF downloads. These platforms provide authentic and comprehensive manuals‚ ensuring access to detailed repair and maintenance information. They are trusted sources for DIY enthusiasts and professionals‚ with easy-to-use search options.

4.2 Step-by-Step Guide to Finding the Manual Online

  • Visit reliable websites like CarManualsOnline.info or OnlineRepairManuals.com.
  • Search using keywords like “Vauxhall Insignia Workshop Manual PDF”.
  • Select your vehicle’s model year and variant from the results.
  • Download the PDF manually or through guided steps provided on the site.

4.3 Verifying the Authenticity of the Manual

Ensure the manual is genuine by cross-checking details like publication dates and file sizes. Look for specific sections like engine overhaul procedures or wiring diagrams‚ which are typically included in official manuals. Additionally‚ check for official Vauxhall branding and download from trusted sources to confirm authenticity before use.

Common Repairs and Maintenance Covered in the Manual

The manual covers essential tasks like oil changes‚ brake pad replacements‚ and spark plug maintenance. These procedures are crucial for maintaining your Vauxhall Insignia’s performance and longevity‚ ensuring reliability on the road.

5.1 Oil Changes and Fluid Replacements

The manual provides step-by-step guidance for oil changes and fluid replacements‚ ensuring your Vauxhall Insignia’s engine remains in prime condition. It outlines the correct procedures‚ recommended lubricants‚ and intervals for maintenance‚ helping you keep your vehicle running smoothly and efficiently over time.

5.2 Brake System Maintenance

The manual details essential brake system maintenance procedures‚ including fluid changes‚ pad replacements‚ and rotor inspections. It provides clear instructions to ensure optimal braking performance‚ safety‚ and longevity of your Vauxhall Insignia’s brakes‚ helping you identify and address potential issues before they escalate into costly repairs.

5.3 Spark Plug and Filter Replacements

The manual provides step-by-step guidance for spark plug replacement and air filter maintenance. It outlines the tools needed‚ replacement intervals‚ and proper installation techniques to ensure optimal engine performance and fuel efficiency. Clear instructions help DIYers perform these tasks confidently‚ maintaining their Vauxhall Insignia’s health and longevity effectively.

Understanding the Structure of the Workshop Manual

The manual is organized into clear sections‚ including an index‚ diagrams‚ and fault-finding tools. This structured format ensures easy navigation‚ helping users locate information quickly and efficiently for any repair or maintenance task.

6.1 Index and Table of Contents

The manual begins with a detailed index and table of contents‚ allowing users to quickly locate specific topics. This organized structure ensures easy navigation through maintenance‚ repair‚ and troubleshooting sections‚ making it simple to find the information needed for any task. Visual indicators and references to diagrams are also included for clarity.

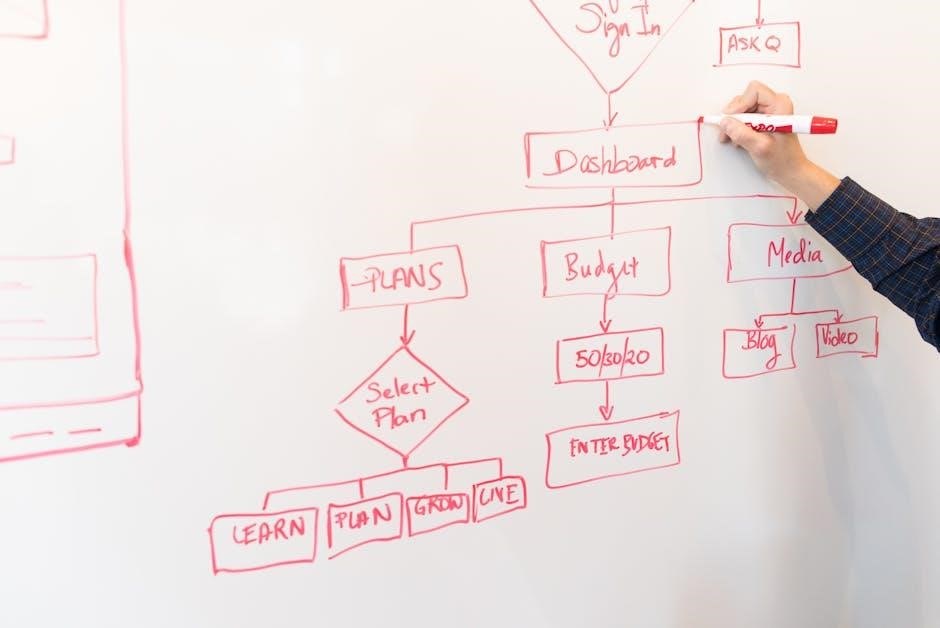
6.2 Visual Aids and Diagrams

The manual includes wiring diagrams‚ engine schematics‚ and component illustrations to guide users through complex repairs. These visual aids provide clear‚ step-by-step representations of parts and systems‚ ensuring accurate disassembly and reassembly. Detailed drawings and exploded views simplify troubleshooting and maintenance tasks‚ making the manual indispensable for DIY enthusiasts and professionals alike.

6.3 Fault Finding and Diagnostic Tools

The manual provides a systematic approach to diagnosing issues‚ including a DTC (Diagnostic Trouble Code) index for decoding error messages. Step-by-step troubleshooting guides help identify and resolve problems efficiently. Combined with detailed wiring diagrams‚ these tools enable users to pinpoint faults and perform accurate repairs‚ saving time and effort.

Safety Precautions When Performing Repairs

Always wear protective gear‚ ensure the vehicle is on level ground‚ and disconnect the battery before starting repairs to avoid accidents and injuries.

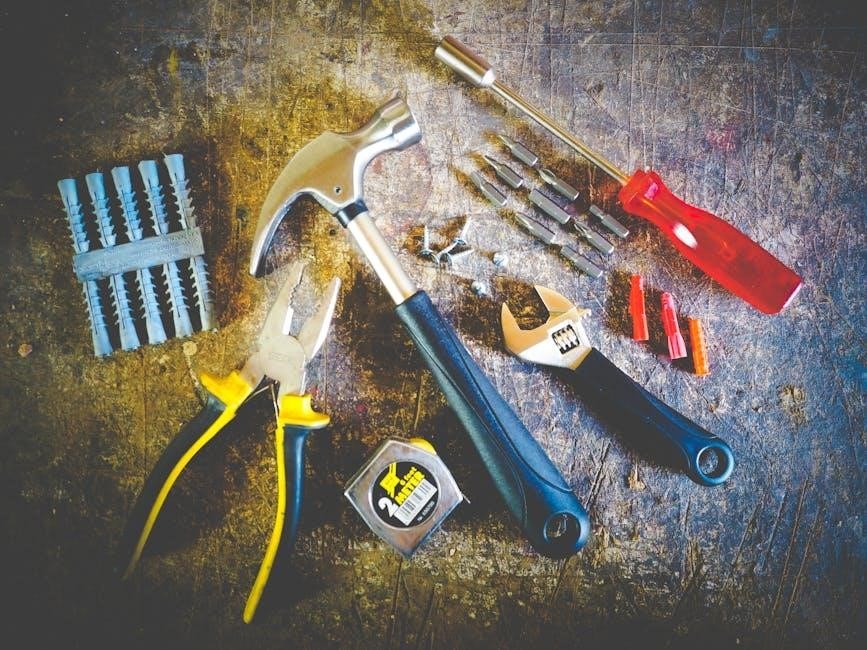
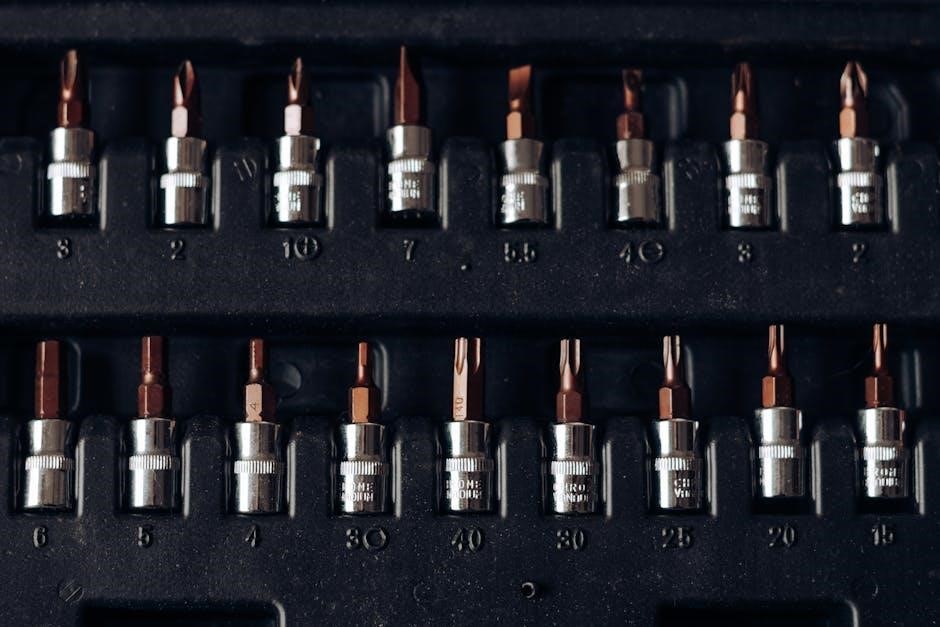
7.1 Essential Tools and Equipment

The Vauxhall Insignia Workshop Manual specifies the need for a socket set‚ wheel wrench‚ multimeter‚ and torque wrench for precise repairs. Additionally‚ always have safety goggles‚ gloves‚ and a fire extinguisher nearby to ensure a safe working environment while performing maintenance or repairs on your vehicle.

7.2 Safety Guidelines for DIY Mechanics

Always follow safety guidelines to avoid accidents. Disconnect the battery before starting work and wear protective gear like goggles and gloves. Ensure good ventilation when working with chemicals and refer to the manual for specific safety precautions. Never overlook warning labels or instructions provided in the Vauxhall Insignia Workshop Manual for your safety.

7.3 Environmental Considerations

Always follow environmental guidelines to minimize ecological impact. Properly dispose of hazardous materials like oils‚ batteries‚ and fluids. Use eco-friendly practices and recycle parts when possible. Refer to the manual for specific instructions on handling and disposing of automotive waste responsibly‚ ensuring sustainable practices for a greener future.

Advanced Topics Covered in the Manual

The manual covers advanced topics like engine overhaul‚ transmission maintenance‚ and electrical system troubleshooting‚ providing detailed instructions for complex repairs and ensuring comprehensive understanding of your Vauxhall Insignia’s mechanics.

8.1 Engine Overhaul and Rebuild

The manual provides detailed instructions for engine overhaul and rebuild‚ including torque specifications‚ component inspection‚ and reassembly procedures. It ensures a comprehensive understanding of engine mechanics‚ offering clear guidance for professionals and DIY enthusiasts to restore your Vauxhall Insignia’s engine to optimal performance.

8.2 Electrical System Troubleshooting

The manual offers a comprehensive guide to diagnosing and resolving electrical system issues. With detailed wiring diagrams‚ fault codes‚ and step-by-step diagnostic procedures‚ it empowers users to identify and repair electrical faults efficiently‚ ensuring optimal vehicle performance without the need for professional assistance.

8.3 Transmission and Gearbox Maintenance

The manual provides detailed insights into transmission and gearbox maintenance‚ including fluid changes‚ torque specifications‚ and common issue resolutions. It covers both automatic and manual systems‚ ensuring smooth operation. With clear instructions and diagrams‚ it helps users perform repairs and maintenance confidently‚ keeping their Vauxhall Insignia in top condition.

Resources and Support for Vauxhall Insignia Owners

Vauxhall Insignia owners can access authorised repairers‚ online forums‚ and additional guides for support. These resources provide expert advice‚ troubleshooting tips‚ and community assistance‚ ensuring optimal vehicle care and maintenance.

9.1 Vauxhall Authorised Repairers and Their Services

Vauxhall Authorised Repairers provide expert maintenance and repair services‚ ensuring your Insignia runs smoothly. Their skilled technicians use genuine parts and follow Vauxhall guidelines‚ offering diagnostics‚ warranty support‚ and comprehensive care to keep your vehicle in optimal condition.

9.2 Online Communities and Forums

Online communities and forums offer a wealth of support‚ advice‚ and resources for Vauxhall Insignia owners. These platforms allow users to share experiences‚ seek troubleshooting tips‚ and access repair guides‚ making them invaluable for DIY enthusiasts and seasoned mechanics alike.

9.3 Additional Repair Guides and Tutorials

Beyond the workshop manual‚ additional repair guides and tutorials provide step-by-step instructions for specific tasks. These resources often include video tutorials and detailed diagrams‚ helping car owners tackle complex repairs with confidence. They complement the manual‚ offering practical solutions for common and advanced maintenance tasks.

The Vauxhall Insignia Workshop Manual is an essential resource for owners‚ offering detailed guidance for maintenance and repairs. It empowers car owners with knowledge‚ enabling them to keep their vehicle in peak condition while saving costs. Regular use ensures longevity and performance.

10.1 Final Thoughts on the Importance of the Workshop Manual

The Vauxhall Insignia Workshop Manual is a crucial resource for owners‚ providing comprehensive guidance for maintenance and repairs. It empowers car owners with detailed knowledge‚ enabling cost savings and ensuring their vehicle runs efficiently. Regular use of the manual guarantees longevity and peak performance‚ making it an indispensable tool for every Vauxhall Insignia owner.

10.2 Encouragement to Explore and Use the Manual

The Vauxhall Insignia Workshop Manual is an invaluable resource for car owners. It provides detailed guidance for maintenance and repairs‚ empowering you to handle tasks confidently. By downloading the free PDF‚ you gain access to comprehensive information that ensures your vehicle runs smoothly. Embrace the knowledge and take the first step towards becoming a DIY expert—it’s user-friendly and packed with essential tips!

Categories
Guide

honeywell t6 installation guide

The Honeywell T6 Thermostat is a smart, Wi-Fi-enabled device offering energy efficiency and adaptive learning to optimize temperature settings. It requires a C wire and is compatible with most HVAC systems, integrating seamlessly with smart home systems for enhanced control.

1.1 Key Features and Benefits

The Honeywell T6 Thermostat features geofencing, smart home integration, and energy-saving modes. It offers a user-friendly interface, adaptive learning, and remote control via the Honeywell Home app. Compatible with most HVAC systems, it provides precise temperature control and scheduling options, ensuring comfort and energy efficiency.

System Requirements and Compatibility

The Honeywell T6 Thermostat requires 24VAC power (C wire) and is compatible with most heating, cooling, and heat pump systems but not electric baseboard heating.

2.1 Compatibility with Heating, Cooling, and Heat Pump Systems

The Honeywell T6 Thermostat is designed to work with various HVAC systems, including forced air, hydronic, and heat pump configurations. It supports 2-stage heating and cooling systems, ensuring compatibility with standard setups. However, it is not compatible with electric baseboard heating systems that require 120/240V power. Proper system compatibility ensures optimal performance and energy efficiency.

2.2 Required: 24 VAC Power (C Wire)

The Honeywell T6 Thermostat requires a 24 VAC power supply, which is typically provided through a C wire connection. A common wire (C wire) ensures continuous power to the thermostat, enabling Wi-Fi connectivity and advanced features. Systems without a C wire may need a compatible adapter to maintain proper functionality and avoid power interruptions during operation.

2.3 Incompatibility with Electric Baseboard Heat

The Honeywell T6 Thermostat is incompatible with 120/240V electric baseboard heating systems. This incompatibility stems from voltage requirements, as the T6 operates on 24 VAC power. Users relying on electric baseboard heat should verify compatibility before installation to ensure proper system functionality and avoid potential operational issues.

Tools and Materials Needed for Installation

Essential tools include a screwdriver, wire strippers, and drill bits. Materials like screws, anchors, and the C wire adapter are provided or required for installation.

3.1 List of Required Tools

A screwdriver, wire strippers, and drill bits are essential. Additionally, a ladder, voltage tester, and marker may be needed. Ensure all tools are readily available before starting the installation process to avoid delays and ensure safety.

3.2 Understanding the C Wire Requirement

The Honeywell T6 Thermostat requires a 24VAC power source, typically provided by a C wire. This wire ensures continuous power for advanced features like Wi-Fi connectivity and smart functionality. Without it, the thermostat may not function properly, necessitating a C wire adapter if your system lacks one.

UWP Mounting System Installation

The UWP Mounting System simplifies installation with pre-drilled holes and included screws. It ensures secure thermostat mounting, accommodating various wall types for a seamless setup experience.

4.1 Overview of the UWP Mounting System

The UWP Mounting System provides a universal and flexible solution for installing the Honeywell T6 Thermostat. Designed for compatibility with various wall types, it includes screws and anchors to ensure secure and level mounting. The system allows for easy adjustments, making it ideal for both new installations and upgrades from existing thermostats. It enhances installation efficiency and reliability.

4.2 Step-by-Step Mounting Instructions

Turn off power to the HVAC system. 2. Attach the UWP mounting plate to the wall using provided screws and anchors. 3. Ensure the plate is level and secure. 4. Align the thermostat with the mounting plate and snap it into place. 5. Tighten the thermostat firmly. 6. Use the optional cover plate to conceal any paint gaps for a polished look.

Wiring and Terminal Designations

The Honeywell T6 requires a C wire for 24VAC power. Connect wires to designated terminals (R, C, W, Y, G, etc.) following standard HVAC conventions for proper functionality.

5.1 Understanding Wiring Conventions

Wiring conventions for the Honeywell T6 involve connecting terminals like R, C, W, Y, and G according to standard HVAC practices. The C wire provides 24VAC power, essential for operation. Properly label and connect wires to avoid system malfunctions. Refer to the terminal designations in the manual to ensure correct connections. Incorrect wiring can damage the thermostat or HVAC system, so careful attention is required during installation.

5.2 Connecting Wires to Terminals

Connect wires to the terminals according to the system type and wiring diagram in the manual. Ensure R and C wires are securely connected for 24VAC power. W, Y, and G terminals control heating, cooling, and fan functions, respectively. Double-check connections to avoid errors. Incorrect wiring can damage the thermostat or HVAC system, so follow the terminal designations carefully.

Thermostat Mounting and Placement

Mount the Honeywell T6 thermostat away from direct sunlight, heat sources, and drafts. Install it at a height of 1;2 to 1.5 meters above the floor for accurate temperature sensing.

6.1 Ideal Locations for Thermostat Placement

The Honeywell T6 thermostat should be placed in a central location, away from direct sunlight, drafts, and heat sources; Ensure it is at least 1.2 to 1.5 meters above the floor to avoid furniture interference and provide accurate temperature readings. This placement ensures optimal performance and energy efficiency by maintaining consistent room conditions;

6.2 Optional Cover Plate Installation

The optional cover plate is used to cover gaps left by previous thermostats or when mounting directly to an electrical junction box. It ensures a clean, professional appearance and is easy to install with provided screws. Use it for a seamless look or to hide paint marks, enhancing the overall aesthetic of your Honeywell T6 setup.

System Setup and Configuration

Configure your Honeywell T6 Thermostat using the Honeywell Home app for initial settings, temperature set points, and smart features. The system learns your preferences for optimal performance.

7.1 Initial System Settings

Begin by setting the Honeywell T6’s system mode, choosing between heating, cooling, or heat pump. Select the temperature scale (°F or °C) and configure the clock format. Ensure the location settings are accurate for proper operation. These initial settings lay the foundation for efficient temperature control and smart home integration.

7.2 Configuring the Thermostat Using the Honeywell Home App

Download and install the Honeywell Home app, then create an account or log in. Connect your T6 thermostat to the app by following in-app instructions. Configure settings like temperature set points, scheduling, and geofencing. Enable features such as smart home integration and energy-saving modes to optimize performance and convenience.

7.3 Setting Temperature Set Points

Access the temperature settings through the Honeywell Home app or thermostat interface. Set your preferred heating and cooling ranges, ensuring optimal comfort and energy efficiency. The T6 learns your system’s behavior to pre-heat or cool, maintaining consistent temperatures. Adjust set points manually or schedule them for automated control, leveraging features like geofencing for smart, adaptive temperature management.

Installer System Test

The Installer System Test verifies heating, cooling, and Wi-Fi connectivity. It ensures the thermostat responds correctly to temperature adjustments, providing a smooth and efficient system operation.

8.1 Testing Heating and Cooling Systems

Test the heating system by setting the thermostat to a higher temperature and ensuring it activates. For cooling, set a lower temperature and verify the AC starts. Check system responsiveness and temperature accuracy to ensure proper functionality. This step confirms the thermostat’s ability to control both heating and cooling effectively and efficiently.

8.2 Verifying Thermostat Response

After installation, test the thermostat’s response by adjusting the temperature and observing if the system activates accordingly. Ensure the display reflects the set temperature and that heating or cooling starts as expected. Verify smooth transitions between modes and confirm the thermostat accurately responds to manual adjustments and scheduled settings.

8.3 Checking Wi-Fi Connectivity

Open the Honeywell Home app to ensure the thermostat is connected to Wi-Fi. Navigate to device settings and verify the connection status. Check for a stable network signal and test remote control functionality to confirm proper connectivity. Ensure the thermostat’s LED indicates a successful Wi-Fi connection for seamless smart home integration and remote operation.

Troubleshooting Common Issues

This section addresses common issues like display malfunctions and connectivity problems. Resetting the thermostat and checking power connections are often effective solutions. Consult the user guide for detailed troubleshooting steps.

9.1 Common Installation Problems and Solutions

Common issues include incorrect wiring, lack of C wire power, and improper mounting. Solutions involve verifying connections, ensuring 24VAC power, and leveling the thermostat. Resetting the device or consulting the manual often resolves these problems effectively, ensuring proper system functionality and user comfort.

9.2 Resetting the Thermostat

To reset the Honeywell T6 Thermostat, remove the batteries and press the reset button located on the backplate; Wait 30 seconds before reinstalling the batteries. This process resolves system glitches and restores default settings. For further assistance, download the Honeywell Home app or consult the user guide for detailed instructions.

Maintenance and Care

Regularly clean the thermostat with a soft cloth and avoid harsh chemicals. Ensure proper functionality by checking batteries and updating software as needed for optimal performance.

10.1 Cleaning the Thermostat

Use a soft, dry cloth to gently wipe down the Honeywell T6 thermostat. Avoid harsh chemicals or abrasive materials that could damage the screen or casing. Regular cleaning ensures optimal performance and maintains the device’s aesthetic appearance while preventing dust buildup that might interfere with temperature sensing or touch functionality.

10.2 Updating Software and Firmware

Regular software and firmware updates are essential for optimal performance. Use the Honeywell Home app to check for updates and install them automatically. Ensure the thermostat is connected to Wi-Fi before starting the process. Updates may add new features, improve functionality, or fix bugs, keeping your system efficient and secure. Always follow on-screen instructions carefully.

Advanced Features and Settings

The Honeywell T6 offers smart home integration, geofencing, and energy-saving modes. It adapts to your schedule and preferences, optimizing comfort and energy efficiency seamlessly through the Honeywell Home app.

11.1 Smart Home Integration

The Honeywell T6 Thermostat seamlessly integrates with popular smart home systems like Amazon Alexa and Google Home. Through the Honeywell Home app, users can control temperatures remotely and create custom scenes. This integration allows for voice control and enhanced automation, ensuring optimal comfort and energy efficiency while simplifying home management.

11.2 Geofencing and Scheduling

The Honeywell T6 Thermostat supports geofencing, using your smartphone’s location to automatically adjust temperatures when you leave or arrive home. Scheduling features allow users to set personalized temperature plans, optimizing comfort and energy efficiency. These features are easily configured through the Honeywell Home app, ensuring a seamless and tailored heating and cooling experience.

11.3 Energy-Saving Features

The Honeywell T6 Thermostat offers advanced energy-saving features, including geofencing and smart scheduling. It learns your heating and cooling patterns to optimize energy use and reduce waste. The thermostat also supports energy-efficient settings and integrates with the Honeywell Home app for remote monitoring, ensuring you save energy without compromising comfort.

Safety Precautions

Ensure safe installation by avoiding heat sources and direct sunlight. Install by a qualified technician, handle electrical components carefully, and comply with local regulations to prevent hazards effectively.

12.1 Importance of Professional Installation

Professional installation is crucial for ensuring safety and proper functionality of the Honeywell T6 Thermostat. Improper installation can lead to electrical hazards, system damage, or inaccurate temperature control. Trained technicians have the expertise to handle wiring, compatibility checks, and system configuration, minimizing risks and ensuring compliance with safety standards for optimal performance and user safety.

12.2 Avoiding Placement Near Heat Sources

The Honeywell T6 Thermostat should not be placed near direct sunlight, drafts, or heat sources like radiators or fireplaces. Such locations can cause inaccurate temperature readings, leading to inefficient heating or cooling. It should be installed at least 1.2 meters above the floor for reliable performance and optimal system regulation.

12.3 Ensuring Proper Power Handling

The Honeywell T6 Thermostat requires a stable 24 VAC power supply, necessitating a C wire connection. It is incompatible with high-voltage systems like electric baseboard heating (120/240V). Proper power handling ensures reliable operation, prevents malfunctions, and avoids damage. Always follow installation guidelines to maintain electrical safety and system integrity.

Thank you for following the Honeywell T6 installation guide. Proper installation ensures optimal performance. Double-check all connections, settings, and system functionality before finalizing. Refer to the Honeywell Home app for additional support and troubleshooting.

13.1 Summary of Key Installation Steps

Mount the UWP system, connect wires to designated terminals, and ensure proper C-wire installation. Configure settings using the Honeywell Home app, set temperature points, and test HVAC functionality. Verify Wi-Fi connectivity and thermostat response. Double-check all connections and settings for optimal performance and smart home integration. Ensure compliance with safety guidelines and manufacturer recommendations.

13.2 Final System Verification

After installation, verify heating, cooling, and heat pump systems operate correctly. Test thermostat response and Wi-Fi connectivity. Ensure temperature set points and scheduling function as configured. Check for proper power handling and system safety. Confirm all features, including smart home integration, are operational. Address any issues promptly to ensure optimal performance and user satisfaction.

Categories
PDF

wiley adult treatment planner pdf

Overview of the Wiley Adult Treatment Planner

The Wiley Adult Treatment Planner, authored by Arthur E. Jongsma Jr. and published by Wiley, offers a comprehensive, evidence-based approach to adult psychotherapy, organized by presenting problems and DSM-5 updates for structured treatment planning.

1.1 Authors and Publication Details

The Wiley Adult Treatment Planner is authored by Arthur E. Jongsma Jr. and David J; Berghuis, with publication by John Wiley & Sons. First published in 2018, it is part of a series that has grown to 53 books. The planner is available in paperback (ISBN: 9781119629931) and PDF (ISBN: 9781119629986), offering evidence-based approaches aligned with DSM-5 standards. It serves as a trusted resource for clinicians, providing structured treatment plans for various adult presenting problems.

1.2 Editions and Updates

The Wiley Adult Treatment Planner is available in multiple editions, including the 5th and 6th editions. The 5th edition, published in 2018, incorporates DSM-5 updates, ensuring compliance with current diagnostic standards. The 6th edition builds on this foundation, offering enhanced content. Both editions are accessible in digital formats, such as PDF, making them convenient for clinicians. Published by John Wiley & Sons, these editions provide evidence-based treatment approaches, aiding in structured and effective planning.

1.3 Structure and Organization

The Wiley Adult Treatment Planner is organized by presenting problems, such as depression, anxiety, and relationship issues. Each section includes clear goals, objectives, and interventions, ensuring a structured approach. The planner is user-friendly, with content grouped by common issues, allowing clinicians to quickly locate relevant treatment strategies. This organization enhances efficiency and effectiveness in developing personalized treatment plans for adult clients, aligning with evidence-based practices and DSM-5 guidelines.

Key Features of the Planner

The Wiley Adult Treatment Planner offers comprehensive, evidence-based strategies for adult psychotherapy, including DSM-5 updates and organized presenting problems, along with homework planners for enhanced treatment planning.

2.1 Comprehensive Treatment Plan Components

The Wiley Adult Treatment Planner includes DSM-5 updates and evidence-based strategies, offering a structured format for goals, objectives, and interventions. It covers 43 presenting problems, such as depression, anxiety, and relationship issues, providing a clear framework for treatment. Each plan is organized to address specific symptoms and behaviors, ensuring a tailored approach for adult therapy. The planner also integrates homework assignments, enhancing client engagement and progress tracking.

2.2 Evidence-Based Approaches

The Wiley Adult Treatment Planner integrates evidence-based methods, including cognitive-behavioral therapy (CBT) and exposure techniques, to address a wide range of adult mental health issues. It aligns with DSM-5 standards, ensuring interventions are grounded in current research. The planner’s structured format allows clinicians to tailor strategies to specific symptoms, enhancing effectiveness. Homework assignments further reinforce therapeutic goals, promoting client engagement and measurable progress in treatment outcomes.

2.3 Organization by Presenting Problems

The Wiley Adult Treatment Planner organizes treatment plans around 43 presenting problems, such as depression, anxiety, and relationship conflicts. Each problem is paired with specific, evidence-based interventions, making it easy for clinicians to tailor plans to individual needs. This structured approach ensures that treatment is focused and measurable, aligning with DSM-5 standards. The format allows for quick access to relevant strategies, enhancing efficiency and effectiveness in clinical practice.

How to Use the Planner

The Wiley Adult Treatment Planner streamlines the process by guiding clinicians through identifying problems, setting SMART goals, and selecting evidence-based interventions, ensuring structured and effective treatment planning.

3.1 Identifying Presenting Problems

The Wiley Adult Treatment Planner organizes treatment plans around 43 common presenting problems, such as depression, anxiety, and relationship issues. Clinicians can quickly identify and define the specific issues affecting their clients, ensuring a clear starting point for treatment. This structured approach helps practitioners pinpoint the core concerns and develop targeted interventions tailored to the individual’s needs, promoting effective and focused therapy sessions from the outset;

3.2 Setting SMART Goals

The Wiley Adult Treatment Planner emphasizes setting SMART goals—Specific, Measurable, Achievable, Relevant, and Time-bound. Clinicians guide clients in defining clear objectives, ensuring goals are tailored to their needs. The planner’s structured format helps break down broad issues into actionable steps, fostering progress tracking and accountability. This approach aligns with evidence-based practices, ensuring goals are realistic and focused on meaningful outcomes, while maintaining DSM-5 compliance for effective treatment planning.

3.3 Selecting Interventions

The Wiley Adult Treatment Planner provides evidence-based interventions tailored to specific presenting problems. Clinicians can choose from a variety of therapeutic techniques, such as cognitive-behavioral strategies or exposure exercises, to address issues like depression, anxiety, or relationship conflicts. The planner’s organized structure allows for easy selection of interventions that align with SMART goals and DSM-5 criteria, ensuring effective and targeted treatment approaches for adult clients.

3.4 Monitoring Progress

The Wiley Adult Treatment Planner includes tools for systematically monitoring client progress. Clinicians can track advancements toward SMART goals and adjust interventions as needed. The planner provides structured formats for documenting sessions, allowing for consistent evaluation of treatment effectiveness. Regular progress monitoring ensures alignment with evidence-based practices and DSM-5 guidelines, helping clinicians make informed decisions to refine treatment plans and improve client outcomes.

3.5 Documenting Sessions

The Wiley Adult Treatment Planner provides structured formats for documenting each session, ensuring consistency and clarity. Clinicians can record client responses, progress toward goals, and any adjustments to interventions. This documentation aligns with evidence-based practices and DSM-5 guidelines, facilitating accurate tracking of treatment outcomes. The planner’s organized approach helps maintain detailed, actionable records, supporting effective communication and continuity of care throughout the therapeutic process.

Advantages of the Planner

The Wiley Adult Treatment Planner is evidence-based, DSM-5 compliant, and time-saving, offering a user-friendly structure that streamlines treatment planning and documentation for mental health professionals.

4.1 Evidence-Based and DSM-5 Compliant

The Wiley Adult Treatment Planner is built on evidence-based approaches, ensuring interventions align with current research and clinical standards. It is fully DSM-5 compliant, providing accurate diagnostic criteria and treatment guidelines. This compliance ensures that clinicians can deliver effective, standardized care while adhering to professional standards. The planner integrates DSM-5 updates seamlessly, making it a reliable resource for diagnosing and treating a wide range of mental health issues.

4.2 Time-Saving for Clinicians

The Wiley Adult Treatment Planner streamlines the planning process, saving clinicians valuable time. With pre-written goals, objectives, and interventions, it reduces documentation burden. Organized by common presenting problems, the planner allows quick access to relevant treatment strategies, enhancing efficiency. This structured approach enables clinicians to focus more on patient care and less on administrative tasks, making it an indispensable time-saving tool for mental health professionals. Its efficiency supports effective practice management.

4.3 User-Friendly Structure

The Wiley Adult Treatment Planner features a highly organized and intuitive structure, making it easy for clinicians to navigate. It is arranged by presenting problems, such as depression, anxiety, and relationship issues, with clear categories for goals, objectives, and interventions. This logical flow ensures quick access to relevant content, reducing confusion and streamlining the treatment planning process. Its user-friendly design enhances accessibility, allowing professionals to focus on patient care with greater efficiency and confidence. This structure is a key advantage for busy practitioners.

Supplementary Resources

The Wiley Adult Treatment Planner is complemented by supplementary resources, including the Adult Psychotherapy Homework Planner and DSM-5 updates, enhancing treatment approaches and patient engagement tools.

5.1 Adult Psychotherapy Homework Planner

The Adult Psychotherapy Homework Planner is a complementary resource designed to enhance therapy sessions. It provides structured assignments tailored to specific behavioral issues such as depression, anxiety, and relationship conflicts. Each exercise is crafted to promote self-reflection, skill development, and progress tracking. Available in digital formats, it can be accessed online or through mobile apps, offering flexibility for both clinicians and patients. This tool aligns with the Treatment Planner, ensuring a cohesive approach to therapy.

5.2 DSM-5 Updates and Integration

The Wiley Adult Treatment Planner incorporates DSM-5 updates, ensuring diagnostic accuracy and compliance with current mental health standards. This integration allows clinicians to align treatment goals and interventions with DSM-5 criteria, enhancing evidence-based practice. The planner reflects the latest diagnostic changes and clinical insights, making it a reliable tool for effective treatment planning and documentation. Regular updates ensure it remains a cornerstone for mental health professionals.

Accessibility and Formats

The Wiley Adult Treatment Planner is available in digital formats, including PDF, and accessible via Wiley’s online platforms, ensuring convenient access for clinicians and mental health professionals.

6.1 Digital Formats Available

The Wiley Adult Treatment Planner is accessible in digital formats, including PDF, allowing clinicians to easily access and utilize the resource. It is available for online reading through Wiley’s platforms, with ISBNs such as 9781119629986 for the PDF version. This digital accessibility ensures convenience for mental health professionals, enabling them to integrate the planner into their practice seamlessly. The digital format also supports portability and efficient reference during sessions.

6.2 Online Access and Platforms

The Wiley Adult Treatment Planner is available for online access through Wiley’s official platforms, ensuring convenient use by mental health professionals. The PDF version, with ISBN 9781119629986, can be accessed via Wiley’s app or website, allowing clinicians to reference the material during sessions. This online accessibility enhances portability and ease of use, making it a versatile resource for modern therapeutic practices.

Editions and Their Features

The Wiley Adult Treatment Planner is available in multiple editions, including the 5th and 6th editions, each offering updated DSM-5 compliance and enhanced evidence-based content.

7.1 The Complete Adult Psychotherapy Treatment Planner, 5th Edition

The 5th edition of The Complete Adult Psychotherapy Treatment Planner includes updated DSM-5 criteria, expanded interventions, and a structured format for organizing treatment plans. It covers over 40 presenting issues, such as depression, anxiety, and substance abuse, with evidence-based approaches. This edition enhances clinical efficiency and provides practical tools for therapists to create and implement effective treatment strategies.

7.2 The Complete Adult Psychotherapy Treatment Planner, 6th Edition

The 6th edition of The Complete Adult Psychotherapy Treatment Planner offers enhanced digital features, updated evidence-based practices, and new presenting problems. It includes refined intervention strategies and expanded DSM-5 compliance. Available in digital formats, this edition provides clinicians with accessible and organized tools for creating effective treatment plans, ensuring flexibility and efficiency in modern psychotherapy practice.

The Wiley Adult Treatment Planner is an essential resource for clinicians, offering evidence-based, DSM-5 compliant strategies. Its structured approach saves time and enhances treatment planning. With continuous updates, including the 6th edition’s digital enhancements, it remains a trusted tool for modern psychotherapy. This planner’s effectiveness lies in its adaptability, ensuring tailored interventions for diverse patient needs, making it indispensable for improving treatment outcomes.

Categories
Manuals

arachnid dart board instruction manual

The Arachnid Dart Board is an advanced electronic dartboard designed for players of all skill levels, offering a fun and competitive experience. It features high-quality construction, innovative technology, and a user-friendly interface, making it perfect for both home and professional use. With its durable NylonTough segments and micro-thin dividers, it ensures minimal bounce-outs and enhanced playability. Ideal for players aged 8 and above, this dartboard combines entertainment with interactive features like Heckler Mode, adding excitement to every game. Proper care ensures years of reliable performance and enjoyment for dart enthusiasts worldwide.

1.1 Overview of the Arachnid Dart Board

The Arachnid Dart Board is a high-quality electronic dartboard designed for players of all skill levels. It features NylonTough segments for durability and micro-thin dividers to reduce bounce-outs. Suitable for both steel tip and soft tip darts, it offers a variety of interactive games, including Cricket, 301, and 501. With its user-friendly interface and exciting features like Heckler Mode, it provides endless entertainment for players aged 8 and above, ensuring a fun and competitive experience for all.

1.2 Key Features and Benefits

The Arachnid Dart Board boasts a range of key features, including NylonTough segments for improved durability and micro-thin segment dividers to minimize bounce-outs. It offers a variety of pre-loaded games like Cricket, 301, and 501, catering to diverse player preferences. The interactive Heckler Mode adds entertainment with praising or humorous comments based on performance. Designed for both steel tip and soft tip darts, it ensures versatility and longevity, making it a top choice for home and professional use.

Unpacking and Assembly

Carefully unpack the dart board and ensure all components are included. Follow the step-by-step assembly instructions to securely mount and set up the board. Check for completeness before starting assembly to avoid missing parts.

2.1 Unpacking the Dart Board

Begin by carefully unpacking the dart board from its box. Inspect for any visible damage and ensure all components, including the board, mounting hardware, and instructions, are included. Handle the electronic components with care to avoid damage. Verify the package contains the dart board, power adapter (if applicable), and any additional accessories like darts or a carrying case. Do not proceed if any parts are missing or damaged. Refer to the manual for a detailed list of included items.

2.2 Assembly Instructions

Mount the dart board on a sturdy wall using the provided hardware. Ensure the board is level for accurate play. Attach the dartboard to the wall bracket securely. Connect the power adapter if required, ensuring it is properly plugged in. Follow the manual for correct installation of any additional features like score displays or stands. Double-check all connections and ensure stability before use. Proper assembly ensures safe and optimal performance of the dart board.

2.3 Initial Setup and Calibration

Turn on the dart board and allow it to complete the self-test cycle. Press any button to enter the game mode. Navigate through the menu to adjust settings like sound volume, unit preferences, and player options. Ensure the dartboard is properly calibrated for accurate scoring. Check that all segments are responsive and functioning correctly. Follow on-screen prompts to customize settings for optimal performance and personalized gameplay experience.

Operating the Dart Board

Power on the dart board and allow it to complete the self-test cycle. Press buttons to navigate through the menu, select game modes, and start playing. The board features interactive options like Heckler Mode and customizable settings for enhanced gameplay.

3.1 Powering On the Dart Board

To power on the Arachnid Dart Board, press the POWER button. The board will initiate a self-test cycle, accompanied by a welcoming melody and displaying “Arachnid” on the score screens. Once the self-test is complete, press ENTER to select a game, then use the UP or DOWN buttons to navigate through options. Confirm your selection with ENTER, and the board will be ready for play.

3.2 Navigating the Menu

After powering on, the dartboard displays menu options. Use the UP and DOWN buttons to scroll through games and settings. Press ENTER to select a game or option, which will be highlighted on the player score display. The START/NXT button advances to the next player or option. Navigate intuitively through the menu to access various game modes, settings, and features, ensuring a seamless and user-friendly experience for all players.

3.4 Selecting and Starting a Game

Once powered on, select a game using the UP and DOWN buttons to navigate the menu. Highlight your desired game and press ENTER to confirm. The dartboard will display the selected game on the player score display. Follow the on-screen instructions to begin play. The board will prompt the first player to throw, ensuring a smooth start to the game. The display will guide players through turns, making gameplay intuitive and enjoyable for everyone.

Game Rules and Options

The Arachnid Dart Board offers a variety of games, including Countdown (301, 501), Cricket, and Shanghai. Each game has specific rules and objectives, ensuring diverse play options for all skill levels. Players can enjoy classic scoring systems, strategic challenges, and interactive features like Heckler Mode for added fun and competition.

4.1 Countdown Games (301, 501, etc.)

Countdown games like 301 and 501 are popular options on the Arachnid Dart Board. Players start with a set number of points (e.g., 301 or 501) and aim to reach exactly zero. Each dart thrown subtracts its score from the current total. If a player exceeds zero, they “bust,” and their score resets to the previous total. The game continues until one player successfully reaches zero, making them the winner. These games are ideal for competitive play and skill improvement.

4.2 Cricket and Other Popular Games

Cricket is a favorite game on the Arachnid Dart Board, where players aim to close numbers 15 to 20 and the bullseye by hitting them three times. Other popular games include Shanghai, which requires hitting specific doubles in sequence, and Count Up, where players accumulate points to reach a target. These games offer variety and challenge, catering to different skill levels and preferences, making the dartboard versatile for all players.

4.3 Special Features (Heckler Mode, etc.)

The Arachnid Dart Board features an exciting Heckler Mode that adds fun to your games with interactive comments. It praises high-scoring throws and playfully mocks missed shots, enhancing the entertainment factor. Additional features include customizable sound effects and voice prompts, creating a dynamic and engaging gaming experience. These unique elements make every match more enjoyable and challenging for players of all skill levels.

Maintenance and Care

Regularly clean the dartboard with a soft cloth and avoid harsh chemicals. Store it in a dry place to prevent damage. Inspect for wear and tear.

5.1 Cleaning the Dart Board

Use a soft, dry cloth to gently wipe the dartboard surface, removing dust and debris. Avoid spray cleaners, ammonia, or harsh chemicals, as they can damage the segments. For stubborn stains, lightly dampen the cloth with water, but ensure the board is thoroughly dry afterward to prevent moisture damage. Regular cleaning maintains optimal performance and extends the life of your dartboard.

5.2 Replacing or Repairing Parts

For damaged segments or components, contact Arachnid directly for factory-authorized replacements to ensure compatibility and performance. Avoid using non-Arachnid parts, as they may void the warranty or cause malfunctions. The Electronic Package and darthead assembly are covered under warranty if defective in manufacture. Regularly inspect and maintain all parts to prevent wear and tear, ensuring optimal functionality and longevity of your dartboard.

Troubleshooting Common Issues

Common issues include power malfunctions, scoring errors, or dart detection problems. Refer to specific subheadings for detailed solutions to resolve these issues effectively and quickly.

6.1 Power Issues

Power issues may occur if the dartboard fails to turn on or malfunctions. Ensure the AC adapter is properly connected and compatible, as non-Arachnid adapters can cause damage. Check battery connections if using battery power. Avoid spills, as liquids can damage electronic circuits. Verify the power button is functioning correctly. If issues persist, consult the manual or contact Arachnid support for assistance. Always use recommended power sources to maintain warranty coverage and ensure safe operation.

6.2 Scoring Errors

Scoring errors may occur if the dartboard fails to accurately detect or display scores. Ensure darts are thrown firmly and land fully within the segments. Check for loose or damaged segments that may cause misreads. Clean the dartboard regularly with a soft cloth to remove dirt or debris. Verify the dart type (steel or soft tip) matches the board’s compatibility. If issues persist, recalibrate the board or consult the manual for troubleshooting steps to restore accurate scoring functionality.

6.3 Dart Detection Problems

Dart detection issues may occur if the dartboard fails to register throws accurately. Ensure the board is properly calibrated and clean. Check for loose or damaged segments that might prevent proper detection. Verify that darts are thrown with sufficient force and that the tips are in good condition. Avoid using darts with worn or bent tips, as they may not register correctly. Regularly inspect and clean the dartboard’s surface to maintain optimal performance and accurate detection of throws.

Safety Precautions

Ensure adult supervision for children aged 8-14. Avoid spills on the dartboard and use only recommended cleaners. Properly secure the board to prevent tipping. Always handle darts with care to prevent accidents and injuries. Regularly inspect darts for damage to ensure safe play. Follow all safety guidelines provided in the manual for optimal use. Keep loose clothing and long hair tied back while playing. Maintain a safe distance from the board during use. Never use damaged or bent darts, as they may cause injury. Ensure the play area is clear of obstacles to prevent tripping. Avoid overreaching or stretching excessively while throwing darts. Never leave darts unattended near children. Store darts in a safe place when not in use. Follow all local safety regulations and guidelines. Use the dartboard only for its intended purpose. Be aware of your surroundings while playing. Ensure the board is installed on a stable and level surface. Avoid playing in wet or slippery conditions. Keep the dartboard away from direct sunlight to prevent overheating. Never modify or alter the dartboard’s components, as this may lead to malfunctions. Use only Arachnid-approved accessories to maintain safety and performance. Be cautious when handling sharp dart tips. Always follow the manufacturer’s instructions for maintenance and repairs. Ensure proper ventilation in the play area to avoid overheating. Regularly check for wear and tear on the dartboard and address any issues promptly. Follow all safety precautions outlined in the manual to ensure a safe and enjoyable experience. By adhering to these guidelines, you can minimize risks and enjoy playing on your Arachnid dartboard. Always prioritize safety to avoid accidents and injuries. The dartboard is designed for recreational use, so ensure all players understand and follow the safety rules. Proper care and attention to safety will extend the life of the dartboard and ensure fun for everyone. Remember, safety is everyone’s responsibility when using the Arachnid dartboard. Make sure all players are aware of and follow these precautions to create a safe and enjoyable environment. Never ignore safety warnings or guidelines provided by the manufacturer. Stay alert and cautious during play to prevent accidents. Encourage responsible behavior and adherence to safety rules among all players. The Arachnid dartboard is a great way to have fun, but safety should always come first. Keep the play area clean and organized to reduce the risk of accidents. Always inspect the dartboard and darts before use to ensure they are in good condition. Follow the recommended maintenance schedule to keep the dartboard functioning safely. Be mindful of the dartboard’s weight and size when moving or installing it. Ensure the dartboard is securely fastened to the wall to prevent it from tipping over. Use a dartboard surround or backboard to protect walls and prevent damage from missed darts. Keep emergency contact information nearby in case of an accident. Encourage players to warm up before playing to prevent muscle strains. Remind players to stay focused and avoid distractions while throwing darts. Never allow players to throw darts when tired or under the influence of substances that may impair judgment. Ensure all players understand the rules and objectives of the game to avoid confusion and potential accidents. Foster a respectful and safe playing environment for everyone involved. Always store the dartboard and accessories in a secure, dry location when not in use. Regularly review and update your safety knowledge to ensure compliance with the latest guidelines. By taking these precautions seriously, you can enjoy your Arachnid dartboard while minimizing risks. Safety should always be your top priority when using the dartboard. Remember, a safe player is a happy player! Always be proactive in maintaining a safe environment for dart games. The Arachnid dartboard is designed to provide years of entertainment, but only when used responsibly and with caution. Take the time to review and understand all safety precautions before starting play. Encourage all players to do the same to ensure a fun and safe experience. Stay informed about any updates or recalls related to the dartboard to maintain safety. Never underestimate the importance of following safety guidelines when using the Arachnid dartboard. A safe and enjoyable experience is just a matter of being responsible and aware. Always put safety first to get the most out of your Arachnid dartboard. The manufacturer has provided these guidelines to ensure your safety, so take them seriously. Remember, your safety and the safety of others depend on your actions. Be a responsible dartboard owner and player by adhering to all safety precautions. The Arachnid dartboard is a valuable investment in fun, but safety must always be a priority. Take pride in maintaining a safe environment for dart games. Share these safety guidelines with all players to ensure everyone’s well-being. Keep the manual handy for quick reference on safety and maintenance. Familiarize yourself with the troubleshooting section to address any issues promptly. Don’t hesitate to contact customer support if you have safety concerns. Regularly check for updates on safety procedures from the manufacturer. Be prepared for emergencies by having a first-aid kit nearby. Encourage players to report any safety hazards or concerns immediately. Create a positive and safe atmosphere for all players. Lead by example and emphasize the importance of safety. Ensure all players understand the consequences of ignoring safety precautions. Stay vigilant and proactive in maintaining a safe playing environment. The Arachnid dartboard is designed to enhance your enjoyment, but safety is key to a positive experience. Always be mindful of potential risks and take steps to mitigate them. By prioritizing safety, you can fully enjoy the features and benefits of your dartboard. Remember, safety is not just a suggestion—it’s a necessity. Take all necessary precautions to ensure a safe and enjoyable experience for everyone. The Arachnid dartboard offers countless hours of fun, but only when used safely and responsibly. Don’t let negligence ruin the experience—stay safe and informed. Always be prepared and aware of your surroundings during play. The Arachnid dartboard is a great addition to any game room, but safety must never be overlooked. Make safety a habit to ensure long-term enjoyment. Encourage a culture of safety among all players. The Arachnid dartboard is a valuable investment, but safety is invaluable. Protect yourself and others by following all safety guidelines. Stay safe, have fun, and enjoy your Arachnid dartboard!

7.1 General Safety Guidelines

  • Always ensure proper care and maintenance of the dartboard to prevent damage.
  • Avoid using spray cleaners or chemicals containing ammonia or acetone.
  • Keep the dartboard dry and avoid spills to prevent electrical issues.
  • Secure the dartboard firmly to a wall to prevent tipping.
  • Supervise children aged 8-14 during play and ensure they understand safety rules.
  • Use only recommended darts and accessories to avoid damage or injury.
  • Keep the play area clean and free from obstacles to reduce tripping hazards.
  • Regularly inspect darts for damage and replace worn or bent tips.
  • Ensure players maintain a safe distance from the board during use.
  • Follow all instructions in the manual to ensure safe and proper operation.
Categories
Guide

arris tm1602 user guide

Safety Precautions

Handle the Arris TM1602 with care, avoiding solvents or cleaning agents․ Follow all safety guidelines to prevent damage and ensure proper functionality․

1․1 General Safety Guidelines

Handle the Arris TM1602 with care, avoiding exposure to liquids or extreme temperatures․ Use only approved cleaning methods and avoid solvents․ Ensure proper ventilation and grounding for optimal performance․ Follow all safety precautions to prevent damage and ensure reliable operation․ Always disconnect power during maintenance or cleaning․ Refer to the user manual for detailed safety instructions․

1․2 Handling and Cleaning Instructions

Handle the Arris TM1602 with care, ensuring no exposure to liquids or harsh chemicals; Use a soft, dry cloth to clean the exterior․ Avoid touching internal components without proper grounding to prevent static damage․ For detailed cleaning procedures, refer to the user manual․ Always unplug the modem before cleaning to ensure safety and prevent any potential damage․

Product Overview

The Arris TM1602 is a versatile telephony modem designed for reliable internet and voice connectivity, supporting both single devices and local area networks with advanced features․

The Arris TM1602 is a high-performance telephony modem offering advanced connectivity solutions․ Designed for both residential and small office use, it supports high-speed internet and voice services․ With its robust design and user-friendly interface, the TM1602 ensures reliable performance․ It is compatible with various networks and systems, making it a versatile choice for modern communication needs․ Simple setup and efficient operation are key features․

2․2 Key Features and Specifications

The Arris TM1602 features a 16×4 bonded channel configuration, delivering high-speed data rates․ It supports both DOCSIS 3․0 and IPv6, ensuring compatibility with advanced networks․ With a built-in telephony modem, it enables voice services alongside internet connectivity․ The modem includes an Ethernet port for wired connections and is upgradeable to 24×8 operation for enhanced performance․ Battery capability is also included for uninterrupted service during power outages․

Installation Guide

Install the Arris TM1602 by connecting the Ethernet cable and power cord; Ensure proper setup, and refer to the guide for battery and network configuration details․

3․1 Unboxing and Physical Setup

Unbox the Arris TM1602 carefully, ensuring all components are included․ Gently remove the modem from its packaging and place it on a stable, flat surface․ Connect the power cord, Ethernet cable, and any additional accessories as described in the manual․ Ensure the device is positioned in a well-ventilated area to prevent overheating and maintain optimal performance․

3․2 Connecting the Modem to Your Network

Connect the Arris TM1602 to your network using an Ethernet cable․ Plug one end into the modem’s Ethernet port and the other into your router or computer․ Ensure the modem is powered on and placed in a well-ventilated area to prevent overheating․ Refer to the manual for specific port labels and configuration details to establish a stable connection․

3․3 Powering On the Device

Locate the power button on the Arris TM1602 modem, typically found on the top or front panel․ Press and hold the button until the device powers on․ Allow the modem to complete its boot-up process, which may take a few minutes․ Ensure the power cord is securely connected to both the modem and a nearby electrical outlet․ Verify the status lights illuminate to confirm successful power-on․

Configuration

Configure the Arris TM1602 by connecting to your network and setting up basic parameters for optimal performance․ Follow the user guide for detailed instructions․

4․1 Basic Configuration Steps

Connect the Arris TM1602 to your network using an Ethernet cable․ Power on the device and access the web interface through a browser․ Navigate to the configuration page, set up admin credentials, and configure basic settings like IP addressing․ Ensure all connections are secure and verify proper functionality․ Refer to the user manual for detailed guidance and restart the modem if necessary․

4․2 Advanced Settings and Customization

Access the Arris TM1602’s web interface to customize advanced settings․ Configure IP configurations, DHCP settings, and Quality of Service (QoS) for optimized performance․ Enable firewall settings and port forwarding for enhanced security and connectivity․ Update firmware regularly to ensure compatibility and security․ Refer to the user manual for detailed instructions on configuring these features effectively․

Troubleshooting Common Issues

Check connectivity, restart the modem, and ensure firmware is updated․ Refer to the user manual for detailed solutions to diagnose and resolve common issues effectively․

5․1 Identifying and Diagnosing Problems

Identify issues by checking modem lights, connectivity, and error messages․ Diagnose problems by verifying cables, settings, and firmware updates․ Consult the user manual for troubleshooting steps or reset the modem to resolve common connectivity or performance issues effectively․ Ensure proper configuration and restart devices if necessary to restore functionality․

  • Check for physical connections and indicator lights․
  • Verify network settings and configuration․
  • Perform a factory reset if issues persist․

5․2 Resetting the Modem to Factory Settings

To reset the Arris TM1602 to factory settings, locate the small reset button on the back of the modem․ Use a pin or paperclip to press and hold the button for 10-15 seconds until the lights flash․ Release the button and wait for the modem to reboot․ This process will restore default settings, so ensure you have your configuration details backed up before performing the reset․

  • Press and hold the reset button for 10-15 seconds․
  • Wait for the modem to complete the reset and restart․
  • Reconfigure settings as needed after the reset․

User Manual Details

The Arris TM1602 user manual is a 42-page PDF guide detailing setup, safety, and troubleshooting․ It is available for free download, offering comprehensive instructions for optimal modem usage․

6․1 How to Download the User Manual

The Arris TM1602 user manual can be downloaded for free in PDF format․ Visit the official Arris website or trusted manual databases․ Navigate to the support section, select your model, and click the download link․ Ensure the source is reliable to avoid unauthorized content․ The manual covers installation, troubleshooting, and advanced settings, providing detailed guidance for users․

6․2 Navigating the User Manual

The Arris TM1602 user manual is structured for easy navigation․ Use the table of contents or index to locate specific topics․ Digital versions allow bookmarking and searching for keywords․ Print versions provide clear section headings and page numbering․ Familiarize yourself with key chapters, such as installation, configuration, and troubleshooting, to optimize your experience and ensure proper device usage․

Additional Resources

Access the Quick Start Guide, FAQs, and detailed PDF manuals for comprehensive support․ These resources provide easy navigation and troubleshooting assistance for optimal Arris TM1602 usage․

7․1 Quick Start Guide

The Arris TM1602 Quick Start Guide provides an overview of installation and basic configuration steps․ It includes diagrams and troubleshooting tips to ensure a smooth setup process․ This concise guide is designed to help users quickly understand and operate their modem efficiently, covering essential features and initial settings for immediate connectivity․

7․2 Frequently Asked Questions (FAQs)

The FAQs section addresses common queries about the Arris TM1602, such as installation steps, troubleshooting connectivity issues, and compatibility with various devices․ It also provides guidance on resetting the modem, updating firmware, and resolving errors․ Users can find detailed solutions and tips to optimize their experience, ensuring smooth operation and addressing potential concerns effectively․

Warranty and Support Information

For warranty details and support, contact Arris via phone, email, or online chat․ Visit their official website for comprehensive assistance and resources․

8․1 Warranty Details

The Arris TM1602 is covered under a limited warranty, with specific terms varying by region and model․ Arris provides this guide without any warranty, expressed or implied, including merchantability or fitness for purpose․ Warranty details are subject to change, and improvements or modifications to the product may occur at any time․ Refer to the official Arris website for precise warranty conditions․

8․2 Contacting Customer Support

For assistance with your Arris TM1602, contact customer support through the official Arris website or designated support channels․ Arris offers resources, including FAQs and user guides, to address common issues․ Select your specific model, such as Arris TM1602A/ CV, to access relevant support materials․ Online portals provide direct access to manuals, troubleshooting tips, and contact options for further help․

Best Practices for Usage

Regularly update firmware for optimal performance and security․ Use recommended configurations to ensure reliability and stability of your Arris TM1602 modem․

9․1 Maintaining Optimal Performance

Regularly update the firmware to ensure the latest features and security patches․ Restart the modem periodically to clear cached data․ Use high-quality Ethernet cables for stable connections․ Place the device in a well-ventilated area to prevent overheating․ Monitor data usage and adjust settings to optimize bandwidth allocation․ Avoid physical stress or extreme temperatures to maintain reliability and performance․

9․2 Regular Firmware Updates

Download and install firmware updates promptly to enhance performance, security, and compatibility․ Updates typically improve connectivity, fix bugs, and expand features․ Use the Arris TM1602 user manual for guidance on the update process․ Always download updates from official sources to avoid malware risks․ Schedule updates during low-traffic times to minimize interruptions․ Regular updates ensure optimal functionality and protect against potential vulnerabilities․

Compatibility and Upgrades

The Arris TM1602 is compatible with various devices and networks․ Upgrades, such as 24×8 operation, can be achieved with a separate license for enhanced performance․

10․1 Compatible Devices and Systems

The Arris TM1602 supports a wide range of devices, including computers, routers, and LAN networks․ It is compatible with both single computers and home/office Local Area Networks (LAN)․ The modem ensures seamless integration with various systems, providing reliable connectivity for enhanced performance and efficient data transfer․

10․2 Upgrading Your Modem

The Arris TM1602 can be upgraded to 24×8 operation with a separate license (Part 782204)․ Regular firmware updates are essential for optimal performance․ Ensure compatibility with your service provider before installing any upgrades․ Refer to the user manual for detailed instructions on updating firmware and licenses to enhance your modem’s functionality and speed․

Security Considerations

Always ensure network security by using strong passwords and enabling encryption․ Regular firmware updates enhance protection against vulnerabilities and help safeguard your data effectively․

11․1 Securing Your Network

To ensure network security, use strong, unique passwords for Wi-Fi and admin access․ Enable WPA3 encryption for maximum protection․ Regularly update firmware to patch vulnerabilities․ Disable unnecessary features like remote management and UPnP․ Use a firewall and monitor connected devices․ Set up a guest network for visitors to isolate IoT devices and protect sensitive data․ Schedule periodic security audits to maintain a secure environment․

11․2 Protecting Your Data

Regularly back up your data to prevent loss․ Use encryption for sensitive information and ensure the modem is physically secure․ Monitor for unauthorized access and update security settings․ Enable parental controls and set up firewalls to safeguard personal data․ Keep firmware updated to protect against potential breaches and maintain privacy settings to avoid data exposure․

The Arris TM1602 user guide provides essential insights for optimal modem usage, ensuring a secure and efficient internet experience with proper setup and maintenance․

12․1 Summary of Key Points

The Arris TM1602 user guide provides comprehensive instructions for installation, configuration, and troubleshooting․ It emphasizes safety precautions, optimal performance tips, and regular firmware updates․ The guide also offers detailed sections on warranty information, customer support, and compatibility upgrades․ By following the outlined steps, users can ensure a secure, efficient, and high-performance internet experience with their Arris TM1602 modem․

Categories
PDF

edley’s nutrition information pdf

Edley’s Bar-B-Que is a beloved Nashville institution, offering mouthwatering BBQ with a focus on quality and flavor. Their commitment to transparency includes providing detailed nutrition information in a downloadable PDF guide, ensuring diners can make informed choices about their meals.

1.1 Overview of Edley’s and Its Popularity

Edley’s Bar-B-Que has become a Nashville staple, celebrated for its authentic, smoky flavors and hearty portions. Known for its fast service and cozy atmosphere, the restaurant attracts both locals and visitors. Its popularity stems from a commitment to quality, with a menu featuring tender meats, fresh sides, and signature dishes like Nashville Hot Links and BBQ Nachos. The establishment’s dedication to transparency, including a detailed nutrition information PDF, reflects its care for diners’ health and dietary needs, further enhancing its reputation as a trusted dining destination.

1.2 Importance of Nutrition Information for Restaurant Meals

Providing nutrition information is essential for restaurants, as it empowers diners to make informed choices. With growing health awareness, consumers increasingly seek transparency about what they eat. Edley’s nutrition information PDF exemplifies this commitment, offering detailed insights into calorie, macronutrient, and micronutrient content. This resource is vital for individuals with dietary restrictions, health goals, or allergies, fostering trust and loyalty. By sharing this data, restaurants like Edley’s support healthier decisions and cater to diverse needs, aligning with the broader demand for nutritional transparency in the food industry.

Key Features of Edley’s Menu

Edley’s menu offers a variety of classic BBQ dishes, including slow-cooked meats, hearty sides, and delectable desserts. The nutrition information PDF provides detailed insights into these offerings, ensuring transparency and helping diners make informed choices about their meals.

2.1 Popular Menu Items and Their Nutritional Significance

Edley’s menu features crowd favorites like Nashville Hot Links, BBQ Nachos, and smoked brisket, each offering unique nutritional profiles. The Nashville Hot Links are high in protein but also contain significant fat and sodium. BBQ Nachos, loaded with smoked meats and cheese, are calorie-dense and rich in carbohydrates and saturated fat. Smoked brisket provides leaner protein options but should be consumed in moderation due to its fat content. The nutrition information PDF details these specifics, helping diners balance indulgence with nutritional awareness. These dishes highlight the importance of portion control and mindful eating when enjoying Edley’s flavorful offerings.

2.2 Nashville Hot Links and BBQ Nachos: A Nutritional Breakdown

Edley’s Nashville Hot Links are smoked sausages served with spicy pimento cheese and tangy Viola sauce, offering a rich mix of flavors. They are high in protein but also contain significant fat and sodium. BBQ Nachos, loaded with smoked pork, nacho cheese, and toppings, are calorie-dense, with high levels of carbohydrates and saturated fat. The nutrition information PDF provides detailed breakdowns, revealing that these dishes are best enjoyed in moderation. Understanding their nutritional profiles helps diners make balanced choices while still savoring Edley’s signature flavors.

Understanding the Nutrition Facts Label

The Nutrition Facts Label provides essential details like serving size, calories, macronutrients, and daily value percentages. It helps diners understand the nutritional content of Edley’s dishes, aiding informed decisions.

3.1 Components of a Standard Nutrition Label

A standard Nutrition Facts Label includes key elements such as serving size, total calories, and macronutrient breakdown (fat, carbohydrates, and protein). It also lists dietary fiber, sugars, and sodium content. The label highlights essential vitamins and minerals, such as vitamin D, calcium, iron, and potassium, often expressed as a percentage of the Daily Value (DV). Additionally, it provides information on cholesterol and saturated fats. These components help consumers understand the nutritional profile of a dish, enabling them to make healthier and more informed choices. Edley’s Nutrition Information PDF includes these details to ensure transparency for diners.

3.2 How to Interpret Nutritional Information for Informed Choices

Interpreting nutritional information involves analyzing the serving size, calories, and macronutrients to assess a dish’s nutritional value. Compare the percentages of daily values (DV) for elements like sodium, sugars, and saturated fats to ensure they align with dietary goals. For example, choosing meals with higher fiber and protein can promote satiety and energy balance. Be mindful of added sugars and sodium levels, which can indicate processed ingredients. By evaluating these factors, diners can select options that fit their health priorities, such as low-calorie or high-protein meals. This approach helps in making balanced and nutritious choices from Edley’s menu.

Nutritional Highlights of Edley’s Menu Items

Edley’s menu offers a variety of nutrient-dense choices, with lean meats and vegetables standing out as standout options for health-conscious diners seeking balanced meals.

4.1 Lean Meats and Vegetables: Healthy Options at Edley’s

Edley’s menu shines with lean meats and fresh vegetables, offering healthier choices for diners. Grilled chicken, turkey, and smoked brisket provide high-quality protein with lower fat content. Vegetables like coleslaw, baked beans, and collard greens add fiber, vitamins, and minerals to meals. These options align with balanced eating goals, making it easier for guests to enjoy delicious BBQ while maintaining nutritional awareness. The availability of such dishes underscores Edley’s commitment to catering to diverse dietary needs without compromising on flavor or quality.

4.2 Calorie and Macronutrient Content of Popular Dishes

Edley’s popular dishes like Nashville Hot Links and BBQ Nachos offer a range of calorie and macronutrient content. For example, the Nashville Hot Links provide approximately 350 calories per serving, with a balance of protein and fat. BBQ Nachos, while higher in calories, deliver a mix of carbohydrates, protein, and fat. The nutrition information PDF details specific values for each dish, helping guests understand macronutrient breakdowns. This transparency allows diners to make informed choices, whether they’re tracking calories or managing macronutrient intake for specific dietary goals.

Tips for Making Healthier Choices at Edley’s

Use Edley’s nutrition guide to make informed decisions. Opt for portion control, lean meats, and vegetables. Avoid high-calorie sauces and extras for a balanced meal.

5.1 Portion Control and Balanced Meals

Practicing portion control is key to enjoying Edley’s Bar-B-Que while maintaining a healthy diet. Refer to their nutrition guide to understand serving sizes and plan balanced meals. Opt for smaller portions of richer dishes like BBQ nachos or hot links. Pair these with lighter options such as salads or grilled vegetables to balance macronutrients and calories. Avoid overloading plates to prevent excessive calorie intake. By combining lean proteins, fiber-rich sides, and mindful portion sizes, diners can savor Edley’s flavors without compromising nutritional goals.

5.2 Avoiding High-Calorie Add-Ons and Sauces

High-calorie add-ons and sauces can significantly increase the nutritional content of your meal at Edley’s. Items like BBQ nachos, loaded with cheese, sour cream, and sauce, or the spicy pimento cheese on Nashville Hot Links, add extra calories and fat. Opting for lighter sauces or skipping them altogether can help reduce calorie intake. Additionally, avoiding extras like fried onions or crispy jalapeños can make your meal healthier. Review the nutrition guide to identify lower-calorie alternatives and make informed choices that align with your dietary goals while still enjoying the flavorful experience Edley’s offers.

Special Dietary Considerations

Edley’s caters to diverse dietary needs with options like lean meats, vegetables, and vegetarian dishes, ensuring a variety of choices for low-fat, low-sodium, and low-sugar preferences.

6.1 Options for Low-Fat, Low-Sodium, and Low-Sugar Diets

Edley’s Bar-B-Que offers several options tailored to guests with specific dietary needs, including low-fat, low-sodium, and low-sugar preferences. Lean meats like smoked turkey or chicken breast provide high-quality protein with fewer calories and less fat. Vegetables such as coleslaw (without dressing) and collard greens are excellent low-sodium choices. For low-sugar diets, diners can opt for unsweetened tea or water and avoid sugary sauces. Sides like baked beans can be modified to reduce sugar content. By referring to Edley’s nutrition information PDF, guests can identify menu items that align with their dietary goals and make informed decisions.

6.2 Vegetarian and Vegan Alternatives at Edley’s

Edley’s Bar-B-Que offers a variety of vegetarian and vegan-friendly options, catering to diverse dietary preferences. Sides like coleslaw, collard greens, and baked beans (without added meats) are vegetarian and can be adapted to vegan diets by omitting sauces; The vegetable plate, featuring seasonal vegetables, is a hearty option; Guests can also customize meals by selecting sides like cornbread or a side salad. For vegans, ensuring sauces and dressings align with dietary restrictions is key. Edley’s nutrition information PDF provides detailed insights, helping guests identify suitable options and make informed, plant-based choices during their visit.

The Role of Nutrition in Maintaining a Healthy Weight

Nutrition plays a vital role in maintaining a healthy weight by balancing calorie intake with macronutrient needs. Monitoring portion sizes and nutrient density helps achieve and sustain weight goals.

7.1 Importance of Monitoring Caloric Intake

Monitoring caloric intake is essential for maintaining a healthy weight and overall well-being. It helps prevent excessive weight gain, which can lead to chronic conditions like diabetes and heart disease. By tracking calories, individuals can balance their energy consumption with physical activity levels. The FDA’s updated Nutrition Facts label makes it easier to identify calorie content, enabling informed decisions. Resources like the Edleys nutrition information PDF provide detailed calorie counts, aiding diners in making healthier choices. Mindful eating and portion control are key to sustaining a balanced diet and promoting long-term health.

7.2 Balancing Nutrients for Optimal Health

Balancing nutrients is crucial for maintaining optimal health. A diet rich in carbohydrates, proteins, and fats, along with vitamins and minerals, ensures proper bodily functions. The FDA’s updated Nutrition Facts label highlights macronutrient content, aiding in balanced meal planning. Edley’s nutrition information PDF provides detailed macronutrient breakdowns, helping diners make informed choices. Prioritizing whole foods, lean proteins, and vegetables aligns with dietary recommendations, supporting energy levels, immune function, and overall well-being. A balanced diet not only prevents nutrient deficiencies but also promotes long-term health and reduces the risk of chronic diseases.

Resources for Detailed Nutritional Information

Edley’s provides a comprehensive nutrition information PDF guide, detailing macronutrients, calories, and dietary content for each menu item. Their official website also offers tools for tracking intake and planning meals.

8.1 Accessing Edley’s Nutrition Information PDF

Edley’s Bar-B-Que provides a detailed Nutrition Information PDF guide, accessible on their official website. This resource offers transparent nutritional data, including calories, macronutrients, and dietary content for every menu item. The guide is designed to help diners make informed decisions about their meals. It includes breakdowns for popular dishes like Nashville Hot Links and BBQ Nachos, ensuring clarity on nutritional values. By downloading the PDF, guests can review the information at their convenience, aligning their choices with dietary preferences or restrictions. This tool reflects Edley’s commitment to transparency and supporting health-conscious dining.

8.2 Additional Tools for Tracking Nutritional Intake

Beyond Edley’s Nutrition Information PDF, diners can utilize various tools to track their intake. Apps like MyFitnessPal and Lose It! allow users to log meals and monitor calories, macronutrients, and micronutrients. Websites such as Nutritionix and MyNetDiary offer detailed databases for verifying nutritional content. These platforms enable users to set dietary goals and track progress, complementing Edley’s PDF guide. By integrating these tools, guests can maintain a comprehensive approach to monitoring their nutrition, ensuring alignment with personal health objectives and preferences.

Categories
PDF

copper mountain trail map pdf

Copper Mountain is a renowned destination in Colorado, offering stunning natural beauty and diverse outdoor activities year-round. Known for its vibrant trails, it attracts hikers and skiers alike, providing breathtaking landscapes and exciting adventures for all skill levels.

Overview of the Trail System

Copper Mountain’s trail system offers an extensive network of paths for hiking and skiing, catering to all skill levels. The trails are well-marked and diverse, providing scenic views and exciting terrain.

2.1. Hiking Trails at Copper Mountain

Copper Mountain offers a variety of hiking trails that cater to different skill levels, from easy, family-friendly paths to more challenging routes for experienced hikers. The trails wind through lush forests, alpine meadows, and rocky terrain, offering stunning views of the surrounding mountains and valleys. Many trails are well-marked and maintained, ensuring a safe and enjoyable experience for all visitors. The trail map PDF provides detailed information about trail lengths, elevations, and difficulty levels, helping hikers plan their routes accordingly. With its diverse landscape and scenic beauty, Copper Mountain is a haven for outdoor enthusiasts seeking adventure and connection with nature.

2.2. Skiing Trails at Copper Mountain

Copper Mountain boasts an extensive network of skiing trails, catering to skiers of all skill levels, from beginners to advanced enthusiasts. The trails are carefully groomed, offering smooth runs through picturesque landscapes. With over 140 trails spread across 2,600 acres, the resort provides endless opportunities for exploration. The trail map PDF is essential for navigating the slopes, highlighting gentle groomers, challenging terrain parks, and exhilarating backcountry routes. Skiers can enjoy breathtaking views of the Rocky Mountains while experiencing world-class skiing conditions. The map also helps users locate lift access, rentals, and dining options, ensuring a seamless and enjoyable skiing experience. Whether carving through powder or gliding down gentle slopes, Copper Mountain delivers unforgettable skiing adventures.

Importance of a Trail Map

A trail map is an indispensable tool for navigating Copper Mountain’s extensive network of hiking and skiing trails. It provides detailed information about trail difficulty, length, and connectivity, helping users plan their routes effectively. The map also highlights essential landmarks, such as rest areas, water sources, and emergency shelters, ensuring safety and preparedness. For skiers, it identifies lift access points and groomed runs, while hikers can locate scenic viewpoints and wildlife areas. A trail map also helps users avoid getting lost, saving time and reducing stress. Additionally, it promotes environmental awareness by guiding users through sensitive habitats and protected zones. Whether you’re a seasoned adventurer or a first-time visitor, a trail map is your key to maximizing the Copper Mountain experience.

How to Obtain the Copper Mountain Trail Map PDF

Obtaining the Copper Mountain trail map PDF is a straightforward process that ensures you have all the necessary information for your adventure. The easiest way to access the map is by visiting the official Copper Mountain website. Navigate to the “Trail Maps” section, where you can download the PDF directly. Additionally, the map is available through third-party apps and websites that specialize in outdoor activities. Some popular options include AllTrails and TrailLink, which also offer interactive versions of the map. For those visiting in person, physical copies of the trail map can be picked up at the Copper Mountain Visitor Center or information booths located at the base of the mountain. Having the map readily available, either digitally or in print, is essential for planning and navigating your hiking or skiing experience.

Key Features of the Copper Mountain Trail Map

The Copper Mountain trail map features a comprehensive network of trails, interactive layers, and detailed markers for trail difficulty, elevations, and key points of interest.

5.1. Comprehensive Trail Network

The Copper Mountain trail map showcases an extensive network of trails, catering to both hiking and skiing enthusiasts. With clearly marked routes, the map ensures easy navigation through diverse terrain, from gentle meadows to challenging peaks. Each trail is categorized by difficulty, allowing users to choose paths that suit their skill levels. The network is interconnected, providing seamless transitions between trails and access to scenic viewpoints, alpine lakes, and forested areas. This comprehensive system is designed to enhance the outdoor experience, offering something for everyone, whether seeking adventure or serene exploration.

5.2. Customizable and Interactive Layers

The Copper Mountain trail map PDF offers customizable and interactive layers, allowing users to tailor their experience. These layers provide detailed information such as trail difficulty, elevation gain, and points of interest. Hikers and skiers can toggle between layers to focus on specific features like lodging, dining, or equipment rentals. The interactive elements enable users to zoom in on sections of the map for a closer look or zoom out for a broader view of the terrain. This feature enhances navigation and planning, making it easier to explore Copper Mountain’s vast trail network. The customizable layers also allow users to save their preferred settings, ensuring a personalized and efficient experience during their adventures.

Understanding the Trail Map Legend

The trail map legend is a crucial component of the Copper Mountain trail map PDF, providing essential information for navigating the terrain. It explains the symbols, colors, and markings used to denote trails, landmarks, and facilities. The legend typically includes details such as trail difficulty levels, marked with distinct colors or icons, to help users choose appropriate routes. It also identifies key points of interest, like rest areas, water sources, and emergency shelters. Understanding the legend ensures that users can interpret the map accurately, making it easier to plan routes and avoid potential hazards. This section is vital for both new and experienced visitors, as it enhances safety and overall navigation efficiency while exploring Copper Mountain’s trails.

Popular Trails Highlighted on the Map

The Copper Mountain trail map PDF highlights popular routes like the challenging Copper Creek Trail for hiking and Resolution Bowl for skiing, both offering panoramic views.

7.1. Most Popular Hiking Trails

Copper Mountain boasts an array of iconic hiking trails, each offering unique experiences. The Copper Creek Trail, a fan favorite, is a challenging yet rewarding hike with stunning views of the surrounding peaks. Another popular option is the Colorado Trail, which stretches for miles and connects to the Continental Divide, providing breathtaking vistas. For those seeking a shorter adventure, the West Tenmile Creek Trail offers a serene journey through alpine meadows. These trails cater to all skill levels, from beginner-friendly paths to more rigorous climbs. The Copper Mountain trail map PDF provides detailed insights, helping hikers navigate and explore these picturesque routes with ease. Whether you’re looking for a leisurely stroll or an adrenaline-pumping climb, Copper Mountain’s trails have something for everyone.

7.2. Most Popular Skiing Trails

Copper Mountain is renowned for its exceptional skiing trails, catering to all skill levels. The Resolution Trail is a favorite among experts, offering steep runs and breathtaking views. For intermediate skiers, the Spaulding Bowl provides wide-open terrain with varying challenges. Families and beginners often enjoy the Collage Trail, with its well-groomed paths and gentle slopes. The Copperopolis Trail is another highlight, offering a mix of cruiser runs and tree skiing. These trails are meticulously maintained and easily accessible via the Copper Mountain trail map PDF, which highlights difficulty levels, lifts, and scenic overlooks. Whether carving through groomed runs or exploring backcountry terrain, Copper Mountain delivers unforgettable skiing experiences for every enthusiast.

Seasonal Variations in Trail Availability

Copper Mountain’s trails experience seasonal variations, with availability changing throughout the year. In winter, skiing trails dominate, offering a vast network of routes for all skill levels. Summer brings hiking and mountain biking opportunities, with trails winding through alpine meadows and forests. Spring and fall are transitional periods, with some trails closing due to snowmelt or maintenance. The Copper Mountain trail map PDF is updated seasonally to reflect these changes, ensuring users access accurate information. It’s essential to check the map before planning adventures, as weather and maintenance can impact trail accessibility. This seasonal diversity makes Copper Mountain a year-round destination for outdoor enthusiasts, with the trail map serving as a reliable guide for every visit.

Navigating Copper Mountain Trails with the Map

Navigating Copper Mountain’s trails is made easy with the detailed trail map PDF, which provides clear markings and symbols to guide users. The map highlights trailheads, intersections, and key landmarks, ensuring visitors can explore confidently. Color-coded trails indicate difficulty levels, while contour lines reveal elevation changes. It’s essential to study the map before heading out, noting potential loops or shortcuts. The PDF format allows for easy zooming and scrolling, making it simple to plan routes. For new visitors, starting with well-marked trails and gradually exploring more challenging paths is recommended. By referencing the map, users can maximize their time on the mountain and enjoy a seamless outdoor experience tailored to their skill level and interests.

Safety Tips for Using the Trail Map

Using the Copper Mountain trail map PDF safely requires careful planning and awareness. Always download the latest version before your trip to ensure accuracy. Carry a physical copy or store it offline on your device in case of no internet connectivity. Familiarize yourself with the map legend to understand trail difficulty and markings. Stay alert to your surroundings and follow posted signs to avoid getting lost. Bring essentials like water, a first aid kit, and a compass. Inform someone of your planned route and expected return time. Respect trail closures and private property. Be mindful of weather conditions and adjust plans accordingly. Remember, the map is a guide—use your judgment and stay within your skill level for a safe and enjoyable experience.

Copper Mountain stands out as a premier destination for outdoor enthusiasts, offering a diverse range of trails for hiking and skiing. The trail map PDF is an indispensable tool, providing detailed insights into the terrain, ensuring safe and enjoyable adventures. By understanding the map’s features, such as trail difficulty and interactive layers, visitors can plan their routes effectively. Seasonal variations and safety tips further enhance the experience, making the Copper Mountain trail map a must-have for anyone exploring this stunning location. Whether you’re a seasoned adventurer or a first-time visitor, the map empowers you to make the most of your time at Copper Mountain, ensuring unforgettable experiences in nature’s splendor.

Categories
PDF

the looking glass pdf

The Looking Glass PDF reveals intriguing insights into Project Looking Glass, a secret program exploring future events through electromagnetic technology. It delves into cultural, technological, and psychological dimensions, offering a unique perspective on perception and reality.

Overview of the Document

The Looking Glass PDF is a comprehensive document that explores the intersection of technology, psychology, and culture through the lens of the “looking glass” concept. It begins with an introduction to Project Looking Glass, a secretive initiative allegedly involving advanced technology for viewing future events. The document also delves into the historical and cultural significance of the “looking glass” metaphor, drawing parallels with Lewis Carroll’s Through the Looking-Glass and its symbolic implications. Additionally, it examines the Thoughtworks Looking Glass 2025 Report, which forecasts technological trends and their impact on innovation. The PDF weaves these themes together, offering a multifaceted analysis of perception, reality, and human identity.

Historical and Cultural Significance

The Looking Glass PDF highlights the enduring symbolic power of the “looking glass” concept across cultures and time. Rooted in ancient myths and folklore, the mirror has long represented a portal to hidden truths and alternate realities. In literature, Lewis Carroll’s Through the Looking-Glass popularized the idea of a reflective boundary between worlds, influencing generations of writers and thinkers. Culturally, the “looking glass” has evolved into a metaphor for self-reflection, identity, and the exploration of the unknown. Its significance extends to psychology, where the “looking-glass self” theory explores how individuals form their sense of self through external perceptions, making it a timeless and universal symbol.

Project Looking Glass: The Secret Program

Project Looking Glass was a clandestine initiative at Area 51 and Facility S4, aiming to explore time and alternate realities using advanced electromagnetic technology.

Description of the Looking Glass Device

The Looking Glass Device is a sophisticated technology described in the PDF as utilizing rotating cylinders and electromagnetic fields to create a portal for viewing probable future events. This innovative apparatus was central to Project Looking Glass, aiming to explore temporal dimensions and alternate realities. The device’s operation relied on complex configurations of electromagnetic pulses, generating a stable vortex for observation. Its primary purpose was to gather intelligence on potential future scenarios, offering insights into strategic decision-making. The technology’s design and functionality were shrouded in secrecy, with experiments conducted at Facility S4. The device symbolizes humanity’s quest to transcend time and predict outcomes, blending science fiction with speculative science.

Area 51 and Facility S4 Involvement

The Looking Glass PDF details the involvement of Area 51 and Facility S4 in Project Looking Glass, a highly classified program aimed at exploring temporal dimensions. These secretive facilities were central to the development and testing of the Looking Glass Device, with experiments conducted under extreme confidentiality. Area 51, renowned for its association with advanced military and extraterrestrial research, provided the infrastructure for initial prototypes. Facility S4, known for its role in reverse-engineering unidentified technologies, housed the final iterations of the device. The collaboration between these sites underscores the project’s significance and the government’s interest in unlocking the mysteries of time and space.

Thoughtworks Looking Glass 2025 Report

Thoughtworks’ Looking Glass 2025 Report offers strategic insights into emerging technologies, guiding businesses to prepare for future challenges and opportunities in innovation and digital transformation.

Key Technology Trends and Predictions

The Thoughtworks Looking Glass 2025 Report highlights emerging technologies poised to reshape industries. It emphasizes advancements in artificial intelligence, quantum computing, and augmented reality, predicting their transformative impact on business operations. The report also explores the integration of blockchain for secure data transactions and the rise of decentralized systems. A focus on sustainability is evident, with predictions on green tech innovations. Additionally, it addresses the growing importance of cybersecurity and ethical data practices. By examining these trends, the report provides actionable insights for companies aiming to stay competitive in a rapidly evolving digital landscape. Its forward-looking perspective helps organizations prepare for future challenges and opportunities.

Implications for Business and Innovation

The Looking Glass PDF underscores the transformative potential of emerging technologies for businesses. By aligning with long-term tech trends, companies can harness innovation to stay competitive. The report encourages organizations to adopt forward-thinking strategies, embracing advancements like AI, quantum computing, and decentralized systems. It highlights the need for ethical data practices and robust cybersecurity measures. Businesses are urged to prioritize sustainability and green tech to meet growing consumer expectations. The document also emphasizes the importance of fostering a culture of innovation to address future challenges. By leveraging these insights, companies can make strategic decisions that drive growth and resilience in an ever-evolving market landscape.

Lewis Carroll’s “Through the Looking-Glass”

Lewis Carroll’s “Through the Looking-Glass” follows Alice’s adventures in a mirrored world, exploring themes of identity, reality, and imagination. The story symbolizes self-discovery and perception shifts.

Plot Summary and Main Themes

Lewis Carroll’s “Through the Looking-Glass” continues Alice’s adventures, as she enters a fantastical world through a mirror. The story explores themes of identity, logic, and imagination, with Alice encountering eccentric characters like the Red Queen and Tweedledee. The narrative delves into the idea of self-discovery, as Alice navigates a complex, ever-changing landscape. The looking-glass serves as a symbol of transition between reality and illusion, reflecting Alice’s growth and understanding of her own identity. The story also critiques societal norms and logic through its absurd, whimsical scenarios, making it a timeless exploration of childhood wonder and the human condition.

Symbolism of the Looking Glass in Literature

The looking glass in literature symbolizes a portal to alternate realities, reflecting themes of self-discovery and illusion. In Lewis Carroll’s work, it represents a transition between reality and fantasy, mirroring Alice’s journey of identity. The glass serves as a metaphor for introspection, revealing hidden truths about oneself and society. Its symbolism extends to broader cultural contexts, often representing the duality of human nature and the blurred lines between perception and reality. The looking glass also embodies the idea of transformation, inviting readers to question their understanding of identity, truth, and the self.

The Looking-Glass Self Theory

The Looking-Glass Self Theory explores how individuals form self-perceptions through societal reflections, explaining self-image formation and its significant impact on identity and social behavior development.

Psychological Concept and Its Development

The Looking-Glass Self Theory, developed by Charles Cooley, explains how individuals form their self-concept based on others’ perceptions. It suggests that our identity emerges from imagined judgments of others, shaping self-image and behavior. Cooley proposed that this process occurs in three stages: others’ judgments, our imagination of these judgments, and our emotional responses. This theory highlights how external reflections influence internal self-perception, emphasizing the social nature of identity formation. The concept underscores the dynamic interplay between individual and societal influences, remaining a foundational idea in social psychology for understanding how we develop and maintain our sense of self.

Modern Applications in Social Psychology

The Looking-Glass Self Theory remains highly relevant in contemporary social psychology, particularly in studying identity formation and self-perception in digital spaces. Social media platforms amplify the concept, as individuals curate their online personas based on perceived judgments of others. This digital “looking glass” influences self-esteem, behavior, and mental health, as people seek validation through likes and comments. Modern research also explores how virtual interactions shape self-image, revealing how the theory adapts to evolving social dynamics. The concept continues to provide insights into how external reflections shape internal identities in an increasingly interconnected world.

The Looking Glass PDF: Content and Structure

The Looking Glass PDF is structured into key chapters, exploring Project Looking Glass, its technological implications, and cultural significance. It blends historical context with modern insights, offering a comprehensive analysis of its relevance in today’s world.

Key Chapters and Topics Covered

The Looking Glass PDF is organized into distinct chapters, each addressing different aspects of the topic. It begins with an overview of Project Looking Glass, detailing its historical background and the mysterious device developed at Area 51. Subsequent chapters explore the involvement of Facility S4 and the alleged experiments conducted there. The document also delves into the Thoughtworks Looking Glass 2025 Report, highlighting key technology trends and their implications for future innovation. Additionally, it examines Lewis Carroll’s Through the Looking-Glass, analyzing its literary themes and symbolic significance. The PDF concludes with a discussion of the Looking-Glass Self Theory and its relevance in modern psychology.

Importance of the Document in Contemporary Context

The Looking Glass PDF holds significant relevance today, offering a bridge between historical mysteries and modern technological advancements. It provides insights into secret programs like Project Looking Glass, shedding light on alleged experiments with time and reality. The document also explores the Thoughtworks Looking Glass 2025 Report, which predicts future tech trends, making it a valuable resource for innovators and businesses. Additionally, its discussion of Lewis Carroll’s Through the Looking-Glass and the Looking-Glass Self Theory highlights the enduring symbolism of reflection in literature and psychology. This PDF serves as a comprehensive guide for understanding perception, identity, and the intersection of science and imagination in today’s world.

Categories
United Kingdom

window cleaning pricing guide uk

The cost of window cleaning in the UK varies‚ with residential services starting from £30. Prices depend on factors like the number of windows‚ property size‚ and location. Average costs range depending on these variables.

Importance of Professional Window Cleaning

Professional window cleaning is essential for maintaining the appearance and value of both residential and commercial properties. Clean windows enhance natural light‚ improve curb appeal‚ and create a positive first impression for visitors or customers. Regular cleaning also prevents the buildup of dirt‚ grime‚ and streaks‚ which can damage window surfaces over time.

Professional cleaners use specialized equipment and techniques to ensure streak-free results‚ unlike DIY methods. They also handle challenging tasks‚ such as high-rise windows or intricate designs‚ safely and efficiently. Additionally‚ professional services can extend the lifespan of windows by removing corrosive substances like hard water spots and pollutants.

For businesses‚ clean windows contribute to a professional image‚ boosting customer trust and satisfaction. Homes benefit from improved aesthetics and better energy efficiency‚ as clean windows allow more sunlight to enter. Investing in professional window cleaning is a cost-effective way to maintain property value and overall appearance.

Factors Affecting Window Cleaning Prices

Window cleaning prices in the UK are influenced by the number of windows‚ property size‚ location‚ and additional services. Urban areas and larger properties typically cost more‚ while rural areas may be cheaper. Special requests can also increase costs.

Location and Regional Variations

Location plays a significant role in determining window cleaning prices across the UK. Urban areas‚ such as London‚ often have higher costs due to increased demand and higher living expenses. In contrast‚ rural areas tend to offer more affordable rates. Regional variations also exist‚ with prices in the South East generally being higher than in the North or Scotland. Additionally‚ the availability of window cleaning services in a specific area can influence costs‚ as competition may drive prices down. For instance‚ areas with a higher concentration of cleaning businesses often see more competitive pricing. Conversely‚ remote locations may incur additional travel fees. These regional differences highlight the importance of comparing local quotes to find the best value for your specific area. Understanding these variations can help homeowners and businesses budget effectively for their window cleaning needs.

Residential Window Cleaning Pricing

Residential window cleaning prices in the UK typically start from £30‚ depending on the number of windows and property size. Average costs range from £40 to £80 for standard homes‚ with larger properties costing more.

Average Costs for Different Types of Properties

Window cleaning costs vary significantly based on property type and size. For a small flat with 5-10 windows‚ prices typically range from £30 to £50. Semi-detached houses with 10-15 windows cost between £40 and £70. Larger detached homes with 15-25 windows can expect prices from £60 to £100. Estates or properties with over 25 windows may pay £100 to £150 or more. These estimates include standard cleaning services but may not account for additional factors like accessibility challenges or special equipment requirements. Regional variations also play a role‚ with urban areas often charging more than rural locations. Regular cleaning schedules‚ such as bi-monthly or quarterly‚ can sometimes reduce costs. Always request a detailed quote to understand the breakdown of charges for your specific property needs.

Commercial Window Cleaning Pricing

Commercial window cleaning prices in the UK are higher than residential services‚ starting from around £50 for small offices. Costs increase with building size‚ accessibility‚ and cleaning frequency‚ often ranging from £100 to £300 or more for large premises.

Costs for Offices‚ Shops‚ and Large Buildings

Commercial window cleaning costs in the UK vary significantly based on the size and complexity of the premises. Offices and small shops typically start from £50-£100‚ while larger buildings with multiple storeys or complex architecture can range from £150 to £300 or more. Accessibility plays a key role‚ with prices increasing for hard-to-reach windows requiring specialized equipment like cherry pickers or abseiling gear. Regular cleaning schedules‚ such as weekly or bi-weekly services‚ may reduce costs per visit‚ while one-off deep cleans are generally more expensive. Additionally‚ factors like the number of windows‚ glass type‚ and local competition influence pricing. For large commercial properties‚ some companies offer custom quotes based on specific requirements‚ ensuring tailored solutions for businesses. Extra services‚ such as internal window cleaning or graffiti removal‚ may also incur additional charges‚ making it essential to request detailed breakdowns when comparing providers.

Additional Services and Costs

Additional services like internal window cleaning‚ squeegee rental‚ or graffiti removal can increase costs. Prices vary‚ with one-off deep cleans costing more than regular schedules. Always request detailed quotes to understand extra charges upfront.

Special Requests and Extra Charges

Special requests can significantly impact window cleaning costs. For instance‚ unique window shapes or hard-to-reach areas may require additional equipment or time‚ leading to higher charges. Some cleaners charge extra for internal window cleaning‚ especially if it involves moving furniture or covering floors.

Other factors include emergency or same-day services‚ which often come with a premium. Graffiti removal or stubborn stain treatment may also incur extra fees. It’s important to discuss these requests upfront to avoid unexpected charges.

  • Unique window shapes: Round‚ arched‚ or unusually large windows may cost more to clean due to specialized tools.
  • Accessibility issues: Windows in high-rise buildings or those requiring ladder extensions may incur additional fees.
  • Special cleaning products: Eco-friendly or industrial-strength cleaners can increase costs.

Always ask for a detailed breakdown of charges to ensure transparency and avoid surprises.

How to Get the Best Quotes

To secure the best quotes for window cleaning‚ compare multiple providers and request detailed breakdowns of services. Check reviews‚ ask about included services‚ and clarify any additional costs to ensure transparency.

Tips for Comparing Prices and Services

When comparing window cleaning prices and services‚ request detailed quotes from multiple providers. Ensure each quote includes the scope of work‚ such as the number of windows‚ cleaning methods‚ and frequency of service. Compare quotes side by side to identify the best value for your needs. Always check for additional services like squeegee and water-fed pole methods‚ as these can impact both cost and quality. Reading reviews and ratings can help you assess a company’s reliability and customer satisfaction. Ask questions about pricing structures‚ such as one-time cleans versus recurring contracts‚ and inquire about any potential hidden fees. Additionally‚ consider providers who offer certifications or insurance for added peace of mind. By taking the time to thoroughly compare options‚ you can find a service that balances affordability with quality results. Negotiate if possible‚ and always ensure the final agreement aligns with your budget and expectations.

Window cleaning prices in the UK vary based on location‚ property type‚ and services. Comparing quotes and services helps find the best value. Choose a reputable provider for clean‚ sparkling windows and excellent service.

Key Takeaways for Choosing the Right Service

When selecting a window cleaning service in the UK‚ consider price‚ quality‚ and reliability. Compare quotes from multiple providers to find the best value for your needs. Ensure the service is insured and reputable to avoid potential issues. Check reviews and ask for references to gauge customer satisfaction. Be clear about the services included in the price and any additional costs. For residential properties‚ expect starting prices from £30‚ while commercial premises may incur higher fees due to larger scale and specialized requirements. Always request a detailed breakdown of charges to understand what you’re paying for. By doing your research and prioritizing transparency‚ you can select a service that meets your budget and delivers sparkling results. Remember‚ cheaper isn’t always better—focus on quality and long-term satisfaction.

Categories
United Kingdom

esol entry 2 writing exam practice pdf

The ESOL Entry 2 Writing Exam assesses basic writing skills, focusing on clear communication and everyday English. It includes two tasks, completed within 60 minutes, requiring practical language use. Practice materials like sample papers and PDF guides are widely available online, helping learners prepare effectively for the exam.

1.1 Overview of the ESOL Entry 2 Writing Exam

The ESOL Entry 2 Writing Exam evaluates learners’ ability to communicate effectively in everyday English. It consists of two tasks, completed within 60 minutes, focusing on practical writing skills. Task 1 involves short writing activities, while Task 2 requires a longer text, such as a letter or short essay. Topics are relevant to daily life, ensuring learners can demonstrate clear and accurate writing. The exam emphasizes the use of simple sentences, basic vocabulary, and correct grammar. Practice materials, including sample papers and PDF guides, are widely available online, helping learners prepare for the exam structure and content.

1.2 Importance of Practice for Success

Regular practice is essential for achieving success in the ESOL Entry 2 Writing Exam. It helps learners become familiar with the exam format, question types, and time constraints. By using sample papers and PDF guides, candidates can improve their writing skills, such as structuring sentences and using appropriate vocabulary. Practice also enhances time management, allowing learners to complete tasks efficiently. Additionally, it builds confidence and reduces exam anxiety. Accessing resources like practice materials and assessment guides ensures learners are well-prepared, enabling them to demonstrate their best abilities on exam day.

Key Features of the ESOL Entry 2 Writing Exam

The ESOL Entry 2 Writing Exam lasts 60 minutes, featuring two tasks. Task 2 carries more marks than Task 1. It assesses grammar, vocabulary, and spelling skills.

2.1 Exam Format and Question Types

The ESOL Entry 2 Writing Exam consists of two tasks, each designed to assess different writing skills. Task 1 typically involves short, guided writing, such as filling gaps or writing short notes, while Task 2 requires longer, more independent writing, like composing a letter or short essay. The exam includes clear instructions and examples to guide learners. Question types focus on practical, everyday English, ensuring learners can communicate effectively. Practice materials, such as sample papers and PDF guides, are widely available to help familiarize learners with the exam format and question types.

2.2 Time Constraints and Task Requirements

The ESOL Entry 2 Writing Exam is completed within 60 minutes, allowing learners to demonstrate their writing abilities effectively. Task 1 involves shorter, structured questions, while Task 2 requires a longer, more detailed response. Learners must manage their time wisely to complete both tasks. The exam focuses on clear communication, with tasks reflecting everyday situations. Practice materials, such as sample papers and PDF guides, provide insights into the specific requirements, helping learners prepare and understand the expected writing standards for each task; This ensures they can perform confidently within the given time constraints.

Understanding the Exam Structure

The ESOL Entry 2 Writing Exam consists of two tasks, with clear instructions and time limits. Task 1 involves short answers, while Task 2 requires longer, detailed responses.

3.1 Tasks and Mark Allocation

The ESOL Entry 2 Writing Exam includes two tasks, each designed to assess different writing skills. Task 1 involves short answers, such as filling in forms or writing notes, while Task 2 requires a longer response, like a letter or description. Marks are allocated based on clarity, accuracy, and the ability to complete tasks effectively. Assessment focuses on grammar, vocabulary, and the ability to communicate ideas clearly. Practice materials, including sample papers, help learners understand task requirements and prepare for the exam structure. Understanding mark allocation ensures learners focus on key areas to achieve higher scores. Regular practice improves performance and confidence.

3.2 Assessment Criteria for Writing

The ESOL Entry 2 Writing Exam is assessed based on clear communication, accuracy, and appropriate use of language. Examiners evaluate grammar, vocabulary, punctuation, and spelling. They also check if the writing meets the task requirements and conveys meaning effectively. Learners are rewarded for using correct sentence structures and vocabulary relevant to the topic. Understanding these criteria helps candidates focus on improving specific areas. Sample papers and mark schemes provide examples of good responses, guiding learners on how to meet expectations and achieve higher scores. Regular practice with these materials enhances writing skills and exam performance.

Effective Preparation Strategies

Use sample papers and practice materials to familiarize yourself with exam formats. Practice writing under timed conditions to build speed and accuracy. Regularly review feedback to improve.

4;1 Utilizing Sample Papers and Practice Materials

Sample papers and practice materials are essential for preparing for the ESOL Entry 2 Writing Exam. They provide insights into the exam format, including task types like writing letters or essays; Practice activities help learners understand the timing and structure, ensuring they can complete tasks within the 60-minute limit. Many resources, such as PDF guides and online quizzes, offer mark schemes and assessment criteria, allowing candidates to self-evaluate and improve. Regular use of these materials helps build confidence and familiarity with the exam requirements, ensuring learners are well-prepared for the challenges they will face.

4.2 Developing Writing Skills for Entry 2 Level

Developing writing skills for ESOL Entry 2 involves focusing on clear sentence structure, basic grammar, and vocabulary relevant to everyday situations. Learners should practice forming short, simple sentences and using correct verb tenses. Expanding vocabulary through word lists and flashcards can enhance expression. Organizing ideas logically is crucial, as tasks may include writing short essays or letters. Regular practice with exercises like fill-in-the-blank and sentence completion helps build confidence. Feedback from tutors or self-assessment using mark schemes is vital for improvement. Consistent practice ensures learners can communicate effectively within the exam’s practical, real-life focus.

Common Challenges in the ESOL Entry 2 Writing Exam

Learners often struggle with time management, understanding question requirements, and producing coherent writing under exam pressure. Practice helps overcome these challenges and build confidence.

5.1 Identifying and Overcoming Writing Difficulties

Common challenges in the ESOL Entry 2 Writing Exam include managing time effectively, understanding task requirements, and organizing ideas clearly. Learners often struggle with grammar, spelling, and vocabulary, which can hinder clear communication. To overcome these difficulties, practice with sample papers and focus on improving sentence structure and coherence; Regular writing exercises, such as completing past exam tasks, help build confidence and fluency. Additionally, seeking feedback from tutors and peers can highlight areas for improvement, enabling learners to refine their skills and approach the exam with greater assurance.

5.2 Managing TimeEffectively During the Exam

Effective time management is crucial for success in the ESOL Entry 2 Writing Exam. Learners should allocate specific time to each task, ensuring they complete both within the 60-minute window. Start by skimming all questions to understand requirements before writing. Plan your responses, focusing on clear and concise language. Leave time for revising your work to correct errors. Practice with sample papers under timed conditions to build familiarity with the format and improve pacing. Prioritize tasks that carry higher marks and avoid spending too long on a single question to maintain progress throughout the exam.

Exam Day Tips and Essentials

Arrive early, stay calm, and follow instructions carefully. Use sample papers to plan your responses, ensuring clear and concise writing. Manage your time effectively to complete all tasks.

6.1 What to Expect on the Day of the Exam

On exam day, arrive early and bring necessary materials. The exam lasts 60 minutes, featuring two writing tasks. Task 2 carries more marks than Task 1. Read instructions carefully, plan responses, and write clearly. Use the provided paper for rough work and avoid corrections. No dictionaries or erasable pens are allowed. Stay calm, manage time effectively, and ensure all answers are completed within the allocated time. Follow invigilator instructions and review work before submission to ensure accuracy and completeness.

6.2 Do’s and Don’ts for the Writing Section

Do read instructions carefully and plan your response before writing. Use the provided paper for rough work and write clearly; Highlight key points in the question to stay focused. Ensure tasks are completed within the word limit and review your work before finishing. Don’t use pencil, erasable pens, or correction fluid. Avoid crossing out work or using dictionaries. Don’t exceed time limits or skip tasks. Refrain from guessing answers and ensure all sections are attempted. Follow invigilator instructions strictly to avoid penalties.

Success in the ESOL Entry 2 Writing Exam requires consistent practice and effective use of available resources like sample papers and strategies to achieve high scores.

7.1 Summarizing Key Points for Success

To excel in the ESOL Entry 2 Writing Exam, learners should focus on clear communication, correct grammar, and appropriate vocabulary. Regular practice with sample papers and past exams is essential to build confidence and familiarity with the exam format. Understanding the question types and time constraints helps in managing tasks effectively. Developing writing skills through structured exercises and seeking feedback can significantly improve performance. Additionally, organizing ideas logically and using connectives enhance coherence. By following these strategies, learners can demonstrate their abilities effectively and achieve a high score in the exam.

7.2 Final Tips for Achieving a High Score

To achieve a high score in the ESOL Entry 2 Writing Exam, focus on completing all tasks accurately and thoroughly. Use sample papers to familiarize yourself with the exam format and practice writing within the time constraints. Plan your essays, ensuring clear structure and logical flow. Proofread your work to avoid grammar and spelling errors. Use simple, appropriate vocabulary and connectives to enhance coherence. Stay calm during the exam, read instructions carefully, and allocate time wisely for each task. By following these tips, you can demonstrate your writing skills effectively and achieve a strong result.