Categories
PDF

roofing materials list pdf

Roofing materials are essential for protecting structures from environmental elements while enhancing durability and aesthetics. This section explores various roofing options‚ their benefits‚ and key considerations for selection.

1.1 Overview of Roofing Systems

A roofing system is a layered structure designed to protect buildings from weather elements while ensuring durability and energy efficiency. It typically includes sheathing‚ underlayment‚ and surface materials like shingles or tiles. Proper installation ensures water drainage‚ ventilation‚ and structural integrity. Flashing and gutters are critical for directing water away‚ preventing leaks. A well-designed system balances aesthetics‚ functionality‚ and cost‚ tailored to climate and architectural needs. Understanding these components is vital for selecting the right materials and ensuring long-term performance.

1.2 Importance of Choosing the Right Materials

Selecting the appropriate roofing materials is crucial for ensuring durability‚ safety‚ and cost-effectiveness. The right materials protect against weather damage‚ improve energy efficiency‚ and enhance curb appeal. They also meet local building codes and withstand specific climate conditions. Incorrect choices can lead to premature deterioration‚ higher maintenance costs‚ and potential safety hazards. A well-chosen material balances aesthetics‚ budget‚ and performance‚ ensuring a roof that lasts for decades. Consulting a comprehensive roofing materials list and professional advice helps make informed decisions tailored to individual needs and environmental demands;

Common Types of Roofing Materials

Popular roofing materials include asphalt shingles‚ metal roofing‚ slate‚ wood shingles‚ clay and concrete tiles‚ and synthetic options‚ each offering unique benefits and aesthetics.

2.1 Asphalt Shingles

Asphalt shingles are a popular and cost-effective roofing material‚ known for their durability and versatility. They are available in various styles‚ including three-tab and architectural designs‚ offering different appearances and levels of protection. With a typical lifespan of 20 to 30 years‚ asphalt shingles are a practical choice for many homeowners. They are resistant to weathering and can withstand moderate wind and hail. Easy to install and maintain‚ asphalt shingles come in a wide range of colors‚ making them a versatile option for various architectural styles; Their affordability and reliability make them a top choice for residential roofing projects.

2.2 Metal Roofing

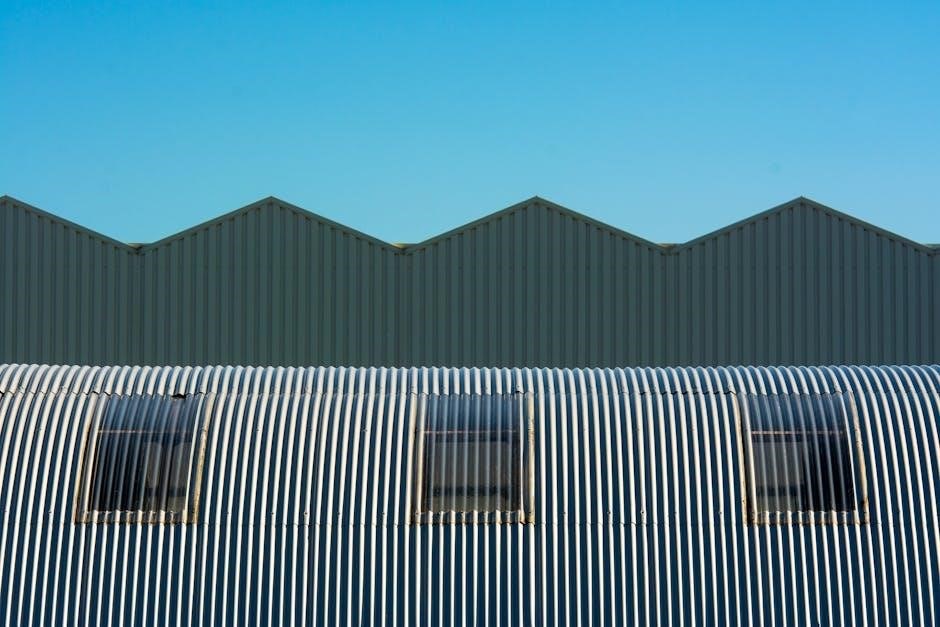
Metal roofing is a highly durable and long-lasting option‚ often made from materials like steel‚ aluminum‚ copper‚ and zinc. Known for its resistance to weathering‚ fire‚ and pests‚ metal roofing can last 30 to 50 years or more. It is lightweight‚ easy to install‚ and comes in various styles‚ including standing seam and corrugated designs. Metal roofs are also eco-friendly‚ as they can be recycled and may qualify for energy efficiency incentives. While initially more expensive than some other materials‚ their longevity and low maintenance make them a cost-effective choice for many homeowners.

2.3 Slate Shingles

Slate shingles are a premium roofing option renowned for their exceptional durability and natural beauty. Made from metamorphic rock‚ they are highly resistant to weathering‚ fire‚ and pests‚ with a lifespan of 100 years or more. Slate shingles come in various colors and textures‚ offering a timeless aesthetic appeal. Their dense composition provides excellent insulation‚ reducing energy costs. However‚ they are heavy‚ requiring sturdy roof support‚ and more expensive than many other materials. Despite these drawbacks‚ slate shingles remain a top choice for those seeking a long-lasting‚ elegant roofing solution.

2.4 Wood Shingles and Shakes

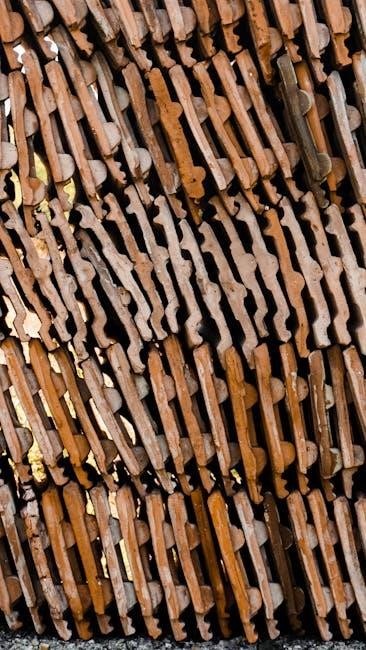
Wood shingles and shakes are eco-friendly roofing options that offer a natural‚ rustic appearance. Shingles are thin‚ uniform slices of wood‚ while shakes are thicker and more textured. Both are durable‚ resistant to weather‚ and provide excellent insulation. Cedar is the most common type due to its resistance to rot and insects. They require periodic maintenance to prevent mold and moisture damage. Wood shingles and shakes are ideal for traditional or country-style homes‚ blending seamlessly with natural surroundings while offering a sustainable roofing solution;

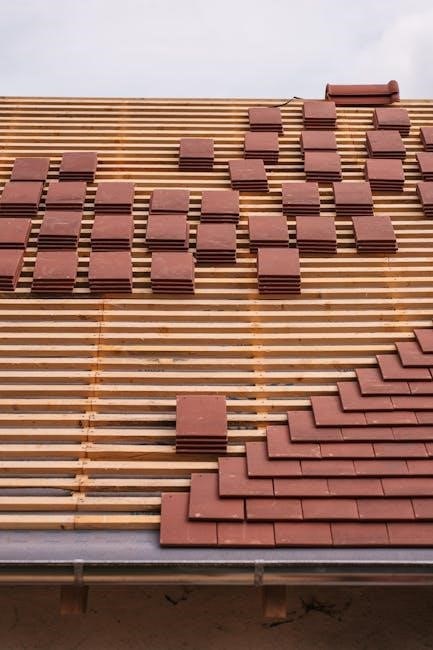
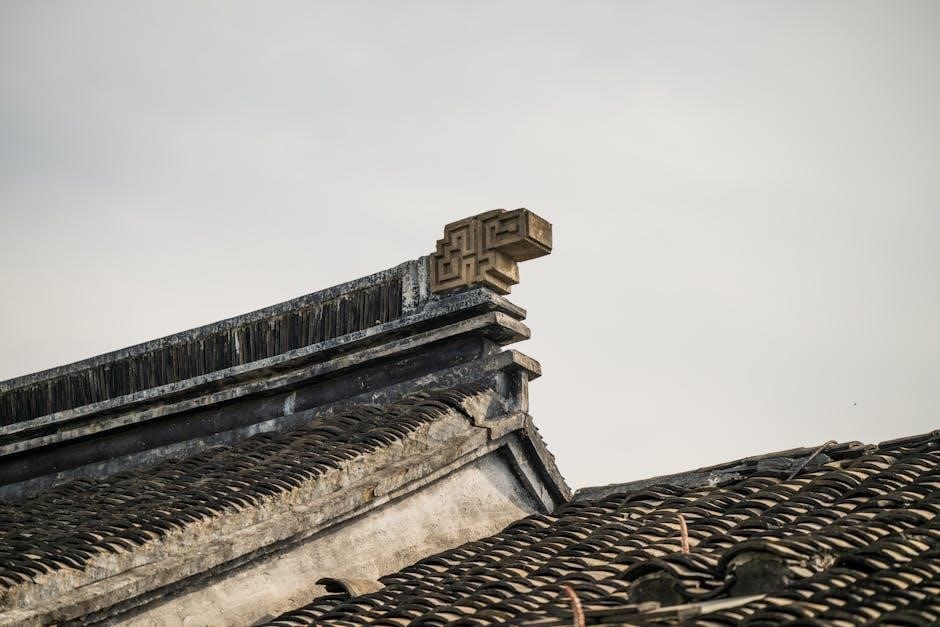
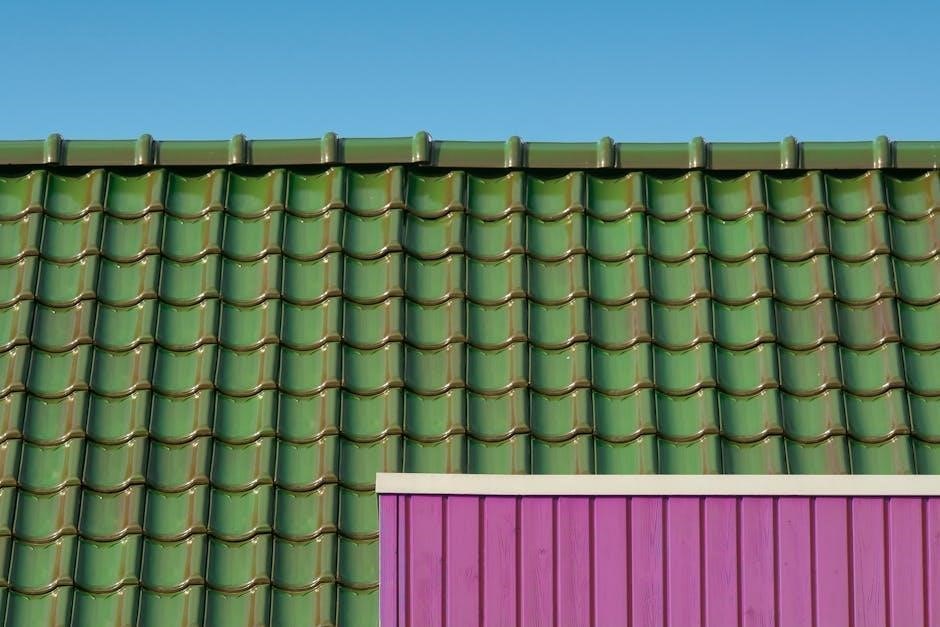
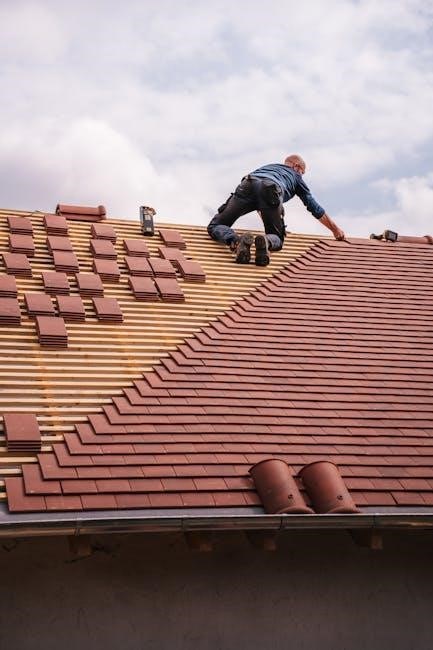
2.5 Concrete and Clay Tiles

Concrete and clay tiles are highly durable and versatile roofing materials known for their long lifespan and resistance to weather conditions. Concrete tiles are made from cement‚ sand‚ and water‚ offering strength and affordability. Clay tiles‚ crafted from natural clay and fired at high temperatures‚ provide a classic‚ timeless look. Both options are fire-resistant‚ low-maintenance‚ and suitable for various architectural styles. They are heavier than other materials‚ requiring sturdy roof support. Concrete and clay tiles are popular for their sustainability and ability to endure harsh weather‚ making them a preferred choice for many homeowners seeking lasting protection and aesthetic appeal.

2.6 Synthetic Roofing Materials

Synthetic roofing materials are modern alternatives designed to mimic natural products like slate‚ wood‚ and clay‚ offering enhanced durability and low maintenance. Made from polymer blends and advanced composites‚ these materials resist weathering‚ fading‚ and cracking. They are lightweight‚ easy to install‚ and customizable to suit various architectural styles. Synthetic options are eco-friendly‚ often made from recycled content‚ and provide excellent insulation. Their versatility and long lifespan make them a popular choice for homeowners seeking cost-effective‚ sustainable‚ and visually appealing roofing solutions that require minimal upkeep and offer long-term performance benefits.

Components of a Roofing System

A roofing system includes sheathing‚ underlayment‚ flashing‚ ventilation‚ gutters‚ and insulation‚ each playing a critical role in structural integrity‚ weatherproofing‚ and energy efficiency.

3.1 Sheathing

Sheathing forms the structural base of a roofing system‚ typically made of wood or engineered materials. It provides a stable surface for installing underlayment‚ shingles‚ and other components. Proper installation ensures even weight distribution and prevents sagging. Sheathing materials must be durable‚ moisture-resistant‚ and capable of withstanding environmental stresses. Incorrectly installed sheathing can lead to roof failure‚ making it a critical component to execute accurately. Regular inspections and repairs are essential to maintain the integrity of the roofing system.

3.2 Underlayment

Underlayment is a protective layer installed between the sheathing and roofing materials‚ such as shingles or tiles. It shields the roof deck from weather damage and provides a smooth surface for installation. Typically made of felt paper or synthetic materials‚ underlayment enhances water resistance and reduces the risk of leaks. Proper installation ensures a durable and long-lasting roofing system. It also acts as a barrier against moisture‚ preventing rot and decay. Choosing the right underlayment material is crucial for maintaining the integrity and performance of the roof over time.

3.3 Flashing

Flashing is a critical component of a roofing system‚ designed to prevent water infiltration at vulnerable points. Installed around chimneys‚ vents‚ skylights‚ and valleys‚ it directs water away from these areas. Made from durable materials like metal or rubber‚ flashing ensures watertight seals where roofing materials meet. Proper installation is essential to avoid leaks and structural damage. Flashing must be carefully selected to match the roof’s design and material type‚ ensuring compatibility and longevity. It plays a vital role in maintaining the roof’s integrity and protecting the building from moisture-related issues.

3.4 Ventilation

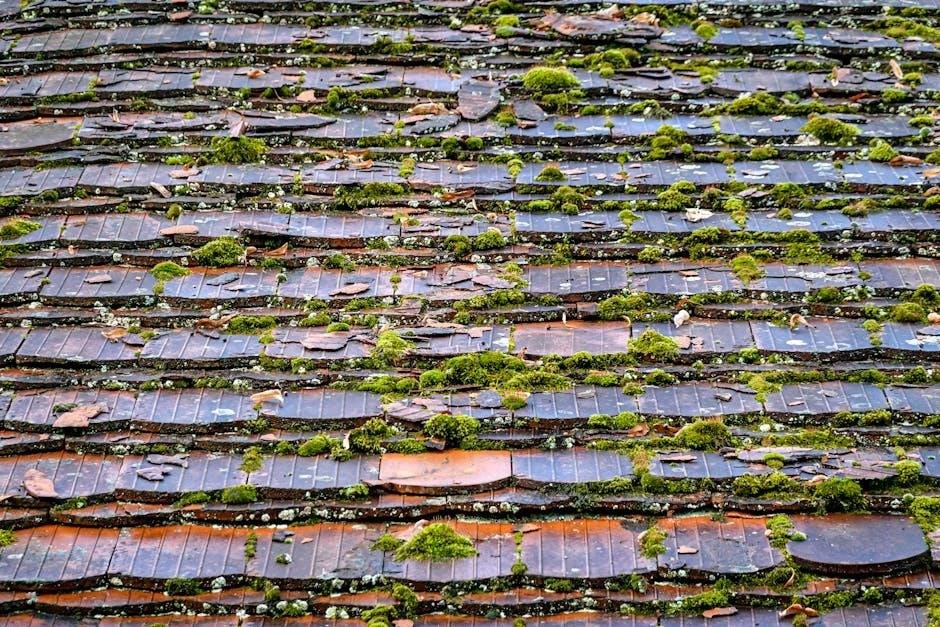
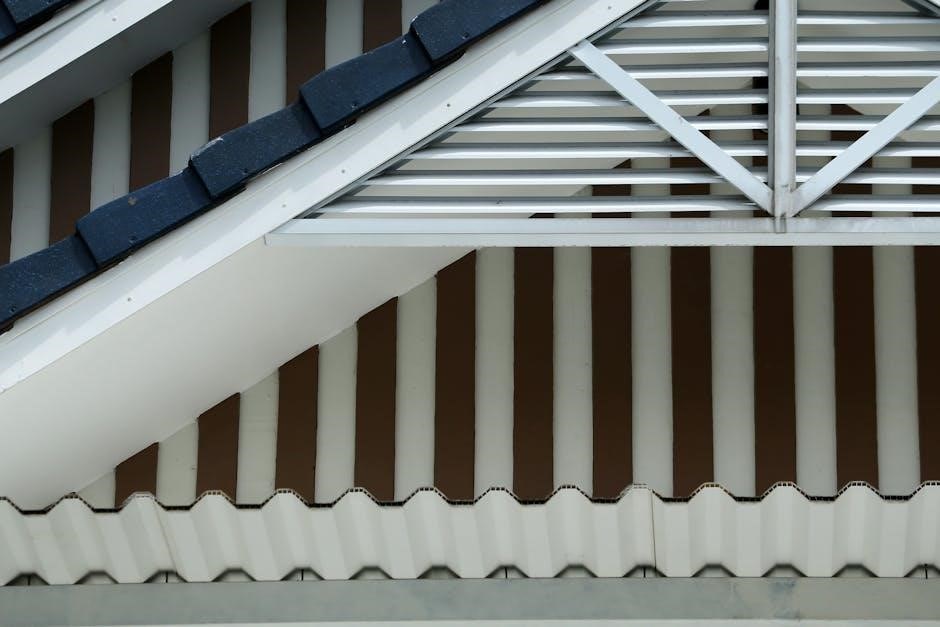
Ventilation is a vital component of a roofing system‚ ensuring proper airflow to maintain a healthy roof structure. It prevents moisture buildup‚ reduces heat in the attic‚ and protects against ice dams in colder climates. Proper ventilation extends the lifespan of roofing materials by preventing rot and mold. Common types include soffit vents‚ ridge vents‚ and attic fans‚ which work together to create a balanced airflow system. Adequate ventilation not only improves energy efficiency but also helps prevent premature deterioration of the roof‚ ensuring long-term performance and durability.

3.5 Gutters and Downspouts

Gutters and downspouts are essential for managing water runoff from the roof‚ protecting the foundation and exterior walls from damage. Gutters are installed along the roof’s edges to collect rainwater‚ while downspouts direct it away from the building. Proper installation and maintenance are crucial to ensure they function effectively. Clogged gutters can lead to water overflow‚ causing structural issues. Regular cleaning and the use of gutter guards can prevent debris buildup. Durable materials like aluminum‚ vinyl‚ or steel are commonly used for gutters and downspouts‚ ensuring longevity and efficient water management.

Low Slope Roofing Materials

Low slope roofing materials are designed for roofs with minimal incline‚ ensuring durability and weather resistance. Common types include membrane roofing‚ liquid roofing‚ and modified bitumen systems.

4.1 Membrane Roofing

Membrane roofing is a popular choice for low-slope roofs‚ offering excellent waterproofing and flexibility. Typically made from rubber‚ PVC‚ or TPO‚ these membranes are seamless and durable‚ resisting UV damage and punctures. Installation involves adhering the membrane to the roof deck‚ ensuring a tight seal. Membrane roofing is lightweight and can be reinforced with polyester or fiberglass for added strength. It’s ideal for flat or slightly sloped surfaces‚ providing long-term protection against leaks and weathering. Regular maintenance ensures optimal performance‚ making it a reliable option for commercial and industrial buildings.

4.2 Liquid Roofing

Liquid roofing refers to a seamless‚ waterproof coating applied as a liquid and cured into a solid membrane. It’s highly elastic‚ making it ideal for low-slope surfaces and unusual roof shapes. This method ensures complete coverage without seams‚ reducing leak risks. Liquid roofing systems are UV-resistant‚ durable‚ and can withstand weathering and thermal expansion. They’re often applied using sprayers for quick installation. Maintenance is minimal‚ and they can last decades. This option is perfect for protecting flat or irregularly shaped roofs‚ offering a cost-effective and long-lasting solution for various roofing needs.

4.3 Modified Bitumen

Modified bitumen is a versatile and durable low-slope roofing material‚ combining asphalt with polymers like APP or SBS for enhanced strength and flexibility. It offers excellent weather resistance‚ UV protection‚ and a strong seal against leaks. Available in rolls‚ it can be installed using torches‚ self-adhesive methods‚ or cold application‚ making it adaptable to various roofing needs. Its robustness and resistance to thermal expansion make it ideal for flat or slightly sloped roofs. Modified bitumen is a cost-effective solution‚ balancing affordability with long-term performance and minimal maintenance requirements‚ making it a preferred choice for commercial and industrial applications.

4.4 Built-Up Roof Membrane

Built-up roof (BUR) membranes are traditional‚ layered systems offering exceptional durability and water resistance. Comprising multiple plies of asphalt-impregnated felts‚ these membranes are reinforced with fabrics like fiberglass or polyester. Each layer is adhered using hot asphalt‚ creating a strong‚ seamless barrier. They are ideal for low-slope roofs‚ providing excellent protection against leaks and weathering. BUR systems also offer fire resistance and can be surfaced with coatings for added UV protection. While installation is labor-intensive‚ their long lifespan and robustness make them a reliable choice for large commercial and industrial buildings‚ ensuring lasting performance and minimal maintenance needs over time.

Sustainable and Modern Roofing Options

Modern roofing emphasizes eco-friendly materials like solar tiles‚ green roofs‚ and recycled products. These options reduce environmental impact‚ lower energy costs‚ and promote sustainable building practices effectively.

5.1 Solar Tiles

Solar tiles are a cutting-edge‚ eco-friendly roofing option that combines energy generation with durability. Designed to integrate seamlessly into traditional roofing systems‚ they convert sunlight into electricity‚ reducing reliance on non-renewable energy sources. Unlike traditional solar panels‚ solar tiles are aesthetically pleasing and blend well with various architectural styles. They offer long-term cost savings through energy efficiency and potential tax incentives. With advancements in technology‚ solar tiles are becoming more affordable and accessible for homeowners seeking sustainable solutions. Their dual functionality makes them a popular choice for modern‚ environmentally conscious building designs.

5.2 Green Roofing

Green roofing involves planting vegetation on rooftops‚ offering numerous environmental benefits. It enhances insulation‚ reduces urban heat islands‚ and improves air quality. Green roofs can be intensive‚ with extensive plant growth‚ or extensive‚ with lighter vegetation. They require a waterproof layer‚ drainage‚ and soil‚ making installation more complex. Despite higher initial costs‚ they provide long-term savings through energy efficiency and extended roof lifespan. Green roofing is ideal for urban areas‚ promoting biodiversity and sustainable living while adding aesthetic value to buildings.

5.3 Recycled Materials

Recycled materials are increasingly popular in roofing for their eco-friendly benefits. Options include repurposed plastics‚ reclaimed wood‚ and metal from recycled sources. These materials reduce landfill waste and lower production energy costs. They often match the durability of traditional materials while offering unique styling. Recycled roofing materials are budget-friendly and promote sustainability. As demand grows‚ innovations continue to expand available options‚ making them a viable choice for environmentally conscious homeowners and builders seeking to minimize their environmental footprint while maintaining quality and performance.

Tools and Tips for Roofing Projects

Essential tools include measuring tapes‚ hammers‚ and utility knives. Use software for accurate material ordering. Follow installation best practices and safety guidelines for successful projects.

6.1 Measuring and Ordering Materials

Accurate measurements are crucial for ordering the right amount of materials. Use a measuring tape to determine the roof’s dimensions and calculate the total area. Consider factors like pitch and valleys to avoid underestimating. Create a detailed list of needed items‚ such as shingles‚ underlayment‚ and flashing. Utilize online tools or consult with professionals to ensure accuracy. Double-check quantities before placing orders to prevent delays. Proper planning helps avoid waste and ensures a seamless installation process.

6.2 Installation Best Practices

Ensure a clean‚ dry deck before installing roofing materials. Always follow manufacturer guidelines for specific products. Start with a proper underlayment to protect against weather damage. Align shingles or panels correctly‚ securing them firmly to prevent shifting. Use compatible fasteners and ensure they are evenly spaced. Install flashing around vents‚ chimneys‚ and skylights to seal gaps. Properly ventilate the attic to maintain temperature balance and prevent moisture buildup. Double-check all measurements and placements to avoid costly repairs later. Follow safety protocols‚ such as wearing harnesses and using ladders securely‚ to protect yourself and others during the process.

6.3 Safety Precautions

Always wear proper safety gear‚ including a harness‚ gloves‚ and safety glasses‚ when working on a roof. Ensure ladders are securely positioned and level. Use non-slip footwear to prevent falls. Secure tools and materials to avoid dropping them. Install guardrails or safety nets on steep roofs. Never work in bad weather‚ as surfaces become slippery. Keep children and pets away from the work area. Regularly inspect equipment for damage. Maintain three points of contact when climbing. Have a first aid kit nearby. Stay hydrated and take breaks to avoid fatigue. Follow all local safety regulations and guidelines.

Cost and Lifespan Considerations

Roofing materials vary in cost and lifespan‚ impacting long-term value. Budget-friendly options like asphalt shingles offer shorter lifespans‚ while premium materials such as slate provide durability but higher upfront costs.

7.1 Budget-Friendly Options

Budget-friendly roofing options provide affordability without compromising essential functionality. Asphalt shingles remain the most cost-effective choice‚ offering durability and versatility. They are widely available‚ easy to install‚ and come in various styles. Additionally‚ rolled roofing and metal roofing options can also be economical‚ especially for larger surfaces. These materials balance quality and affordability‚ making them ideal for homeowners seeking to stay within budget while ensuring a reliable roofing system. Proper installation and maintenance can extend their lifespan‚ providing long-term value.

7.2 Long-Term Durability Factors

Long-term durability of roofing materials depends on factors like quality‚ installation‚ and environmental conditions. Metal roofing‚ slate‚ and clay tiles are known for their extended lifespans‚ often exceeding 30 years. Proper ventilation and weather-resistant coatings can enhance durability. Regular maintenance‚ such as clearing debris and inspecting for damage‚ also plays a crucial role. High-quality underlayment and flashing further protect against leaks and wear. Investing in durable materials and following best practices ensures a roof’s longevity‚ reducing the need for frequent repairs or replacements while maintaining structural integrity and aesthetic appeal over time.

Roofing Materials Checklist

A comprehensive roofing materials checklist ensures all essential items are included‚ from sheathing and underlayment to shingles‚ flashing‚ and gutters‚ guaranteeing a complete and durable installation.

8.1 Essential Items for Installation

Essential items for roofing installation include durable materials like asphalt shingles‚ metal roofing‚ and slate tiles. Underlayment‚ sheathing‚ and flashing are critical for weather-tight protection. Additionally‚ ventilation systems‚ gutters‚ and downspouts ensure proper water management and airflow. Leak barriers‚ starter strips‚ and ridge caps are also vital for a secure and long-lasting roof. These components work together to provide structural integrity and protection against environmental elements‚ ensuring a safe and reliable roofing system for any building. Proper selection and installation of these items are key to achieving optimal performance and longevity. Always consult a professional for precise material requirements specific to your project needs. A well-organized checklist guarantees all essential items are included‚ preventing delays and ensuring a successful installation process. By prioritizing quality and completeness‚ you can ensure your roof withstands the test of time and harsh weather conditions. This approach not only enhances durability but also maintains the aesthetic appeal of your property‚ making it a worthwhile investment for homeowners and builders alike.

8.2 Optional but Recommended Components

While essential items are necessary for a functional roof‚ optional components can enhance performance and durability. Solar tiles‚ for instance‚ offer renewable energy integration‚ while green roofing provides insulation and reduces stormwater runoff. Synthetic roofing materials are another optional choice‚ offering superior durability and resistance to environmental factors. Additionally‚ advanced flashing systems and high-quality sealants can provide extra protection against leaks. These components may not be mandatory but are highly recommended for homeowners seeking a modern‚ eco-friendly‚ and long-lasting roofing solution. Incorporating these options can significantly improve your roof’s functionality and aesthetic appeal‚ making them worthwhile investments for many. Always consider your budget and climate when selecting optional components to ensure they align with your roofing goals and provide the best value for your project. By incorporating these advanced features‚ you can create a roof that not only protects but also enhances your home’s overall performance and sustainability. These optional yet beneficial additions can make a noticeable difference in the long run‚ offering peace of mind and added security for years to come;

Categories
Canada

cuisinière frigidaire manuel d’instruction

Welcome to the Frigidaire Cooktop manual! This guide provides essential information for installing, operating, and maintaining your cooktop. It covers safety tips, key features, and troubleshooting to ensure optimal performance and longevity of your appliance.

1.1 Overview of the Frigidaire Cooktop Manual

The Frigidaire Cooktop manual is a comprehensive guide designed to help users understand and utilize their appliance effectively. It includes detailed instructions for installation, operation, and maintenance, ensuring safety and optimal performance. The manual covers essential features such as burner layouts, cooking surfaces, and advanced settings. Additionally, it provides troubleshooting tips for common issues and highlights safety precautions to prevent accidents. With clear, step-by-step instructions, the manual empowers users to make the most of their cooktop’s capabilities while maintaining its longevity. Whether you’re a new user or seeking to resolve an issue, this guide serves as an indispensable resource for enhancing your cooking experience with Frigidaire.

Installation Guide

The Frigidaire Cooktop manual provides essential steps for a safe and proper installation. Ensure professional installation for gas models, and follow electrical and gas connection guidelines. Use recommended tools and comply with local codes. Refer to the manual for detailed diagrams and instructions.

2.1 Step-by-Step Instructions for Installing Your Frigidaire Cooktop

Begin by carefully unpacking and inspecting your Frigidaire Cooktop for any damage. Ensure all components, including the cooktop, knobs, and installation hardware, are included. Next, prepare the installation site by ensuring the counter is level and free of debris.

For electrical connections, consult the manual to verify voltage and wattage requirements. Connect the cooktop to a dedicated circuit, and ensure all wires are securely fastened. For gas models, install the gas line according to local codes and have it inspected by a professional.

Place the cooktop into the pre-cut countertop opening, aligning it with the mounting brackets. Secure the cooktop using the provided screws, ensuring it is tightly fastened to prevent movement. For gas models, attach the burner caps and grates according to the manual’s instructions.

Connect the ventilation system to maintain proper airflow and prevent gas fumes from accumulating. Finally, test the burners and electrical controls to ensure everything functions correctly. Refer to the manual for model-specific instructions and safety guidelines.

Safety Precautions

Always follow the manual’s guidelines to ensure safe operation. Keep children away from the cooktop and never leave cooking unattended. Avoid wearing loose clothing near open flames. Ensure proper ventilation to prevent gas fumes buildup. Regularly inspect burners and electrical components for damage.

3.1 Essential Safety Tips for Using Your Frigidaire Cooktop

Ensure a safe cooking experience with your Frigidaire cooktop by following these essential tips:

  • Always keep children and pets away from the cooktop to avoid accidents.
  • Never leave cooking unattended, especially when using gas burners or high heat.
  • Use oven mitts or tongs to handle hot cookware to prevent burns.
  • Ensure proper ventilation in your kitchen to avoid gas fume buildup.
  • Avoid wearing loose clothing that could catch fire near open flames.
  • Keep flammable materials, such as curtains or towels, away from the cooktop.
  • Regularly inspect burners, igniters, and electrical components for damage or wear.
  • Never use a damaged or frayed power cord, as it may cause electrical hazards.
  • Always follow the manufacturer’s guidelines for burner usage and maintenance.

By adhering to these safety tips, you can enjoy a secure and efficient cooking experience with your Frigidaire cooktop.

Key Features of the Frigidaire Cooktop

Frigidaire cooktops feature multiple burners, including high-power and simmer options, ensuring versatile cooking. The even heat distribution guarantees consistent results. Durable, easy-clean surfaces make maintenance simple, enhancing longevity and performance.

4.1 Burners and Cooking Surfaces: Understanding the Layout

The Frigidaire cooktop features a sleek and functional design with multiple burners and a durable cooking surface. The layout typically includes high-power burners for intense heat and simmer burners for low-heat cooking. The burners are strategically positioned to accommodate various pot sizes, ensuring efficient heat distribution. The cooking surface is made of high-quality materials, such as ceramic or stainless steel, designed for easy cleaning and long-lasting performance.

Each burner is equipped with a control knob, allowing precise flame adjustment. The surface is smooth and even, preventing food from sticking and making cleanup straightforward. The cooktop also includes features like spill containment and a heat indicator for added safety. Understanding the burner layout and cooking surface design helps optimize cooking efficiency and maintenance. Always refer to the manual for specific details on your model’s configuration and care instructions.

Operating Instructions

Start by ensuring the cooktop is preheated and clean. Use the control knobs to ignite burners and adjust flame size. Always use cookware suitable for gas stoves. For safety, never leave cooking unattended and keep children away. Refer to the manual for detailed guidance.

5.1 Starting the Cooktop: Initial Setup and Ignition

Before using your Frigidaire cooktop, ensure it is properly installed and all safety precautions are followed. Begin by reading the manual to understand the control layout and features. Turn the knob to the “Light” position and press the ignition button until the burner lights. For models with electronic ignition, simply turn the knob to ignite the burner automatically. Always check that the burner flames are steady and blue, indicating proper operation. If the burner does not light, wait a few minutes and try again. Never attempt to ignite burners manually with matches or lighters, as this can be hazardous. Keep the cooktop surface clean and clear of debris to ensure efficient performance. If you notice any irregularities in the flame or ignition, refer to the troubleshooting section for guidance. Proper setup and ignition are crucial for safe and effective cooking with your Frigidaire cooktop.

5.2 Adjusting Burner Flames: Precision Cooking Made Easy

Adjusting the burner flames on your Frigidaire cooktop is straightforward and designed for precise cooking control. To regulate the flame, simply turn the control knob clockwise or counterclockwise to achieve the desired heat level. The flame size can be adjusted from a low simmer to a high heat output, perfect for various cooking techniques such as boiling, frying, or gentle warming. For optimal performance, ensure the burner caps and bases are properly aligned and clean. If the flame appears uneven or yellow, it may indicate a need for cleaning or maintenance. Always avoid leaving the cooktop unattended while cooking, especially at high heat settings. For additional precision, some models feature a dual-flame burner, allowing you to customize the flame size further. By mastering the flame adjustment, you can achieve professional-level results in your home kitchen. Refer to the manual for specific details on your model’s burner configuration and customization options.

Maintenance and Cleaning

Regular cleaning and maintenance are crucial for your Frigidaire cooktop’s longevity. Clean spills immediately with a damp cloth and mild detergent. Avoid harsh chemicals or abrasive cleaners. For tough stains, use a cooktop cleaner. Ensure the cooktop is cool before cleaning. Always unplug the unit before deep cleaning. Check and replace worn-out burner caps or bases annually. For gas models, inspect and clean burner ports regularly to ensure proper flame ignition. Never use metal scrapers or rough sponges, as they may scratch the surface. Proper maintenance enhances performance and keeps your cooktop looking new. Refer to the manual for detailed cleaning instructions tailored to your model.

6.1 Daily Cleaning Tips to Keep Your Cooktop in Prime Condition

Daily cleaning is essential to maintain the performance and appearance of your Frigidaire cooktop. Start by wiping down the surface after each use with a soft, damp cloth to remove food residue and spills. For tougher stains, use a mild detergent or a cooktop-specific cleaner, avoiding harsh chemicals or abrasive scrubbers that could damage the finish. For gas models, clean the burner caps and grates with warm soapy water, ensuring they are dry before reinstalling. Regularly inspect and clean the burner ports to prevent clogs and ensure proper flame ignition. For electric or induction models, avoid using metal utensils or abrasive cleaners, as they can scratch the glass surface. Instead, use a gentle glass cleaner and a lint-free cloth to maintain a streak-free finish. Finally, dry the cooktop thoroughly after cleaning to prevent water spots. By following these simple steps, you can keep your Frigidaire cooktop in excellent condition and ensure years of reliable service.

Troubleshooting Common Issues

Identify and resolve common cooktop issues like burner ignition problems or error codes. Refer to the detailed troubleshooting guide in the manual for step-by-step solutions to ensure your Frigidaire cooktop operates smoothly and efficiently.

7.1 Diagnosing Burner Problems: Quick Fixes and Solutions

Experiencing issues with your Frigidaire cooktop burners? This section helps you identify and resolve common problems. Start by checking if burner caps are clean and properly aligned, as debris or misalignment can prevent proper ignition. If burners aren’t lighting, ensure the gas supply is turned on and check for blockages in the burner ports. For persistent issues, refer to the troubleshooting chart in your manual for error code meanings and solutions. If a burner is not heating evenly, inspect the flame—uneven flames may indicate a clogged burner jet, which can be cleaned with a small brush or needle. Always turn off the cooktop and let it cool before attempting any repairs. For more complex problems, such as faulty igniters or electrical issues, consult a professional to ensure safety and avoid further damage. Regular maintenance, like cleaning the burners and drip pans, can prevent many of these issues from arising. Keep your cooktop in top shape with these quick fixes and solutions.

Manufacturer Support and Resources

Frigidaire offers comprehensive support through their official website, including downloadable manuals, FAQs, and warranty information. Contact customer service via phone, email, or live chat for assistance. Visit www.frigidaire.com for quick solutions and expert help.

8.1 Accessing Customer Service and Online Support

Frigidaire provides exceptional customer service and online support to ensure a seamless experience with your cooktop. Visit their official website at www.frigidaire.com to access a wealth of resources, including user manuals, troubleshooting guides, and warranty information.

For direct assistance, contact their customer service team via phone at 1-800-FRIGIDAIRE (1-800-374-4432) or through their live chat feature. Additionally, you can submit inquiries via email or consult the FAQ section for quick answers to common questions.

The website also offers a dedicated support section where you can:

  • Download product manuals and guides
  • Check warranty status
  • Find authorized service providers
  • Stay updated on product recalls

Frigidaire’s online support ensures you have all the tools needed to maintain and repair your cooktop effectively. Their commitment to customer satisfaction makes troubleshooting and maintenance straightforward and stress-free.

With the Frigidaire Cooktop manual as your guide, you are now equipped to maximize the potential of your appliance while ensuring safety and longevity. From installation and operation to maintenance and troubleshooting, this manual has provided comprehensive insights to enhance your cooking experience.

By following the outlined safety precautions and operational guidelines, you can enjoy efficient and precise cooking. Regular cleaning and proper maintenance will keep your cooktop in excellent condition, ensuring it remains a reliable kitchen companion for years to come.

Should you encounter any issues, Frigidaire’s customer support and online resources are readily available to assist. Refer back to this manual for quick solutions or explore additional support options on the Frigidaire website. Happy cooking with your Frigidaire Cooktop!

Categories
Guide

midi making guide

MIDI (Musical Instrument Digital Interface) is a digital communication protocol enabling electronic instruments, computers, and related devices to communicate. It revolutionizes music production by allowing precise control over musical elements like pitch, tempo, and dynamics, making it an essential tool for modern creators.

1.1 What is MIDI and Its Importance in Music Production

MIDI (Musical Instrument Digital Interface) is a protocol enabling electronic instruments, computers, and devices to communicate. It transmits musical data like pitch, tempo, and velocity, allowing precise control over performances. Unlike audio, MIDI doesn’t record sound but instructions, making it ideal for editing and tweaking. Its importance lies in its versatility, enabling creators to compose, edit, and enhance music efficiently. MIDI integrates seamlessly with virtual instruments and hardware, fostering creativity and streamlining production processes across genres and industries.

1.2 Brief History of MIDI Technology

MIDI (Musical Instrument Digital Interface) emerged in the 1980s as a revolutionary protocol for electronic music. Developed collaboratively by Roland, Yamaha, Korg, and Sequential Circuits, MIDI standardized communication between devices. Dave Smith and Ikutaro Kakehashi pioneered its creation, ensuring compatibility across manufacturers. MIDI transformed music production by enabling seamless interaction between synthesizers, drum machines, and computers. Its adoption democratized music creation, reducing costs and fostering creativity. Today, MIDI remains a cornerstone of digital music-making, integral to DAWs and modern instruments, proving its enduring legacy.

1.3 Benefits of Using MIDI in Modern Music Creation

MIDI offers unparalleled flexibility and precision in music production. It allows for non-destructive editing, enabling creators to tweak notes, timing, and dynamics without altering the original recording. MIDI’s lightweight file size facilitates easy sharing and collaboration. It also integrates seamlessly with virtual instruments, making it a cornerstone for composing and arranging. Additionally, MIDI’s adaptability across genres and production scales ensures it remains indispensable for both professional and amateur musicians, fostering creativity and efficiency in the digital age.

Essential Tools for MIDI Making

MIDI controllers, DAWs, and MIDI interfaces are fundamental for creating and editing MIDI files. They enable precise recording, editing, and seamless connectivity between devices, forming the core of MIDI production.

2.1 MIDI Controllers: Keyboards, Pads, and Other Devices

MIDI controllers are essential for creating and performing music. Keyboards and pads allow tactile interaction, translating gestures into digital data. Other devices, like drum pads and sliders, offer versatility. They connect to computers via USB or MIDI interfaces, enabling real-time recording and editing in DAWs. Popular models include the MIDI Fighter Twister, known for its customizable layouts, and devices with built-in banks for multiple presets. These tools enhance creativity, providing precise control over musical elements like pitch, tempo, and dynamics, making them indispensable for modern producers and performers.

2.2 DAWs (Digital Audio Workstations) for MIDI Production

DAWs are the backbone of MIDI production, offering tools for recording, editing, and arranging musical ideas. Popular options like Ableton Live, FL Studio, and Logic Pro provide advanced MIDI editing features. These platforms support virtual instruments, effects processing, and seamless integration with MIDI controllers. DAWs also enable precise control over timing, velocity, and dynamics, allowing for professional-grade productions. Whether you’re composing, arranging, or performing live, a DAW is essential for transforming MIDI data into polished, high-quality music.

2.3 MIDI Interfaces and Connectivity Options

MIDI interfaces are crucial for connecting MIDI controllers, synthesizers, and other devices to your computer. USB-to-MIDI interfaces are the most common, offering plug-and-play convenience. Traditional 5-pin DIN MIDI interfaces provide more ports for multiple devices. Some interfaces also support MIDI over Bluetooth or Wi-Fi for wireless connectivity. Ensuring stable connections and proper configuration is vital for low-latency performance. Troubleshooting common issues like driver conflicts or incorrect settings can help maintain seamless communication between devices, ensuring your MIDI setup operates flawlessly.

Setting Up Your MIDI Workspace

Organize your MIDI hardware, install necessary drivers, and configure settings in your DAW. Ensure proper connectivity, test MIDI signals, and optimize your workspace for creativity and efficiency.

3.1 Choosing the Right DAW for Your Needs

Selecting the right DAW is crucial for MIDI production. Popular options like Ableton Live, FL Studio, and Logic Pro offer robust MIDI tools. Consider your workflow, OS compatibility, and specific features needed. If you’re a beginner, FL Studio’s user-friendly interface might be ideal. For live performances, Ableton’s flexibility shines. Ensure the DAW supports your MIDI hardware and offers the editing capabilities you require for precision and creativity. This choice will significantly impact your efficiency and overall music-making experience.

3.2 Connecting MIDI Hardware to Your Computer

Connecting MIDI hardware to your computer is straightforward with the right setup. Use a MIDI interface or USB-to-MIDI cable for reliable communication. Install the latest drivers from the manufacturer’s website to ensure compatibility. For USB MIDI devices, plug-and-play functionality often simplifies the process. Once connected, your DAW should recognize the hardware automatically. If issues arise, consult the device manual or restart your system. Proper connectivity ensures low latency and seamless integration, essential for precise MIDI control and an efficient workflow.

3.3 Configuring MIDI Settings in Your DAW

To configure MIDI settings in your DAW, navigate to the MIDI preferences section. Select your MIDI interface and ensure it is properly recognized. Adjust the buffer size for optimal latency. Enable MIDI input and specify the correct input channels. Save your settings and test by recording a MIDI clip. If issues arise, restart your DAW or reinstall drivers. Proper MIDI setup ensures smooth communication between hardware and software, allowing precise control over your music production workflow.

Creating MIDI Files from Scratch

Start by opening a new project in your DAW, setting the tempo, and recording notes using a MIDI keyboard or controller. Experiment with virtual instruments, then refine your arrangement by editing and layering tracks. Export your final composition as a MIDI file for further collaboration or use in other projects, ensuring your creative vision is preserved and ready to share.

4.1 Step-by-Step Guide to Recording MIDI Notes

Open your DAW and create a new project. Select a virtual instrument or connect a MIDI controller. Arm the track for recording, set the tempo, and choose a time signature. Press record and play your melody or rhythm on the controller. Review your performance and edit any mistakes. Use quantization if needed. Add layers by recording additional tracks. Experiment with velocity adjustments for dynamics. Save your MIDI file for future use or export it for collaboration.

4.2 Using Virtual Instruments with MIDI

Virtual instruments expand your creative possibilities by allowing you to trigger high-quality sounds via MIDI. Load a virtual instrument in your DAW and assign it to a MIDI track. Play your MIDI controller to audition sounds in real-time. Adjust parameters like attack, decay, and reverb for customization. Use MIDI effects to enhance expression. Experiment with layering multiple instruments for depth. Virtual instruments offer flexibility and versatility, enabling you to achieve professional-grade sounds without physical hardware. They are a cornerstone of modern MIDI-based music production.

4.3 Editing MIDI Data for Precision and Creativity

Editing MIDI data allows for precise control over your music. Use your DAW’s MIDI editor to adjust note timing, velocity, and duration. Quantization helps align notes to a grid for a polished feel. Experiment with humanizing notes for a more natural sound. Apply MIDI effects like arpeggiation or randomization to add creativity. Edit velocity to enhance dynamics, making your tracks more expressive. Fine-tuning MIDI data ensures your music is both technically accurate and artistically compelling, giving you the flexibility to refine your vision.

Advanced MIDI Editing Techniques

Mastering advanced MIDI techniques enhances precision and creativity. Use quantization, velocity adjustments, and MIDI effects to refine tracks. Optimize performance and explore creative tools for professional results.

5.1 Quantization: Timing Correction for MIDI Notes

Quantization corrects MIDI note timing by aligning them to a grid, enhancing rhythmic precision. It adjusts notes to predetermined time values, improving sync and consistency. Use quantization to fix performance imperfections, ensuring tight grooves. Adjust strength settings to maintain human feel while correcting errors. Apply swing or shuffle feels for stylistic variations. Quantization tools in DAWs allow fine-tuning, preserving expression while perfecting timing. It’s essential for polished, professional-sounding tracks, balancing accuracy with creativity.

5.2 Velocity and Dynamics: Adding Expression

Velocity controls the intensity of MIDI notes, mimicking human performance. Adjusting velocity values adds dynamic range, making music more expressive. Use velocity to create subtle variations, from soft pianissimo to powerful fortissimo. Dynamics enhance emotional depth, with velocity edits allowing precise control over note accents and feel. Apply automation or manual adjustments to shape the sound. This technique ensures your tracks resonate with authenticity and feeling, elevating them beyond mechanical perfection into compelling musical experiences that engage listeners deeply.

5.3 Using MIDI Effects for Creative Processing

MIDI effects offer powerful tools for transforming and enhancing your creations. Arpeggiators, chord generators, and randomizers add complexity and interest. Use MIDI filters to modify specific note ranges or velocities, creating dynamic variations. Effects like humanizers introduce subtle timing imperfections for a more natural feel. MIDI effects can also generate new musical ideas, such as random melodies or rhythmic variations. These tools allow producers to experiment and push boundaries, turning simple ideas into intricate, professional-sounding compositions with ease and creativity.

MIDI and Audio Recording Integration

MIDI and audio integration enhances productions by combining digital control with organic sounds. This fusion allows precise editing and synchronization, offering endless creative possibilities for modern music-making workflows.

6;1 Combining MIDI and Audio Tracks in a Project

Combining MIDI and audio tracks enriches your project by blending digital precision with organic sound. Import audio files and align them with MIDI tracks for seamless synchronization. Use virtual instruments to enhance melodies or rhythms, ensuring both elements complement each other. Adjust timing and dynamics using quantization and velocity editing tools. This integration allows for creative layering, enabling you to craft cohesive and professional-sounding music productions. Proper synchronization ensures that MIDI and audio elements work together harmoniously, enhancing the overall quality and depth of your work.

6.2 Syncing MIDI with Live Recordings

Syncing MIDI with live recordings ensures tight integration between digital and organic elements. Use a DAW to align MIDI tracks with live audio, achieving precise timing and groove. Enable tempo and timecode features to lock both elements together. Adjust MIDI quantization to match the feel of live performances. This synchronization enhances the natural dynamics of live recordings while maintaining the versatility of MIDI. Proper alignment ensures a cohesive mix, blending the best of both worlds for polished and professional results in music production.

6.3 Exporting MIDI Files for Collaboration

Exporting MIDI files allows seamless collaboration with other musicians and producers. Most DAWs support MIDI file export in formats like .mid or .midi. These files contain note, timing, and controller data, enabling others to import and edit them using their preferred software. Ensure compatibility by selecting the correct file type and resolution. Organize your files clearly and include metadata for easy identification. Exporting MIDI files fosters creativity and efficiency in collaborative projects, making it a cornerstone of modern music production workflows.

MIDI Hardware and Software Setup Tips

Ensure stable connections by testing MIDI interfaces and updating drivers. Optimize DAW settings for low latency and organize MIDI files for easy access during sessions.

7.1 Troubleshooting Common MIDI Connection Issues

Identify and resolve MIDI connection problems by checking cable integrity and driver updates. Ensure MIDI interfaces are properly configured in your DAW. Restart devices and systems to eliminate glitches. Verify MIDI ports are correctly assigned and test with simple setups. If issues persist, consult user manuals or seek community support for specific hardware troubleshooting tips.

7.2 Optimizing MIDI Performance for Low Latency

To achieve low latency in MIDI performance, ensure your system is optimized. Use high-quality MIDI interfaces and updated drivers. Adjust buffer sizes in your DAW for real-time processing. Close unnecessary background applications to reduce CPU load. Consider using MIDI hubs or dedicated controllers for better connectivity. Test different setups to find the optimal balance between performance and stability. Regularly update firmware and software to maintain peak functionality and minimize delays during recording or live performances.

7.3 Backup and Organization Strategies for MIDI Files

Backing up and organizing MIDI files is crucial for efficient workflow. Use cloud storage services like Google Drive or Dropbox for secure backups. Create folders by project or date for easy access. Regularly save versions to track progress and avoid data loss. Consider external hard drives for local backups. Implement consistent naming conventions to quickly locate files. Ensure backups are automated or scheduled to maintain data integrity and accessibility across different devices and collaborations.

MIDI Making for Live Performances

MIDI enhances live shows by enabling real-time control of sounds, effects, and visuals. Organize MIDI files for quick access, ensure low latency, and sync seamlessly with lighting and visuals.

8.1 Preparing MIDI Files for Stage Use

Preparing MIDI files for live performances involves organizing and optimizing them for seamless execution. Ensure all MIDI data is clean and properly labeled. Use clear file naming conventions to quickly locate sounds or cues during a show. Normalize velocities and timing to maintain consistency across different devices. Test MIDI files on your performance setup to identify and fix any issues. Backup your files to avoid performance interruptions. Additionally, consider using setlists or scenes in your DAW to streamline transitions between songs or sections. This ensures a smooth and professional performance.

8.2 Using MIDI Controllers in Real-Time Performances

MIDI controllers are essential for real-time performances, offering dynamic control over sounds and effects. They allow artists to manipulate parameters like pitch, volume, and filters seamlessly. Customizable layouts enable performers to tailor controls to their needs, enhancing creativity. Wireless MIDI controllers provide portability and reduce cable clutter. Visual feedback through LED lights or screens aids in monitoring adjustments. Integrating MIDI controllers with DAWs or hardware synths creates a powerful setup for engaging live shows. They also support audience interaction, making performances more immersive and visually appealing.

8.3 Syncing MIDI with Lighting and Visual Effects

Syncing MIDI with lighting and visual effects enhances live performances by creating a unified audio-visual experience. MIDI signals can trigger lighting changes, video transitions, and visual effects in real-time. DMX controllers and software tools like Resolume or TouchDesigner bridge MIDI and lighting systems. This synchronization allows performers to program intricate shows, ensuring visuals align with musical beats and transitions. It adds a dynamic layer of engagement, making performances more immersive and visually captivating for audiences. Proper setup ensures seamless integration, transforming concerts into multi-sensory experiences.

Sharing and Collaborating with MIDI Files

MIDI files are versatile for sharing and collaboration. Export them across platforms, maintaining quality. Share with fellow musicians for creative input, enhancing your music projects effectively.

9.1 Exporting MIDI Files for Different Platforms

MIDI files are universally compatible across various platforms, making them ideal for sharing and collaboration. Exporting MIDI files ensures your music can be used on Windows, macOS, iOS, and Android devices. Most DAWs support MIDI file export, allowing you to maintain note accuracy and timing. When exporting, choose the correct format (Type 0 or Type 1) to suit your needs; Standard MIDI files (.mid) are widely supported, ensuring seamless integration across different software and hardware. Always test compatibility to ensure your files work as intended.

9.2 Collaborating with Other Musicians Using MIDI

MIDI files simplify collaboration by allowing musicians to share musical ideas without audio quality loss. Artists can exchange MIDI files, enabling seamless integration into different projects. Online platforms and cloud storage make sharing MIDI data effortless. MIDI’s flexibility lets collaborators modify notes, velocities, and timings independently. This fosters creativity and ensures everyone can contribute effectively. Using MIDI, producers and composers can work remotely, merging ideas into a cohesive piece. Version control and backups are crucial to track changes and avoid data loss during the collaborative process.

9.3 Uploading MIDI Files to Online Platforms

Sharing MIDI files online allows creators to showcase their work and receive feedback. Platforms like SoundCloud, MIDI hubs, and forums support MIDI uploads. Before uploading, ensure files are properly formatted and named. Use platform-specific upload tools or drag-and-drop features. Once live, others can download, remix, or collaborate on your tracks. This fosters community engagement and expands your audience. Regularly update your uploads to reflect your creative growth and connect with fellow musicians worldwide. This digital showcase is a powerful tool for networking and inspiration in the music production community.

Mastering MIDI production enhances creativity, precision, and collaboration. Continuous learning and experimentation are key to unlocking its full potential in music creation and innovation.

10.1 Final Tips for Mastering MIDI Production

Refine your MIDI skills by exploring advanced editing techniques like quantization and velocity adjustments. Practice regularly to enhance your workflow. Stay updated with new tools and software. Experiment with unique sounds and effects to innovate. Collaborate with other musicians to gain diverse perspectives and insights. Backup your files regularly to avoid data loss. Finally, embrace creativity and push boundaries to achieve exceptional results in your MIDI productions.

10.2 Resources for Further Learning

Explore official MIDI Association resources for in-depth guides and updates. Utilize tutorials on platforms like YouTube and Udemy for practical skills. Join forums like Gearslutz or Reddit communities to connect with producers. Check out books on MIDI programming for foundational knowledge. Experiment with free DAWs like GarageBand or FL Studio to apply concepts. Visit websites like MusicRadar or The Pro Audio Files for expert tips and industry insights to enhance your MIDI production skills continuously.

10.3 Encouragement to Experiment and Innovate

Embrace creativity and push boundaries in MIDI making by experimenting with unique sounds and techniques. Try layering MIDI tracks, exploring unconventional controller mappings, and integrating live performance elements. Innovation often arises from unexpected combinations, so don’t hesitate to explore new DAW features or collaborate with others to spark fresh ideas. Remember, MIDI is a versatile tool that thrives on imagination. Keep pushing the limits to create groundbreaking music and stay inspired by the endless possibilities MIDI offers.

Categories
PDF

psalm 23 explained beautifully pdf

Psalm 23 Explained Beautifully: An Overview

Psalms 23 is a comforting passage highlighting God’s provision‚ protection‚ and peace. It beautifully portrays the shepherd metaphor‚ emphasizing divine care and guidance‚ offering hope and reassurance.

Psalm 23‚ attributed to King David‚ is a timeless expression of trust in God’s care. Its vivid imagery and comforting words have made it a beloved passage for centuries. The psalm opens with the iconic declaration‚ “The Lord is my shepherd‚” introducing the central metaphor of God as a shepherd guiding and protecting His people. It reflects David’s deep trust in God’s provision‚ even in life’s darkest moments. This psalm serves as a powerful reminder of divine care‚ offering solace‚ hope‚ and reassurance to all who seek comfort in God’s faithfulness. Its beauty lies in its simplicity and profound truth.

The Significance of the Shepherd Metaphor

The shepherd metaphor in Psalm 23 is deeply symbolic‚ reflecting ancient Near Eastern shepherd practices. A shepherd provided food‚ water‚ protection‚ and guidance‚ ensuring the flock’s well-being. Similarly‚ God is portrayed as a caring shepherd who meets all needs‚ offering restoration and guidance. This metaphor emphasizes trust‚ reliance‚ and intimacy with God‚ highlighting His faithfulness and love. It also underscores the idea of spiritual leadership and the belief that God’s care extends beyond physical needs to spiritual restoration‚ providing comfort and peace in life’s challenges. The metaphor remains a powerful expression of divine care and provision‚ resonating across cultures and time.

God’s Provision and Care

Psalm 23 vividly illustrates God’s unwavering provision and care‚ offering rest‚ refreshment‚ and restoration. His faithfulness ensures abundance‚ even in adversity‚ bringing comfort and peace to believers.

The Shepherd’s Role in Providing for His Sheep

The shepherd’s role in Psalm 23 is deeply symbolic‚ representing God’s attentive care. Like a dedicated shepherd‚ He provides for every need‚ ensuring His sheep lack nothing. This includes guidance‚ protection‚ and sustenance‚ reflecting His faithfulness and love. The shepherd leads His flock to green pastures and still waters‚ symbolizing spiritual nourishment and refreshment. Even in challenging times‚ the shepherd’s presence offers comfort and security‚ highlighting God’s promise to never forsake His people. This imagery reassures believers of God’s constant provision and unwavering commitment to their well-being‚ both in this life and eternally.

Verse 1: “The Lord is my shepherd‚ I shall not want”

This verse is a profound declaration of trust and dependence on God. By calling the Lord his shepherd‚ David expresses unwavering faith in God’s provision and care; The phrase “I shall not want” reflects a deep contentment‚ knowing that God meets all needs—spiritual‚ emotional‚ and physical. The shepherd metaphor highlights protection‚ guidance‚ and abundant provision‚ reassuring believers of God’s faithfulness. This verse invites readers to trust in God’s sufficiency‚ even in times of uncertainty‚ and to find peace in His loving care. It establishes the foundation of Psalm 23‚ emphasizing a personal relationship with a loving and reliable Shepherd.

Walking Through the Valley of the Shadow of Death

Psalm 23 reassures believers that even in life’s darkest moments‚ God’s presence provides comfort and courage. His rod and staff symbolize guidance‚ dispelling fear and offering peace.

Facing Life’s Challenges with Faith

Facing life’s challenges with faith is central to Psalm 23. The psalm reminds us that even in the darkest valleys‚ God’s presence offers comfort and strength. It encourages believers to trust in His guidance‚ knowing His rod and staff symbolize divine protection. The passage emphasizes that faith is not about avoiding difficulties but navigating them with courage‚ assured of God’s steadfast care. This mindset transforms fear into confidence‚ as we recognize His faithfulness in every season. By focusing on God’s provision and peace‚ we can face life’s trials with unwavering trust‚ knowing He is always with us.

The Presence of God in Dark Times

The presence of God in dark times is a profound theme in Psalm 23. The phrase “the valley of the shadow of death” highlights God’s unwavering companionship during life’s most challenging moments. The psalm assures believers that even amidst fear and uncertainty‚ God’s comforting presence remains constant. His rod and staff serve as symbols of protection and guidance‚ offering peace when circumstances seem overwhelming. This divine presence transforms darkness into a place of trust and reliance on Him‚ reminding us that we are never alone. Such assurance brings comfort and strength‚ enabling believers to face adversity with courage and hope.

The Preparation of the Table

The table symbolizes God’s abundant love‚ prepared even in adversity‚ highlighting His care and provision‚ reminding us of His faithfulness despite challenging circumstances and enemies.

Abundance in the Midst of Adversity

In Psalm 23‚ the prepared table amidst enemies signifies divine abundance during hardship. God’s provision is not limited by adversity; instead‚ it flourishes‚ offering comfort and assurance. This imagery reminds believers that even in challenging times‚ they are not forsaken. The table symbolizes spiritual and emotional nourishment‚ reflecting God’s unwavering care. It teaches trust in His faithfulness‚ emphasizing that His goodness prevails‚ bringing peace and satisfaction regardless of external circumstances. This concept is central to the psalm’s message‚ offering hope and strength to those facing difficulties‚ reassuring them of God’s enduring love and abundant grace.

The Symbolism of the Anointed Head

The anointed head in Psalm 23 symbolizes divine favor and spiritual refreshment. The imagery of oil pouring over the head represents God’s blessings and comfort‚ reinforcing His presence and care. This act signifies being strengthened and rejuvenated by His enduring love‚ even in challenging times. The anointed head reflects a deep sense of peace and confidence‚ knowing that God’s grace overflows abundantly. It embodies trust in His faithfulness‚ reminding believers of His constant companionship and provision. This symbolism underscores the transformative power of divine love‚ offering emotional healing and reassurance amidst life’s adversities. It is a vivid depiction of God’s unwavering care and grace.

God’s Guidance and Restoration

Psalm 23 highlights God’s guidance and restoration‚ offering trust in His faithfulness. He leads believers in righteous paths and restores their souls‚ ensuring divine purpose and peace.

“He restores my soul; He leads me in the paths of righteousness”

This verse emphasizes God’s role in spiritual restoration and guidance. The phrase “He restores my soul” reflects His healing and renewal‚ bringing peace to troubled hearts. By leading in “paths of righteousness‚” God ensures believers walk in His purpose‚ aligning their lives with His will. This promise offers comfort‚ knowing that despite life’s challenges‚ God faithfully guides and restores‚ fostering spiritual growth and trust in His divine plan. His leadership and restoration are constant‚ providing strength and direction for those who follow Him‚ ensuring they remain on the right path.

The Concept of Spiritual Restoration

Spiritual restoration in Psalm 23 highlights God’s power to heal and renew. The phrase “He restores my soul” underscores His ability to mend brokenness and bring inner peace. This restoration is rooted in His forgiveness and grace‚ freeing believers from spiritual emptiness. The shepherd metaphor illustrates His gentle care‚ guiding His sheep back to spiritual health. Through restoration‚ God revives faith‚ hope‚ and purpose‚ ensuring His people walk in righteousness. This concept offers comfort‚ promising that no matter how lost or weary one feels‚ divine restoration is always available‚ leading to a deeper connection with Him and His divine plan.

The Eternal Perspective

Psalms 23 assures believers of eternal life and divine faithfulness. Trusting God’s guidance and restoration offers eternal peace‚ knowing His love endures forever‚ surpassing earthly challenges.

Trust in God’s Faithfulness

Psalm 23 emphasizes unwavering trust in God’s faithfulness. The shepherd metaphor illustrates His constant presence and care‚ even in life’s darkest valleys. This trust reassures believers of His eternal love and guidance‚ offering peace amidst challenges. By focusing on God’s reliability‚ one finds strength to face adversity with confidence‚ knowing His promises endure forever.

The Assurance of Eternal Life

Psalm 23 beautifully assures believers of eternal life through God’s steadfast love. The imagery of the shepherd’s enduring care reflects His promise of eternal rest and peace. This psalm reminds us that trusting in God’s faithfulness leads to eternal life‚ where believers will dwell in His presence forever. The assurance of eternal life brings comfort‚ knowing that God’s love and guidance extend beyond this world‚ offering hope and security for the future. This promise strengthens faith and provides a steadfast foundation for facing life’s uncertainties with confidence in God’s eternal plan.

Themes of Comfort and Peace

Psalm 23 offers profound comfort and peace through its imagery of God’s gentle care‚ reassuring believers of divine protection and love‚ even in life’s darkest moments.

Psalm 23 as a Source of Emotional Healing

Psalm 23 serves as a powerful source of emotional healing‚ offering solace to those facing grief‚ fear‚ or uncertainty. The imagery of a shepherd’s gentle care reminds believers of God’s steadfast presence and love. Verse 4‚ “though I walk through the valley of the shadow of death‚” provides reassurance that even in life’s darkest moments‚ divine comfort is near. This psalm has been a refuge for many‚ helping to mend broken hearts and restore peace. Its timeless words continue to uplift and heal‚ providing emotional strength and spiritual renewal for those seeking solace in faith.

The Role of Faith in Overcoming Fear

Psalm 23 beautifully illustrates how faith in God’s presence and provision can overcome fear. The phrase “though I walk through the valley of the shadow of death” highlights trust in divine guidance‚ even in life’s darkest moments. Fear is replaced with confidence as the shepherd’s care ensures safety and peace. This psalm reminds believers that faith is the anchor that holds firm‚ providing strength to face challenges without trembling. By focusing on God’s faithfulness‚ individuals can rise above fear‚ knowing they are never alone. Thus‚ Psalm 23 becomes a powerful tool for cultivating courage and trust in God’s eternal love.

Historical and Cultural Context

Psalm 23‚ written by David‚ reflects his experience as a shepherd‚ offering insights into ancient Israel’s shepherd-sheep relationship‚ symbolizing divine care and leadership.

David’s Life as a Shepherd

David’s experience as a shepherd deeply influenced Psalm 23. His role involved protecting‚ feeding‚ and guiding his flock‚ which he later applied metaphorically to God’s care for humanity. This background shaped his understanding of divine provision and leadership‚ translating into the psalm’s vivid imagery and personal trust in God. His shepherd’s perspective provided a relatable framework for expressing faith and assurance‚ making the psalm resonate universally. Through his shepherd’s lens‚ David conveyed the intimacy and reliability of God’s relationship with His people‚ anchoring the psalm in both personal experience and cultural context.

The Shepherd-Sheep Relationship in Ancient Israel

In ancient Israel‚ the shepherd-sheep relationship was deeply rooted in daily life and culture. Shepherds were entrusted with guiding‚ protecting‚ and providing for their flocks‚ often risking their lives to ensure safety. This bond of trust and dependence mirrored the spiritual dynamic between God and His people. Sheep relied entirely on their shepherd for sustenance and protection‚ much like believers depend on God. The shepherd’s role symbolized care‚ loyalty‚ and leadership‚ reflecting the biblical portrayal of God as the ultimate Shepherd who tenderly guides and safeguards His flock. This cultural context enriches the metaphor in Psalm 23‚ making it deeply relatable.

Psalm 23 in Modern Context

Psalm 23 remains timeless‚ offering guidance for modern challenges; Its themes of trust‚ provision‚ and peace resonate deeply‚ providing comfort and strength in today’s fast-paced world.

Relevance to Contemporary Life

Psalm 23’s timeless message resonates deeply in modern life‚ offering comfort and strength amidst life’s challenges. Its themes of trust‚ provision‚ and peace provide guidance for navigating today’s uncertainties‚ reminding us of God’s steadfast presence and care. The shepherd metaphor speaks to our need for divine leadership‚ while the promise of abundance in adversity gives hope. In a world filled with anxiety and stress‚ this psalm serves as a powerful reminder of God’s faithfulness‚ encouraging believers to trust Him in all circumstances‚ making it a vital source of encouragement for contemporary life.

Applying the Teachings in Daily Life

Psalm 23’s teachings can be practically applied by trusting God as our Shepherd‚ seeking His guidance in decisions‚ and finding peace in life’s challenges. By meditating on its verses‚ we can cultivate gratitude for His provision and presence. Applying its principles fosters a mindset of faith‚ helping us navigate difficulties with confidence in God’s care. This psalm encourages daily reflection‚ prayer‚ and trust‚ transforming our relationship with Him and enhancing our spiritual growth‚ making it a powerful tool for living a faith-centered life.

Biblical Commentary Insights

Biblical commentators highlight the profound meaning of Psalm 23‚ emphasizing themes of trust‚ divine provision‚ and comfort. Scholars note the shepherd metaphor underscores God’s faithfulness and care‚ inspiring trust in His plan and presence.

Key Insights from Commentaries

Commentaries on Psalm 23 highlight its rich theological depth‚ emphasizing trust in God’s faithfulness. Scholars like David Guzik note the shepherd metaphor as a powerful symbol of divine care‚ provision‚ and protection. The psalm’s structure‚ moving from need to abundance‚ reflects God’s transformative grace. Many commentators stress the universal relevance of its themes‚ such as facing life’s challenges with faith and finding comfort in God’s presence. These insights underscore the psalm’s timeless appeal‚ offering solace and hope to believers across generations. The commentary also explores the symbolic meanings of the shepherd’s tools and the prepared table‚ reinforcing the idea of God’s abundant love and restoration.

David Guzik’s Perspective on Psalm 23

David Guzik’s commentary on Psalm 23 provides a profound exploration of its themes‚ emphasizing trust in God’s faithfulness. He highlights the shepherd metaphor as a symbol of divine care‚ provision‚ and protection. Guzik explains how the psalm transitions from acknowledging human need to celebrating God’s abundance‚ reflecting His transformative grace. He also underscores the universal relevance of its message‚ offering comfort to believers in all circumstances. Guzik’s insights reveal the psalm’s timeless appeal‚ providing solace and hope through its vivid imagery and reassuring promises of God’s presence and restoration‚ making it a cherished passage for personal reflection and spiritual growth.

Practical Application

Psalm 23 encourages trusting God’s provision‚ finding peace in His presence‚ and applying its teachings to daily life through prayer‚ reflection‚ and faith-based decision-making‚ fostering spiritual growth.

Reflections for Personal Growth

Psalm 23 offers profound reflections for personal growth‚ encouraging trust in God’s plan and finding peace in His presence. The shepherd metaphor reminds us of divine care‚ guiding us to depend on God’s provision and protection. Reflecting on its teachings helps us face life’s challenges with faith‚ embracing God’s restoration and guidance. This psalm inspires spiritual growth by fostering a deeper relationship with God‚ emphasizing trust‚ humility‚ and gratitude. Its timeless wisdom invites us to seek comfort in God’s faithfulness‚ leading to inner peace and a stronger‚ unwavering faith. Embracing these reflections enriches our spiritual journey‚ aligning our lives with God’s purpose.

Prayers Inspired by Psalm 23

Psalm 23 inspires heartfelt prayers of gratitude and trust in God’s faithfulness. One can pray‚ “Lord‚ thank You for being my Shepherd‚ guiding me through life’s challenges and providing for my needs.” Another prayer might be‚ “Help me trust Your presence‚ even in dark valleys‚ knowing You are always with me.” Prayers reflecting its themes include asking for spiritual restoration‚ guidance‚ and comfort. Pray for strength to walk in paths of righteousness and for the assurance of Your eternal love. These prayers deepen our relationship with God‚ fostering peace and reliance on His grace. Let Your goodness and mercy follow me always.

Psalm 23 beautifully assures us of God’s faithfulness and eternal love‚ offering comfort‚ guidance‚ and peace in every season of life‚ forever.

Psalm 23 beautifully highlights God’s provision‚ protection‚ and peace‚ using the shepherd metaphor to illustrate His divine care. It emphasizes trust in God’s faithfulness‚ even in life’s darkest valleys‚ reassuring believers of His eternal love and guidance. The psalm underscores spiritual restoration‚ abundance in adversity‚ and the assurance of eternal life. Its timeless message offers comfort‚ hope‚ and strength‚ reminding us that God’s grace and presence are always sufficient. This passage remains a powerful declaration of God’s faithfulness‚ encouraging believers to trust Him in every season of life‚ knowing He leads‚ restores‚ and loves unconditionally.

Final Thoughts on the Beauty of Psalm 23

Psalm 23’s profound beauty lies in its timeless message of divine love and care. It masterfully combines poetic imagery with spiritual depth‚ offering comfort and hope. The shepherd metaphor speaks universally‚ transcending cultures and centuries‚ reminding us of God’s faithfulness. Its assurance of guidance‚ restoration‚ and eternal peace resonates deeply‚ making it a cherished passage for millions. The psalm’s simplicity belies its richness‚ inviting reflection and trust in God’s plan. Its enduring relevance ensures it remains a source of strength‚ inspiring hearts to seek solace in the Good Shepherd’s unwavering care and provision‚ now and forever.

Recommended Resources

Explore Bible study books like A Shepherd Looks at Psalm 23 and trusted commentaries‚ including insights from David Guzik‚ for deeper understanding and spiritual growth.

Bible Study Materials

For a deeper dive into Psalm 23‚ consider The New Jerusalem Bible and A Shepherd Looks at Psalm 23 by Philip Keller. These resources offer insightful commentary and historical context‚ helping readers grasp the psalm’s rich symbolism. Psalm 23 ౼ Bible Study Book provides structured lessons for personal or group study‚ while Brothers‚ We Are Not Professionals by John Piper adds practical applications. These materials are ideal for those seeking to explore the theological depth and personal relevance of Psalm 23 in their spiritual journey. They cater to diverse learning styles‚ ensuring a comprehensive understanding of the passage.

Books and Commentaries on Psalm 23

Exploring Psalm 23 is enriched by books like A Shepherd Looks at Psalm 23 by Philip Keller‚ which offers a shepherd’s perspective on the passage. The Psalms of David by C.H. Spurgeon provides deep theological insights‚ while Psalm 23: A Biography by Robert L. Deffinbaugh delves into its historical and cultural significance. The Book of Psalms by Matthew Henry offers timeless commentary‚ and Be Still and Know by John MacArthur emphasizes trust in God. These resources‚ along with David Guzik’s Commentary‚ provide a wealth of understanding‚ making them invaluable for personal study or group discussions on Psalm 23.