Categories
Guide

bore guide cleaning

Bore guide cleaning is essential for maintaining firearm accuracy and longevity. It prevents damage, ensures proper tool alignment, and enhances cleaning efficiency, keeping your rifle in optimal condition.

1.1 Importance of Proper Bore Guide Maintenance

Proper bore guide maintenance is crucial for ensuring the longevity and accuracy of your firearm. A well-maintained bore guide prevents damage to the barrel and action, ensuring cleaning tools align correctly. Regular inspection and cleaning of the bore guide remove residue and debris, which can affect performance. Neglecting maintenance can lead to misalignment of cleaning tools, potentially harming the barrel. By keeping the bore guide in good condition, you enhance cleaning efficiency and protect your firearm’s investment. Proper care also ensures consistent accuracy and reliability, making it a vital part of firearm ownership.

1.2 Overview of Bore Guide Functionality

A bore guide is a precision tool designed to align cleaning rods and brushes with the barrel, preventing damage and ensuring effective cleaning. Made from durable materials like plastic or metal, it fits snugly into the action, guiding tools through the barrel without causing wear. This alignment enhances cleaning efficiency by allowing solvents and brushes to target fouling directly. The bore guide also protects the chamber and rifling from potential damage caused by improper tool movement. By streamlining the cleaning process, it helps maintain the firearm’s accuracy and overall performance, making it an indispensable tool for gun owners.

Understanding the Role of a Bore Guide

A bore guide protects the barrel, aligns cleaning tools, and ensures efficient maintenance, preserving firearm accuracy and longevity, essential for maintaining performance.

2.1 Preventing Damage to the Barrel and Action

A bore guide is crucial in preventing damage to the barrel and action by guiding cleaning tools straight, avoiding contact with sensitive areas. This protection ensures no scratches or wear occur during cleaning, preserving the firearm’s integrity and functionality. Proper alignment prevents solvents and debris from seeping into the action, maintaining its precision and longevity. Regular use of a bore guide safeguards the rifle’s internal components, ensuring optimal performance and accuracy over time.

2.2 Ensuring Alignment of Cleaning Tools

Proper alignment of cleaning tools is critical for effective bore cleaning. A bore guide ensures that brushes, jags, and solvents are directed straight through the barrel, avoiding accidental damage. This alignment reduces the number of passes needed to remove fouling, saving time and effort. Tools like the Tipton RAPID Deluxe Bore Guide Kit provide precise guidance, making the cleaning process safer and more efficient. By keeping tools properly aligned, you maintain the firearm’s accuracy and extend its lifespan, ensuring optimal performance with every use.

2.3 Enhancing Cleaning Efficiency

A bore guide streamlines the cleaning process by ensuring that solvents, brushes, and patches are applied directly to the barrel. This reduces the number of passes needed to remove fouling, saving time and effort. Proper alignment prevents waste of cleaning materials, making the process more efficient. Tools like the Tipton RAPID Deluxe Bore Guide Kit and Sinclair O-Ring Bore Guide are designed to enhance cleaning effectiveness, ensuring your firearm remains in top condition. By guiding cleaning tools precisely, a bore guide helps maintain accuracy and extends the life of your rifle.

Step-by-Step Bore Guide Cleaning Process

The process involves preparing the rifle, inserting the bore guide, applying solvents, and using cleaning tools to ensure a thorough and efficient cleaning process.

3.1 Preparing the Rifle for Cleaning

Begin by ensuring the rifle is unloaded and safe to handle. Remove any detachable parts, such as the bolt or action, to access the barrel. Place the rifle securely on a cleaning bench or vise. Apply a small amount of solvent to the chamber area to loosen fouling. Protect the stock with a fitted sleeve or plastic tape to prevent solvent drips. Ensure the bore guide is clean and free of debris before insertion. This preparation ensures a smooth and effective cleaning process.

3.2 Inserting and Securing the Bore Guide

Gently insert the bore guide into the rifle’s action, ensuring it aligns with the barrel. Use the action-locking key to secure it firmly in place. Make sure the O-ring is clean and properly seated to avoid leaving marks in the chamber. Align the guide straight with the barrel to prevent any deviation. Once secured, double-check the alignment to ensure proper cleaning tool guidance. This step is crucial for preventing damage and ensuring effective cleaning.

3.3 Applying Solvent and Cleaning Tools

Once the bore guide is securely in place, apply a suitable solvent to the cleaning brush or patch. Insert the brush or patch through the guide, ensuring it enters the barrel straight. Use the integrated solvent port if available to apply the solvent directly. Gently push the brush or patch through the barrel, making several passes to loosen and remove fouling. Avoid allowing solvents to drip into the action or trigger mechanism. Repeat the process until the barrel is clean, ensuring all residue is removed for optimal performance and maintenance.

3.4 Inspecting and Repeating the Process

After applying solvent and cleaning tools, inspect the barrel to assess cleanliness. Use a clean patch to wipe the bore and visually check for residue. If fouling remains, repeat the process, ensuring thorough coverage. Avoid over-saturating the barrel with solvent to prevent damage. Continue inspecting and cleaning until the patches emerge clean. Properly dispose of used patches and solvents, following safety guidelines. This step ensures the barrel is free from debris, maintaining accuracy and performance.

Essential Tips for Effective Bore Guide Cleaning

Use correct cleaning solutions, avoid common mistakes, and maintain the bore guide regularly. Proper care ensures effective cleaning, prevents damage, and extends the tool’s lifespan.

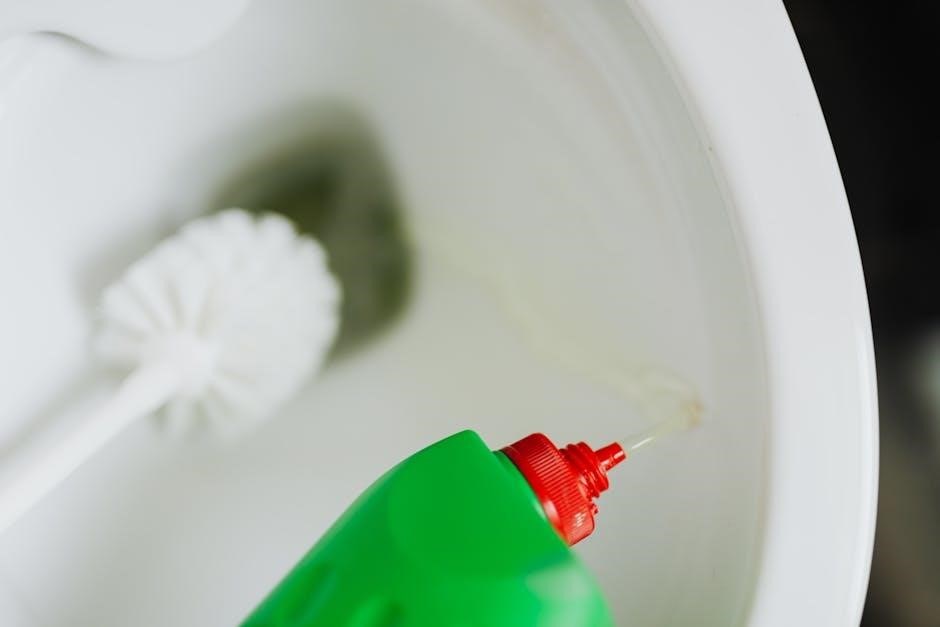
4.1 Using the Correct Cleaning Solutions

Using the right cleaning solutions is crucial for effective bore guide maintenance. Choose solvents and brushes designed for your firearm’s caliber to avoid damage. Avoid household chemicals, as they may harm the barrel or action. Always follow the manufacturer’s instructions for cleaning products to ensure safety and efficiency. Proper solutions help remove fouling without leaving residue, ensuring optimal performance. Regularly inspect and clean the bore guide itself to prevent debris buildup. This maintains accuracy and extends the life of your rifle, keeping it in prime condition for consistent shooting performance.

4.2 Avoiding Common Mistakes

Avoiding common mistakes during bore guide cleaning ensures the longevity and performance of your firearm. Never use household chemicals, as they can damage the barrel or action. Always ensure the bore guide is properly aligned to prevent rubbing against the bore, which can cause wear. Avoid using excessive force, as it may damage the guide or the rifle’s mechanism. Keep the bore guide clean and dry after each use to prevent residue buildup. Proper storage and regular inspection are key to maintaining its effectiveness and ensuring precise cleaning results.

4.3 Maintaining the Bore Guide Itself

Regular maintenance of the bore guide ensures its longevity and effectiveness. After each use, disassemble the guide according to the manufacturer’s instructions and inspect for residue or debris. Clean all parts with a soft brush and mild solvent, avoiding harsh chemicals. Lubricate moving components to prevent friction and wear. Store the bore guide in a dry, protected area to prevent rust or damage. Proper care extends the life of the guide and ensures consistent performance during firearm cleaning. Always follow manufacturer guidelines for maintenance to preserve accuracy and functionality.

Choosing the Right Bore Guide for Your Rifle

Selecting the correct bore guide ensures compatibility with your rifle’s caliber and action type. Look for durability, precise alignment features, and trusted brands like Tipton or Sinclair.

5.1 Factors to Consider in Selection

When selecting a bore guide, consider your rifle’s specific caliber, action type, and barrel length. Ensure the guide is durable and chemically resistant. Look for features like adjustable O-rings or snug-fit designs to prevent solvent leakage. Compatibility with your cleaning tools, such as brushes and jags, is crucial. Additionally, choose a guide from reputable brands like Tipton or Sinclair, known for quality and reliability. Proper fit ensures effective cleaning and protects your rifle’s chamber and action from damage.

5.2 Recommended Brands and Models

Top-rated bore guides include the Tipton Rapid Deluxe Bore Guide Kit, known for its ease of use and comprehensive tools. Sinclair’s O-Ring Bore Guide is praised for its durability and precise fit. Real Avid’s Cleaning Kit offers a self-contained, all-in-one solution. These brands are trusted for their quality and compatibility with various rifles. Each model ensures effective cleaning while protecting your firearm’s action and chamber, making them excellent choices for both professionals and enthusiasts.

Common Mistakes to Avoid

Common mistakes include improper alignment of cleaning tools, using incorrect solvents, and failing to keep the cleaning rod straight, which can damage the barrel and action.

6.1 Improper Alignment of Cleaning Tools

Improper alignment of cleaning tools can cause significant damage to the barrel and action. Always ensure the rod is straight and properly guided to prevent rubbing against the bore walls. Misalignment can lead to scratches, affecting accuracy and longevity. Regularly inspect and clean the bore guide to maintain optimal performance. Using the correct tools and following manufacturer instructions is crucial. Proper alignment ensures effective cleaning and prevents unnecessary wear on your firearm, keeping it in top condition for reliable use.

6.2 Using Incorrect Solvents or Brushes

Using incorrect solvents or brushes can damage the barrel and hinder cleaning effectiveness. Always choose solvents compatible with your firearm’s materials to avoid corrosion. Brushes that are too abrasive can scratch the bore, while too soft ones may not remove fouling efficiently. Follow manufacturer recommendations for cleaning solutions and tools. Proper selection ensures the longevity and performance of your rifle, preventing unnecessary damage and maintaining its accuracy over time. Regular inspection of cleaning tools helps avoid such mistakes, keeping your firearm in optimal condition for consistent use.

Product Reviews and Recommendations

Highly recommended bore guide kits include Tipton Rapid Deluxe, Sinclair O-Ring, and Real Avid, offering safe and effective cleaning solutions to maintain your rifle’s optimal performance.

7.1 Tipton Rapid Deluxe Bore Guide Kit

The Tipton Rapid Deluxe Bore Guide Kit is a top-tier cleaning accessory designed to simplify and enhance the maintenance of your rifle. It features a durable construction with precision-engineered components to ensure a perfect fit for various calibers. The kit includes multiple brushes, mops, jags, and a comprehensive set of cleaning patches, making it a versatile tool for thorough barrel cleaning. Its ergonomic design allows for easy alignment and secure locking, preventing damage to the barrel and action. This kit is highly recommended for both professionals and enthusiasts seeking reliable results.

7.2 Sinclair O-Ring Bore Guide

The Sinclair O-Ring Bore Guide is a high-quality tool specifically designed for Blaser rifles, ensuring precise alignment of cleaning rods. Its robust construction and innovative O-ring technology provide a snug fit, preventing solvents from seeping into the action. This guide minimizes the risk of damage to the barrel and chamber, while facilitating efficient cleaning. Sinclair’s reputation for excellence makes this bore guide a trusted choice among shooters seeking reliability and durability for their firearm maintenance needs, ensuring optimal performance and longevity of their rifles.

7.3 Real Avid Cleaning Kit

The Real Avid Cleaning Kit is a comprehensive, self-contained solution designed for efficient firearm maintenance. It includes a durable bore guide that protects the chamber and rifling, ensuring precise alignment of cleaning tools. The kit features a workstation with organized storage for accessories like brushes, mops, and patches. Its O-ring sealed design prevents solvent leakage, safeguarding the action. Priced at $199 MSRP, Real Avid offers a complete, high-quality cleaning system that enhances accuracy and extends firearm life, making it a valuable investment for shooters seeking professional-grade results.

Bore guide cleaning is a critical process for maintaining firearm accuracy and longevity. By using a high-quality bore guide, shooters can prevent damage to the barrel and action, ensure proper alignment of cleaning tools, and achieve a more efficient cleaning process. Investing in kits like the Tipton Rapid Deluxe or Sinclair O-Ring Bore Guide can significantly enhance your cleaning routine. Regular maintenance and proper technique will keep your rifle in optimal condition, ensuring reliable performance and extending its lifespan. Proper care through effective bore guide cleaning is essential for every firearm owner.

Categories
PDF

rental income and expense worksheet pdf free

A Rental Income and Expense Worksheet is a toolspecifically designed to help landlords and property managers track and organize financial data related to rental properties. It allows users to document income‚ expenses‚ and other relevant details efficiently. Available for free in PDF format‚ these templates simplify financial management for rental properties‚ ensuring accurate record-keeping and compliance with tax requirements.

Benefits of Using a Rental Income and Expense Worksheet

Using a Rental Income and Expense Worksheet offers numerous benefits for landlords and property managers. It provides a centralized platform to track all financial activities related to rental properties‚ ensuring better organization and accuracy. By documenting income‚ expenses‚ and other financial details‚ users can easily monitor cash flow and make informed decisions. This tool also simplifies tax preparation‚ as it helps categorize income and expenses in accordance with IRS requirements‚ reducing the risk of errors or missed deductions.

  • Enhances financial clarity and transparency.
  • Streamlines tax reporting and compliance.
  • Identifies opportunities to reduce costs and improve profitability.
  • Saves time by automating financial record-keeping.
  • Supports long-term financial planning and budgeting.

Additionally‚ free PDF templates are readily available‚ making it accessible for users to download and customize according to their needs. This tool is essential for managing rental properties efficiently and ensuring financial stability.

Where to Find Free Rental Income and Expense Worksheet Templates

Finding free Rental Income and Expense Worksheet templates is straightforward‚ with numerous online resources offering downloadable PDF and Excel formats. Websites like Hampton Financial LLC provide comprehensive templates designed specifically for rental property management. These templates are available in PDF format and can be downloaded instantly‚ offering a structured way to track income and expenses. Additionally‚ platforms like Google Sheets and Microsoft Excel offer free templates that can be customized to suit individual needs.

  • Hampton Financial LLC offers a detailed Rental Property Income and Expense Worksheet in PDF format.
  • Google Sheets and Microsoft Excel provide customizable templates for rental income and expense tracking.
  • Other websites offer free downloadable templates specifically designed for landlords and property managers.

These templates are user-friendly and require minimal setup‚ allowing landlords to focus on managing their properties effectively. They often include pre-designed categories for income and expenses‚ making it easier to organize financial data. By utilizing these free resources‚ landlords can streamline their financial record-keeping and ensure compliance with tax requirements.

Key Components of a Rental Income and Expense Worksheet

Key Components of a Rental Income and Expense Worksheet

A Rental Income and Expense Worksheet typically includes sections for tracking rental income‚ such as rent payments and fees‚ and expenses like HOA dues‚ utilities‚ maintenance‚ and repairs. It also provides spaces for calculating totals and net profit/loss.

4.1 Rental Income Tracking

Rental income tracking is a fundamental component of a Rental Income and Expense Worksheet‚ designed to document all revenue generated from rental properties. This section allows landlords to record monthly rent payments‚ late fees‚ and other income-related items. It also accounts for non-cash transactions‚ such as barter exchanges or services received in lieu of rent. By categorizing income streams‚ users can monitor cash flow and ensure accurate financial reporting. The worksheet typically includes fields for property address‚ tenant names‚ and payment dates‚ providing a clear audit trail. Additionally‚ it helps in identifying trends‚ such as consistent late payments or seasonal fluctuations in occupancy rates. This data is essential for preparing tax returns and demonstrating compliance with IRS requirements. Proper rental income tracking also enables landlords to assess the profitability of their properties and make informed decisions for future investments or adjustments in rental rates.

4.2 Rental Expense Tracking

Rental expense tracking is a critical feature of a Rental Income and Expense Worksheet‚ enabling landlords to monitor and categorize all costs associated with managing rental properties. Common expenses include mortgage payments‚ property taxes‚ insurance‚ maintenance‚ repairs‚ and utility bills. The worksheet provides a structured format to log these expenses‚ ensuring no cost goes unrecorded. It also accommodates variable expenses‚ such as landscaping or unexpected repairs‚ allowing for precise budgeting and financial planning. By itemizing each expense‚ landlords can analyze spending patterns and identify areas for cost reduction. This detailed tracking is vital for tax purposes‚ as it helps in claiming deductions and ensuring compliance with IRS guidelines. Additionally‚ the worksheet may include sections for tracking expenses related to specific properties or tenants‚ enhancing organizational clarity. Regularly updating the expense tracker helps landlords maintain profitability and make informed decisions about property management or potential investments in new rental properties.

IRS Requirements for Rental Income and Expenses

The IRS requires accurate reporting of rental income and expenses‚ typically documented on Schedule E. A Rental Income and Expense Worksheet helps organize this data‚ ensuring compliance with tax regulations and facilitating the preparation of your tax return.

5.1 Schedule E and Its Importance

Schedule E is a critical IRS form for reporting rental income and expenses. It is essential for landlords to accurately document all rental-related financial activities. A Rental Income and Expense Worksheet is a valuable tool to prepare for Schedule E‚ as it helps organize income‚ deductions‚ and credits. The worksheet ensures that all rental income‚ such as rent payments and non-cash income‚ is accounted for‚ while also itemizing expenses like mortgage interest‚ property taxes‚ and operating costs. Properly completing Schedule E is vital for compliance with tax laws and avoiding audits. It also helps in calculating net rental income or loss‚ which impacts overall taxable income. By using a rental worksheet‚ landlords can streamline the process of transferring data to Schedule E‚ reducing errors and saving time. The IRS requires detailed records to support all figures reported on Schedule E‚ making a worksheet an indispensable resource for landlords. Accurate completion of Schedule E ensures that all rental income is reported correctly‚ and all eligible expenses are deducted‚ maximizing tax savings and minimizing legal risks.

Tools and Resources to Complement Your Worksheet

To maximize the effectiveness of your Rental Income and Expense Worksheet‚ consider using complementary tools and resources. Free templates in PDF‚ Excel‚ and Word formats are widely available online‚ offering customizable solutions for tracking rental finances. These templates often include pre-designed categories for income‚ expenses‚ and tax-deductible items‚ making it easier to organize data; Additionally‚ budgeting tools like Kiplinger’s household budget worksheet can help landlords plan and manage their finances more effectively. For Airbnb properties‚ an annual income statement template is useful for tracking revenue and expenses specific to short-term rentals. Many property management templates also include features for generating rent receipts and invoices‚ streamlining communication with tenants. Spreadsheets and calculators‚ such as those for motor vehicle expenses‚ can further enhance your ability to track and calculate costs related to rental properties. These tools integrate seamlessly with your worksheet‚ ensuring accurate and efficient financial management. By leveraging these resources‚ landlords can maintain better control over their rental income and expenses‚ making tax preparation and financial planning less cumbersome.

Tips for Effectively Using a Rental Income and Expense Worksheet

To make the most of your Rental Income and Expense Worksheet‚ consider the following tips. First‚ ensure all income and expenses are tracked regularly‚ updating the worksheet monthly or quarterly to maintain accuracy. Organize receipts and invoices in a designated folder to support the figures entered. Automate calculations where possible‚ using formulas in Excel or other spreadsheet tools to reduce errors. Review the worksheet periodically to identify trends‚ such as rising utility costs or declining rental income‚ and adjust your budget accordingly. For properties with shared ownership‚ use separate worksheets to track each owner’s contributions and expenses. Accurately report all income‚ including non-cash payments like services provided by tenants. Finally‚ use the worksheet to prepare for tax season by ensuring all deductible expenses are documented and categorized correctly. By following these practices‚ landlords can streamline financial management‚ improve transparency‚ and ensure compliance with tax requirements. Regular updates and thorough record-keeping are key to maximizing the benefits of this essential tool.

Categories
Guide

lake placid freshwater charter and guide

Overview of Lake Placid Freshwater Charter and Guide

Lake Placid Freshwater Charter and Guide offers world-class freshwater fishing experiences with expert guides. Specializing in crappie, bass, trout, and pike, they provide eco tours, realtor tours, and night fishing trips. With fully equipped boats and local expertise, they ensure memorable adventures for anglers of all skill levels, making them a top choice for freshwater fishing enthusiasts.

Lake Placid Freshwater Charter and Guide, established in 2014, offers exceptional fishing and tour experiences. Owned by Dennis Crenshaw, a retired law enforcement officer, the service specializes in crappie fishing, day and night trips, and eco tours. With a passion for fishing and a commitment to customer satisfaction, they provide memorable adventures on Lake Placid’s pristine waters, catering to anglers of all skill levels.

Services Offered: Fishing Charters, Eco Tours, and Realtor Tours

Lake Placid Freshwater Charter and Guide provides diverse services including fishing charters targeting bass, trout, and pike, eco tours to explore natural beauty, and realtor tours for lakefront properties. Their trips are tailored for small groups, ensuring personalized experiences. With specialized gear and expert guides, they cater to both anglers and nature enthusiasts, offering a unique way to experience Lake Placid’s serene landscapes and vibrant wildlife.

Specialties and Expertise

Lake Placid Freshwater Charter and Guide specializes in crappie fishing, day and night trips, and targeting bass, trout, and pike. Their expertise ensures successful fishing experiences.

Crappie Fishing: Day and Night Trips

Lake Placid Freshwater Charter and Guide excels in crappie fishing, offering both day and night trips. Their 6-hour excursions cater to 1-4 anglers, providing expert guidance and specialized gear. Night trips feature attractive lights to lure crappie, ensuring a unique and productive experience. With extensive local knowledge, their guides maximize catches, making every trip memorable and rewarding for anglers of all skill levels.

Target Species: Bass, Trout, and Pike

Lake Placid Freshwater Charter and Guide specializes in targeting bass, trout, and pike, offering tailored trips to suit anglers’ preferences. With expert guides and specialized gear, they ensure successful catches. Their extensive knowledge of Lake Placid’s waters allows them to locate prime fishing spots, providing an exciting experience for both novice and experienced anglers seeking these popular species.

History and Background

Lake Placid Freshwater Charter and Guide was established in 2014 by a retired law enforcement officer, combining his passion for fishing with extensive local knowledge.

Established in 2014

Lake Placid Freshwater Charter and Guide was founded in 2014 by Dennis Crenshaw, a retired law enforcement officer. After his partner shifted focus to hunting, Dennis took over, bringing his lifelong passion for fishing to the business. The company quickly gained recognition for its specialized crappie fishing trips, eco tours, and realtor tours, offering unique experiences on Lake Placid’s pristine waters.

Owner’s Background: Retired Law Enforcement Officer

Dennis Crenshaw, a retired law enforcement officer, brings over 25 years of service experience to Lake Placid Freshwater Charter and Guide. His passion for fishing, rooted in childhood, led him to establish the business after retirement. Dennis combines his dedication to community service with his love for the outdoors, offering exceptional guided fishing experiences that reflect his commitment to excellence and customer satisfaction.

Fishing Trips and Packages

Lake Placid Freshwater Charter offers 6-hour day or night fishing trips for 1-4 people. Packages are priced at $300 for 1-3 anglers, with a $50 additional fee for a fourth person. A $100 non-refundable deposit secures bookings, ensuring a well-organized and enjoyable fishing experience tailored to all skill levels.

6-Hour Day or Night Fishing Trips

Lake Placid Freshwater Charter offers 6-hour day or night fishing trips, priced at $300 for 1-3 anglers. An additional $50 fee applies for a fourth person. Trips are tailored to target species like crappie, bass, and pike, with night fishing featuring attractive lights to minimize bugs. A $100 non-refundable deposit secures bookings, ensuring a memorable and productive fishing experience.

Group Sizes: 1-4 People

Lake Placid Freshwater Charter accommodates groups of 1-4 people, ensuring personalized attention and a tailored fishing experience. This intimate setting allows anglers to maximize their time on the water, with guides providing expert tips and local insights. The smaller group size enhances comfort and productivity, making it ideal for both novice and experienced anglers seeking a memorable fishing adventure.

Additional Services

Lake Placid Freshwater Charter and Guide offers additional services, including gift certificates for special occasions and a selection of branded apparel and merchandise for enthusiasts.

Gift Certificates for Special Occasions

Lake Placid Freshwater Charter and Guide offers gift certificates, perfect for birthdays, holidays, or any special occasion. They allow recipients to choose their ideal fishing or eco-tour experience. Customizable options make them a thoughtful and unique gift for anglers and nature enthusiasts alike, providing unforgettable memories on the water.

Apparel and Merchandise

Lake Placid Freshwater Charter and Guide offers a variety of stylish apparel and merchandise, including t-shirts, hats, and more. Perfect for anglers and outdoor enthusiasts, their items feature breathable, moisture-wicking fabric. Show off your love for Lake Placid with durable, high-quality gear that combines comfort and style for any adventure.

Online Booking and Reviews

Lake Placid Freshwater Charter and Guide offers a secure online booking system and verified customer reviews, ensuring a seamless experience and trusted feedback for anglers.

Secure Online Booking System

Lake Placid Freshwater Charter and Guide features a user-friendly, secure online booking system. Anglers can easily reserve trips, view availability, and complete payments with confidence. The system ensures a smooth, hassle-free experience, allowing customers to plan their fishing adventures effortlessly. Verified reviews and clear pricing further enhance the booking process, providing transparency and trust for all clients.

Verified Customer Reviews

Customers praise Lake Placid Freshwater Charter and Guide for their professionalism and expertise. Many highlight the guides’ extensive local knowledge and ability to locate prime fishing spots. Reviews often mention the enjoyable and stress-free experiences, with clients appreciating the personalized attention and success in catching target species. The positive feedback underscores the service’s reputation for reliability and customer satisfaction.

Contact Information

Lake Placid Freshwater Charter and Guide is located at 126 Roland Street NW, Lake Placid, FL 33852. Call (863) 441-2784 or visit their website at https://www.lakeplacidfreshwaterandguide.com for more information.

Address: 126 Roland Street NW, Lake Placid, FL 33852

Nestled in the heart of Lake Placid, our address at 126 Roland Street NW serves as the base for our freshwater charter and guide operations. Strategically located near the serene freshwater lakes, this location provides easy access to prime fishing spots, ensuring a seamless experience for anglers. Visit us to plan your next adventure in a peaceful, natural setting.

Phone: (863) 441-2784

Reach us at (863) 441-2784 to book your fishing trip or inquire about our services. Our team is ready to assist with trip planning, answer questions, and provide expert advice. Call today to secure your spot and experience the best of Lake Placid’s freshwater fishing with our knowledgeable guides and well-equipped charters.

Website: https://www.lakeplacidfreshwaterandguide.com

Visit our website to explore fishing charters, eco tours, and realtor tours. Secure online booking, gift certificates, and detailed service information are available. Check verified customer reviews and plan your trip effortlessly. Discover the best freshwater fishing experiences in Lake Placid with our expert guides and fully equipped boats.

Equipment and Gear

The boats are fully equipped with essential gear for comfort and productivity, ensuring anglers have everything needed for a successful fishing experience.

Fully Equipped Boats for Comfort and Productivity

The boats are equipped with everything needed for a successful fishing trip, including comfortable seating, ample storage, and essential gear. They are designed to maximize efficiency and accessibility, ensuring anglers can focus on their fishing experience while enjoying a smooth and comfortable ride on the water.

Specialized Gear for Targeted Fishing

Lake Placid Freshwater Charter and Guide provides top-tier, specialized gear tailored for specific fishing techniques and species. From crappie to bass, the equipment is meticulously selected to enhance success rates. Seasoned guides ensure the gear is perfectly suited for the target species, offering anglers the best chance to land their desired catch efficiently and effectively.

Boat Details

Lake Placid Freshwater Charter and Guide operates multiple boats, each designed for specific trips, ensuring comfort and productivity. Their fleet accommodates up to 15 people, catering to various group sizes and fishing preferences, making them versatile for both small and larger fishing parties.

Multiple Boats Available for Different Trips

Lake Placid Freshwater Charter and Guide offers multiple boats tailored for various fishing and tour experiences, including bass, crappie, and nature cruises. Their fleet accommodates different group sizes, ensuring personalized trips for anglers and nature enthusiasts alike. Each boat is equipped to provide comfort and productivity, catering to both fishing adventures and scenic explorations, making them ideal for diverse preferences and trip requirements.

Capacity: Up to 15 People

Lake Placid Freshwater Charter and Guide accommodates groups of up to 15 people, ideal for larger families, corporate events, or group outings. Their fleet ensures comfortable and safe experiences, catering to diverse needs while maintaining personalized service. This capacity makes them a versatile choice for both intimate gatherings and bigger social fishing or eco-tour adventures on the lake.

Eco and Realtor Tours

Lake Placid Freshwater Charter and Guide offers eco tours to explore the lake’s natural beauty and realtor tours for showcasing lakefront properties, combining adventure with property exploration.

Exploring Lake Placid’s Natural Beauty

Lake Placid’s eco tours offer a serene escape to explore its 27 freshwater lakes, surrounded by natural beauty. These tours provide a chance to enjoy peaceful surroundings, observe wildlife, and experience the tranquility of the area. With experienced guides, visitors can discover hidden gems and appreciate the unique ecosystems that make Lake Placid a nature lover’s paradise.

Realtor Tours for Lakefront Properties

Lake Placid Freshwater Charter and Guide offers realtor tours tailored for those seeking lakefront properties. With knowledgeable guides, these tours provide a unique opportunity to explore and view properties from the water, ensuring a comprehensive understanding of the area’s real estate offerings. It’s an ideal way to find the perfect lakeside home or investment property in a serene setting.

Customer Testimonials

Customers praise the professionalism and expertise of Lake Placid Freshwater Charter and Guide. Anglers highlight the enjoyable and productive fishing experiences, commending the guides’ extensive local knowledge and dedication.

Positive Feedback from Anglers

Anglers consistently praise Lake Placid Freshwater Charter and Guide for their professional and enjoyable experiences. Many highlight the guides’ extensive local knowledge and dedication, ensuring successful and memorable fishing trips. Customers appreciate the relaxed yet productive environment, often expressing gratitude for the expertise that leads to impressive catches and unforgettable adventures on the water;

Experienced and Professional Guides

Lake Placid Freshwater Charter and Guide is led by Dennis Crenshaw, a retired law enforcement officer with a lifelong passion for fishing. His extensive local knowledge and 25 years of experience ensure expert guidance. The team’s professionalism and dedication to providing exceptional fishing experiences make them a trusted choice for anglers seeking memorable trips on the lake.

Seasonal Fishing Opportunities

Lake Placid Freshwater Charter and Guide offers fishing trips year-round, with seasonal opportunities in spring, summer, and fall. Night fishing with attractive lights is a specialty.

Fishing in Spring, Summer, and Fall

Lake Placid Freshwater Charter and Guide offers exceptional fishing experiences across spring, summer, and fall. Spring brings vibrant crappie action, while summer nights shine with illuminated trips. Fall provides thrilling bass and panfish opportunities. Each season offers unique fishing conditions, ensuring year-round adventures tailored to anglers seeking diverse freshwater species in Lake Placid’s pristine waters.

Night Fishing with Attractive Lights

Night fishing with Lake Placid Freshwater Charter and Guide is a unique experience. Using attractive lights, anglers can target species like crappie, which are often more active at night. The lights not only attract fish but also enhance the excitement of the trip. With experienced guides and well-equipped boats, night fishing becomes a memorable adventure, offering a different perspective on freshwater fishing.

Local Knowledge and Expertise

Lake Placid Freshwater Charter and Guide’s experienced guides offer extensive local knowledge, ensuring anglers access to the best fishing spots on the lake for a productive trip.

Guides with Extensive Local Experience

Lake Placid Freshwater Charter and Guide’s expert guides have years of experience navigating the waters, ensuring anglers access to prime fishing locations. Their deep knowledge of Lake Placid’s ecosystem and fish behavior maximizes fishing success, making every trip both productive and enjoyable for anglers of all skill levels.

Best Fishing Spots on the Lake

Lake Placid Freshwater Charter and Guide knows the most productive fishing spots, leveraging local knowledge to target species like crappie, bass, trout, and pike. Guides identify prime locations such as drop-offs, weed beds, and structural elements, ensuring anglers maximize their catch. Seasonal patterns and fish behavior are expertly considered, while secret spots remain exclusive to their tours for unmatched fishing success.

Categories
Guide

field guide to american houses

This guide explores the rich diversity of American residential architecture, offering insights into historical developments, regional variations, and iconic styles. It serves as a comprehensive resource for identifying and appreciating the unique characteristics of American homes, blending history, design, and cultural influences.

Historical Development of American Residential Architecture

American residential architecture has evolved significantly over centuries, reflecting cultural, social, and technological changes. Early colonial homes were influenced by European styles, with designs like Cape Cod and Saltbox houses dominating the 17th and 18th centuries. The 19th century saw the rise of Victorian-era homes, characterized by ornate detailing and diverse styles such as Gothic Revival and Italianate. The early 20th century introduced the Craftsman movement, emphasizing handcrafted details and simplicity. Post-WWII, suburbanization and modernist influences led to the popularity of Ranch and Mid-Century Modern homes. Each era reflects the values and resources of its time, shaping the diverse landscape of American housing. Regional variations further enriched this architectural tapestry, creating a unique story of design and functionality across the nation.

Key Features of American House Styles

American house styles are defined by distinct architectural elements that reflect their historical and cultural origins. Colonial-style homes often feature symmetrical facades, multi-paned windows, and central chimneys. Victorian-era houses are known for their intricate ornamentation, steeply pitched roofs, and ornate woodwork. Craftsman-style homes emphasize handcrafted details, low-pitched gabled roofs, and wide porches. Modern and contemporary designs prioritize open floor plans, minimal ornamentation, and the use of glass and steel. Regional variations, such as the shotgun houses of the South or the adobe homes of the Southwest, further diversify the architectural landscape. Each style incorporates unique features that cater to climate, lifestyle, and aesthetic preferences, creating a rich and varied tapestry of residential design across America.

Regional Variations in American Housing Design

America’s diverse geography and cultural influences have shaped distinct regional housing designs. The Northeast is known for Cape Cod and Colonial styles, often featuring steep roofs and brick exteriors. The South embraces antebellum mansions with grand porches and shotgun houses with long, narrow layouts. The Southwest is characterized by adobe homes and Pueblo-style architecture, emphasizing earthy materials and flat roofs. The Midwest favors practical designs like Craftsman homes and farmhouses, reflecting agrarian traditions. The West Coast, meanwhile, has popularized modern and contemporary styles, often incorporating large windows and open spaces. Climate also plays a role, with Southern homes built for ventilation and Southwest designs focused on insulation. These regional variations highlight America’s architectural diversity, blending historical, cultural, and environmental factors to create unique housing styles across the country.

Popular House Styles in America

America boasts a wide array of iconic house styles, including Colonial, Victorian, Craftsman, Modern, and Ranch homes, each reflecting unique architectural influences and cultural heritage.

Colonial-Style Houses

Colonial-style houses are quintessential representations of early American architecture, reflecting the country’s European heritage. These homes are known for their symmetrical facades, classical detailing, and practical layouts. Originating in the 17th and 18th centuries, they were influenced by British, Dutch, Spanish, and French colonial designs. Key features include evenly spaced windows, central front doors, and balanced proportions. Regional variations, such as New England’s saltbox homes and Dutch Colonials in the Midwest, showcase adaptability to local climates and materials. The simplicity and elegance of Colonial-style houses have made them enduringly popular, blending seamlessly into modern neighborhoods while preserving historical charm. These homes are a cornerstone of American architectural identity, offering a glimpse into the nation’s founding era. Their timeless appeal continues to inspire architects and homeowners alike, making them a beloved part of the American housing landscape.

Victorian-Era Houses

Victorian-era houses, built during the reign of Queen Victoria (1837–1901), are celebrated for their elaborate and ornate designs. These homes reflect the cultural and social values of the time, with a focus on individuality and craftsmanship. Characterized by steeply pitched roofs, intricate woodwork, and vibrant color schemes, Victorian houses often feature turrets, bay windows, and wraparound porches. The era saw the rise of various sub-styles, such as Gothic Revival, Italianate, and Queen Anne, each with distinct architectural elements. The use of new materials like cast-iron and mass-produced wood trim allowed for greater detailing. Victorian homes were not only statements of wealth but also expressions of personal taste. Despite their complexity, these houses remain iconic symbols of 19th-century American architecture, blending history, artistry, and functionality. Their enduring appeal lies in their unique blend of nostalgia and innovation, making them a staple of historic neighborhoods across the country.

Craftsman-Style Homes

Craftsman-style homes, popularized in the early 20th century, emphasize handcrafted details and natural materials. Originating from the Arts and Crafts movement, these homes prioritize simplicity, functionality, and harmony with their surroundings. Key features include low-pitched gabled roofs with wide eaves, exposed rafters, and decorative trusses. Porches are often prominent, with square or tapered columns and wood braces. Interior elements like built-in cabinetry, wood paneling, and fireplaces with inglenooks reflect a focus on craftsmanship. The use of natural materials, such as wood, stone, and brick, underscores the style’s emphasis on authenticity. Open floor plans and minimal ornamentation contrast with earlier Victorian styles, creating a sense of warmth and accessibility. Craftsman homes were designed to be approachable and practical, blending seamlessly into their environments while celebrating the beauty of handmade design. Their enduring popularity highlights their timeless appeal and connection to artisanal traditions.

Architectural Elements of American Houses

American houses showcase a variety of architectural elements, including roof types, facade designs, and stylistic doors and windows, each reflecting historical and cultural influences that define their unique character and identity.

Roof Types and Their Significance

American houses feature a wide variety of roof types, each with unique stylistic and functional characteristics. The gabled roof, with its two sloping sides, is one of the most common, often associated with colonial and Victorian-era homes. In contrast, the hipped roof, with all sides sloping downward, is known for its durability and is frequently seen in Craftsman and ranch-style houses. Flat roofs are typical in modern and urban designs, emphasizing minimalism and practicality. The shed roof, a single sloping plane, is often used in contemporary and minimalist architectures. Each roof type reflects historical, regional, and aesthetic influences, contributing to the diverse architectural landscape of American housing. Understanding these designs helps in identifying and appreciating the cultural and stylistic evolution of American homes.

Facade Designs and Ornamentation

American house facades reflect a rich diversity of architectural styles, often showcasing intricate ornamentation that highlights historical and cultural influences. Victorian-era homes, for instance, frequently feature elaborate detailing, including intricate woodwork, patterned masonry, and ornate trim. In contrast, Craftsman-style homes emphasize handcrafted elements like exposed beams, decorative trusses, and earthy materials. Colonial-style houses often display symmetrical facades with classical details such as pilasters and pediments. Modern and contemporary designs tend to prioritize minimalism, with clean lines, large windows, and sparse ornamentation. The facade not only serves as the home’s exterior identity but also communicates its stylistic era and regional heritage, making it a key element in understanding American residential architecture. These designs and decorations play a crucial role in defining the aesthetic and cultural identity of each home.

Doors and Windows: Stylistic Differences

American houses showcase a wide variety of door and window styles, reflecting architectural trends and cultural influences. Colonial-style homes often feature symmetrical window arrangements with multi-paned double-hung designs and classically styled doors with pilastered surrounds. Victorian-era houses boast elaborate window details, such as stained glass, rounded tops, and ornate woodwork, while their doors are typically heavy and adorned with intricate carvings. In contrast, Craftsman-style homes emphasize simplicity with wide, low-profile doors and windows divided into multiple small panes, often with a focus on natural materials. Modern designs frequently incorporate large, unadorned windows and sleek, minimalist doors to emphasize openness and functionality. These stylistic differences not only define the aesthetic of a home but also provide insight into its historical and regional context, making doors and windows key elements in identifying architectural styles.

Interior Design Trends Across Eras

The evolution of American interior design showcases shifting tastes and cultural influences, from colonial simplicity to Victorian opulence and modern minimalism, reflecting societal changes and aesthetic preferences.

Colonial-Era Interiors

Colonial-era interiors reflect simplicity, functionality, and symmetry, influenced by European traditions adapted to American resources. Early colonial homes featured modest spaces with minimal ornamentation, emphasizing practicality over decoration. Walls were often adorned with wood paneling, while floors were made of wide wooden planks. Fireplaces served as central gathering points, with built-in cabinetry and shelving optimizing storage. Natural materials like wood and stone dominated, creating a cohesive, rustic aesthetic. The Puritan influence emphasized restraint, with limited use of color and pattern. Lighting was minimal, relying on candles and firelight. Multi-functional spaces, such as kitchens doubling as living areas, highlight the era’s focus on utility. These interiors laid the foundation for later American design, blending resourcefulness with cultural heritage.

Modern and Contemporary Interior Styles

Modern and contemporary interior styles emphasize minimalism, functionality, and a connection to the surrounding environment. Open floor plans dominate, creating fluid living spaces that foster interaction and versatility. Natural light is maximized through large windows and skylights, while neutral color palettes and clean lines define the aesthetic. Materials such as steel, glass, and reclaimed wood are often used to create a sleek, modern look. Technology integration, such as smart home systems, is a key feature, enhancing convenience and efficiency. These interiors also prioritize sustainability, incorporating eco-friendly materials and energy-efficient designs. The focus is on simplicity, comfort, and adaptability, reflecting the evolving needs of modern living while maintaining a timeless appeal. This style blends seamlessly with various architectural forms, making it a versatile choice for contemporary American homes.

Identifying and Appreciating American Houses

This section provides essential insights into recognizing and valuing American homes, highlighting key features, architectural details, and historical contexts to deepen your understanding and appreciation of their unique designs.

Key Features for Identification

Identifying American houses begins with recognizing distinct architectural elements. Key features include roof types, such as gabled, hipped, or flat designs, and their unique detailing. Facades often reveal stylistic influences, like symmetrical layouts in Colonial homes or ornate trim in Victorians. Doors and windows vary significantly, from multi-paned double-hung windows in Craftsman homes to central front doors with pilasters in Classical Revival styles. Porches, such as wrap-around designs in Victorians or recessed entries in Mid-Century Modern homes, also serve as identifiers. Exterior materials, like clapboard siding in Cape Cods or stucco in Spanish Revival homes, further distinguish styles. Ornamentation, including shutters, moldings, and decorative brackets, adds to the visual vocabulary. Understanding these elements helps enthusiasts and historians classify and appreciate the diverse architectural legacy of American housing. By focusing on these details, one can trace the evolution of residential design across regions and eras.

Tools and Resources for Further Exploration

Exploring American houses further requires a combination of research tools and practical resources. Books like A Field Guide to American Houses provide detailed classifications and historical context. Online databases, such as architectural archives and historical societies, offer extensive collections of designs and blueprints. Mobile apps, like home design platforms, enable users to visualize and analyze architectural styles. Additionally, attending workshops or online courses on architectural history can deepen understanding. Visiting museums or historical home tours provides hands-on insights. For enthusiasts, checklists and field guides are indispensable for identifying key features during house viewings. Lastly, joining architectural communities or forums connects one with experts and like-minded individuals, fostering collaborative learning and exploration. These tools collectively empower anyone to delve deeper into the fascinating world of American residential architecture.

Categories
Instructions

holmes air purifier instructions

Holmes air purifiers are designed to improve indoor air quality by removing allergens, dust, and odors. With advanced filtration systems, they offer clean air solutions for homes and offices, ensuring a healthier environment through efficient and quiet operation.

1.1 Key Features and Benefits of Holmes Air Purifiers

Holmes air purifiers offer advanced filtration systems, including HEPA-Type filters that capture 99% of airborne particles as small as 2 microns. They feature optional ionizers to enhance air cleaning and odor-neutralizing filters for fresher air. Quiet operation ensures minimal noise, while energy-efficient designs reduce power consumption. User-friendly controls allow easy adjustment of settings, and filter check indicators remind you when maintenance is needed. These purifiers are designed for various room sizes, providing clean and allergen-free air for a healthier living space.

Understanding Your Holmes Air Purifier Components

Your Holmes air purifier includes a HEPA-Type filter, ionizer, and control panel with indicators. These components work together to ensure efficient air cleaning and easy operation.

2.1 Overview of Filters and Ionizer

The Holmes air purifier features a HEPA-Type filter that captures 99% of airborne particles as small as 2 microns, including dust, pollen, and pet dander. The optional ionizer emits negative ions to attract and trap pollutants, enhancing air quality. These components work together to provide cleaner air and reduce odors. Regular maintenance and filter replacements are essential for optimal performance. The ionizer can be activated or deactivated based on preference, offering flexibility for different air cleaning needs. This combination ensures effective removal of allergens and contaminants for a healthier environment.

2.2 Control Panel and Indicator Lights

The control panel on Holmes air purifiers offers intuitive buttons for adjusting fan speed, activating the ionizer, and setting the timer. Indicator lights provide visual feedback, such as power status and filter replacement reminders. The power light confirms the unit is operational, while the filter check indicator signals when the filter needs replacement. These features ensure easy operation and maintenance. The user-friendly design allows seamless adjustments, making it simple to customize air purification settings. The indicator lights help maintain optimal performance by reminding users of necessary upkeep, ensuring clean and healthy air quality consistently.

Installation and Setup Instructions

Place the air purifier on a flat surface, ensuring unobstructed airflow. Remove packaging materials, install filters, and plug into a 120V outlet. Follow manual for setup.

3.1 Placement Guidelines for Optimal Performance

To ensure optimal performance, place the Holmes air purifier on a flat, stable surface. Keep it at least 12 inches away from walls and furniture to allow proper airflow. Avoid placing it near windows, doors, or areas with direct sunlight, as this can reduce efficiency. Ensure the air purifier is positioned in the center of the room if possible but not in corners, as this can obstruct air circulation. Do not place it near heating vents or radiators, as this can interfere with its operation. Additionally, avoid areas with high humidity or moisture, such as basements without proper ventilation, to prevent damage to the unit. Keep the rear grill unobstructed to ensure smooth airflow and avoid blocking the air inlet or outlet with curtains or rugs. By following these placement guidelines, you can maximize the effectiveness of your Holmes air purifier and enjoy cleaner, healthier air in your home or office. Always refer to the user manual for specific placement recommendations tailored to your model.

3.2 Initial Setup and Powering On the Device

Start by unpacking your Holmes air purifier and ensuring all components, including filters, are included. Place the unit in a suitable location following the placement guidelines. Plug the device into a 120V AC electrical outlet, ensuring it is not overloaded. Before turning it on, verify that the filters are correctly installed and the rear grill is securely fastened. Press the power button to turn it on and select your desired speed setting using the control panel. Ensure no objects are blocking the air inlet or outlets. Finally, refer to the user manual for model-specific instructions to complete the setup and begin enjoying cleaner air.

Operating Your Holmes Air Purifier

Operate your Holmes air purifier by selecting the desired speed, using the ionizer for enhanced cleaning, and monitoring the filter check indicator for optimal performance.

4.1 Choosing the Right Speed Setting

Your Holmes air purifier offers multiple speed settings to customize air purification based on your needs. For quiet operation, use the low speed, ideal for bedrooms or offices. The medium setting provides balanced cleaning for everyday use, while the high setting maximizes airflow for faster purification in larger spaces. Adjust the speed according to room size, air quality, and personal preference. Regularly monitor the air quality and noise level to select the optimal setting for a clean and comfortable environment; This feature ensures efficient performance while maintaining a peaceful atmosphere in your home or workspace.

4.2 Using the Ionizer Function

The ionizer function on your Holmes air purifier releases negative ions to attract and trap airborne particles, enhancing purification efficiency. To activate it, press the ionizer button on the control panel. The ionizer is optional and can be turned off if desired. Use this feature to reduce particles and odors more effectively. Note that the ionizer should be used in well-ventilated areas to avoid ozone buildup. Regularly clean the ionizer as per the manual to maintain its performance. This feature is ideal for improving air quality and freshness in your space, especially during allergy seasons or in areas with strong odors.

4.3 Understanding the Filter Check Indicator

The Filter Check Indicator on your Holmes air purifier lights up after 4 months of use, reminding you to replace the filter. This feature ensures optimal performance by signaling when the filter is no longer effective. Press and hold the ‘Filter Check’ button for 3 seconds to reset the indicator after replacing the filter. A clean filter guarantees efficient air purification, so timely replacements are essential for maintaining air quality. Regular monitoring of this indicator helps prolong the life of your air purifier and ensures consistent performance in cleaning the air effectively.

Maintenance and Cleaning

Regular cleaning of the exterior with a soft cloth and checking the pre-filter condition are essential. Ensure the air purifier is placed on a flat surface away from walls for optimal airflow. Clean the grill regularly and check for blockages. Reset the filter indicator after maintenance tasks.

5.1 Regular Cleaning Procedures

Regular cleaning is crucial for maintaining your Holmes air purifier’s efficiency. Start by turning off and unplugging the device. Use a soft, dry cloth to wipe the exterior, removing dust and debris. Avoid using harsh chemicals or abrasive materials that may damage the surface. Clean the pre-filter by gently vacuuming or rinsing it with cool water. Allow it to dry completely before reinstalling. Ensure the grill and air outlets are free from obstructions. Regularly inspect and clean the filters according to the manufacturer’s guidelines to ensure optimal performance and air quality. This routine maintenance will extend the life of your air purifier.

Filter Replacement Instructions

Replace filters regularly to maintain optimal performance. This section provides step-by-step instructions for properly changing your Holmes air purifier’s Filters, ensuring clean air and efficiency.

6.1 When to Replace Filters

The Filter Check Indicator light illuminates when filters need replacement, typically every 4 months. Replace filters if air quality decreases or allergen capture efficiency reduces. Always use genuine Holmes filters for optimal performance. Regular replacement ensures cleaner air and prevents dust buildup. Refer to the manual for specific guidelines, as filter lifespan may vary based on usage and environmental conditions; Proper filter maintenance is crucial for the air purifier to function effectively, improving indoor air quality and overall health benefits.

6.2 Step-by-Step Filter Replacement Guide

Turn off and unplug the air purifier. Open the filter compartment by removing the rear grille or top cover, depending on the model. Gently pull out the old filters.
Dispose of the used filters responsibly. Insert the new Aer1 or HEPA-Type filters, ensuring they are properly seated and aligned.
Replace the grille or cover securely. Plug in the device and turn it on. Reset the Filter Check Indicator by holding the Filter Reset button for a few seconds.
Ensure the air purifier operates quietly and efficiently. Always use genuine Holmes filters for optimal performance and air quality improvement.

Troubleshooting Common Issues

If your Holmes air purifier is not functioning properly, check these common issues:
– Device not turning on: Ensure the power cord is securely plugged in and the outlet is working.
– Reduced airflow: Clean or replace the filters as needed, and ensure no blockages near air vents.
– Unusual noise: Check for loose parts or dirt accumulation on the fan.
– Ionizer not working: Verify the ionizer button is pressed and the function is enabled.
– Filter Check Indicator stays on: Replace the filters and reset the indicator.
For persistent issues, refer to the user manual or contact customer support for assistance.

Tips for Optimal Performance

Run your Holmes air purifier continuously on low speed for consistent air quality. Use the ionizer sparingly to avoid ozone buildup and adjust settings based on room activity.

8.1 Maximizing Air Purification Efficiency

To maximize your Holmes air purifier’s efficiency, ensure it’s placed in an open area, away from walls and furniture, for optimal airflow. Regularly clean the pre-filter and replace HEPA filters every 4-6 months. Use the ionizer function sparingly to avoid ozone buildup. Adjust fan speeds according to room activity and maintain a consistent operation schedule. Keep doors and windows closed to prevent pollutants from re-entering the space. By following these steps, you can enhance the air purifier’s performance and enjoy cleaner, fresher air in your home or office.

Warranty and Customer Support Information

Holmes air purifiers are backed by a 5-year limited warranty covering defects in materials and workmanship. To activate the warranty, register your product on the Holmes website or mail in the registration card. For inquiries or issues, contact Holmes Customer Service at 1-800-546- or visit their website for support resources. The warranty does not cover damage caused by misuse or improper maintenance. Keep your receipt as proof of purchase, as it is required for warranty claims. For detailed warranty terms and conditions, refer to the manual or Holmes’ official website.

Categories
Manuals

honeywell t5 smart thermostat manual

The Honeywell T5 Smart Thermostat is a budget-friendly, Wi-Fi enabled device offering geolocation and smart scheduling․ It combines convenience with energy efficiency, ideal for modern homes․

Overview of Features and Importance of the Manual

The Honeywell T5 Smart Thermostat offers a range of advanced features, including geolocation-based temperature control, smart scheduling, and Wi-Fi connectivity for remote access․ Its user-friendly design allows for seamless integration with smart home systems․ The manual is essential for understanding installation requirements, such as C-wire needs and wiring configurations․ It also provides detailed guidance on initial setup, customization options, and troubleshooting common issues․ With step-by-step instructions, the manual ensures a smooth installation process and helps users maximize the thermostat’s energy-saving capabilities․ Whether you’re a homeowner or an installer, the manual is a vital resource for unlocking the full potential of the Honeywell T5 Smart Thermostat․

Features of the Honeywell T5 Smart Thermostat

The Honeywell T5 Smart Thermostat offers geolocation, Wi-Fi connectivity, and smart scheduling․ It supports single-stage and multi-stage systems, with a user-friendly interface for easy temperature control․

Overview of Key Features

The Honeywell T5 Smart Thermostat boasts a range of innovative features designed to enhance comfort and energy efficiency․ It offers programmable scheduling, allowing users to set custom temperature profiles that adapt to their daily routines․ Geofencing technology enables location-based temperature control, automatically adjusting settings when you leave or arrive home․ The thermostat supports both single-stage and multi-stage heating and cooling systems, ensuring compatibility with various HVAC setups․ Additionally, it provides smart alerts for system changes and maintenance reminders, helping users stay informed․ The T5 also features a user-friendly interface with customizable display options, making it easy to navigate and personalize․ With Wi-Fi connectivity, it seamlessly integrates with the Honeywell Home app for remote control and scheduling․ The device requires a C-wire for operation, ensuring reliable performance in smart home environments․

Smart Features Including Geolocation and Wi-Fi Connectivity

The Honeywell T5 Smart Thermostat excels with its advanced smart features, including geofencing and Wi-Fi connectivity․ Geofencing technology uses your smartphone’s location to determine when you’re home or away, automatically adjusting temperatures to save energy․ Wi-Fi connectivity allows seamless integration with the Honeywell Home app, enabling remote temperature adjustments, scheduling, and system monitoring․ The thermostat also supports smart scheduling, where users can create custom temperature profiles that align with their daily routines․ Additionally, it provides smart alerts for system changes and maintenance reminders, ensuring optimal performance․ These features make the T5 a convenient and energy-efficient choice for modern smart homes, offering a balance of innovation and simplicity․

Customization Options for Display and Functionality

The Honeywell T5 Smart Thermostat offers extensive customization options to tailor its display and functionality to your preferences․ Users can personalize the thermostat’s interface with customizable themes and brightness settings, ensuring it blends seamlessly with their home decor․ The display can also be programmed to show the time, current temperature, or weather forecasts․ Functionality-wise, the T5 allows users to create custom smart schedules that adapt to their daily routines, providing precise temperature control․ Additionally, the thermostat supports multi-device syncing, enabling integration with other smart home systems for enhanced convenience․ These customization features make the T5 highly adaptable, ensuring a user-friendly experience while maintaining energy efficiency and comfort․

Installation of the Honeywell T5 Smart Thermostat

Install the Honeywell T5 Smart Thermostat using basic tools like screwdrivers, a pencil, and a level․ Ensure you have a C-wire and follow the Quick Install Guide․

Installation Requirements and Necessary Tools

Before installing the Honeywell T5 Smart Thermostat, ensure you have a compatible HVAC system and a C-wire or C-wire adapter․ Required tools include a screwdriver, pencil, and level․ A smartphone with the Resideo App and your Wi-Fi password are essential for setup․ The thermostat supports single-stage and multi-stage systems, including heat pumps․ Familiarize yourself with the Quick Install Guide for step-by-step instructions․ If your system lacks a C-terminal, consult the manufacturer’s manual to identify the 24 VAC terminal․ Proper installation ensures optimal performance and smart features functionality․

Step-by-Step Installation Guide

Turn off power to your HVAC system at the circuit breaker․ Verify the system is off before proceeding․
Remove the old thermostat and label the wires according to their terminals (e;g․, R, W, Y, G, C)․
Mount the T5 Smart Thermostat’s base plate to the wall using the provided screws or existing holes․ Ensure it is level for accurate operation․
Connect the labeled wires to the corresponding terminals on the new thermostat․ If no C-wire is present, use the included C-wire adapter․
Snap the thermostat onto the base plate until it clicks securely into place․
Turn the power back on and ensure the thermostat powers up․
Open the Resideo App on your smartphone to configure Wi-Fi settings and complete the initial setup․ Follow in-app instructions to finalize installation and test functionality․ Proper installation ensures optimal performance and smart features․

Understanding C-Wire Requirements and Wiring

The Honeywell T5 Smart Thermostat requires a 24VAC power supply, typically provided by a C-wire․ If your system lacks a C-wire, the thermostat includes an adapter to bypass this requirement․ For systems without a C-terminal, refer to your HVAC manual to identify the correct 24VAC terminal․ Proper wiring is essential for functionality, ensuring features like Wi-Fi connectivity and smart operation work seamlessly․ Always label wires during removal of your old thermostat to avoid confusion․ If unsure, consult a professional to prevent system damage․ Accurate wiring ensures reliable performance and unlocks all smart capabilities of the T5 thermostat․

Initial Configuration Post-Installation

After installing the Honeywell T5 Smart Thermostat, power it on and follow the on-screen instructions to connect it to your Wi-Fi network using the Honeywell Home app․ Ensure your router is nearby and your password is ready․ Once connected, set your location and preferred temperature ranges for Home and Away modes․ Enable geolocation to allow the thermostat to adjust settings based on your smartphone’s location․ Customize the display by selecting themes and adjusting brightness․ Finally, review and save your settings to complete the configuration; This initial setup ensures seamless operation and unlocks all smart features for enhanced energy efficiency and comfort․

Advanced Features and Capabilities

The Honeywell T5 Smart Thermostat offers a range of advanced features, including geofencing technology that adjusts temperatures based on your location․ It provides smart scheduling options through the Honeywell Home app, allowing you to customize settings for different times of the day․ The thermostat also supports multi-stage heating and cooling systems, ensuring efficient temperature control․ Additionally, it offers smart alerts for system notifications and maintenance reminders, such as when to change the air filter․ The T5 also integrates with other smart home devices, enhancing overall home automation․ These features make the Honeywell T5 a versatile and user-friendly solution for modern home comfort and energy management․

Troubleshooting Common Issues

Common issues with the Honeywell T5 Smart Thermostat include connectivity problems, unresponsive screens, and temperature inconsistencies․ To resolve these, ensure the thermostat is properly powered and check your Wi-Fi connection․ Restarting the device often fixes connectivity issues․ For an unresponsive screen, perform a factory reset by holding the center button for 10 seconds․ Temperature discrepancies may result from incorrect sensor calibration or outdated software; update the thermostat firmware through the Honeywell Home app․ If issues persist, refer to the manual or contact Honeywell support for assistance․ Regularly checking for software updates and ensuring proper wiring can prevent many problems․ These steps help maintain optimal performance and address common concerns effectively․

Maintenance and Care Tips

Regular maintenance ensures the Honeywell T5 Smart Thermostat operates efficiently․ Clean the touchscreen regularly with a soft cloth to prevent dirt buildup․ Check for firmware updates via the Honeywell Home app to ensure optimal performance․ Inspect wiring connections periodically to avoid loose terminals, which can cause malfunctions․ Replace air filters as prompted by the thermostat to maintain HVAC system efficiency․ Avoid exposing the device to extreme temperatures or moisture․ For battery-powered models, replace batteries annually or when low battery alerts appear; Schedule periodic checks of the C-wire connection if applicable․ These steps help prevent common issues and ensure reliable operation․ Proper care extends the lifespan of the thermostat and maintains energy-saving functionality․

Support and Resources Available

Honeywell provides comprehensive support for the T5 Smart Thermostat, ensuring seamless operation․ Visit the Honeywell Home website for detailed manuals, installation guides, and troubleshooting tips․ The Honeywell Home app offers in-app support features, including step-by-step guides and FAQs․ For direct assistance, contact Honeywell’s customer support team via phone, email, or live chat, available 24/7․ Additional resources include community forums where users share solutions and experiences․ Honeywell also offers video tutorials on YouTube and their official website, covering installation and advanced settings․ Stay updated with the latest software by enabling automatic updates through the app․ These resources ensure users can resolve issues quickly and maximize their thermostat’s functionality․

Comparison with Other Honeywell Models

The Honeywell T5 Smart Thermostat stands out in the Honeywell lineup for its simplicity and affordability․ Unlike the more advanced T6 and T9 models, the T5 offers essential smart features without the higher price tag․ While the T6 includes multi-stage heating and cooling compatibility, the T5 is better suited for single-stage systems․ The T9, on the other hand, boasts higher-end features like multi-room sensors and advanced energy reporting․ The T5, however, excels in its ease of use and geofencing capabilities, making it a great choice for homeowners seeking a budget-friendly, user-friendly option․ It strikes a balance between smart functionality and affordability, appealing to those who don’t need the premium features of higher-end models․

User Reviews and Ratings

The Honeywell T5 Smart Thermostat has received mixed but generally positive feedback from users․ Many praise its ease of installation and intuitive geofencing feature, which adjusts temperatures based on location․ The scheduling options and compatibility with the Honeywell Home app are also highlights․ Some users note that the interface is less sophisticated compared to higher-end models like the T6 or T9, but it meets basic needs effectively․ Average ratings range from 6․9 to 9․5, with most owners appreciating its affordability and energy-saving potential․ While not as feature-rich as premium thermostats, the T5 is a solid choice for those seeking a reliable, budget-friendly smart thermostat․

The Honeywell T5 Smart Thermostat stands out as a cost-effective solution for smart home temperature control․ With its geofencing capabilities, smart scheduling, and Wi-Fi connectivity, it offers a balance of convenience and energy efficiency․ While it may lack the advanced features of higher-end models, its simplicity and ease of use make it an excellent choice for homeowners seeking a reliable thermostat without breaking the bank․ User reviews highlight its value, though some note its limited interface compared to premium alternatives․ Overall, the T5 is a practical and efficient option for those looking to upgrade to a smart thermostat without compromising on essential functionality․

Categories
Guide

foundations of government guided reading activity

Understanding the foundations of government is essential for grasping how societies organize authority‚ ensure order‚ and address collective needs. Governments establish frameworks for decision-making‚ laws‚ and policies‚ shaping social‚ economic‚ and political structures. This introduction explores the core principles and systems that underpin governance‚ emphasizing their role in maintaining stability and fostering societal progress.

Overview of Government Systems

Government systems are structured frameworks that outline how authority is distributed and exercised within societies. Common forms include democratic‚ authoritarian‚ and constitutional monarchies‚ each with distinct characteristics. Democracies emphasize citizen participation and representation‚ while authoritarian systems concentrate power in a central entity. Constitutional monarchies blend tradition with legal frameworks. Understanding these systems involves exploring their historical development‚ key principles‚ and how they address societal needs. Effective analysis requires using Boolean operators and search strategies to gather accurate‚ relevant information on governance structures and their global implications.

Importance of Understanding Government Structures

Understanding government structures is vital for fostering informed citizenship and ensuring accountability. It equips individuals to evaluate policies‚ participate in civic processes‚ and demand transparency. Knowledge of governance frameworks enables citizens to comprehend how authority is exercised and how laws are created. This awareness promotes engagement in public discourse and helps individuals navigate the complexities of societal governance. By grasping these fundamentals‚ citizens can contribute to shaping equitable and effective governance systems that reflect collective values and priorities.

Types of Government Systems

Government systems vary widely‚ ranging from democratic to authoritarian and constitutional monarchies. Each system defines how authority is exercised‚ laws are created‚ and power is distributed within society.

Democratic Systems

Democratic systems are characterized by free and fair elections‚ majority rule‚ and the protection of individual rights. They operate on the principle of popular sovereignty‚ where power resides with the people. In democracies‚ citizens elect representatives to make decisions on their behalf‚ ensuring accountability and transparency. Key features include the rule of law‚ separation of powers‚ and safeguards for civil liberties. Democratic systems promote inclusivity‚ allowing diverse voices to influence governance‚ and rely on checks and balances to prevent abuse of power.

Authoritarian Systems

Authoritarian systems are marked by centralized power and limited political freedoms; Decision-making authority rests with a single leader or small group‚ often suppressing dissent. These systems prioritize stability and control over individual rights‚ with restricted civil liberties and minimal public input. Unlike democracies‚ authoritarian regimes typically lack free elections and robust checks on power‚ enabling rulers to maintain dominance without accountability. This structure often leads to hierarchical governance‚ where compliance is enforced rather than voluntary‚ limiting societal participation in policymaking processes.

Constitutional Monarchies

Constitutional monarchies blend tradition with democratic governance‚ featuring a monarch as head of state and a constitution limiting their powers. The monarch’s role is largely ceremonial‚ while elected officials manage governance. These systems ensure stability by separating symbolic and administrative duties‚ often fostering national unity. Constitutional monarchies‚ like those in the UK or Japan‚ balance heritage with modern governance‚ providing a framework for accountability and representation while maintaining cultural continuity and institutional stability.

Principles of Democracy

Democracy relies on principles like free elections‚ rule of law‚ and representation‚ ensuring power derives from the people and is exercised transparently for the common good.

Rule of Law

The rule of law is a cornerstone of democracy‚ ensuring that all individuals and institutions are governed by and adhere to a set of established‚ fair‚ and publicly known laws. It mandates that no one is above the law‚ fostering equality and justice within society. This principle enforces accountability‚ transparency‚ and predictability in governance‚ safeguarding human rights and promoting social order. By upholding the rule of law‚ democracies create a framework where power is exercised responsibly and in the best interest of the people‚ ensuring long-term stability and trust in government systems.

Separation of Powers

The separation of powers is a fundamental principle of governance that divides authority among three distinct branches: legislative‚ executive‚ and judicial. This system ensures that no single branch holds absolute power‚ fostering accountability and preventing abuses of authority. By establishing checks and balances‚ it safeguards individual rights and promotes democratic stability. Each branch has defined responsibilities‚ with the legislative making laws‚ the executive enforcing them‚ and the judiciary interpreting them‚ ensuring a balanced distribution of power essential for a fair and functional government system.

Representation and Accountability

Representation ensures that citizens’ interests are reflected in governance through elected officials‚ fostering a connection between the people and their government. Accountability mechanisms‚ such as elections‚ transparency‚ and oversight‚ hold leaders responsible for their actions. This dual principle strengthens trust in institutions by ensuring that power is exercised in the public’s best interest. Effective representation and accountability are vital for maintaining legitimacy and promoting equitable decision-making in a democratic system.

The Role of Constitutions

A constitution is a foundational document that outlines the structure‚ powers‚ and limits of government. It establishes the framework for governance‚ ensuring justice and safeguarding citizens’ rights while limiting governmental authority to prevent abuse.

Purpose and Function

A constitution serves as the backbone of governance‚ establishing the rule of law and defining the structure of government. Its primary function is to limit governmental power‚ ensuring accountability and justice. By safeguarding individual rights and promoting equality‚ it provides stability and continuity. The constitution outlines the separation of powers‚ preventing abuse of authority. It also sets boundaries for institutions and guides interactions between the government and citizens‚ fostering a balanced and fair societal framework.

Key Provisions in Modern Constitutions

Modern constitutions typically include provisions that protect fundamental rights‚ ensure separation of powers‚ and establish the rule of law. They often outline principles like equality‚ justice‚ and accountability. Additionally‚ constitutions may address checks and balances‚ electoral processes‚ and mechanisms for amendment. These provisions aim to safeguard individual freedoms‚ promote stability‚ and create a framework for governance that is both effective and just. They also provide clarity on the roles of institutions and the limits of governmental authority.

Comparative Analysis of Government Systems

Comparative analysis evaluates strengths‚ weaknesses‚ and structures of various government systems‚ examining their historical development‚ policy implementation‚ and societal impact to identify patterns and best practices globally.

Strengths and Weaknesses

The comparative analysis of government systems reveals their unique strengths and weaknesses. Democratic systems often emphasize accountability and representation but can struggle with inefficiency and political polarization. Authoritarian regimes may achieve rapid decision-making but lack transparency and individual freedoms. Constitutional monarchies balance tradition with modern governance‚ yet may face challenges in adapting to societal changes. Each system’s effectiveness depends on its ability to address internal contradictions and respond to the needs of its citizens‚ highlighting the complexities of governance in diverse contexts.

Historical Development

The historical development of government systems reflects evolving societal needs and political ideologies. Early forms of governance‚ such as tribal councils and monarchies‚ laid the groundwork for more complex structures. The rise of democracy in ancient Greece and its revival during the Enlightenment marked significant milestones. Over time‚ governments have adapted to challenges like revolutions‚ colonialism‚ and technological advancements‚ shaping modern systems. This evolution underscores the dynamic nature of governance in addressing the changing demands of societies and ensuring stability across generations.

Civic Engagement and Participation

Civic engagement and participation are crucial for democracy‚ allowing citizens to influence decisions and hold leaders accountable through activities such as voting‚ volunteering‚ community involvement.

Voting and Elections

Voting and elections are fundamental processes in democratic governance‚ ensuring citizens’ voices shape government decisions. Free‚ fair elections hold leaders accountable and grant representation. They require transparency‚ inclusivity‚ and integrity to reflect the will of the people accurately. Voter turnout and education are critical for legitimacy‚ while electoral systems vary‚ impacting outcomes. Challenges like voter suppression or misinformation can undermine the process‚ emphasizing the need for robust safeguards to maintain trust and uphold democratic principles.

Civil Society and Advocacy

Civil society plays a vital role in shaping governance by advocating for public interests and holding institutions accountable. Through organizations‚ movements‚ and grassroots efforts‚ citizens engage in activism‚ influencing policy and fostering social change. Effective advocacy often relies on strategic communication‚ research‚ and collaboration to amplify voices. Civil society strengthens democracy by ensuring diverse perspectives are represented‚ promoting transparency‚ and addressing systemic issues. Its impact is evident in policy reforms‚ community empowerment‚ and the advancement of human rights‚ underscoring its importance in sustaining equitable governance.

Global Governance and International Relations

Global governance and international relations involve systems of cooperation and decision-making among nations and organizations‚ addressing issues like economic crises and environmental challenges. International organizations facilitate dialogue and enforce agreements‚ balancing diverse interests and power dynamics.

Role of International Organizations

International organizations play a crucial role in global governance by fostering cooperation among nations. They establish standards‚ mediate conflicts‚ and address global challenges like climate change and human rights. Organizations such as the United Nations and the World Bank promote economic stability and development. By facilitating dialogue and enforcing agreements‚ these entities help maintain international order and address shared issues‚ ensuring collective progress and security in an increasingly interconnected world. Their influence is vital for solving global problems effectively.

Challenges in Global Governance

Global governance faces significant challenges‚ including varying digital privacy laws‚ AI’s impact on decision-making‚ and differing national regulations. Coordination among nations is complex‚ with enforcement of international agreements often inconsistent. Additionally‚ the rise of AI raises ethical concerns and challenges traditional governance structures. These issues highlight the need for adaptive frameworks to address evolving global problems effectively and ensure equitable solutions for all nations and their citizens. Balancing sovereignty with collective action remains a critical challenge in maintaining global stability and prosperity.

Categories
PDF

types of sutures pdf

Classification of Suture Materials

Suture materials are primarily classified as absorbable or non-absorbable. Absorbable sutures, such as catgut, degrade naturally, while non-absorbable sutures, like nylon, remain intact and require removal.

1.1 Absorbable Sutures

Absorbable sutures are designed to degrade naturally in the body, eliminating the need for removal. Common examples include catgut (natural) and Vicryl/Dexon (synthetic). These sutures are ideal for temporary wound support, such as in skin or intestinal closures. Synthetic absorbable sutures offer predictable degradation and reduced tissue reaction compared to natural ones. They are widely used in surgeries where prolonged wound strength is required, providing convenience and minimizing patient discomfort. Their absorption time varies, making them suitable for diverse surgical needs.

1.2 Non-Absorbable Sutures

Non-absorbable sutures are permanent materials that do not degrade in the body and typically require manual removal. Examples include nylon, polypropylene (Prolene), and silk. These sutures are used for skin closures, ophthalmic procedures, and cardiovascular surgeries where long-term tissue support is essential. They provide enduring tensile strength and are often chosen for their durability and minimal tissue reaction. Non-absorbable sutures are ideal when prolonged wound stability is necessary, making them a preferred choice in various surgical applications requiring lasting support.

Types of Suture Materials

Suture materials are categorized as natural (e.g., silk, catgut) or synthetic (e.g., nylon, polypropylene). Each type offers distinct properties tailored for specific surgical applications and tissue compatibility.

2.1 Natural Sutures (e.g., Silk, Catgut)

Natural sutures, such as silk and catgut, are derived from organic sources. Silk is a non-absorbable suture known for its smooth texture and minimal tissue reaction, making it ideal for skin closure. Catgut, conversely, is absorbable and traditionally made from animal intestines. These sutures are valued for their biocompatibility and have been used historically in various surgical procedures, though synthetic alternatives are now often preferred due to improved consistency and reduced immune responses.

2.2 Synthetic Sutures (e.g., Nylon, Polypropylene)

Synthetic sutures, such as nylon and polypropylene, are man-made materials designed for surgical use. Nylon sutures are known for their flexibility and are often used in soft tissue repair. Polypropylene sutures, on the other hand, are monofilament and non-absorbable, making them ideal for cardiovascular surgeries where long-term strength is crucial. Synthetic sutures generally offer consistent performance, minimal tissue reaction, and high tensile strength, making them a popular choice in modern surgical practices.

Suture Structure

Suture structure refers to the filament type. Monofilament sutures are smooth, reducing tissue reaction, while multifilament sutures are braided for strength but may increase tissue irritation.

3.1 Monofilament Sutures

Monofilament sutures are made from a single strand of material, offering smooth passage through tissue and minimal friction. They resist knotting and are less likely to cause tissue irritation. Common examples include nylon and polypropylene. These sutures are ideal for skin closure and general soft tissue approximation due to their ease of use and reduced risk of infection. Their simplicity also contributes to consistent wound healing outcomes.

3.2 Multifilament (Braided) Sutures

Multifilament, or braided, sutures are composed of multiple strands woven together. They provide superior knot security and resistance to breakage. Common materials include polyester and silk. These sutures are ideal for tissues requiring high tensile strength, such as fascia or tendons. However, their braided structure can harbor bacteria, increasing infection risk. They are often used in cardiovascular and orthopedic surgeries where durability is critical. Coatings are sometimes applied to reduce friction and tissue reaction.

Suture Size Classification

Suture size is classified by diameter, using a ‘0’ scale where higher numbers indicate smaller diameters. USP standards classify sizes from 10-0 (thinnest) to 5 (thickest).

4.1 Suture Diameter and ‘0’ Scale

Suture diameter is classified using a ‘0’ scale, where higher numbers indicate smaller diameters. For example, a 10-0 suture is thinner than a 5-0. The United States Pharmacopeia (USP) standardizes these measurements, ensuring consistency across materials. Suture size selection depends on tissue type, wound tension, and the procedure’s requirements. Smaller sutures minimize tissue trauma, while larger ones provide stronger wound support. Proper sizing ensures optimal healing and minimizes complications, making it a critical factor in surgical wound closure.

Coated Sutures

Coated sutures have specialized surface layers to enhance properties like knotting, tissue passage, and reduce reactions. Examples include Dexon and Vicryl, designed for improved surgical handling and performance.

5.1 Purpose and Types of Coatings

Coatings on sutures serve to enhance performance by reducing tissue friction, improving knot security, and minimizing immune responses. Common coatings include polybutyrate and calcium stearate, which aid in smooth tissue passage and maintain suture strength. Some sutures, like Vicryl, feature dyed coatings for visibility. These coatings ensure optimal wound healing and ease of use during procedures, making them a critical advancement in suture technology.

Specialized Sutures

Specialized sutures include retention sutures, used to relieve pressure on primary closures, and purse string sutures, which invert lumens like the stomach or intestine.

6.1 Retention Sutures

Retention sutures are strong, large-diameter sutures placed through the peritoneum and abdominal wall to relieve tension on the primary suture line, reducing the risk of wound dehiscence. They are often used in high-tension closures, such as in obese patients or complex abdominal surgeries, to provide additional support and distribute pressure evenly, ensuring wound integrity and promoting healing without compromising tissue strength or patient comfort.

6.2 Purse String Sutures

Purse string sutures are used to close openings around a lumen or cavity, creating a tight seal. They involve looping the suture material around the edges and pulling it tight, like a drawstring, to invert the tissue. Commonly used in procedures such as cesarean sections or hernia repairs, these sutures help minimize leakage and promote healing by evenly distributing tension around the closure site, ensuring a secure and effective seal without compromising tissue integrity.

Indications for Use

Absorbable sutures are ideal for internal tissues, reducing the need for removal. Non-absorbable sutures are used for skin closure or external wounds, ensuring long-term support and strength.

7.1 Absorbable Sutures

Absorbable sutures are used for internal wounds or tissues that heal quickly. They degrade naturally, eliminating the need for removal. Common examples include Vicryl and Dexon, which are synthetic and provide reliable tensile strength. These sutures are ideal for procedures like skin closure, ophthalmic surgeries, or pediatric cases, minimizing postoperative care. Their biocompatibility reduces tissue reaction, promoting faster healing and patient comfort. Absorbable sutures are particularly beneficial in cases where long-term support is unnecessary, avoiding complications associated with non-absorbable materials.

7.2 Non-Absorbable Sutures

Non-absorbable sutures are used for permanent tissue support or in cases requiring prolonged strength. Made from materials like nylon or polypropylene, they resist degradation and maintain tensile strength indefinitely. These sutures are commonly used for skin closure, cardiovascular surgeries, or orthopedic procedures. They are ideal for areas under tension but require removal to avoid long-term tissue reaction. Non-absorbable sutures are preferred when durable, long-lasting support is essential for proper healing and to prevent wound dehiscence.

Suture Needles

Suture needles are typically made of stainless steel, designed for sharpness and durability. They vary in shape, size, and eye type to suit different surgical needs and tissues.

8.1 Types of Needles (e.g., Cutting, Tapered)

Suture needles are categorized into cutting, tapered, and blunt types. Cutting needles have a sharp edge for penetrating tough tissues, while tapered needles have a rounded tip for precise tissue entry. Blunt needles are used in delicate tissues to minimize puncture damage. Needle selection depends on the surgical site, tissue type, and procedure requirements, ensuring optimal performance and tissue compatibility during suturing.

Suturing Techniques

Proper suturing involves even spacing, gentle tissue handling, and secure knot tying. Techniques vary by procedure, emphasizing precision to promote healing and minimize scarring.

9.1 Principles of Effective Suturing

Effective suturing requires precise technique, ensuring even tension and proper spacing. The suture material should be handled gently to avoid damage. Tissue should be approximated without excessive force, promoting healing. Knots must be secure to prevent unraveling. Proper needle control and placement are crucial, as is maintaining a clean field to reduce infection risk. Correct technique minimizes complications and supports optimal wound healing outcomes.

Categories
Instructions

nj-coj instructions

Understanding NJ-COJ Instructions

The NJ-COJ schedule allows residents to claim credits for taxes paid to other states, ensuring they aren’t double-taxed on income earned outside New Jersey. Following instructions carefully is crucial for accurate filing and maximizing benefits.

Overview of NJ-COJ Schedule

The NJ-COJ schedule is designed to prevent double taxation by allowing New Jersey residents to claim a credit for income taxes paid to other states or localities. This schedule applies to residents and part-year residents who earn income in jurisdictions outside New Jersey. It ensures that taxpayers are not taxed twice on the same income by both New Jersey and another jurisdiction. The credit is calculated based on the income taxed by both New Jersey and the other jurisdiction, with the credit amount being the lesser of the tax paid to the other jurisdiction or the New Jersey tax liability on that income. Taxpayers must complete Schedule NJ-COJ for each jurisdiction and attach it to their NJ-1040 form. This process helps in accurately determining the allowable credit and ensures compliance with state tax regulations. Proper documentation and adherence to instructions are essential for a smooth filing experience.

Eligibility Criteria for Claiming the Credit

To qualify for the NJ-COJ credit, taxpayers must be New Jersey residents, part-year residents, or nonresidents with income taxed by another jurisdiction. Income must be taxed by both New Jersey and the other jurisdiction in the same tax year to claim the credit, ensuring no double taxation occurs. Proper documentation and adherence to specific filing requirements are essential for eligibility.

Income Taxed by Both New Jersey and Other Jurisdictions

Income must be subject to tax in both New Jersey and another jurisdiction to qualify for the credit. This means the same income is reported on both tax returns, ensuring no double taxation. The credit applies to income earned in another state or locality where taxes were paid. For example, if a New Jersey resident works in New York, their income is taxed by both states. The credit is limited to the lesser of the tax paid to the other jurisdiction or the amount of New Jersey tax on that income. Proper documentation, such as W-2 forms or tax returns from the other jurisdiction, is required to verify the taxes paid. This ensures the credit is calculated accurately and adheres to New Jersey’s tax regulations. The income must be taxable in both jurisdictions during the same tax year to be eligible for the credit.

Taxes Paid to Other States or Localities

Taxes paid to other states or localities are eligible for a credit under the NJ-COJ schedule. This applies to income taxes imposed by other jurisdictions, such as neighboring states or local governments. The credit is designed to prevent double taxation on the same income. For example, if a New Jersey resident works in New York, they may pay income taxes to both states. The credit amount is the lesser of the tax paid to the other jurisdiction or the New Jersey tax on that income. To qualify, the income must be taxable in both New Jersey and the other jurisdiction during the same tax year. Proper documentation, such as W-2 forms or tax returns from the other jurisdiction, is required to support the claim. This ensures accurate calculation of the credit and compliance with New Jersey tax regulations.

Step-by-Step Guide to Completing Schedule NJ-COJ

Complete Schedule NJ-COJ by detailing income taxed elsewhere and taxes paid. Use Form NJ-1040 to calculate the credit, ensuring accurate filing and compliance with state regulations.

Calculating the Credit for Income Taxes Paid to Other Jurisdictions

To calculate the credit for income taxes paid to other jurisdictions, use Schedule NJ-COJ. Enter the income taxed by New Jersey (from Form NJ-1040, line 29) and the tax paid to the other jurisdiction. The credit is the lesser of the tax paid or the amount that would have been paid in New Jersey. Complete one Schedule NJ-COJ for each jurisdiction and sum the credits on Form NJ-1040, line 43. Ensure accuracy to avoid double taxation and maximize your credit entitlement. Proper documentation is essential for verification. This process ensures compliance with New Jersey tax regulations while providing relief for taxes paid elsewhere. Always refer to the latest instructions for any updates or changes in the calculation process. Accurate filing prevents errors and ensures you receive the full benefit of the credit.

Entering the Credit on Form NJ-1040

After calculating the credit using Schedule NJ-COJ, enter the total credit amount on Form NJ-1040, line 43. Ensure the amount does not exceed the tax liability as calculated on line 42. If multiple Schedule NJ-COJ forms are completed for different jurisdictions, sum the credits and enter the total on line 43. Double-check entries to avoid errors or delays in processing; For accurate filing, attach all completed Schedule NJ-COJ forms to your NJ-1040 return. The New Jersey Online Filing Service simplifies this process, guiding you through each step. Always verify the instructions for the most current guidance on entering credits. Proper entry ensures compliance and maximizes your tax benefits. This step is critical for receiving the correct credit for taxes paid to other jurisdictions.

Special Scenarios and Considerations

Special scenarios, such as part-year residency or income taxed by multiple jurisdictions, require careful handling to ensure accurate NJ-COJ credit calculations and compliance with state tax regulations.

Filing as a Part-Year Resident

Part-year residents must prorate their income and taxes paid to other jurisdictions when filing Schedule NJ-COJ. This ensures only the portion of income taxed by New Jersey during residency is considered. Key steps include: calculating the ratio of New Jersey residency days to the total year, applying this ratio to income and taxes paid elsewhere, and ensuring no double taxation occurs. Residents must attach supporting documentation, such as proof of residency dates and tax payments, to their return. Consult the NJ-1040 instructions for specific proration formulas and guidance. Failure to accurately prorate may result in overpayment or underpayment of taxes. For complex cases, seek professional advice to ensure compliance with New Jersey tax laws and avoid potential penalties; Proper filing ensures part-year residents receive the correct credit for taxes paid to other jurisdictions.

Allocation of Income and Taxes Paid to Multiple Jurisdictions

Taxpayers with income taxed by multiple jurisdictions must allocate income and taxes paid separately for each jurisdiction when filing Schedule NJ-COJ. This prevents double-counting and ensures accurate credit calculations. For each jurisdiction, residents should list the income subject to tax and the corresponding taxes paid. Separate schedules may be required for each jurisdiction to maintain clarity. Importantly, the credit cannot exceed the amount of New Jersey tax on the same income. Residents must ensure that only income taxed by both New Jersey and another jurisdiction qualifies for the credit. Proper documentation, such as W-2s and tax returns from other states, is essential. Consult the NJ-1040 instructions for detailed allocation methods and examples. Accurate allocation ensures compliance and maximizes the credit available for taxes paid elsewhere.

Required Documentation and Forms

Complete Form NJ-1040 and include Schedule NJ-COJ to claim credits for taxes paid to other jurisdictions. Attach W-2s and tax returns from other states to verify income and taxes paid.

Forms and Worksheets Needed for Schedule NJ-COJ

To complete Schedule NJ-COJ, you will need Form NJ-1040 and any relevant W-2s or 1099s showing income earned in other jurisdictions. Attach copies of tax returns filed with other states or localities to verify taxes paid. If claiming credits for multiple jurisdictions, complete a separate Schedule NJ-COJ for each. Ensure all income and taxes align with New Jersey’s tax rules to avoid discrepancies. Proper documentation is essential for accurate credit calculations and to support your claims during audits. Refer to the NJ-1040 instructions for specific guidance on required forms and worksheets. Organize all documents neatly to facilitate a smooth filing process.

Filing Electronically and Benefits of E-File

Filing your New Jersey tax return electronically is a fast and secure way to submit your NJ-1040 and Schedule NJ-COJ. E-filing reduces errors and accelerates refund processing. The New Jersey Online Filing Service is user-friendly, guiding you through the process step-by-step. Free e-file options are available for eligible residents, making it cost-effective. Electronic filing ensures accurate data entry and quicker acknowledgment of submission. It also allows for direct deposit of refunds, providing faster access to your money. For residents and part-year residents, e-filing streamlines the process, reducing the need for paper documentation. Utilize New Jersey’s e-file system to ensure compliance and efficiency when submitting your tax return and claiming credits through Schedule NJ-COJ.

Categories
PDF

troy bilt service manual pdf

Welcome to the Troy-Bilt Service Manual PDF, your comprehensive guide to understanding, maintaining, and repairing your equipment. This essential resource provides detailed instructions, troubleshooting tips, and safety guidelines to ensure optimal performance and longevity of your Troy-Bilt products.

1.1 Overview of the Troy-Bilt Service Manual

The Troy-Bilt Service Manual PDF is a professional guide designed to help users understand their equipment’s operation, maintenance, and repair. It covers installation, troubleshooting, and safety tips, ensuring optimal performance and longevity. This comprehensive resource is tailored for both novice and experienced users, providing clear instructions for various Troy-Bilt models and their specific needs.

1.2 Importance of Using the Service Manual

Using the Troy-Bilt Service Manual PDF is crucial for ensuring proper maintenance, troubleshooting, and repair. It provides detailed instructions to prevent errors, enhance safety, and maintain equipment longevity. Adhering to the manual’s guidelines helps preserve warranty coverage and ensures your Troy-Bilt product operates at peak performance, minimizing costly repairs and downtime.

Where to Find the Troy-Bilt Service Manual PDF

The Troy-Bilt Service Manual PDF can be found on the official Troy-Bilt website, authorized dealers, or online marketplaces. Visit troybilt.com for direct access or check authorized service centers for reliable downloads.

2.1 Official Troy-Bilt Website

The official Troy-Bilt website is the primary source for downloading the Service Manual PDF. Visit troybilt.com to access free service and parts manuals. Simply search by model number to find your specific guide. This ensures you receive accurate and up-to-date information for your equipment. For assistance, contact their customer support at (800) 828-5500.

2.2 Authorized Dealers and Service Centers

Authorized Troy-Bilt dealers and service centers offer direct access to genuine Service Manual PDFs. Visit their websites or contact local dealers to obtain model-specific manuals. Many provide free downloads, ensuring authenticity and reliability. Use the “Find a Dealer” tool on Troy-Bilt’s official site to locate nearby centers and get expert support.

2.3 Online Marketplaces and Forums

Online marketplaces like eBay and Amazon, as well as forums such as Reddit, often host downloadable Troy-Bilt Service Manual PDFs. These platforms provide convenient access to manuals, but verify authenticity and compatibility with your specific model. Professional shop manuals are also available on forums dedicated to outdoor power equipment enthusiasts and technicians.

Understanding the Structure of the Troy-Bilt Service Manual

The Troy-Bilt Service Manual is organized to help users navigate easily, featuring a clear table of contents, detailed diagrams, and model-specific instructions for efficient troubleshooting and repair.

3.1 Table of Contents and Index

The Troy-Bilt Service Manual begins with a detailed table of contents, outlining sections like maintenance, repair, and troubleshooting. An extensive index follows, allowing users to quickly locate specific topics, ensuring efficient navigation and easy access to critical information for optimal equipment servicing and DIY repairs.

3.2 Diagrams and Illustrations

The Troy-Bilt Service Manual includes detailed diagrams and illustrations to guide users through complex repairs and maintenance. These visuals cover engine components, transmission systems, and mower assemblies, providing clear step-by-step references. Exploded views and labeled parts ensure accurate identification, making DIY servicing easier and reducing errors. They are essential for safe and effective troubleshooting.

3.3 Model-Specific Information

The Troy-Bilt Service Manual provides detailed, model-specific information to cater to diverse equipment needs. From the TB115 to the TB200, each model’s unique features, specifications, and maintenance requirements are clearly outlined. This ensures users can accurately follow procedures tailored to their specific Troy-Bilt product, enhancing safety and effectiveness during repairs and maintenance tasks.

Maintenance and Repair Guidelines

The Troy-Bilt Service Manual offers detailed maintenance schedules, troubleshooting tips, and step-by-step repair instructions to keep your equipment running smoothly. Regular upkeep ensures longevity and optimal performance, addressing common issues before they escalate.

4.1 Regular Maintenance Schedule

The Troy-Bilt Service Manual provides a detailed maintenance schedule to ensure optimal performance. Routine tasks include oil changes, blade sharpening, and tire pressure checks. Following these guidelines helps extend equipment life and prevents unexpected breakdowns, keeping your Troy-Bilt tools in peak condition throughout the season.

4.2 Troubleshooting Common Issues

The Troy-Bilt Service Manual includes a section dedicated to diagnosing and resolving common issues. From engine problems to blade malfunctions, it offers step-by-step solutions. Fault diagnosis charts and error code explanations help users identify and address issues promptly, ensuring minimal downtime and efficient repairs.

4.3 Step-by-Step Repair Instructions

The manual provides clear, detailed repair instructions for various components, ensuring repairs are done efficiently. Each step is outlined with precision, covering tools needed and safety precautions. Whether replacing a blade or servicing the engine, the guide offers straightforward solutions for users of all skill levels, promoting confidence and successful outcomes.

Safety Precautions and Tips

Always wear protective gear, ensure the machine is off, and follow proper shutdown procedures. Adhere to safety guidelines to prevent accidents and ensure safe equipment operation and maintenance.

5.1 General Safety Guidelines

Always wear protective gear, ensure the machine is off, and follow proper shutdown procedures. Adhere to safety guidelines to prevent accidents. Keep loose clothing and long hair tied back. Avoid operating machinery in hazardous conditions. Ensure the work area is clear of obstacles. Never leave a running machine unattended. Safety is paramount.

5.2 Protective Equipment Recommendations

Wear safety glasses, gloves, and steel-toe boots when servicing your equipment. Use hearing protection near loud machinery. Avoid loose clothing or jewelry that could get caught. Ensure proper fit and condition of all gear. This equipment helps prevent injuries and ensures safe working conditions while maintaining or repairing your Troy-Bilt equipment.

5.3 Emergency Procedures

In case of an emergency, disconnect the spark plug wire and ensure the equipment is turned off. Wear protective gloves and eyewear. Keep a fire extinguisher nearby. Properly ventilate the area if fumes are present. Follow first aid procedures for injuries and seek professional help if needed. Stay calm and act quickly.

Parts and Accessories Information

Identify compatible parts using the Troy-Bilt parts manual. Order genuine replacements through authorized dealers or online. Explore accessories to enhance performance and customize your equipment for specific tasks.

6.1 Identifying Compatible Parts

Visit the Troy-Bilt website or consult the parts manual to find compatible parts for your equipment. Use your model number to ensure accuracy. The manual provides detailed lists and diagrams to help you identify the correct components for maintenance or repair, ensuring proper fitment and functionality.

6;2 Ordering Replacement Parts

To order replacement parts, visit the Troy-Bilt website or contact an authorized dealer. Use your model number to ensure accuracy. The manual provides part numbers and descriptions. Order genuine parts for reliability and compatibility. Follow the website’s instructions or contact customer support for assistance with your purchase.

6.3 Accessories for Enhanced Performance

The Troy-Bilt service manual highlights various accessories to enhance your equipment’s performance. These include mulching kits, bagger attachments, and blade sharpeners. Visit the official Troy-Bilt website or authorized dealers to explore compatible accessories. Using genuine parts ensures optimal performance and longevity, keeping your equipment running at its best.

Advanced Service and Repair Techniques

Discover advanced methods for servicing and repairing Troy-Bilt equipment, covering engine maintenance, transmission repair, and electrical diagnostics. These techniques, detailed in the manual, ensure efficient and professional-level fixes.

7.1 Engine Maintenance and Repair

The Troy-Bilt Service Manual provides detailed guidance on engine maintenance, including oil changes, air filter cleaning, and spark plug replacement. It also covers advanced repair techniques for Briggs & Stratton engines, such as diagnosing faults and replacing critical components. Regular inspections of belts, hoses, and valves are emphasized for optimal performance and longevity.

7.2 Transmission and Drive System Service

The manual outlines procedures for servicing the transmission and drive system, including lubrication, belt replacement, and hydrostatic transmission checks. It provides diagnostic steps for common issues like slipping or lack of power. Detailed instructions ensure proper adjustments and repairs, maintaining optimal performance and extending the lifespan of your Troy-Bilt equipment.

7.3 Electrical System Diagnostics

The manual provides detailed steps for diagnosing electrical system issues, such as faulty sensors, wiring problems, or ignition system malfunctions. It includes troubleshooting guides, voltage checks, and repair procedures to ensure proper electrical function. Referencing the manual is crucial for accurate diagnostics and safe, effective repairs to your Troy-Bilt equipment.

Warranty and Support Information

This section outlines warranty coverage details, contact information for customer support, and locations of authorized service centers to assist with repairs and maintenance under warranty.

8.1 Warranty Coverage Details

Troy-Bilt products typically come with a warranty covering defects in materials and workmanship for 2 to 5 years, depending on the product. The warranty applies to lawn mowers, tillers, snow blowers, and other equipment. Proper registration and maintenance are required to validate the warranty. For full terms, refer to the service manual or Troy-Bilt’s official website.

8.2 Contacting Customer Support

For assistance, visit Troy-Bilt’s official website to access live chat, email support, or phone services. You can also call (800) 828-5500 for direct help. Ensure to have your model number ready for efficient support. Additionally, authorized service centers are available for in-person inquiries and professional guidance.

8.4 Authorized Service Centers

Visit Troy-Bilt’s official website to locate an authorized service center near you. These centers offer professional repairs, genuine parts, and expert advice. Trained technicians ensure your equipment receives high-quality service, honoring warranties and maintaining performance standards. Use the service center locator tool for convenient access to trusted support and reliable maintenance.

The Troy-Bilt Service Manual PDF is an invaluable resource for owners, offering comprehensive guidance for maintenance, repair, and optimal performance. Regular use ensures longevity and reliability of your equipment, helping you achieve professional results with confidence.

9.1 Summary of Key Points

The Troy-Bilt Service Manual PDF provides essential guidance for maintenance, troubleshooting, and repair. It includes detailed schedules, diagnostic tips, and step-by-step instructions. The manual emphasizes safety, proper tool usage, and genuine part replacements. By following its structured approach, users can ensure optimal performance, extend equipment lifespan, and maintain warranty coverage effectively.

9.2 Encouragement for Proper Maintenance

Regular maintenance is crucial for extending the life of your Troy-Bilt equipment. By following the manual’s guidelines, you’ll ensure optimal performance, prevent issues, and maintain safety. Stay proactive with scheduled checks, genuine part replacements, and proper storage. Consistent care not only enhances efficiency but also protects your investment, ensuring reliable operation for years to come.