The Isuzu MU-X 2023 Owner’s Manual is a comprehensive guide providing detailed information on vehicle features, maintenance, and troubleshooting․ It is available as a downloadable PDF online․
Purpose and Scope of the Manual
The Isuzu MU-X 2023 Owner’s Manual is designed to provide owners with essential information for safe and efficient operation of their vehicle․ It covers vehicle features, maintenance requirements, and troubleshooting tips, ensuring a comprehensive understanding of the SUV․ The manual serves as a reference guide for both new and experienced owners, offering detailed instructions to enhance the overall ownership experience while adhering to manufacturer recommendations․
Key Features of the 2023 Isuzu MU-X
The 2023 Isuzu MU-X boasts a powerful turbo-diesel engine, delivering exceptional performance and fuel efficiency․ It features advanced safety technologies, including ADAS systems, ensuring a secure driving experience․ The SUV offers a spacious 7-seat cabin, modern infotainment systems, and robust 4×4 capabilities․ With its sleek design and reliable engineering, the MU-X is tailored for both on-road comfort and off-road adventures, making it a versatile choice for diverse driving needs․

Importance of the Owner’s Manual
The owner’s manual is essential for optimizing performance, understanding features, and ensuring safe operation of the Isuzu MU-X․ It provides vital information for troubleshooting and maintenance, making it a crucial resource for every owner․
Understanding Vehicle Features
The Isuzu MU-X 2023 owner’s manual provides detailed insights into the vehicle’s advanced features, including its turbo-diesel engine, 4WD system, and infotainment technology․ It explains the functionality of safety features like collision mitigation and lane departure warning․ The manual also covers customizable settings, ensuring owners can optimize their driving experience․ By understanding these features, drivers can maximize performance, comfort, and safety, making the manual an indispensable guide for everyday use and troubleshooting․
Troubleshooting Common Issues
The Isuzu MU-X 2023 owner’s manual includes a dedicated section for diagnosing and resolving common issues․ It covers dashboard warning lights, engine faults, and electrical system problems․ The manual provides step-by-step solutions for issues like low battery, faulty sensors, and transmission concerns․ Additionally, it offers guidance on resetting systems and performing basic checks․ This section is essential for drivers to address problems efficiently, ensuring safety and optimal vehicle performance․
Regular Maintenance Requirements
The Isuzu MU-X 2023 owner’s manual outlines essential maintenance tasks to ensure optimal performance․ Regular oil changes, filter replacements, and tire pressure checks are highlighted․ The manual specifies service intervals, including timing belt replacements and brake inspections․ It also covers battery maintenance and coolant checks․ Adhering to these schedules helps prevent mechanical issues, ensuring reliability and extending the vehicle’s lifespan․ DIY maintenance guides are provided for convenience․

How to Find the Isuzu MU-X 2023 Owner’s Manual PDF
Download the Isuzu MU-X 2023 owner’s manual PDF from Isuzu’s official website, authorized dealerships, or third-party automotive forums and repositories online․
Official Isuzu Websites and Resources
- The Isuzu MU-X 2023 owner’s manual PDF is available for download on Isuzu’s official website under the customer information section․
- Visit Isuzu’s official website and navigate to the “Owners Manual” page to access the PDF․
- The manual is free to download and provides comprehensive details on vehicle features, maintenance, and troubleshooting․
- Ensure to select the correct model year (2023) and region for the most accurate information․
Authorized Dealerships and Support
- Authorized Isuzu dealerships provide direct access to the MU-X 2023 owner’s manual in PDF format․
- Visit your local Isuzu dealership for a physical or digital copy of the manual․
- Dealerships offer expert support and can address specific questions about the manual or vehicle features․
- Contact Isuzu’s customer service through their official website for dealership locations and assistance․
Third-Party Automotive Forums and Repositories
- Third-party automotive forums and repositories offer downloadable PDF versions of the Isuzu MU-X 2023 owner’s manual․
- Websites like forums․isuzu․com․au and other automotive communities provide access to these manuals․
- These platforms often include discussions and advice from experienced owners and technicians․
- Be cautious of unverified sources and ensure the manual is credible and up-to-date before downloading․

Downloading and Accessing the Manual
The Isuzu MU-X 2023 owner’s manual is readily available as a downloadable PDF file online․ Access it through official Isuzu websites, authorized dealerships, or trusted automotive forums․
Step-by-Step Download Instructions
To download the Isuzu MU-X 2023 owner’s manual, visit the official Isuzu website or authorized dealership portals․ Navigate to the “Customer Information” or “Owners Manual” section․ Select your vehicle model (MU-X 2023) and language preference․ Click the provided PDF link to initiate the download․ Ensure a stable internet connection for a smooth process․ Once downloaded, the manual can be accessed on your device, offering detailed guidance on maintenance, troubleshooting, and vehicle features․
Navigation and Organization of the PDF
The Isuzu MU-X 2023 owner’s manual PDF is well-organized for easy navigation․ It features clear bookmarks and a detailed index, allowing users to quickly locate specific sections․ The document is divided into logical chapters, such as introduction, vehicle features, maintenance, troubleshooting, and safety guidelines․ Each section is further subdivided for seamless access․ The PDF also includes a search function, enabling users to find topics instantly, making it a user-friendly resource for owners․

Comparison with the Isuzu D-Max Manual
The Isuzu MU-X 2023 manual shares similarities with the D-Max manual in maintenance and troubleshooting sections but offers additional details specific to the MU-X’s SUV features․
Similarities and Differences
The Isuzu MU-X 2023 and D-Max manuals share core maintenance and troubleshooting guidance, but the MU-X manual includes additional details on SUV-specific features like seating configurations and safety technologies․ The D-Max manual focuses more on pickup truck functionalities, such as cargo capacity and towing specifications․ Both manuals are available as downloadable PDFs, ensuring accessibility for owners to reference key information efficiently․
Shared Maintenance and Repair Information
Both the Isuzu MU-X and D-Max manuals provide shared maintenance schedules, such as oil change intervals and tire pressure checks․ Repair procedures for common issues like brake replacements and filter changes are also similarly outlined․ This overlap is due to shared engine and mechanical components, making the manuals useful for owners seeking consistent maintenance practices across both models, ensuring reliability and optimal performance․
Maintenance Tips from the Manual
Regular oil changes, tire pressure checks, and battery maintenance are emphasized․ Scheduled services ensure optimal performance and longevity of the Isuzu MU-X 2023․
Scheduled Services and Intervals
The Isuzu MU-X 2023 Owner’s Manual outlines specific service intervals to ensure optimal vehicle performance․ Oil changes are recommended every 5,000 to 7,500 miles, while tire rotations should occur every 10,000 miles․ Brake fluid and coolant replacements are scheduled at 30,000 and 60,000 miles, respectively․ Adhering to these intervals helps maintain warranty coverage and prevents potential issues․ Regular inspections of belts, hoses, and air filters are also advised for long-term reliability․
DIY Maintenance Procedures
The Isuzu MU-X 2023 Owner’s Manual provides clear guidance for DIY maintenance, such as oil changes and filter replacements․ It recommends using genuine Isuzu parts and specifies intervals for each task․ Detailed step-by-step instructions ensure owners can perform routine maintenance confidently․ Additionally, the manual includes troubleshooting tips and precautions to avoid common errors․ Regular DIY upkeep helps extend the vehicle’s lifespan and maintains its performance at optimal levels․
DIY Repair and Service Guides
The Isuzu MU-X 2023 Owner’s Manual includes detailed DIY repair guides, covering oil changes, brake maintenance, and filter replacements․ It provides step-by-step instructions and visual guides to help owners perform repairs confidently and efficiently, saving time and money․
Oil Change and Filter Replacement
The Isuzu MU-X 2023 Owner’s Manual provides clear, step-by-step instructions for performing oil changes and filter replacements․ It specifies the recommended oil type (0W-20) and filter specifications for optimal performance․ The manual outlines the replacement interval (every 5,000 to 7,500 miles) and includes torque specifications for the drain plug․ DIY enthusiasts can follow the guide to ensure proper maintenance, while tips on disposal and safety precautions are also included․
Brake System Maintenance
The Isuzu MU-X 2023 Owner’s Manual details essential brake system maintenance procedures, including pad replacement, rotor inspection, and brake fluid checks․ It recommends inspecting brake components every 10,000 to 15,000 miles․ The manual provides step-by-step instructions for bleeding brakes and replacing worn pads․ Regular maintenance ensures optimal braking performance and safety․ Always refer to the manual for specific torque specifications and safety precautions to avoid damage or injury․

Safety Features and Precautions
The 2023 Isuzu MU-X boasts a 5-star ANCAP safety rating, featuring multiple airbags, electronic stability control, and anti-lock braking․ Always follow manual guidelines for safe operation, ensuring proper seat belt use and child restraint installation to maximize protection․
Operational Safety Guidelines
The Isuzu MU-X 2023 manual emphasizes adherence to safety protocols, such as proper seat belt use, child restraint installation, and speed limit compliance․ Drivers should avoid distractions like using electronic devices while driving․ Regular checks of safety features like airbags and anti-lock braking systems are essential․ Always follow guidelines for loading cargo to maintain vehicle stability․ Consult the manual for detailed instructions on safe driving practices and emergency procedures․
Emergency Procedures
The Isuzu MU-X 2023 manual outlines essential emergency procedures, such as what to do in case of a breakdown or accident․ It provides steps for safely stopping the vehicle, using hazard lights, and securing the area․ Instructions for administering first aid and contacting emergency services are included․ The manual also covers proper use of the fire extinguisher and procedures in the event of a collision or rollover․ Always refer to these guidelines to ensure safety․

Troubleshooting Common Issues
The Isuzu MU-X 2023 manual provides solutions for common issues, such as dashboard warning lights and fault codes․ It offers diagnostic tips and repair guidance for drivers․
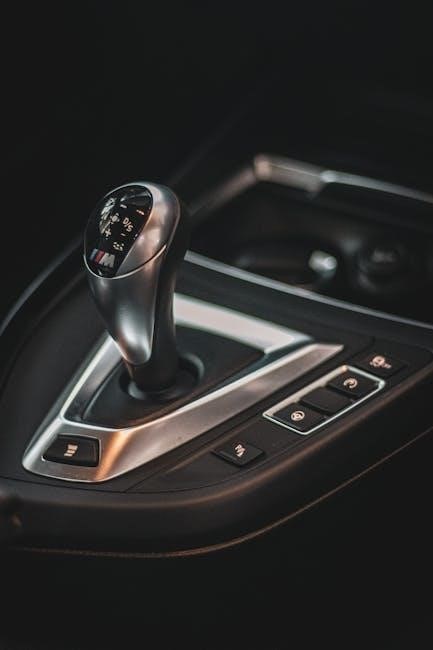
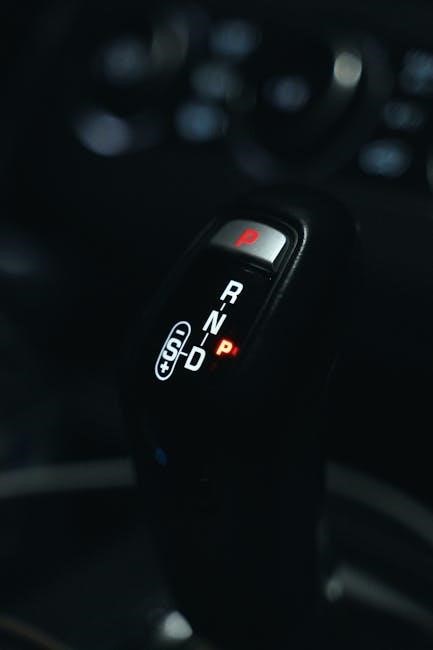
Dashboard Warning Lights
Dashboard Warning Lights
The Isuzu MU-X 2023 manual explains the meanings of various dashboard warning lights, such as engine, oil, and brake alerts․ It provides guidance on identifying and addressing issues promptly to ensure safety and prevent damage․ Detailed descriptions and solutions for common indicators are included, helping drivers understand when professional assistance is required․ Refer to the manual for specific light interpretations and troubleshooting steps․
Common Faults and Solutions
The Isuzu MU-X 2023 manual highlights common faults such as engine overheating, low battery warnings, and faulty sensors․ Solutions include checking coolant levels, testing the battery, and resetting systems․ For recurring issues, the manual advises consulting authorized dealers or professionals․ Regular maintenance, as outlined, helps prevent these faults, ensuring optimal vehicle performance and longevity․ Refer to the manual for detailed troubleshooting steps and repair guidance․
Accessories and Customization Options
The Isuzu MU-X 2023 manual details compatible accessories like roof racks, alloy wheels, and cargo trays․ It also provides guidelines for safe and proper installation․
Compatible Accessories
The Isuzu MU-X 2023 manual lists compatible accessories, including roof racks, alloy wheels, cargo trays, and towing equipment․ These enhancements are designed to maintain safety and performance while personalizing your vehicle․ Always refer to the manual for specific compatibility and installation guidelines to ensure proper fitment and functionality․ Accessories can be sourced from authorized Isuzu dealers or trusted aftermarket suppliers․
Installation Guidelines
The manual provides detailed installation guidelines for compatible accessories, ensuring proper fitment and functionality․ Follow step-by-step instructions for roof racks, tow bars, and cargo solutions․ Torque specifications and electrical system precautions are highlighted to prevent damage․ Always test accessories post-installation to ensure safety and performance․ Consult authorized dealers or professionals for complex installations to maintain warranty coverage and vehicle integrity․
Warranty Information
The Isuzu MU-X 2023 Owner’s Manual outlines warranty coverage, duration, and terms․ It details conditions for maintaining warranty validity and procedures for filing claims, ensuring protection․
Coverage and Duration
The Isuzu MU-X 2023 warranty provides coverage for up to 6 years or unlimited kilometers, ensuring protection against manufacturing defects․ It includes parts and labor for repairs, with conditions against unauthorized modifications or improper maintenance․ Regular servicing, as outlined in the manual, is required to maintain warranty validity․ Coverage extends to key components, with varying terms for batteries and other specific parts, ensuring comprehensive protection for owners․
Terms and Conditions
The Isuzu MU-X 2023 warranty terms specify that coverage applies only to vehicles serviced according to the owner’s manual․ Unauthorized modifications or tampering void the warranty․ Owners must adhere to maintenance schedules and use approved parts․ Normal wear and tear items are excluded․ Transfer of ownership requires notifying Isuzu to maintain coverage․ The warranty is non-transferable to third-party sellers without prior approval, ensuring original purchaser protections remain intact․ Compliance with these conditions ensures full warranty benefits․
The Isuzu MU-X 2023 Owner’s Manual is a vital resource for understanding and maintaining your vehicle․ Refer to it regularly for optimal performance and troubleshooting guidance;
Final Thoughts
The Isuzu MU-X 2023 Owner’s Manual is a comprehensive guide essential for understanding and maintaining your vehicle․ It provides detailed insights into features, troubleshooting, and maintenance, ensuring optimal performance and longevity․ Whether addressing common issues or planning DIY repairs, the manual is a valuable resource․ Regularly referring to it will help you maximize safety, efficiency, and overall driving experience․ Always keep it handy for quick reference and guidance․
Encouragement to Refer to the Manual Regularly
Regularly referring to the Isuzu MU-X 2023 Owner’s Manual ensures you stay informed about your vehicle’s features, maintenance needs, and troubleshooting tips․ It helps you identify potential issues early, perform DIY repairs confidently, and maintain your SUV’s optimal performance․ By keeping the manual handy, you can enhance safety, efficiency, and driving satisfaction․ Make it a habit to consult the guide for any questions or concerns about your MU-X․