Categories
Guide

rope bondage guide

Rope bondage is an artful and intimate practice combining creativity‚ trust‚ and physical connection․ Originating from various cultures‚ it involves using ropes to create decorative or immobilizing patterns․ While it can be deeply rewarding‚ safety‚ communication‚ and consent are paramount․ This guide provides a comprehensive introduction for those exploring this fascinating craft․

Overview of Rope Bondage

Rope bondage is a versatile and artistic practice that combines physical restraint with emotional connection․ It involves using ropes to create intricate patterns or immobilizing poses‚ emphasizing trust‚ communication‚ and mutual consent․ This discipline spans various styles‚ from decorative to functional‚ and is practiced globally for personal expression‚ intimacy‚ or performance art․

Importance of Safety and Consent

Safety and consent are the foundation of rope bondage․ Open communication ensures all parties are comfortable and aware of boundaries․ Establishing clear agreements and safe words is crucial․ Understanding potential risks and taking precautions safeguards physical and emotional well-being․ Prioritizing consent respects autonomy‚ fostering trust and a positive experience for everyone involved․

Basic Equipment Needed

The essential equipment for rope bondage includes high-quality ropes‚ scissors for cutting‚ and a first aid kit․ Natural fiber ropes like jute or hemp are popular for their grip and texture․ Synthetic ropes‚ such as nylon‚ offer durability and ease of cleaning․ A blindfold and safe word tool enhance sensory experiences‚ ensuring safety and consent․

Safety Considerations

Safety in rope bondage requires clear communication‚ consent‚ and continuous monitoring of the bottom’s physical and emotional state․ Proper techniques ensure a safe and enjoyable experience with emergency preparedness․

Understanding Risk and Precautions

Understanding risks in rope bondage involves knowing potential hazards like nerve damage‚ circulation issues‚ and emotional distress․ Precautions include proper technique‚ regular checks on the bottom‚ and having safety tools ready․ Open communication ensures comfort and safety‚ while preparedness for emergencies is essential to handle any situation effectively and responsibly․

Health Considerations for Participants

Health considerations are crucial for rope bondage participants․ Physical factors include circulation‚ joint mobility‚ and pre-existing injuries․ Mental health aspects involve stress tolerance and emotional well-being․ Both parties should disclose medical conditions and ensure a safe environment‚ adapting techniques to accommodate individual needs for a positive and healthy experience․

Signs of Distress and When to Stop

Recognizing signs of distress is vital in rope bondage․ Look for numbness‚ tingling‚ pale skin‚ or panic․ If a participant experiences discomfort‚ pain‚ or inability to move‚ stop immediately․ Use safe words or signals for clear communication․ Prioritize well-being and release restraints swiftly to ensure safety and prevent harm․

Types of Rope

Rope bondage utilizes various materials‚ each offering unique qualities․ Natural fibers like jute and hemp are prized for texture‚ while synthetic ropes‚ such as nylon‚ provide durability and softness․ The choice depends on safety‚ comfort‚ and aesthetic preference‚ ensuring a pleasant and secure experience for all participants․

Natural Fiber Ropes (Jute‚ Hemp‚ Cotton)

Natural ropes like jute‚ hemp‚ and cotton are popular in bondage for their organic feel and texture․ Jute is durable with a rougher texture‚ creating satisfying friction․ Hemp is strong yet flexible‚ offering a smooth experience․ Cotton is soft and gentle‚ ideal for sensitive skin․ Each natural rope provides distinct sensations and aesthetic appeal․

Synthetic Ropes (Nylon‚ Polyester)

Nylon and polyester ropes are highly durable and resistant to wear‚ making them excellent for bondage․ Nylon is smooth‚ flexible‚ and easy to clean‚ while polyester is strong and maintains its structure․ Synthetic ropes are versatile‚ suitable for both beginners and experienced practitioners‚ offering a modern‚ low-maintenance alternative to natural fibers․

Specialty Ropes for Bondage

Specialty ropes are crafted for specific bondage needs‚ offering unique textures and properties․ Bamboo and silk ropes are smooth and gentle‚ ideal for sensitive skin‚ while others are designed for durability or aesthetic appeal․ These ropes cater to particular preferences‚ ensuring a tailored experience for both functionality and visual impact in rope play․

Choosing the Right Rope for the Scene

Selecting the ideal rope depends on the scene’s purpose‚ your partner’s comfort‚ and desired intensity․ Consider factors like rope texture‚ flexibility‚ and durability․ Natural fibers suit beginners‚ while synthetic ropes offer durability․ Ensure the rope complements the scene’s dynamics‚ balancing safety‚ comfort‚ and aesthetic appeal for an optimal experience․

Basic Knots for Beginners

Mastering foundational knots like the square knot and bowline is essential for safety and versatility․ These knots form the basis of more complex techniques‚ ensuring secure and reliable ties․

Foundation Knots (Square Knot‚ Bowline)

The square knot‚ also known as the reef knot‚ is a simple and reliable knot used to secure two ends of a rope together․ The bowline creates a fixed loop‚ ideal for creating secure points for tying limbs or suspension․ Both are fundamental for beginners‚ ensuring safety and control in bondage scenes․

Quick-Release Knots

Quick-release knots are essential for ensuring rapid and safe untying during rope bondage․ The slip knot is a popular choice‚ as it can be released with a single tug‚ making it ideal for emergencies or scene conclusions․ These knots provide peace of mind while maintaining control‚ enhancing the overall bondage experience with added security․

Practicing Knot Tying

Mastering knot tying requires patience and consistent practice․ Start with simple knots like the square knot and bowline‚ gradually progressing to more complex patterns․ Use soft‚ manageable ropes and practice on willing partners or inanimate objects․ Watching tutorials and slowing down can enhance learning․ Regular practice builds muscle memory and confidence․

Intermediate Techniques

Intermediate techniques involve refining foundational skills and exploring more complex bondage methods․ These include body harnesses‚ limb restraints‚ and combining multiple knots for enhanced functionality and aesthetic appeal․ Smooth‚ controlled movements and clear communication are essential to ensure safety and comfort during these advanced practices․

Body Harnesses and ChestBindings

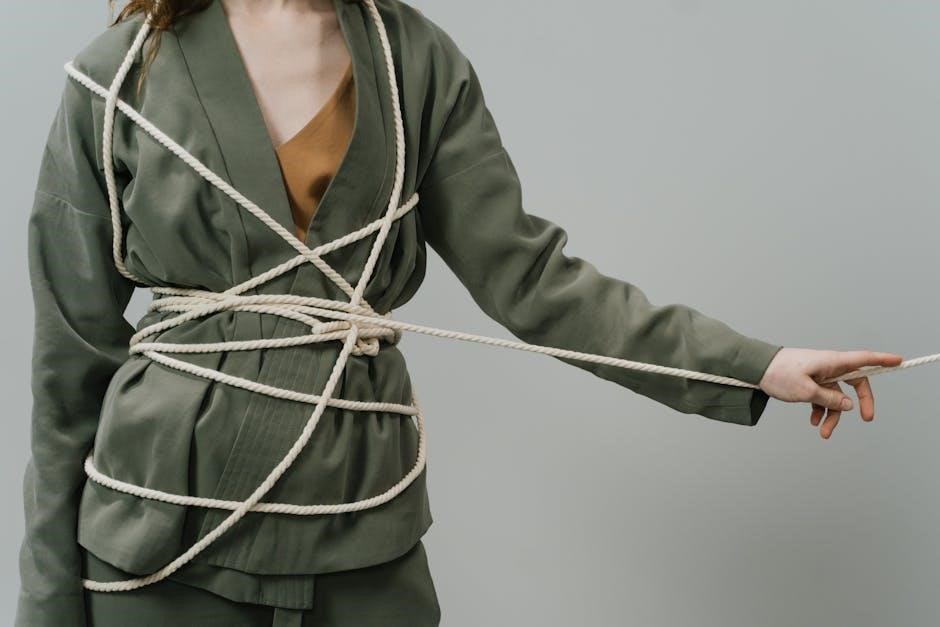
Body harnesses and chest bindings are intermediate techniques that combine artistry with functionality․ They create restrictive yet decorative patterns across the torso‚ enhancing both control and visual appeal․ Proper tension is crucial to avoid restricting breathing or circulation․ Communication and safety checks are essential to ensure comfort and well-being during the experience․

Limb Restraints and Spread Eagle

Limb restraints involve binding arms and legs to create a sense of control and vulnerability․ The spread eagle technique‚ where limbs are restrained in opposite directions‚ enhances this dynamic․ Proper technique ensures comfort and safety‚ with regular checks for circulation and tension․ Communication is key to balancing restriction with pleasure and relaxation․

Combining Multiple Knots

Combining knots enhances complexity and stability in rope bondage․ Start with foundational knots‚ then integrate additional knots strategically․ Practice planning scenes to ensure each knot serves a purpose․ Regular checks for tightness and comfort are essential․ This approach balances aesthetics with functionality‚ creating visually appealing and secure restraints for intermediate practitioners․

Advanced Bondage Techniques

Advanced techniques involve intricate rope work‚ suspension‚ and dynamic movements․ They require precision‚ trust‚ and experience․ These methods elevate the practice‚ combining artistry and control․

Suspension Bondage Basics

Suspension bondage involves lifting a person off the ground using ropes‚ requiring specialized techniques and equipment․ It demands expertise in knot work‚ load distribution‚ and safety protocols․ Proper planning‚ communication‚ and aftercare are essential to ensure a safe and enjoyable experience for all participants․

Decorative Patterns and Aesthetics

Decorative rope bondage emphasizes visual appeal‚ blending artistry with technique․ Intricate patterns‚ such as woven designs or symmetrical layouts‚ enhance the aesthetic experience․ Using colored ropes or contrasting textures can create striking visuals‚ making the practice a form of body art that combines beauty with restraint for a unique sensory and visual journey․

Dynamic Rope Play

Dynamic rope play involves active movement and interaction‚ creating an immersive experience․ It combines fluid transitions‚ tension adjustments‚ and rhythmic patterns to enhance connection and sensation․ This evolving practice allows for spontaneous creativity‚ adapting to the moment and the participants’ responses‚ ensuring a engaging and dynamic interaction that goes beyond static bondage techniques․

Aftercare and Recovery

Aftercare is essential for emotional and physical recovery post-session․ Ensure open communication‚ comfort‚ and mutual respect to create a safe and nurturing environment for all involved․

Physical and Emotional Aftercare

Physical aftercare involves gently removing ropes‚ massaging limbs‚ and ensuring circulation returns to normal․ Emotional aftercare requires empathy‚ reassurance‚ and open dialogue to process feelings․ Both aspects foster trust and intimacy‚ essential for a positive experience․ Prioritize comfort and connection to support each participant’s well-being and emotional stability post-session․

Releasing Knots Safely

Releasing knots safely is essential to avoid rope burn or injury․ Always use tools like scissors or a knife for difficult knots․ Practice patience and maintain clear communication with your partner to ensure their comfort․ After releasing‚ inspect for circulation issues and provide appropriate aftercare to promote recovery and well-being․

Post-Scene Communication

Post-scene communication ensures emotional and physical well-being․ Discuss experiences‚ feelings‚ and any discomfort openly․ Acknowledge boundaries and provide reassurance․ This dialogue strengthens trust and connection‚ fostering a safe environment for future interactions․ Active listening and empathy are key to understanding each other’s needs and ensuring a positive experience for all involved․

Legal and Ethical Considerations

Legal and ethical considerations are crucial in rope bondage․ Ensure consent‚ respect privacy‚ and comply with local laws․ Understand rights and obligations to maintain trust and safety․

Understanding Consent Laws

Consent is a legal and ethical cornerstone in rope bondage․ Laws vary by jurisdiction‚ but all activities must be voluntary and agreed upon by all parties․ Ensure clear communication‚ respecting boundaries and privacy․ Understand local regulations to avoid legal issues and ensure mutual understanding and respect in all interactions․

Privacy and Discretion

Maintaining privacy and discretion is crucial in rope bondage․ All participants must agree on what information can be shared and with whom․ Using techniques like secure communication channels and respecting personal boundaries helps protect identities and experiences․ Ensuring privacy fosters trust and safety within the community․

Community Guidelines

Rope bondage communities emphasize respect‚ inclusivity‚ and consent․ Members should engage constructively‚ avoid judgment‚ and prioritize education over criticism․ Sharing experiences respectfully and adhering to platform rules fosters a safe‚ supportive environment for all participants to explore and learn together․

Practice and Patience

Mastery of rope bondage requires consistent practice and patience; Dedication to learning and refining techniques ensures progress․ Embrace the journey‚ as skill development is a gradual‚ rewarding process over time․

Building Skill Over Time

Mastering rope bondage requires consistent practice and patience․ Begin with basic knots‚ gradually exploring more complex techniques․ Regular practice helps develop muscle memory and confidence․ Dedication and persistence are key to refining skills‚ ensuring a safe and enjoyable experience for all participants․ Over time‚ patience and effort yield remarkable progress․

Learning from Mistakes

Mistakes are inevitable but valuable in mastering rope bondage․ Analyze errors to understand their causes‚ whether due to improper knot placement or insufficient communication․ Stay calm and address issues promptly‚ ensuring participant comfort and safety․ Each mistake is an opportunity to refine techniques and strengthen trust‚ fostering growth and improvement over time․

Continuous Education

Continuous education is essential for mastering rope bondage․ Attend workshops‚ explore online tutorials‚ and read books to refine skills․ Engage with communities to learn from experienced practitioners and stay updated on safety guidelines and innovative techniques․ Education fosters confidence‚ creativity‚ and a deeper understanding of this evolving craft․

Resources for Further Learning

Explore books‚ online tutorials‚ and workshops to deepen your rope bondage knowledge․ Join communities and forums for shared insights and continuous growth in this craft․

Recommended Books and Tutorials

Explore “The Art of Rope Bondage” by Midori and “Rope Bondage: The Essential Guide” by Two Knotty Boys for in-depth techniques․ Online platforms like FetLife and ropebondage․com offer video tutorials․ These resources provide step-by-step guides‚ safety tips‚ and creative patterns‚ catering to all skill levels and interests in rope bondage․

Online Communities

Engage with online communities like FetLife‚ Reddit’s r/ropebondage‚ and specialized forums to connect with enthusiasts․ These platforms offer tutorials‚ discussions‚ and events․ Participate respectfully and learn from experienced practitioners to enhance your rope bondage journey․

Workshops and Classes

Attend workshops and classes to gain hands-on experience in rope bondage․ Many BDSM organizations and dungeons offer courses for all skill levels․ Learn from experienced instructors‚ practice techniques safely‚ and build confidence․ These sessions often cover essential skills‚ safety protocols‚ and creative methods‚ providing a structured environment for mastering rope bondage techniques effectively․

Troubleshooting Common Issues

Identify and address common problems like rope burn or knots that are too tight․ Use search techniques to find solutions‚ ensuring a safe and enjoyable experience․

Dealing with Rope Burn

Rope burn can occur due to friction or tight knots․ To prevent it‚ use soft ropes like jute or hemp․ If rope burn happens‚ stop immediately‚ assess the skin‚ and apply cooling treatments․ Moisturize afterward to soothe irritation․ Ensure open communication and regular checks to avoid discomfort‚ enhancing overall safety and enjoyment․

Fixing Knots That Are Too Tight

If knots become too tight‚ stop immediately to assess the situation․ Carefully loosen the rope using fingers or tools like scissors․ Avoid yanking‚ as it may worsen discomfort․ Regular checks and open communication can prevent this․ Using synthetic ropes like nylon‚ which are easier to adjust‚ can also help maintain safety and comfort․

Managing Nervousness

Nervousness is natural when exploring rope bondage․ Deep breathing and open communication can help calm nerves․ Ensure both parties are comfortable and consenting․ Using search techniques to find reliable resources can also build confidence and prepare you for the experience‚ fostering a safe and enjoyable environment for all involved․

Rope bondage is a journey requiring patience‚ trust‚ and practice․ By mastering search techniques and boolean operators‚ enthusiasts can find reliable resources to enhance their skills and enjoyment of this craft․

Final Thoughts on Rope Bondage

Rope bondage is a journey of trust‚ creativity‚ and connection․ Embrace continuous learning‚ practice patience‚ and seek inspiration from online communities and workshops․ Mastery comes with time‚ and effective search techniques can unlock valuable resources․ Remember‚ safety and consent are foundational․ Keep exploring‚ and let your passion for this craft grow․

Encouragement for Continued Exploration

Embark on this journey with curiosity and openness․ Explore tutorials‚ books‚ and workshops to deepen your skills․ Engage with online communities for inspiration and support․ Remember‚ mastery takes time—be patient and kind to yourself․ Keep learning‚ stay inspired‚ and enjoy the process of growth in this rewarding craft of rope bondage․

Categories
Guide

electricity study guide

Electricity is a fundamental form of energy powering modern society, enabling technologies, lighting, and industrial processes. Understanding its basics is crucial for harnessing its potential safely and efficiently.

1;1 Basic Concepts of Electricity

Electricity is the flow of charged particles, forming the basis of modern technology. It powers devices, lights, and systems, essential for daily life. Basic concepts include static electricity and current, where electrons move through conductors. Voltage drives the flow, while resistance opposes it. Understanding these principles is vital for grasping electrical systems. Electricity’s role is fundamental, enabling innovation and progress across various industries and applications.

1.2 Importance of Electricity in Modern Life

Electricity is indispensable in modern society, powering everything from communication devices to medical equipment. It drives industries, transportation, and household appliances, enhancing productivity and quality of life. Electricity enables technological advancements, including internet connectivity and renewable energy systems. Without it, daily operations would halt, emphasizing its critical role in sustaining global progress and economic growth.

Fundamental Principles of Electricity

Electricity relies on voltage, current, and resistance, governed by Ohm’s Law, which explains their relationships, forming the cornerstone of electrical theory and practical applications.

2.1 Voltage, Current, and Resistance

Voltage, current, and resistance are core electrical concepts. Voltage, or potential difference, drives electric current through a circuit. Current measures the rate of electron flow, while resistance opposes it. Ohm’s Law (V=IR) defines their relationship, essential for circuit analysis and design. Understanding these principles is crucial for electrical engineering, enabling the safe and efficient use of electricity in various applications.

2.2 Ohm’s Law and Its Applications

Ohm’s Law states that current (I) equals voltage (V) divided by resistance (R), expressed as I = V/R. This fundamental principle helps calculate unknown values in circuits. Its applications span circuit design, troubleshooting, and ensuring safety. By understanding Ohm’s Law, engineers can optimize power distribution, predict component behavior, and maintain system efficiency, making it indispensable in electrical engineering and everyday electronics.

Electrical Circuits

Electrical circuits are pathways for electron flow, enabling devices to function. They consist of power sources, conductors, and loads, forming the backbone of modern electronics.

3.1 Series and Parallel Circuits

In electrical systems, circuits are configured in two primary ways: series and parallel. Series circuits connect components end-to-end, ensuring the same current flows through all devices, while voltage drops add up. Parallel circuits, however, branch components from a common voltage source, allowing each device to operate independently at the same voltage but with currents that sum. Understanding these configurations is essential for designing and analyzing electrical networks, as they determine how power is distributed and utilized in various applications.

3.2 Circuit Analysis and Diagrams

Circuit analysis involves understanding the behavior of electrical networks using diagrams and mathematical tools. Circuit diagrams represent components like resistors, capacitors, and inductors with standardized symbols, making it easier to visualize and analyze connections. Techniques such as Kirchhoff’s laws and node analysis help determine voltage, current, and power in circuits. These methods are essential for troubleshooting and designing efficient electrical systems, ensuring components function safely and effectively within specified parameters.

Electrical Safety

Electrical safety ensures protection from hazards like shocks and fires. Proper precautions and adherence to guidelines are essential for safe handling and usage of electrical systems and devices.

4.1 Safety Tips for Handling Electricity

Always turn off the power source before working with electrical systems. Use insulated tools to prevent shocks. Avoid contact with water or damp surfaces. Never overload circuits or use damaged cords. Ensure proper grounding of equipment and wear protective gear. Keep children away from electrical devices. Regularly inspect wiring and appliances for damage. Follow safety guidelines and consult professionals for complex tasks. Understanding these precautions helps prevent accidents and ensures safe handling of electricity.

4.2 Common Electrical Hazards and Precautions

Common electrical hazards include overloaded circuits, faulty wiring, and exposure to live components. Precautions such as using circuit breakers, proper insulation, and avoiding water contact can mitigate risks. Regularly inspecting equipment and ensuring good grounding are essential. Avoiding overloaded outlets and keeping flammable materials away reduces fire hazards. Understanding these precautions helps minimize risks and ensures a safer environment when working with electricity.

Electrical Components

Electrical components like resistors, capacitors, and transformers are essential in circuits, controlling voltage, current, and energy storage. They enable various functions, from filtering frequencies to stepping voltage levels efficiently.

5.1 Resistors, Capacitors, and Inductors

Resistors oppose current flow, while capacitors store energy in electric fields and inductors store it magnetically. Resistors are used in voltage division and current limiting. Capacitors filter frequencies and supply power during interruptions. Inductors smooth current fluctuations and enhance signal quality. Together, they regulate, store, and manage energy flow in circuits, ensuring stability and efficiency in electronic systems. Understanding their functions is vital for designing and troubleshooting circuits effectively, as each component plays a unique role in controlling electrical energy.

5.2 Transformers and Their Functions

Transformers are devices that transfer electrical energy between circuits through electromagnetic induction. They adjust voltage levels, enabling efficient power transmission over long distances. Transformers consist of primary and secondary coils wound around a common core. They step up or step down voltage, enhancing system flexibility and efficiency. Iron-core transformers reduce energy loss, while air-core types suit high-frequency applications. Transformers are essential for voltage regulation, circuit isolation, and impedance matching, making them critical in power grids, electronic devices, and industrial systems for reliable energy distribution and system protection.

Power and Energy in Electricity

Power measures the rate of energy transfer in electrical systems, while energy quantifies total work done. Efficiency ensures minimal energy loss during power conversion.

6.1 Understanding Power and Energy Calculations

Power and energy are core concepts in electricity, with power representing the rate of energy transfer. Calculations involve voltage, current, and resistance, using formulas like ( P = VI ) and ( E = Pt ). Understanding these principles is essential for designing efficient systems and minimizing energy loss. Ohm’s Law and efficiency ratios are key tools in analyzing power and energy flow in electrical circuits, ensuring optimal performance and resource utilization.

6.2 Efficiency and Power Factor

Efficiency measures the ratio of useful output to total input energy, while power factor is the cosine of the phase angle between voltage and current in AC systems. A high power factor (>0.8) indicates efficient energy use, reducing reactive power losses. Improving power factor with capacitors enhances system performance and reduces energy costs. Understanding these concepts is vital for optimizing electrical systems and minimizing energy waste in industrial and residential applications.

Electromagnetism

Electromagnetism is the interaction between electric currents and magnetic fields, forming the basis of motors, generators, and transformers. It is crucial for understanding energy conversion and transmission systems.

7.1 Magnetic Fields and Induction

A magnetic field is a region around a magnet or current-carrying conductor where magnetic forces can be detected. It is represented by field lines that emerge from the north pole and enter the south pole. The strength of a magnetic field is measured in teslas. Magnetic induction, discovered by Michael Faraday, occurs when a changing magnetic field within a coil induces an electromotive force (EMF), forming the basis of transformers and generators. This principle is vital for understanding energy transfer in electrical systems.

7.2 Generators and Motors

A generator converts mechanical energy into electrical energy through electromagnetic induction, while a motor performs the reverse, turning electrical energy into mechanical energy. Generators use a rotating magnetic field to induce current in a coil, whereas motors use current to create rotational force. Both rely on the interaction between magnetic fields and current-carrying conductors. Understanding these devices is essential for applications like power generation, industrial machinery, and household appliances, highlighting their pivotal role in modern energy systems.

Alternating Current (AC) and Direct Current (DC)

AC changes direction periodically, while DC flows in one direction. AC is used in households and power grids due to its efficiency in long-distance transmission.

8.1 Differences Between AC and DC

Alternating Current (AC) periodically reverses direction, while Direct Current (DC) flows steadily in one direction. AC is better for long-distance power transmission due to lower energy loss, making it ideal for power grids. DC is commonly used in electronic devices like batteries and motors, where a consistent flow is essential. Understanding these differences is crucial for designing efficient electrical systems and selecting the appropriate current type for specific applications and devices.

8.2 Applications of AC and DC Systems

AC systems are widely used in power grids and household appliances due to their efficiency in long-distance transmission. DC systems are essential in electronic devices, batteries, and electric vehicles, ensuring consistent power flow. AC is ideal for high-voltage applications, while DC powers low-voltage devices like smartphones and lamps. Both systems complement each other, enabling modern technology to function seamlessly across various industries and everyday life, from industrial machinery to renewable energy systems.

Electrical Tools and Instruments

Electrical tools and instruments are essential for diagnosing, measuring, and maintaining electrical systems. Multimeters, oscilloscopes, and circuit testers are crucial for voltage, current, and resistance measurements, ensuring safety and efficiency in electrical work.

9.1 Multimeters and Their Usage

Multimeters are versatile tools for measuring voltage, current, resistance, and continuity in electrical circuits. They are essential for diagnosing issues, ensuring safety, and verifying circuit integrity. Digital multimeters offer precise readings, while analog versions provide visual needle movements. Proper usage involves selecting the correct range, connecting probes accurately, and interpreting results to troubleshoot faults effectively. Regular calibration ensures accuracy, making multimeters indispensable for both professionals and hobbyists in electrical work.

9.2 Oscilloscopes and Other Measuring Devices

Oscilloscopes are essential tools for visualizing and measuring signal waveforms, amplitude, and frequency in electrical circuits. They are particularly useful for analyzing alternating current (AC) signals and transient phenomena. Other devices include spectrum analyzers for frequency domain analysis and logic analyzers for digital signals. These instruments enable precise diagnostics and optimization of electrical systems, ensuring reliability and performance. Their applications span from troubleshooting to advanced research, making them indispensable in electrical engineering and electronics.

Modern Applications of Electricity

Electricity drives modern innovation, powering renewable energy systems, smart grids, and electric vehicles. These technologies reduce emissions and enhance energy efficiency, transforming how we live and work globally.

10.1 Renewable Energy Sources

Renewable energy sources are essential for sustainable electricity generation. Solar, wind, and hydropower convert natural resources into electricity, reducing reliance on fossil fuels. Photovoltaic cells and wind turbines harness energy, while hydroelectric plants use water flow. These technologies lower greenhouse gas emissions and promote energy independence. Advancements in storage systems ensure stable power supply, addressing intermittency issues. Investing in renewables supports global sustainability and mitigates climate change impacts, making them vital for future energy demands.

10.2 Smart Grids and Energy Storage Systems

Smart grids revolutionize electricity distribution by enabling real-time monitoring and two-way communication between utilities and consumers. They optimize energy use, reduce waste, and enhance reliability. Energy storage systems, like batteries, play a crucial role in stabilizing the grid, especially with renewable energy integration. These technologies ensure a sustainable and resilient energy future, balancing supply and demand while supporting decarbonization efforts. Advanced storage solutions also address intermittency issues, making smart grids indispensable for modern electricity systems.

Electricity is vital for modern life, driving innovation and progress. This guide has covered essential concepts, safety, components, and future trends, providing a comprehensive understanding of electricity’s role in shaping our world.

11.1 Key Takeaways from the Study Guide

This guide has covered the fundamentals of electricity, including basic concepts, circuit analysis, safety practices, and modern applications. Key points emphasize understanding voltage, current, and resistance, mastering Ohm’s Law, and recognizing the importance of safety measures. Electrical components like resistors, capacitors, and transformers play crucial roles in circuits. Additionally, the guide highlights the significance of renewable energy and smart grids in shaping the future of electricity. These principles form the foundation for further exploration in electrical engineering.

11.2 Future Directions in Electrical Engineering

Electrical engineering is evolving rapidly, with advancements in renewable energy, smart grids, and energy storage systems. The integration of AI and machine learning optimizes power distribution and consumption. Electrification of transportation and industries reduces carbon emissions, promoting sustainability. Emerging technologies like supercapacitors and advanced materials are reshaping circuit design. These innovations are driving the field toward a more efficient, sustainable, and connected future, addressing global energy challenges and fostering technological growth.

Categories
Guide

navy prt guide

The Navy Physical Readiness Test (PRT) Guide, updated in January 2023, provides comprehensive policies and procedures for assessing sailor fitness. It introduces new exercises like the 2km row and forearm planks, aligning with modern fitness standards. The guide serves as a compliance tool for commanding officers to ensure readiness and health standards are met across the Navy.

1.1 Purpose and Overview

The Navy Physical Readiness Test (PRT) Guide, updated in January 2023, outlines the framework for assessing sailors’ physical fitness. It introduces new modalities like the 2km row and forearm planks, aligning with modern fitness standards. The guide ensures compliance with OPNAVINST 6110.1K and promotes a culture of physical readiness. It provides standardized procedures for testing, ensuring fairness and accuracy in evaluating sailors’ performance.

1.2 Recent Updates (January 2023)

The January 2023 update to the Navy PRT Guide introduced the 2km row and forearm planks as new test modalities, replacing traditional exercises. These changes aim to enhance functional fitness assessments. Additionally, scoring standards were revised to reflect the new exercises, ensuring a comprehensive evaluation of sailors’ physical readiness. The updates align with modern fitness trends and operational demands, fostering a more robust and capable force.

Key Components of the Navy PRT

The Navy PRT encompasses Physical Readiness Tests and Body Composition Assessments. It evaluates sailors’ strength, endurance, and overall physical fitness through standardized exercises and measurements.

2.1 Physical Readiness Test (PRT) Modalities

The PRT includes push-ups, forearm planks, 1.5-mile runs, and the 2km row. These exercises assess upper body strength, core stability, cardiovascular endurance, and muscular efficiency. The tests are standardized to ensure fairness and accuracy in evaluating sailors’ physical fitness levels. Scoring standards are updated periodically to reflect current fitness goals and readiness requirements for Navy personnel.

2.2 Body Composition Assessment (BCA)

The Body Composition Assessment (BCA) measures sailors’ body fat percentage to ensure compliance with Navy fitness standards. It uses skinfold measurements at specific points to calculate percentage. Sailors must meet initial standards, with follow-up assessments for those who fail. The BCA is a critical component of the PRT, ensuring readiness and promoting a healthy, disciplined force. Guidelines are outlined in the Navy Physical Readiness Program Guide 4.

Policies and Guidelines

This section outlines essential policies and guidelines for the Navy PRT, including OPNAVINST 6110.1K compliance and recent updates as of January 2023. Referencing key guides and instructions like BUMED 6110.15B ensures adherence to regulations and standards.

3.1 OPNAVINST 6110.1K Compliance

OPNAVINST 6110.1K outlines the Navy’s Physical Readiness Program, ensuring adherence to fitness standards across the fleet. This instruction mandates periodic assessments, including the PRT and BCA, to maintain readiness. Updated in January 2023, it incorporates new test modalities like the 2km row and forearm planks, reflecting modern fitness goals. Compliance with this instruction is critical for command effectiveness and sailor health.

3.2 Physical Readiness Program Guides 1-10

The Physical Readiness Program Guides 1-10 provide detailed instructions for implementing the Navy’s fitness initiatives. Guide 5 focuses on PRT procedures, including new exercises like the 2km row, while Guide 6 addresses medical readiness. These guides ensure consistency across commands, offering clear protocols for testing, medical clearance, and record management, thereby supporting overall fleet readiness and compliance with Navy standards.

Command Responsibilities

Commands play a critical role in enforcing PRT compliance, ensuring sailors meet fitness standards, and maintaining accurate records. Command Fitness Leaders (CFLs) and Assistant CFLs (ACFLs) are key to successful implementation, providing guidance and oversight to ensure all Navy Physical Readiness Program policies are followed effectively.

4.1 CFL/ACFL Roles

Command Fitness Leaders (CFLs) and Assistant CFLs (ACFLs) are pivotal in managing the Navy’s Physical Readiness Program. They oversee PRT and BCA administrations, ensuring compliance with OPNAVINST 6110.1K. CFLs/ACFLs organize fitness events, provide training guidance, and maintain accurate records in PRIMS-2. Their responsibilities include fostering a culture of physical readiness, addressing sailor concerns, and ensuring all safety protocols are followed during assessments. Effective leadership from CFLs/ACFLs is essential for unit success and adherence to Navy standards.

4.2 Command Checklists and Procedures

Commands must adhere to standardized checklists and procedures to ensure PRT and BCA accuracy. Documentation in PRIMS-2 is mandatory, with CFLs/ACFLs verifying data integrity. Procedures include scheduling, equipment preparation, and safety protocols. Commands must also maintain records for pregnant sailors and ensure compliance with medical clearance requirements. Strict adherence to these processes guarantees fair and consistent assessments across all units, aligning with Navy-wide physical readiness standards and policies.

Medical Readiness and Clearance

Medical readiness ensures sailors meet physical fitness standards safely. Commands must verify medical clearance and review Pre-Physical Activity Questions (PPAQ) before PRT participation. Proper documentation is required.

5.1 PFA Medical Requirements

Sailors must meet specific medical standards before participating in the Physical Fitness Assessment (PFA). This includes completing the Pre-Physical Activity Questionnaire (PPAQ) and obtaining clearance from medical personnel. The PPAQ helps identify potential health risks, ensuring safe participation. Medical waivers are required for sailors with existing conditions. Compliance with these requirements is mandatory to prevent health complications during the assessment.

5.2 Pre-Physical Activity Questions (PPAQ)

The Pre-Physical Activity Questions (PPAQ) is a mandatory questionnaire designed to identify potential health risks before engaging in physical activity. Sailors must complete the PPAQ honestly to ensure safe participation in the PFA. It assesses medical history, current health status, and physical limitations. The PPAQ helps prevent injuries and health complications by flagging conditions that may require medical clearance or accommodations during the assessment.

Scoring and Standards

The Navy PRT scoring system evaluates performance in push-ups, planks, and cardio exercises like the 1.5-mile run or 2km row. Standards vary by age and rank, ensuring fairness and accountability. The introduction of the 2km row offers an alternative assessment, aligning with modern fitness trends and providing sailors with more options to demonstrate readiness.

6.1 Minimum Passing Scores

The minimum passing scores for the Navy PRT include 38 push-ups, a 1:18 forearm plank, and a 13:45 1.5-mile run or 9:20 2km row. These standards ensure fairness and accountability across age groups and ranks. Sailors must meet these thresholds to pass, with scores adjusted for age and gender. The updated 2023 guidelines introduced the 2km row as an alternative, offering flexibility while maintaining rigorous fitness expectations.

6.2 New Scoring Standards for 2km Row

The 2km row, introduced in January 2023, offers an alternative to the 1.5-mile run. Scoring ranges from 9:20 (maximum points) to slower times for lower scores. The new standards provide flexibility while maintaining fitness benchmarks. Sailors on ships or with limited running access benefit from this option. The updated guidelines ensure consistency and fairness in evaluating physical readiness across the fleet, aligning with the Navy’s commitment to modernizing fitness assessments.

Nutrition and Training Resources

Nutrition guidelines and training programs are essential for PRT success. Resources include tailored meal plans and Command PT initiatives to enhance physical performance and readiness.

7.1 Nutrition Guidelines for PRT Preparation

Proper nutrition is critical for PRT success. Sailors should focus on balanced diets rich in lean proteins, complex carbs, and healthy fats. Hydration is emphasized, with recommendations to avoid high-sugar foods and alcohol. Meal timing and portion control are also highlighted to optimize energy levels and recovery. These guidelines help sailors maintain peak physical condition and achieve their PRT goals effectively.

7.2 Command PT and FEP Programs

Command PT and Fitness Enhancement Programs (FEP) are structured to improve sailor readiness. These initiatives include group workouts, personalized fitness plans, and corrective exercises. Commands tailor programs to address individual needs, ensuring sailors meet PRT standards. FEPs focus on building strength, endurance, and mobility, while promoting a culture of health and accountability within the unit.

Managing PFA Records

Accurate PFA records are maintained using the PRIMS-2 system, ensuring compliance and accountability. Commands must update scores and medical clearances promptly, adhering to Navy guidelines for data integrity.

8.1 PRIMS-2 System Overview

The Physical Readiness Information Management System-2 (PRIMS-2) is the Navy’s official platform for managing PFA records. It streamlines data entry, tracking, and reporting of sailors’ fitness assessments, including PRT scores and BCA results. PRIMS-2 ensures accuracy, transparency, and compliance with Navy regulations. Commands use this system to monitor progress, generate reports, and maintain accountability throughout the PFA cycle. Access is restricted to authorized personnel to safeguard sensitive information.

8.2 Record-Keeping for Pregnant Sailors

Record-keeping for pregnant sailors ensures compliance with Navy policies and medical guidelines. Pregnant sailors are exempt from PRT and BCA requirements until cleared postpartum. Commands must document medical clearances and maintain confidential records. This includes tracking exemptions and accommodations. Records are stored securely, ensuring privacy and adherence to Navy regulations. Accurate documentation supports seamless reintegration into the PRT program after pregnancy.

Special Considerations

The Navy PRT Guide addresses special considerations, including exemptions for medical conditions and accommodations for pregnant sailors. It ensures fairness and safety while maintaining fitness standards.

9.1 Exemptions and Accommodations

The Navy PRT Guide outlines exemptions and accommodations for sailors with medical conditions or disabilities. Pregnant sailors are exempt from PRT and BCA until cleared postpartum. Medical waivers are granted for injuries or chronic conditions, ensuring safe participation. Commanding officers must approve exemptions, with documentation from medical providers. Accommodations, such as alternative exercises, are provided to ensure inclusivity while maintaining fitness standards.

9.2 PRT Cycle Schedule (2023-2024)

The 2023-2024 PRT cycle begins on December 1, 2023, and is labeled as Cycle 1 2024 in PRIMS-2. Sailors must complete their Physical Fitness Assessment (PFA) between February 1 and November 30, 2023. Reservists have until the end of the following month to retest. Electronic submission of PFA results is mandatory, ensuring timely tracking and compliance with Navy fitness standards.

Resources and References

The Navy Physical Readiness Program Guide provides essential resources, including Guide 5 for PRT details and Guide 8 for record management. BUMED Instruction 6110.15B offers medical guidelines, while official Navy PDFs are available for download and editing to support sailors’ preparation and compliance with fitness standards.

10.1 Navy Physical Readiness Program Guide PDFs

The official Navy Physical Readiness Program Guide PDFs are essential resources for understanding PRT requirements, scoring standards, and medical guidelines. Available for download, these guides cover topics like body composition assessments, medical readiness, and command responsibilities. Sailors can access updated versions, including Guide 5 for PRT details and Guide 8 for managing records. These PDFs ensure compliance with Navy fitness standards and policies.

10.2 BUMED Instruction 6110.15B

BUMED Instruction 6110.15B outlines medical responsibilities for the Navy’s Physical Readiness Program. Released in April 2023, it aligns with OPNAVINST 6110.1K and Navy Physical Readiness Program Guides 6 and 8. This instruction provides medical oversight for PRT-related activities, ensuring sailors meet health and readiness standards. It covers medical clearances, exemptions, and accommodations, supporting the Navy’s mission to maintain a fit and capable workforce.

The Navy PRT Guide ensures sailors meet fitness standards through updated modalities and scoring. Compliance with guidelines is crucial for mission readiness and overall success.

11.1 Importance of Compliance

Compliance with the Navy PRT Guide ensures consistency in evaluating sailor fitness, promoting mission readiness, and maintaining high standards across commands. Proper adherence to guidelines guarantees fair assessment and accountability, fostering a culture of excellence within the Navy.

Non-compliance risks legal repercussions and undermines unit cohesion. Adhering to policies ensures accurate documentation, supports legal standards, and reinforces the Navy’s commitment to physical and professional excellence, critical for operational success.

11.2 Final Tips for Success

To excel in the Navy PRT, sailors should focus on consistent training, proper nutrition, and adequate rest. Utilize command PT programs and FEP resources for structured workouts. Stay updated on PRT guidelines and scoring standards. Prioritize health by completing PPAQs and adhering to medical clearance requirements. Leveraging tools like PRIMS-2 for record management ensures accuracy and accountability. Maintain discipline and seek guidance from CFL/ACFL to achieve optimal results.

Categories
Guide

glock 43 tungsten guide rod

The Glock 43 Tungsten Guide Rod is a high-performance aftermarket accessory designed to enhance shooting experience by reducing recoil and muzzle flip, improving control and accuracy.

Overview of the Glock 43 Tungsten Guide Rod

The Glock 43 Tungsten Guide Rod is a premium aftermarket component crafted from pure tungsten, offering significant weight increase compared to standard guide rods. Designed for compatibility with Glock 43, 43X, and 48 models, it ensures enhanced performance through reduced recoil and muzzle flip. The guide rod features a captured spring system, available in standard or reduced power options, making it easier to cycle the slide. Its drop-in design simplifies installation, providing improved control and accuracy for shooters.

Importance of the Guide Rod in Firearm Performance

The guide rod plays a critical role in firearm performance by stabilizing the slide’s movement, ensuring smooth cycling, and reducing recoil. A heavier tungsten guide rod adds mass, which helps counter muzzle rise, leading to faster target reacquisition and tighter shot groups. This results in improved accuracy and control, especially during rapid fire, making it essential for both competitive shooters and concealed carry users seeking reliable performance.

Benefits of the Tungsten Guide Rod

The Tungsten Guide Rod offers reduced recoil, improved control, and enhanced performance for concealed carry, making it a versatile upgrade for Glock 43 users seeking better handling.

Reduced Felt Recoil and Muzzle Flip

The Tungsten Guide Rod significantly reduces felt recoil and muzzle flip by adding weight to the front of the pistol, enhancing control during rapid fire. Its heavy construction helps stabilize the firearm, minimizing upward movement and allowing for faster target reacquisition. This results in tighter shot groups and improved shooting accuracy, especially in dynamic situations. The added mass ensures smoother cycling, making it ideal for both concealed carry and competitive shooting scenarios.

Improved Accuracy and Control

The Tungsten Guide Rod enhances accuracy by minimizing muzzle movement, allowing for more precise shot placement. Its added weight stabilizes the pistol, reducing unwanted motion during firing. Shooters experience better control, especially during rapid sequences, as the firearm remains steadier in hand. This improvement is particularly beneficial for concealed carry and self-defense situations, where quick and accurate shots are critical. The result is a smoother, more predictable shooting experience.

Enhanced Performance for Concealed Carry

The Tungsten Guide Rod significantly enhances performance for concealed carry by reducing recoil and muzzle flip, allowing for faster target reacquisition. Its added weight improves control, making the firearm easier to handle in dynamic situations. This upgrade is particularly beneficial for self-defense scenarios, where quick and accurate shots are crucial. The guide rod ensures a smoother shooting experience, making it an ideal accessory for concealed carry firearms. Its reliability and effectiveness make it a top choice for everyday carry.

Design and Construction of the Tungsten Guide Rod

The Tungsten Guide Rod is crafted from high-density tungsten, offering increased weight for improved balance and reduced recoil. Its durable construction ensures long-lasting reliability and performance.

Material Advantages of Tungsten

Tungsten’s high density and mass provide significant advantages, reducing felt recoil and muzzle flip effectively. Its heavy weight enhances stability, improving control during rapid fire. The material’s durability ensures long-lasting performance, making it ideal for concealed carry and competitive shooting. Tungsten’s superior construction minimizes wear and tear, ensuring reliable functionality over time. These properties make it a top choice for enhancing the Glock 43’s performance.

Weight Distribution and Balance

The Tungsten Guide Rod’s additional weight is strategically distributed to enhance balance, countering muzzle rise effectively. This design improves handling, allowing for smoother trigger control and faster target reacquisition. The balanced weight reduces rotational torque during firing, making the Glock 43 more stable and user-friendly. This optimized balance is particularly beneficial for concealed carry, where control and precision are paramount in high-stress situations.

Installation and Compatibility

The Glock 43 Tungsten Guide Rod offers a straightforward drop-in installation process, ensuring compatibility with Glock 43, 43X, and 48 models for enhanced performance.

Drop-In Installation Process

The Glock 43 Tungsten Guide Rod features a simple, drop-in design, requiring no specialized tools or modifications. Its compatibility with Glock 43, 43X, and 48 models ensures a seamless fit. Designed with a lighter spring, it allows easier slide manipulation while maintaining reliability across various ammunition types, making installation quick and hassle-free for users of all skill levels.

Compatibility with Glock 43, 43X, and 48 Models

The Tungsten Guide Rod is specifically designed for seamless compatibility with the Glock 43, 43X, and 48 models. Its precision engineering ensures a perfect fit without requiring any modifications to the firearm. Made to align with factory specifications, it integrates effortlessly, maintaining reliability and performance across all compatible models while enhancing their overall functionality for concealed carry and competitive shooting scenarios.

Performance Comparison

The Tungsten Guide Rod reduces felt recoil and muzzle flip, offering improved control and accuracy compared to standard guide rods, enhancing rapid fire performance.

Standard Guide Rod vs. Tungsten Guide Rod

The standard guide rod is lighter and comes with a factory spring, while the tungsten version is heavier, reducing recoil and muzzle flip significantly. The tungsten guide rod’s added weight enhances control during rapid fire, allowing for tighter shot groups. It also offers easier slide manipulation due to its lighter spring option, making it ideal for shooters who struggle with slide cycling. This makes the tungsten guide rod a superior choice for performance and usability.

Impact on Slide Cycle and Functionality

The tungsten guide rod’s heavier weight stabilizes the slide cycle, ensuring smoother operation and consistent functionality. It reduces muzzle flip, allowing for faster target reacquisition. The lighter spring option eases slide manipulation, making it accessible for a broader range of shooters. This enhancement maintains reliability while improving controllability, making it a practical upgrade for both concealed carry and competitive shooting scenarios without compromising the pistol’s performance or reliability.

Maintenance and Care

Regular cleaning and lubrication of the tungsten guide rod are crucial for optimal performance. Inspect for wear and tear, ensuring longevity and reliable functionality of your Glock 43.

Cleaning and Lubrication Best Practices

Regularly clean the tungsten guide rod by disassembling and soaking it in a solvent. Use a soft-bristle brush to remove grime and debris. Lubricate lightly with high-quality gun oil, focusing on contact points between the rod and slide. Avoid over-lubrication to prevent attracting dust. Proper maintenance ensures smooth operation, reduces wear, and maintains the reliability of your Glock 43 tungsten guide rod.

Ensuring Longevity and reliability

Ensuring Longevity and Reliability

For optimal longevity, clean and lubricate the tungsten guide rod regularly, focusing on contact points. Avoid harsh chemicals and excessive force during disassembly. Store in a dry environment to prevent corrosion. Proper installation ensures smooth functionality. Follow manufacturer guidelines to maintain performance and reliability, ensuring your Glock 43 tungsten guide rod continues to enhance your shooting experience effectively over time.

Customer Reviews and Feedback

Customers praise the Glock 43 Tungsten Guide Rod for significantly reducing recoil and muzzle flip, enhancing control and accuracy. Many report smoother shooting experiences and faster target reacquisition.

Positive Experiences with the Tungsten Guide Rod

Shooting enthusiasts and concealed carriers highlight the Tungsten Guide Rod’s exceptional performance, noting reduced recoil and muzzle flip. Users appreciate the smoother slide operation and improved accuracy, making rapid fire more controlled. Many find the drop-in installation straightforward and the increased weight beneficial for better handling. Overall, it has become a favorite upgrade for Glock 43 owners seeking enhanced reliability and shooting comfort.

Common Praise for Reduced Recoil

Users consistently praise the Tungsten Guide Rod for significantly minimizing felt recoil and muzzle flip. The added weight stabilizes the pistol, allowing for faster target reacquisition and tighter shot groups. Shooters with smaller hands or those sensitive to recoil particularly appreciate the smoother shooting experience, making the Glock 43 more enjoyable and accurate during practice or self-defense scenarios.

Future of Tungsten Guide Rods

The future of Tungsten Guide Rods lies in expanding compatibility across more Glock models and innovating materials for enhanced performance, ensuring improved shooting experiences.

Upcoming Innovations and Trends

Future innovations for Tungsten Guide Rods include advanced material blends and ergonomic designs. Manufacturers are exploring hybrid materials to further reduce recoil while maintaining durability. Additionally, customizable spring options and modular designs are gaining traction, allowing shooters to tailor the guide rod to their specific needs and preferences. These trends aim to enhance performance and adaptability for various shooting scenarios.

Expanding Compatibility and Options

Manufacturers are broadening the compatibility of Tungsten Guide Rods to include more Glock models, such as the G43X and G48, offering enhanced versatility. They are also introducing variable spring weights and finishes, providing shooters with customization options to suit their preferences and shooting styles. This expansion ensures that more users can benefit from the improved performance and reliability of Tungsten Guide Rods.

The Glock 43 Tungsten Guide Rod is a valuable upgrade, enhancing performance by reducing recoil and improving accuracy, making it a must-have accessory for Glock enthusiasts.

Final Thoughts on the Glock 43 Tungsten Guide Rod

The Glock 43 Tungsten Guide Rod is an excellent upgrade for concealed carry and recreational shooting, offering reduced recoil and muzzle flip. Its heavy tungsten construction provides a smoother shooting experience, enhancing accuracy and control. Designed for drop-in installation, it’s compatible with Glock 43, 43X, and 48 models. With improved functionality and reliability, it’s a highly recommended accessory for Glock enthusiasts seeking enhanced performance.

Recommendation for Potential Buyers

The Glock 43 Tungsten Guide Rod is a must-have for shooters seeking improved performance. Its heavy tungsten construction reduces recoil and muzzle flip, making it ideal for concealed carry and rapid-fire scenarios. Compatible with Glock 43, 43X, and 48, it offers a drop-in installation and enhanced control. Whether for self-defense or recreational shooting, this upgrade provides a smoother, more accurate experience, making it a worthwhile investment for Glock enthusiasts.

Categories
Guide

a neets guide to the parallel world chapter 1

Introducing A NEET’s Guide to the Parallel World: Healer, the Strongest Cheat?, a fantasy adventure following Hidako Masamune, a bullied NEET who enters a new realm, discovers his role as the weakest healer, and uncovers a powerful skill, exploring themes of revenge and self-discovery.

1.1 Overview of the Series and Its Genre

A NEET’s Guide to the Parallel World: Healer, the Strongest Cheat? is a fantasy adventure series blending elements of action, harem, and isekai genres. It follows Hidako Masamune, a bullied NEET, as he navigates a parallel world after an attempted suicide. Despite being labeled the weakest healer, he discovers a powerful cheat skill, setting the stage for themes of revenge, redemption, and self-discovery.

1.2 Importance of Chapter 1 in Setting the Tone

Chapter 1 of A NEET’s Guide to the Parallel World: Healer, the Strongest Cheat? introduces protagonist Hidako Masamune, a bullied NEET, and sets the tone for his journey. It establishes his despair, the sudden transition to a parallel world, and his classification as the weakest healer. This chapter lays the groundwork for themes of revenge, self-discovery, and the exploration of a new reality, hooking readers with its emotional depth and premise.

Main Character Background: Haruto

Haruto, a NEET, leads a reclusive life, escaping reality through games. His mundane existence is disrupted when he transitions to a new world, altering his fate.

2.1 Haruto’s Life as a NEET

Haruto, a reclusive NEET, spends his days confined to his room, escaping reality through video games and online forums. His life is marked by social isolation and a lack of direction, reflecting the struggles of a NEET lifestyle. This mundane existence highlights his disconnection from the world, setting the stage for his eventual transition to a new reality.

2.2 Motivations and Personality Traits

Haruto, driven by a desire to escape his tormented past, seeks revenge against his bullies. His personality evolves from a timid NEET to a determined individual, willing to embrace his new role as a healer. This journey showcases his resilience and growth, transforming him into a formidable character in the parallel world.

The Transition to the Parallel World

Hidako Masamune, a bullied NEET, attempts suicide but is transported to a parallel world with his classmates, initiating a journey filled with unexpected challenges and opportunities.

3.1 The Incident That Leads to the Parallel World

Hidako Masamune, a bullied high school student, attempts suicide but is unexpectedly transported to a parallel world alongside his classmates. This pivotal event marks the beginning of his journey, shifting his fate from despair to a realm of adventure and discovery.

3.2 Initial Reactions and Challenges

Upon arriving in the parallel world, Masamune is met with confusion and despair. While his classmates receive powerful roles like Sage or Hero, he is deemed a healer, the weakest occupation. Mocked and banished, he faces isolation and self-doubt. His journey takes a turn when he discovers the “Mischief Inversion” skill, transforming his perspective and igniting a spark of determination amidst adversity.

The World and Its Rules

The parallel world is a realm of fantasy where roles are assigned based on unknown criteria. Masamune’s classmates receive prestigious titles, while he is labeled a healer.

4.1 Description of the Parallel World

The parallel world is a fantasy realm where magic and unique creatures thrive. It features diverse landscapes and inhabitants, with demons and the white cat tribe playing significant roles. The world operates on a system where individuals are assigned roles, often reflecting their hidden potential, though the criteria remain mysterious.

4.2 Unique Aspects of This New Reality

This parallel world introduces a unique job system, where roles like Healer are deemed weak yet hold latent powers. The presence of demons and the white cat tribe as allies adds depth, while the Mischief Inversion skill offers unexpected advantages. These elements create a rich, layered reality that challenges and empowers its inhabitants in unforeseen ways.

The Role of the Healer

Masamune becomes the weakest job, a Healer, but discovers the Mischief Inversion skill, transforming his role from helpless to uniquely powerful in this new world.

5.1 The Weakest Job in the New World

Masamune is assigned the Healer role, deemed the weakest in the parallel world, leading to disappointment and isolation. His classmates receive powerful roles like Sage or Hero, while he faces ridicule and mistreatment. This underscores his initial struggles and societal expectations, emphasizing his feelings of inadequacy and despair in this new reality.

5.2 The Discovery of the Mischief Inversion Skill

Masamune discovers the Mischief Inversion skill, a unique ability transforming his role as a healer. This skill allows him to invert the effects of his healing, granting him unexpected offensive power. Despite his initial despair, this discovery opens new possibilities, showcasing his potential to redefine his role and challenge the world’s expectations, hinting at future growth and revenge.

Supporting Characters and Their Roles

Classmates with extraordinary abilities, demons, and the white cat tribe play crucial roles, aiding Masamune in his journey and shaping his path in this new world.

6.1 Classmates and Their New Abilities

Haruto’s classmates receive powerful roles such as Sage or Hero, showcasing their extraordinary abilities. This stark contrast with Haruto’s role as a healer emphasizes his initial struggles and the challenges he faces in this new world, while also highlighting the broader story dynamics and character interactions.

6.2 The White Cat Tribe and Demons as Allies

Haruto forms unexpected alliances with the White Cat Tribe and demons, who become invaluable companions. These unique relationships provide him with support and strength, aiding his survival and growth in the parallel world, while adding depth to the story’s diverse cast and cultural elements;

Themes and Messages in Chapter 1

Chapter 1 explores themes of bullying, revenge, and self-discovery, highlighting Haruto’s transformation from a victim to a determined individual seeking justice in a new world.

7.1 The Struggle with Bullying and Revenge

Haruto, a bullied NEET, faces relentless torment in high school, driving him to despair. His transition to a parallel world amplifies his pain as a healer, the weakest role, sparking deep-seated resentment and a burning desire for revenge against those who wronged him, fueling his journey of transformation and retribution.

7.2 Self-Discovery and Growth

Haruto’s journey from a bullied NEET to a healer in a parallel world sparks profound self-discovery. Initially overwhelmed by his role as the weakest, he uncovers the Mischief Inversion skill, transforming his perspective. Through trials and alliances with the white cat tribe and demons, he learns to embrace his uniqueness, finding purpose and growth in his newfound reality.

Initial Impressions and Reactions

Audiences had mixed reactions to Chapter 1, with some finding the premise intriguing while others expressed disappointment due to low expectations and the story’s slow pacing.

8.1 Audience Reception of Chapter 1

The first chapter of A NEET’s Guide to the Parallel World: Healer, the Strongest Cheat? received mixed reviews. Many readers found the premise intriguing, appreciating its unique take on the isekai genre; However, some expressed disappointment, citing slow pacing and underdeveloped characters. The low rating of 2.6 on NovelUpdates reflects a divided audience, with critics highlighting unmet expectations and a lack of depth in the initial setup.

8.2 Critical Reviews and Ratings

Critics gave the first chapter low ratings, with a 2.6 on NovelUpdates. Reviewers noted the story’s potential but criticized its execution. The slow pacing and underdeveloped characters were major drawbacks. Many felt the premise was unoriginal, lacking the depth expected for the genre. Despite its unique elements, the chapter struggled to engage readers, leading to overall disappointment and negative feedback from the community.

Literary Devices and Style

The narrative employs a straightforward style with slow pacing, focusing on dialogue to reveal character traits and develop the plot gradually, keeping readers engaged with its simplicity and clarity.

9.1 Narrative Style and Pacing

The story is told through a third-person perspective, with a straightforward narrative style. The pacing is moderate, allowing readers to absorb the protagonist’s transformation from a bullied NEET to an empowered healer. The text uses simple language, making it accessible while building suspense about Masamune’s journey and the mysteries of the parallel world. The narrative effectively balances action with emotional depth, engaging readers from the start.

9.2 Use of Dialogue and Character Development

The dialogue effectively highlights Haruto’s transformation from a bullied NEET to a determined healer. Conversations with classmates reveal his initial weakness, while interactions with the white cat tribe and demons showcase his growth. The exchanges are concise yet impactful, providing insight into his motivations and the support he receives, enriching his character development and the story’s emotional depth. The dialogue drives the narrative forward, enhancing the protagonist’s journey and relationships. Haruto’s voice evolves, reflecting his newfound confidence and resilience in the face of adversity, supported by his companions who aid his growth and understanding of his role in this new world.

A NEET’s Guide to the Parallel World: Healer, the Strongest Cheat? introduces a compelling narrative of self-discovery and revenge. Chapter 1 sets the stage for Haruto’s journey, hinting at future character growth and world exploration. Readers can anticipate deeper plot developments and the unveiling of the healer’s true potential in upcoming chapters, promising an engaging continuation of Haruto’s adventures.

10.1 Summary of Key Takeaways

A NEET’s Guide to the Parallel World: Healer, the Strongest Cheat? introduces Haruto, a bullied NEET who transitions to a parallel world. Despite being assigned the weakest role of a healer, he discovers the Mischief Inversion skill, offering unexpected potential. The chapter sets up themes of revenge and self-discovery, with audiences expressing mixed reactions to its premise but showing interest in Haruto’s growth and the world’s unique mechanics.

10.2 Anticipation for Upcoming Plot Developments

Readers eagerly await how Haruto will leverage his Mischief Inversion skill to overcome challenges. The dynamics with the White Cat Tribe and demon allies promise intriguing conflicts and alliances. Fans are curious to see how Haruto evolves from the weakest healer to a potential powerhouse, and how the world’s unique mechanics will expand, offering fresh twists and character development in future chapters.

Categories
Guide

t shirt size guide

Discover the ultimate t-shirt size guide to ensure a perfect fit. Learn how chest measurements, fabric type, and fit styles impact your choice. Avoid common mistakes and find your ideal size effortlessly with this comprehensive guide.

Understanding the Importance of Proper Fit

A proper-fitting t-shirt is essential for both comfort and style. Ill-fitting shirts can cause discomfort, restrict movement, or appear unflattering. A shirt that is too tight may feel restrictive, while one that is too loose can look sloppy. Proper fit ensures optimal comfort, allowing you to move freely and maintain a polished appearance. It also enhances confidence, as a well-fitting t-shirt complements your body type. Understanding the importance of proper fit helps you make informed decisions when selecting sizes, ensuring a balance of style and comfort.

Overview of T-Shirt Sizing Charts

T-shirt sizing charts provide a standardized guide to help determine the best fit. These charts typically include measurements for chest, waist, and shirt length, varying by brand and style. While some brands use numeric sizes (S, M, L), others offer detailed measurements in inches or centimeters. International sizing differences, such as US, European, and Asian standards, also play a role. Understanding these charts is crucial for selecting the right size, ensuring comfort, and achieving the desired fit, whether you prefer a regular, slim, or tall style.

How to Measure Yourself for the Perfect Fit

Measure your chest, waist, and hips with a flexible tape measure. Ensure the tape is level and not too tight for accurate sizing.

Chest Measurement: The Key to Choosing the Right Size

Accurate chest measurement is essential for selecting the perfect t-shirt size. Measure around the fullest part of your chest, just under the armpits, with a flexible tape measure. Ensure the tape is level and not too tight. This measurement directly corresponds to the sizing chart, helping you determine whether a small, medium, large, or other size is best. Remember, fabric type and stretch may affect fit, so always refer to the brand’s specific guidelines for precise sizing.

  • Measure under the armpits for the most accurate reading.
  • Fabric stretch and fit style (slim, regular, or tall) can impact size choice.

Waist and Hip Measurements: Additional Factors for Accuracy

While chest measurements are primary, waist and hip measurements add precision to your t-shirt size selection. Measure your waist at its narrowest point and hips at their widest to ensure a balanced fit. These measurements help determine the shirt’s comfort around the midsection, especially for styles like slim or tall fits. Combining these with chest size ensures a more accurate fit, avoiding overly tight or loose clothing. Always measure with a straight, horizontal tape measure for the best results.

  • Waist: Measure at the narrowest point, typically where trousers sit.
  • Hips: Measure at the widest part, keeping feet close together.

Popular T-Shirt Fit Styles

Explore the main t-shirt fit styles, including regular, slim, and tall fits, each catering to different body types and fashion preferences for a personalized look.

Regular Fit: The Classic T-Shirt Style

The regular fit is a timeless choice, offering a comfortable, relaxed silhouette that isn’t too tight or boxy. Perfect for everyday wear, it suits most body types and preferences, providing ease of movement while maintaining a classic look. This style is ideal for those who prefer a traditional fit that’s neither slim nor oversized. Its universal appeal makes it a popular choice for casual outings and layering. Whether you’re looking for versatility or simplicity, the regular fit remains a wardrobe staple for its balanced comfort and style.

Slim Fit: Tailored for a Modern Look

The slim fit T-shirt offers a contemporary, tailored appearance that skims the body without being overly tight. Designed for a modern aesthetic, it’s perfect for those seeking a stylish, form-fitting option. This fit is slightly narrower in the chest and sleeves compared to the regular fit, creating a sleek, streamlined look. Ideal for layering or making a fashion statement, the slim fit is a great choice for individuals who prefer a more polished, trendy silhouette while maintaining comfort and flexibility.

Tall Fit: Designed for Longer Length and Sleeve Adjustments

The tall fit T-shirt is specifically crafted for individuals with a taller frame, featuring extended length and proportionally longer sleeves. This style ensures coverage and comfort, eliminating the need for alterations. Designed to accommodate longer torsos, the tall fit maintains a flattering silhouette without compromising on style. It’s ideal for those seeking a more tailored look while addressing the unique needs of taller body types, offering both functionality and modern aesthetics in one design.

Brand-Specific Sizing Charts

Brand-specific sizing charts vary by manufacturer, such as Gildan and Bella Canvas, offering unique measurements. Always consult the brand’s chart for precise sizing to ensure the best fit.

Gildan and Bella Canvas: Common Measurements and Differences

Gildan and Bella Canvas offer distinct sizing approaches. Gildan’s unisex shirts often feature broader chest measurements, while Bella Canvas focuses on a tailored fit with precise chest and body length. Both brands provide detailed charts, but Gildan’s sizes tend to run larger. Bella Canvas emphasizes a slimmer cut, making it ideal for a modern look. Understanding these differences helps in selecting the right size for a comfortable and stylish fit. Always refer to the specific brand’s chart for accurate measurements.

International Sizing: Comparing US, European, and Asian Standards

Understanding international sizing standards is crucial for a perfect fit. US sizes often run larger than European and Asian sizes, with differences in chest and waist measurements. For example, a US Medium may equate to an EU Medium but fit differently due to regional sizing norms. Asian sizes tend to be more fitted, while European sizes may have longer lengths. Always consult brand-specific charts, as global sizing variations can significantly affect the fit of your t-shirt.

How to Choose the Right T-Shirt Size

Ensure a perfect fit by matching your chest measurements to sizing charts and considering your preferred fit style; Check brand-specific charts and fabric stretch for accuracy.

Using Body Measurements to Match Sizing Charts

Accurate body measurements are key to selecting the right t-shirt size. Measure your chest around the fullest part, ensuring the tape is horizontal. For men, this typically determines the size, while women should also consider waist and hip measurements. Compare these measurements to brand-specific sizing charts, as sizes can vary between brands. Pay attention to international sizing differences, such as US, European, or Asian standards. Using a t-shirt size calculator or comparing your measurements to a favorite fitting shirt can also help ensure accuracy and comfort.

Fabric Type and Stretch: Factors Affecting Fit

Fabric type and stretch significantly impact how a t-shirt fits. Cotton, polyester, and blended fabrics offer varying levels of breathability and elasticity. Stretchy materials like elastane provide a snug fit, while 100% cotton may shrink slightly after washing. Heavier fabrics, such as those used in tall or athletic fits, offer durability but less drape. Consider the fabric’s weight and stretch when choosing a size, as these factors influence comfort and how the shirt molds to your body. This ensures a flattering and comfortable fit tailored to your preferences.

Common Mistakes When Selecting T-Shirt Sizes

Common mistakes include ignoring body type and fit preferences, leading to ill-fitting shirts. Many also fail to account for fabric shrinkage or differences in brand sizing standards.

Ignoring Body Type and Fit Preferences

One major mistake is neglecting your body type and fit preferences. Petite individuals may find regular fits too bulky, while tall or athletic builds might struggle with insufficient length or tightness. Ignoring these factors can lead to shirts that are either too tight or too loose, compromising both comfort and style. Understanding your body type and how it aligns with fit styles (e.g., slim, regular, or tall) is crucial for a flattering and comfortable fit. Always consider these elements when selecting sizes.

Not Considering Shrinkage of Fabrics

Overlooking fabric shrinkage is a common error that can ruin the fit of your t-shirt. Natural fibers like cotton often shrink after washing, especially if not preshrunk. This can cause a shirt that initially fits perfectly to become too tight or short. Always check care labels for shrinkage information and consider sizing up if the fabric is prone to shrinking. Ignoring this factor may lead to discomfort and alterations, so it’s essential to account for potential shrinkage when choosing your size.

T-Shirt Size Guide for Specific Body Types

Find the perfect fit for petite, tall, or athletic builds. Petite frames may prefer shorter lengths, while tall individuals need longer shirts. Athletic builds often require broader chest measurements. Use sizing charts to match your body type for optimal comfort and style.

Petite, Tall, and Athletic Builds: Finding the Best Fit

For petite frames, opt for shorter lengths and slim-fit styles to avoid overwhelming your silhouette. Tall individuals benefit from longer shirts with proportionally adjusted sleeve lengths. Athletic builds require broader chest measurements and slightly longer shirts to accommodate muscle mass. Consider body type-specific sizing charts to ensure comfort and style. Measure chest, waist, and hip to match your body type with the ideal fit. This tailored approach ensures your t-shirt looks great and feels comfortable all day long.

Creating Your Own T-Shirt Size Chart

Use body measurements to craft a custom t-shirt size chart. Measure chest, waist, and hip, then compare with standard sizes. Tools like Placeit templates simplify the process, ensuring a perfect fit tailored to your needs.

Using Placeit Templates for Custom Measurements

Placeit templates offer a convenient way to create custom t-shirt size charts. Simply input your measurements, such as chest, waist, and hip, and the template generates a personalized chart. This tool is ideal for ensuring a precise fit, especially for unique body types or specific styles. With user-friendly interfaces and real-time previews, Placeit simplifies the process of designing a tailored size guide. It’s perfect for individuals or businesses looking to provide accurate sizing options, saving time and reducing errors in measurement calculations.

Caring for Your T-Shirt to Maintain Fit

Proper care ensures your t-shirt retains its shape and size; Wash inside out in cold water, avoid hot dryers, and don’t over-dry to prevent shrinkage and fabric wear.

Washing and Drying Tips to Prevent Shrinkage

To maintain your t-shirt’s fit, wash it inside out in cold water using a gentle detergent. Avoid fabric softeners, as they can affect breathability. Gently reshape the garment while damp to preserve its dimensions. Air-dry by laying it flat or hanging it, avoiding direct sunlight. Never use hot water or dryers, as heat causes shrinkage. If ironing is necessary, use a low setting and avoid the neckline or logos. Proper care ensures your t-shirt stays comfortable and retains its size.

Finding the perfect t-shirt fit ensures comfort and style. Use size charts, consider fabric type, and measure accurately for confidence. Your ideal t-shirt is a wardrobe staple. Happy shopping!

Final Tips for Ensuring a Comfortable and Stylish Fit

For a seamless shopping experience, always measure yourself accurately and consider fabric stretch. Avoid sizing mistakes by checking brand-specific charts and reading reviews. Opt for styles that flatter your body type, whether petite, tall, or athletic. Don’t forget to account for potential shrinkage and choose high-quality materials for durability. By combining these strategies, you’ll find a t-shirt that offers both comfort and style, making it a timeless addition to your wardrobe.

Categories
Guide

blundstones size guide

Discover the perfect fit with Blundstone’s comprehensive size guide. Explore conversion charts, sizing tips, and expert advice to ensure comfort and confidence in your boot choice.

Why Sizing is Important for Blundstone Boots

Proper sizing is crucial for Blundstone boots to ensure comfort, durability, and optimal performance. Ill-fitting boots can lead to discomfort, blisters, or even early wear and tear. Blundstone boots are designed with precise measurements, but their fit can vary due to materials and boot shapes. Incorrect sizing may result in returns or exchanges, which can be inconvenient. Understanding the size guide helps you make informed decisions, ensuring your boots provide the support and comfort you need. Accurate sizing also extends the lifespan of your boots, as they are less likely to be stretched or damaged from poor fit. Measure carefully for the best experience.

Overview of Blundstone Size Chart

Blundstone’s size chart offers a clear, standardized guide to help determine the perfect fit. The chart includes UK/AU, US, and EU sizes, ensuring compatibility across regions. It features measurements in millimeters, focusing on foot length, which is crucial for accurate sizing. The chart also addresses unisex sizing, applicable to most styles, with specific considerations for women’s and kids’ ranges. Half sizes are included, differing in width rather than length, catering to those needing extra space. This comprehensive tool simplifies the selection process, reducing the likelihood of sizing errors and ensuring a comfortable, tailored fit for every wearer.

Understanding Blundstone Sizing

Blundstone sizing uses UK/AU standards, with half sizes offering wider fits. Boots generally fit true to size, while materials and shapes may slightly affect comfort and sizing accuracy.

Blundstone Size Chart: UK/AU vs. US/EU Conversions

Blundstone boots are sized using the UK/AU system, but most retailers provide US/EU conversions for easier selection. For example, a UK size 3 corresponds to a US men’s size 4 and a EU size 34.5. Understanding these conversions is essential for international customers to ensure the right fit.

The size chart typically includes measurements in millimeters, reflecting the boot’s internal length. Half sizes in Blundstone boots increase width, not length, making them ideal for those with wider feet. Referencing the official conversion chart is crucial for accurate sizing, especially for unisex styles that use men’s UK sizes but cater to women’s fits as well.

How Blundstone Boots Fit: True to Size or Not?

Blundstone boots generally fit true to size for most wearers, offering a consistent and reliable fit based on standard UK/AU sizing. However, the fit can vary slightly depending on the boot’s material and design. For example, leather boots may stretch over time, while Chelsea boots with elastic sides provide a snug, flexible fit. If you prefer a roomier fit, considering a half size up is recommended, especially for wider feet. This ensures comfort without sacrificing support.

Ultimately, Blundstone boots are designed to feel comfortable right out of the box, with their anatomical shape hugging the foot naturally. While personal preference plays a role, most users find their usual size works perfectly.

Half Sizes: What They Mean for Fit

Half sizes in Blundstone boots are designed to provide additional width without increasing the length of the footbed. This means the boot’s overall length remains consistent with the full size, but the upper part of the boot features more leather, offering extra space for wider feet. For those who find their foot slightly wider than average, a half size can enhance comfort. However, if you prefer a snug fit, sticking to the full size is recommended. Half sizes are particularly beneficial for achieving a balanced fit without compromising support or length. They cater to individual foot shapes, ensuring a more personalized comfort experience.

How to Measure Your Foot for Blundstone Boots

Measure your foot length in millimeters from the heel to the big toe. Use the larger measurement to find your size using Blundstone’s size chart for the best fit.

Step-by-Step Guide to Measuring Foot Length

To measure your foot length accurately, stand on a flat, hard surface with your foot flat. Use a ruler or Brannock device to measure from the back of your heel to the tip of your longest toe. Ensure your foot is not angled or arched. Take measurements for both feet, as they may differ slightly. Record the larger measurement in millimeters to ensure the best fit. This method aligns with Blundstone’s sizing chart, which is based on the length of the foot. For optimal accuracy, measure later in the day, as feet tend to swell slightly. Use this measurement to find your perfect Blundstone size for comfort and support;

Using the Rule of Toe for Proper Sizing

The Rule of Toe ensures optimal comfort by allowing a small gap between your toes and the boot’s end. When standing, your toes should wiggle freely without pressure. Approximately 1/2 to 1 inch (1.3 to 2.5 cm) of space is ideal. This rule helps prevent tightness and discomfort, especially during long wear. It also accounts for the natural swelling of feet throughout the day. By applying this guideline, you can select a Blundstone size that offers both support and flexibility, ensuring a comfortable fit whether you’re walking, working, or enjoying outdoor activities.

Fitting Tips for Blundstone Boots

Blundstone boots fit true to size, but consider afternoon try-ons as feet swell. Half sizes offer more width, not length. Choose based on comfort and intended use.

How Blundstone Boots Should Feel

Blundstone boots should feel snug but comfortable, with enough room for your toes to wiggle slightly. The boot’s anatomical design provides excellent support, hugging your foot naturally. When first tried on, they should feel firm but not overly tight, as the high-quality leather will mold to your feet over time. Half sizes offer a wider fit without adding length, making them ideal for those with broader feet. Your boots should not feel too loose or restrictive; instead, they should provide a secure, balanced fit that allows for comfort during extended wear. Properly fitted Blundstone boots should feel like a second skin, blending durability with everyday comfort.

Adjusting Fit with Insoles

Using insoles is an excellent way to customize the fit of your Blundstone boots. If your boots feel slightly too roomy or tight, insoles can help adjust the fit to your liking. They can compensate for a boot that feels too snug by reducing internal space or add cushioning for extra comfort. Additionally, insoles can provide arch support or better foot positioning, enhancing overall comfort. Switching out the standard insole with one that suits your foot shape can make a significant difference. This is especially useful if you find your boots almost perfect but need a little extra customization for the ideal fit.

Blundstone Size Guide for Specific Needs

Blundstone offers tailored sizing solutions for men, women, and kids, ensuring comfort for every foot shape and preference. Use conversion charts and specific fit recommendations for accuracy.

Men’s/Unisex Sizing: Key Considerations

Men’s and unisex Blundstone boots are designed with versatility in mind, fitting a wide range of foot shapes. They typically follow UK sizing, which may require converting from US or EU sizes. For those with wider feet, half sizes offer additional space without extra length. The anatomical design provides excellent support and comfort, making them ideal for both casual and work environments. To ensure the best fit, measure your foot length and refer to the official size chart. Consider the boot’s material and shape, as these can influence how they feel. Proper sizing ensures all-day comfort and durability.

Women’s Sizing: Differences and Recommendations

Blundstone offers tailored sizing for women, with specific styles designed to accommodate feminine foot shapes. While most boots are unisex, women’s sizes are converted from the UK/AU chart. For the best fit, women may need to size down by one to two sizes compared to their US size. Measure your foot length and refer to the official size chart for accuracy. Half sizes provide additional width without extra length, ideal for wider feet. Consider the boot’s material and shape, as these can influence comfort. Proper sizing ensures all-day comfort and durability, making Blundstone boots a versatile choice for any occasion.

Kids’ Sizing: Ensuring the Right Fit

Blundstone offers a range of sizes for kids, ensuring a comfortable and supportive fit. Their boots are designed to accommodate growing feet, with sizes based on the UK/AU chart. To determine the right size, measure your child’s foot length and compare it to the size chart. Blundstone boots fit true to size, but consider future growth when selecting. Half sizes provide additional width, which can be beneficial for wider feet. Proper sizing is crucial for comfort and support. Refer to the official size guide for accurate measurements and ensure the best fit for your child’s active lifestyle with Blundstone boots.

Common Mistakes to Avoid

Common mistakes include ignoring boot shape, material differences, and width. Not using the size chart or assuming unisex sizes fit all without checking can lead to poor fit.

Not Considering Boot Shape and Material

One common mistake is not accounting for boot shape and material differences. Blundstone boots come in various styles, from Chelsea boots to lace-up designs, each fitting differently. The material, such as leather type, can affect how the boot molds to your foot. Ignoring these factors may lead to a poor fit. For instance, a softer leather may stretch more, while a stiffer material might require a slightly larger size. Always check the specific boot’s features and consider trying them on or consulting the size chart for the best fit. This ensures comfort and prevents the need for returns or adjustments. Proper consideration of these elements is key to finding your ideal pair.

Ignoring the Importance of Width

Overlooking boot width can lead to discomfort and poor fit. Blundstone offers half sizes, which increase width without adding length, ideal for those with wider feet. Neglecting width may result in tightness or pressure points, especially in styles with structured uppers. Always consider your foot’s width when choosing a size. If unsure, opt for a half size to accommodate a broader fit. Proper width ensures all-day comfort and prevents blisters or discomfort. Don’t compromise on width—prioritize it for the best fit and long-lasting wear. This attention to detail makes a significant difference in the overall comfort of your Blundstone boots.

Finding your perfect Blundstone fit ensures comfort and confidence. Use this guide’s tips to make informed choices and enjoy your boots to the fullest.

Final Tips for Finding Your Perfect Blundstone Fit

Ensure a comfortable and precise fit by following these essential tips: measure your foot accurately, consider the boot’s shape and material, and refer to the official size chart. Remember, Blundstone boots are true to size but may vary slightly due to material stretch. If between sizes, opt for a half size for a wider fit. Don’t hesitate to use insoles for adjustment and consider virtual fittings for expert advice. Prioritize your foot’s comfort to enjoy the durability and style Blundstone boots offer. Happy shopping and enjoy your perfect pair!

Categories
Guide

tv guide bozeman mt

Discover the ultimate Bozeman‚ MT TV Guide‚ offering detailed listings for local channels‚ major networks‚ and streaming services. Find your favorite shows and optimize your viewing experience with our comprehensive guide.

1.1 Overview of TV Listings in Bozeman‚ Montana

Bozeman‚ Montana‚ offers a diverse range of TV listings catering to various viewer preferences. Residents can access local channels‚ major networks‚ and streaming services‚ ensuring a wide selection of entertainment‚ news‚ and sports. Over-the-air broadcasts provide free access to channels like ABC‚ Fox‚ and PBS‚ while cable and satellite providers such as Montana Opticom and DirecTV offer expanded channel lineups. Streaming services like Hulu and fuboTV also enable viewers to watch their favorite shows on-demand. With detailed TV guides available online and through mobile apps‚ users can easily navigate schedules‚ set reminders‚ and plan their viewing experience. Whether you’re a fan of local news‚ sports‚ or primetime series‚ Bozeman’s TV listings have something for everyone‚ making it simple to stay entertained and informed.

1.2 Importance of TV Guides for Local Viewers

TV guides play a crucial role for viewers in Bozeman‚ Montana‚ by providing essential information to navigate the vast array of channels and programs. They help users discover new shows‚ track favorite series‚ and stay updated on local news and events. With the rise of streaming services‚ TV guides also assist in managing content across multiple platforms‚ ensuring viewers never miss an episode. Additionally‚ TV guides enable users to optimize their viewing experience by highlighting popular and trending shows‚ making it easier to plan their entertainment schedule. For local audiences‚ these guides are indispensable‚ offering a centralized resource to explore and enjoy the diverse range of available programming.

TV Service Providers in Bozeman‚ MT

Explore top TV service providers in Bozeman‚ MT‚ including over-the-air‚ cable‚ satellite‚ and streaming services. Choose the best option for your entertainment needs and budget.

2.1 Over-the-Air TV Providers

Over-the-air (OTA) TV providers in Bozeman‚ MT‚ offer free access to local channels using an antenna. Popular options include TVGuide.com and AntennaWeb.org for channel lineups. Residents can enjoy major networks like ABC‚ CBS‚ and FOX‚ as well as local stations such as CH 7.1‚ 7.2‚ 7.3‚ and 7.4‚ which broadcast shows like Suits LA and Wild Kratts. OTA TV is a cost-effective way to watch live programming without subscription fees. Ensure optimal reception by choosing the right antenna and periodically rescanning for available channels. This method is ideal for viewers seeking free‚ high-definition content and local news updates.

2.2 Cable TV Providers

In Bozeman‚ MT‚ cable TV providers such as Montana Opticom offer a wide range of channels and services. These providers deliver both local and national programming‚ including sports‚ news‚ and entertainment. Cable TV packages often include HD channels‚ premium networks‚ and on-demand content. Viewers can access popular shows‚ live events‚ and exclusive series through these services. For example‚ Montana Opticom provides digital cable options tailored to different viewer preferences. With cable TV‚ residents can enjoy reliable access to their favorite programs without the need for an antenna. It’s a convenient option for those seeking a diverse channel lineup and advanced features like DVR capabilities. Always check the provider’s channel lineup to ensure it includes your preferred networks and shows.

2.3 Satellite TV Providers

Satellite TV providers like DirecTV and DISH Network are popular choices for viewers in Bozeman‚ MT. These services offer a wide range of channels‚ including local networks‚ sports‚ movies‚ and premium content. Satellite TV is ideal for residents in areas where cable or fiber-optic services may be limited. Providers often include features like HD programming‚ DVR capabilities‚ and flexible package options. For example‚ DirecTV in Bozeman offers access to major networks such as ABC‚ CBS‚ and NBC‚ along with sports and entertainment channels. Satellite TV ensures reliable access to a diverse channel lineup‚ even in rural areas. Check with providers for specific packages and promotions available in your region to enhance your viewing experience with a variety of content options.

2.4 Streaming Services Available in Bozeman

Streaming services have become a popular choice for viewers in Bozeman‚ offering flexible and cost-effective entertainment options. Platforms like Hulu‚ fuboTV‚ and Amazon Prime Video provide access to live TV‚ on-demand content‚ and exclusive series. These services often include local channels‚ sports‚ and news‚ catering to diverse viewer preferences. For instance‚ Hulu offers a range of TV shows‚ movies‚ and live sports‚ while fuboTV focuses on sports and live events. Amazon Prime Video includes original content and add-on channels for additional programming. Streaming services in Bozeman allow users to customize their viewing experience without the need for traditional cable or satellite equipment; With reliable internet access‚ residents can enjoy their favorite shows and movies anytime‚ making streaming a convenient and modern choice for entertainment.

Popular TV Channels in Bozeman‚ MT

Bozeman viewers enjoy a variety of channels‚ including ABC‚ Fox‚ CBS‚ and NBC affiliates‚ plus local stations like KBZK and KWYB‚ offering news‚ sports‚ and entertainment for all interests.

3.1 Major Broadcast Channels

Bozeman‚ Montana‚ offers a diverse range of major broadcast channels‚ ensuring a wide variety of programming for viewers. These include ABC‚ CBS‚ NBC‚ and Fox affiliates‚ which provide national news‚ popular TV shows‚ and live sports events. Additionally‚ PBS is available‚ offering educational and cultural content. Local stations like KBZK (CBS affiliate) and KWYB (ABC/Fox affiliate) cater to regional interests‚ delivering local news‚ weather updates‚ and community-focused programs. These channels are accessible through various service providers‚ including over-the-air antennas‚ cable TV‚ and satellite services. With such a robust lineup‚ residents and visitors in Bozeman can enjoy a rich television experience tailored to their preferences and needs.

3.2 Local News and Weather Channels

Stay informed with Bozeman’s local news and weather channels‚ which provide essential updates for the community. Channels like KBZK and KWYB offer comprehensive local news coverage‚ including current events‚ sports‚ and community stories. For weather updates‚ stations such as MTN News deliver accurate forecasts and severe weather alerts‚ crucial for outdoor enthusiasts and commuters. These channels ensure viewers stay connected to what’s happening in Bozeman and surrounding areas. Their programming is accessible via over-the-air broadcasts‚ cable‚ and streaming services‚ making it easy to stay informed wherever you are.

How to Access TV Listings in Bozeman‚ MT

Access Bozeman’s TV listings through online guides‚ mobile apps‚ or provider websites‚ ensuring you never miss your favorite shows with real-time updates and schedules.

4.1 Online TV Guides and Websites

Online TV guides and websites are the primary sources for accessing TV listings in Bozeman‚ Montana. Websites like TVGuide.com and Channel Master provide detailed schedules for local channels‚ including both over-the-air and cable networks. These platforms allow users to filter listings by zip code‚ ensuring accurate and personalized results. For instance‚ residents in Bozeman can input zip codes like 59715 or 59718 to view specific channel lineups and showtimes. Many sites also offer features like program reminders and the ability to customize viewing preferences. Additionally‚ online guides often include links to streaming services‚ making it easier to switch between traditional TV and digital platforms. With real-time updates and user-friendly interfaces‚ online TV guides are an essential tool for staying informed about Bozeman’s television offerings.

4.2 Mobile Apps for TV Listings

Mobile apps are a convenient way to access TV listings on the go in Bozeman‚ Montana. Popular apps like TV Guide and Channel Master offer personalized TV schedules based on your location. By entering your zip code‚ such as 59715 or 59718‚ you can view channel lineups‚ set reminders for favorite shows‚ and even stream content directly. These apps often include features like customizable watchlists and real-time updates‚ ensuring you never miss your favorite programs. Additionally‚ many apps provide details about upcoming episodes‚ cast information‚ and ratings‚ making it easier to plan your viewing experience. Whether you’re using an iOS or Android device‚ mobile apps are a reliable and user-friendly option for staying connected to Bozeman’s TV listings wherever you are.

Tips for Optimizing TV Viewing Experience

Enhance your viewing pleasure by choosing the right antenna and performing regular channel rescans to ensure access to all available channels in Bozeman‚ MT;

5.1 Choosing the Right Antenna for Over-the-Air TV

Choosing the right antenna is crucial for optimal over-the-air TV viewing in Bozeman‚ MT. Consider your location and the strength of local signals. Indoor antennas are convenient but may struggle with weak signals‚ while outdoor antennas offer better reception but require installation. Amplified antennas can boost signal strength for clearer channels. Check local broadcast listings to ensure your antenna supports the frequencies used by Bozeman’s stations. Rescan for channels regularly to update your TV’s list of available stations. Use tools like TVGuide.com to identify the best channels and antennas for your area. Proper antenna selection ensures access to free HD content‚ including major networks like ABC and Fox‚ and local news channels.

5.2 Rescan for Available Channels

Rescanning for available channels is essential to ensure you receive all over-the-air TV stations in Bozeman‚ MT. This process updates your TV’s channel lineup‚ reflecting any changes or new stations. Rescan regularly‚ such as monthly‚ to maintain access to local broadcasts like ABC‚ Fox‚ and SWX. Changes in broadcast frequencies or new channel additions can require a rescan. To do this‚ go to your TV’s settings‚ select the channel menu‚ and choose “rescan” or “auto-tune.” This quick process is free and ensures you enjoy all available HD content. If you encounter issues‚ consult your TV’s user manual or online guides for assistance. Rescanning keeps your channel lineup current and enhances your viewing experience in Bozeman.

Categories
Guide

guide railing

Guide railings are essential structures designed to provide support, balance, and safety in various environments. Commonly found in public spaces, staircases, and walkways, they ensure accessibility and prevent accidents. Made from durable materials, they offer stability and convenience, enhancing overall safety standards.

Importance of Guide Railings

Guide railings play a crucial role in ensuring safety, accessibility, and convenience in various settings. They provide structural support and balance, particularly for individuals with mobility challenges, elderly persons, or those navigating stairs or uneven surfaces. By preventing accidental falls and injuries, guide railings significantly enhance safety standards in public spaces, workplaces, and residential areas. Their presence also contributes to compliance with accessibility laws and building codes, ensuring that environments are inclusive for everyone. Additionally, guide railings act as protective barriers in high-traffic areas, such as pedestrian walkways, stadiums, or public transportation hubs, minimizing collisions and crowding. Their durability and reliability make them a vital component in maintaining order and safety in both indoor and outdoor environments. Overall, guide railings are indispensable for creating secure, user-friendly, and accessible spaces, making them a fundamental feature in modern infrastructure design.

Types of Guide Railings

Guide railings come in various types, each designed to suit specific environments and needs. Common types include metal railings, often made from stainless steel or aluminum, known for their durability and modern appearance. Wooden railings offer a traditional look and are frequently used in classic settings. Glass railings provide a sleek, contemporary option and are favored for their transparency. PVC or plastic railings are cost-effective and low-maintenance, commonly found in public areas like parks. Cable railings feature a minimalist design with cables between posts, popular in modern architecture. Additionally, wrought iron railings combine decorative elements with strength, and hybrid designs blend materials like metal and wood for both aesthetics and durability. The choice of railing type depends on factors such as location, weather conditions, and intended use, ensuring functionality and style are balanced effectively.

Materials Used in Guide Railings

Guide railings are constructed from a variety of materials, each offering unique benefits and suitability for different environments. Stainless steel and aluminum are popular choices due to their durability, corrosion resistance, and modern aesthetic appeal. Wood is another common material, often preferred for its classic look and ability to blend with traditional designs. Glass railings are favored for their transparency and sleek appearance, making them ideal for contemporary spaces. PVC or vinyl railings are cost-effective, low-maintenance, and resistant to weathering, often used in outdoor settings. Wrought iron railings combine strength with decorative elements, while concrete and stone railings provide a robust and timeless option. Composite materials, blending wood and synthetic components, offer enhanced durability and minimal upkeep. The choice of material depends on factors such as weather exposure, budget, and desired appearance, ensuring the railing system is both functional and visually appealing.

Installation and Maintenance

The installation of guide railings requires careful planning and precise execution to ensure safety and functionality. Professionals typically begin by assessing the site to determine the best placement and alignment of the railings. Anchoring systems, such as brackets or posts, are securely fastened to the ground or walls to provide stability. The materials chosen for the railings are then attached to these anchors, ensuring a sturdy and even surface. Proper alignment and level checking are critical to avoid tripping hazards.

Maintenance is equally important to prolong the lifespan of guide railings. Regular inspections are necessary to identify any damage, wear, or loosening of components. Cleaning the railings to remove dirt, grime, or corrosion ensures they remain durable and visually appealing. For materials like wood or metal, applying protective coatings or finishes can prevent degradation. In cases of damage, prompt repairs or replacements of faulty parts are essential to maintain safety standards. Additionally, lubricating moving parts, such as hinges or joints, can ensure smooth operation and prevent rust buildup.

By adhering to a consistent maintenance schedule, guide railings can continue to serve their purpose effectively, providing support and safety for years to come.

Safety Standards and Compliance

Safety standards and compliance are critical when installing and maintaining guide railings. These structures must adhere to local building codes, accessibility regulations, and safety guidelines to ensure they provide effective support and prevent accidents. Regulatory bodies, such as the International Building Code (IBC) and the Americans with Disabilities Act (ADA), outline specific requirements for railing height, spacing, and load-bearing capacity. For instance, handrails must be graspable, with a diameter between 1.25 and 2 inches, and they should be continuous along staircases and ramps.

Compliance also involves materials and construction; Railings must withstand specific weight limits to ensure durability and reliability. Regular inspections are essential to identify any wear or damage that could compromise safety. Non-compliance with these standards can lead to legal issues, financial penalties, and increased risk of accidents. Therefore, adhering to safety standards is not only a legal requirement but also a moral obligation to protect users.

By following established guidelines, guide railings can effectively serve their purpose while meeting the necessary safety and regulatory expectations. This ensures a safe and accessible environment for everyone. Regular updates to standards should also be monitored to maintain long-term compliance and safety.

Design Considerations

Design considerations for guide railings focus on functionality, aesthetics, and user experience. The primary goal is to create railings that are both visually appealing and highly functional, ensuring they blend seamlessly with their surroundings. Key factors include the height, shape, and material of the railings, which must align with the intended use and environment. Ergonomic design principles are crucial, such as ensuring handrails are easy to grip and provide adequate support for users of all ages and abilities.

Load-bearing capacity and structural integrity are also critical design elements. Railings must be designed to withstand expected weight and stress, particularly in high-traffic areas. Customization options, such as color, texture, and style, allow guide railings to complement architectural designs while maintaining safety standards. Additionally, integrating lighting or wayfinding elements can enhance both functionality and visual appeal.

Environmental factors, such as weather resistance and durability, must also be considered. Designers should select materials and finishes that can withstand harsh conditions, ensuring long-term performance. By balancing practicality with creativity, guide railings can serve as both functional safety features and attractive design elements. Regular maintenance and inspections further ensure their effectiveness over time.

Cost and Budgeting

When planning for guide railings, cost and budgeting are critical considerations. The total expense depends on factors such as materials, size, design complexity, and installation requirements. Materials like aluminum, steel, or wood vary in price, with aluminum being more affordable and durable, while wood may be chosen for aesthetic reasons but requires higher maintenance costs. Installation costs also vary based on the location, with labor fees differing by region and project complexity.

Budgeting tips include setting a clear financial plan and prioritizing essential features over decorative elements. Comparing quotes from multiple suppliers or contractors can help identify cost-effective options. Additionally, considering long-term maintenance and repair costs is crucial, as they can impact the overall budget. By balancing quality, functionality, and aesthetics, guide railings can be installed within a reasonable budget while meeting safety and design standards. Proper planning ensures that the investment provides lasting value and safety benefits.

Environmental Impact

Guide railings can have varying environmental impacts depending on their materials, manufacturing processes, and lifecycle. Sustainable materials, such as recycled metals or FSC-certified wood, are increasingly used to minimize ecological footprints. Aluminum, for instance, is highly recyclable, making it a popular choice for eco-conscious projects. Conversely, materials like PVC may pose environmental concerns due to their non-biodegradable nature and potential chemical emissions during production.

The manufacturing process also plays a role in determining environmental impact. Energy-efficient production methods and coatings that reduce chemical emissions can significantly lower the carbon footprint of guide railings. Maintenance practices, such as using durable, weather-resistant materials, can extend the lifespan of railings, reducing the need for frequent replacements and waste generation. At the end of their lifecycle, proper recycling or responsible disposal of materials is crucial to prevent environmental harm. By prioritizing sustainable materials and practices, guide railings can be designed and installed with minimal ecological disruption, aligning with modern environmental standards and promoting greener infrastructure.

Case Studies and Examples

Guide railings are widely implemented in various settings to enhance safety and accessibility. For instance, in a busy shopping mall, glass railings were installed along escalators and balconies to provide a modern aesthetic while ensuring customer safety. Similarly, metal railings were chosen for a train station to withstand heavy foot traffic and harsh weather conditions.

In a hospital setting, continuous railings were mounted along corridors to assist patients and staff with mobility challenges. The railings were designed with smooth, easy-grip surfaces to accommodate different user needs. Another example is a school where colorful, durable plastic railings were installed to match the playful environment while maintaining safety standards.

These examples demonstrate how guide railings adapt to different environments, materials, and purposes, showcasing their versatility and importance in ensuring safety and accessibility across various industries and public spaces.

The examples highlighted in this guide demonstrate the versatility of guide railings, showcasing how they adapt to different settings and needs. Whether in staircases, walkways, or public transportation, their role in enhancing safety and accessibility remains consistent. As safety standards and design innovation continue to evolve, guide railings will remain a fundamental component in promoting well-being and ease of movement for everyone.

Ultimately, guide railings are more than just structural elements; they are essential tools for creating environments that prioritize safety, accessibility, and user comfort. Their continued use and development ensure that spaces remain safe and functional for years to come.

Categories
Guide

compression sock size guide

Compression socks are specially designed to improve blood circulation, reduce swelling, and provide support for legs; They are widely used for medical, athletic, and everyday comfort needs.

1.1 What Are Compression Socks?

Compression socks are snug-fitting, stretchy garments designed to gently squeeze the leg, promoting blood flow and reducing swelling. They are typically used to alleviate symptoms of varicose veins, prevent blood clots, and enhance circulation. These socks are popular among athletes for performance and recovery and are also recommended for medical conditions. They come in various compression levels measured in mmHg, offering tailored support for different needs.

1.2 Benefits of Using Compression Socks

Compression socks enhance blood circulation, reduce leg swelling, and provide support for individuals with medical conditions or those seeking comfort during physical activity. They help prevent blood clots, alleviate symptoms of varicose veins, and improve overall leg health. Athletes benefit from faster recovery and reduced muscle fatigue, while others enjoy relief from long periods of standing or sitting.

Understanding Compression Levels

Compression levels, measured in mmHg, determine the pressure applied by socks. They aid blood flow, with options suited for medical, athletic, or everyday use, enhancing comfort and performance.

2.1 What Is mmHg and How Does It Relate to Compression?

mmHg (millimeters of mercury) measures the pressure applied by compression socks. It indicates how tightly the sock squeezes the leg, with higher mmHg meaning greater compression. This pressure gradient helps improve blood flow, reducing swelling and discomfort. Proper mmHg levels are crucial for effectiveness, ensuring the sock is neither too loose nor too tight. Always consult a size guide to match your needs with the right compression level.

2.2 Different Compression Levels and Their Uses

Compression levels vary from light (8-15 mmHg) to extra firm (30-40 mmHg). Light compression aids circulation for everyday wear, while moderate (15-20 mmHg) supports sports and travel. Firm (20-30 mmHg) is for medical conditions like varicose veins, and extra firm (30-40 mmHg) is typically prescribed for severe swelling or post-surgery recovery. Choosing the right level ensures optimal comfort and effectiveness for specific needs.

Measuring for the Right Fit

Accurate measurements of your ankle, calf, and shoe size are essential for selecting the correct compression sock size, ensuring proper fit and optimal benefits for circulation.

3.1 How to Measure Your Calf Circumference

To measure your calf circumference, stand up and wrap a flexible tape measure around the widest part of your calf. Ensure the tape is level and not too tight. Record the measurement in inches or centimeters. This step is crucial for determining the correct compression sock size, as calf size varies significantly among individuals. Always refer to the manufacturer’s size chart for accurate fitting. Measure both legs, as sizes may differ slightly.

3.2 How to Measure Your Ankle Circumference

To measure your ankle circumference, stand up and wrap a flexible tape measure around the widest part of your ankle, just above the ankle bone. Ensure the tape is level and not too tight. Record the measurement in inches or centimeters. This measurement, along with your calf circumference, helps determine the correct compression sock size. Measure both ankles, as sizes may differ slightly, and refer to the manufacturer’s size chart for accurate fitting.

3.3 The Importance of Shoe Size in Sizing

Your shoe size is crucial for determining the correct compression sock fit. It helps ensure the sock’s foot length aligns with your footwear, preventing discomfort or restricted movement. Matching your shoe size to the sock’s size chart ensures a proper fit, especially in the toe and heel areas. This alignment is vital for both comfort and effectiveness of the compression sock.

How Compression Levels Affect Size

Compression levels influence fit, with higher mmHg offering firmer support but potentially feeling tighter. Balancing compression and comfort ensures proper sizing and effectiveness for your needs.

4.1 How Different Compression Levels Impact Fit

Different compression levels significantly affect the fit of socks. Lower mmHg levels, like 8-15 mmHg, provide mild support and are suitable for everyday use. Higher levels, such as 20-30 mmHg, offer firmer pressure, which can feel tighter but are ideal for medical needs or intense activities. Proper sizing ensures the compression level feels comfortable and effective without restricting movement or causing discomfort. Balancing compression strength with personal comfort is key to achieving the best results.

4.2 Graduated Compression and Its Effect on Sizing

Graduated compression socks apply varying pressure, tighter at the ankle and looser as they move up the leg. This design enhances blood flow without compromising comfort. While compression levels are standardized, sizing can vary by brand, so measuring calf and ankle circumference is essential. Proper fit ensures the compression gradient works effectively, but sizing may differ across manufacturers, requiring users to consult specific size charts for accuracy and comfort.

Choosing the Right Fabric

Fabric selection is crucial for comfort and performance. Look for breathable, moisture-wicking materials like cotton, wool, or synthetic blends to ensure durability and optimal circulation support.

5.1 Importance of Fabric in Compression Socks

Fabric plays a vital role in compression socks, impacting comfort, moisture management, and durability. Breathable materials like cotton, wool, or synthetic blends wick sweat, preventing odors and blisters. Soft fabrics enhance comfort, while strong materials maintain compression. The right fabric ensures optimal performance for sports, medical needs, or everyday wear, balancing support and comfort effectively.

5.2 How Fabric Affects Comfort and Performance

Fabric significantly influences the comfort and performance of compression socks. Moisture-wicking materials prevent chafing and keep feet dry, enhancing comfort during activities. Soft fabrics reduce irritation, while durable options maintain compression longevity. Breathable textiles promote airflow, regulating temperature and preventing blisters. The right fabric ensures sustained support, comfort, and hygiene, making it crucial for both athletic and medical uses.

Factors Influencing Compression Sock Size

Compression sock size is influenced by calf circumference, ankle size, shoe size, and activity level. Proper measurements ensure optimal fit, comfort, and effectiveness.

6.1 How Activity Level Affects Size Selection

Your activity level significantly impacts compression sock size selection. Athletes or highly active individuals often require tighter fits for enhanced support and performance. Conversely, less active users may prefer looser compression for comfort. Proper sizing ensures the right balance between support and mobility, catering to specific activity demands effectively.

6.2 How Shoe Size Correlates to Compression Sock Size

Shoe size often serves as a starting point for selecting compression sock sizes, as it correlates with foot length. However, calf and ankle measurements are equally important for a proper fit. While shoe size provides a general guideline, precise sizing may vary by brand, emphasizing the need to consult a size chart for accurate measurements.

Compression Sock Size Chart

Compression sock size charts typically range from Small to Double XL, based on calf and ankle measurements, ensuring a proper fit for optimal comfort and effectiveness.

7.1 Standard Size Charts for Compression Socks

Standard size charts for compression socks typically categorize sizes from Small to Double XL, based on calf and ankle measurements. These charts often correlate shoe size to sock size, ensuring a proper fit. Manufacturers provide specific guidelines, accommodating calf sizes from 10-20 inches and shoe sizes from women’s 4 to men’s 15. Accurate measurements are crucial for optimal comfort and effectiveness.

7.2 How to Read and Use a Size Chart Effectively

To effectively use a compression sock size chart, start by locating it on the manufacturer’s website or packaging. Match your measured calf and ankle sizes to the chart, ensuring alignment with your shoe size. Consider compression levels and fabric preferences. Accurate measurements and proper fit are essential for comfort and performance. Always refer to the chart specific to the brand and style you’re purchasing.

Special Considerations

Special considerations include medical conditions, activity levels, and ensuring proper fit without compromising comfort or performance. These factors ensure optimal benefits from compression socks.

8.1 Compression Socks for Medical Conditions

Compression socks are often prescribed for medical conditions like varicose veins, swelling, and poor circulation. They help reduce leg fatigue and prevent blood clots. For post-surgery recovery, they improve circulation and minimize swelling. Doctors recommend specific mmHg levels, such as 20-30 mmHg, to address medical needs effectively. Proper sizing is crucial to ensure they provide the right support without causing discomfort.

8.2 Compression Socks for Athletic Activities

Compression socks are popular among athletes to enhance performance and aid recovery. They improve blood flow, reduce muscle fatigue, and provide support during physical activity. Runners and cyclists often use them to boost endurance and prevent swelling. Compression levels vary, with 15-20 mmHg for moderate activity and 20-30 mmHg for intense sports. Proper sizing ensures optimal comfort and effectiveness during workouts.

Common Mistakes to Avoid

  1. Choosing the wrong compression level can lead to discomfort or ineffective support.
  2. Measuring incorrectly or not at all results in a poor fit.

9.1 Choosing the Wrong Compression Level

Choosing the wrong compression level is a common mistake that can lead to discomfort or ineffective support. Lower compression (8-15 mmHg) is suited for mild swelling, while higher levels (20-30 mmHg or more) are typically for medical conditions. Selecting a compression level too high or too low can result in poor circulation, discomfort, or inadequate support. Always consult a size chart or expert advice to determine the right level for your needs.

9.2 Measuring Incorrectly or Not at All

Measuring incorrectly or skipping measurements altogether can lead to an improper fit, reducing the effectiveness of compression socks. Incorrect sizing may cause discomfort, poor circulation, or inadequate support. Always measure calf and ankle circumference accurately, as sizes vary by manufacturer; Failure to measure can result in socks that are too tight or too loose, defeating their purpose. Proper measurement ensures optimal comfort and performance.

Selecting the right compression socks involves understanding your needs, measuring accurately, and choosing the correct compression level and fabric. Proper fit ensures improved comfort and performance.

10.1 Key Takeaways for Choosing the Right Compression Socks

Key takeaways include measuring calf and ankle circumference, referring to size charts, and understanding mmHg levels. Choose fabric based on comfort and activity, ensure proper fit, and avoid overly tight socks. Consider medical needs, activity levels, and consult a size guide for accuracy. Proper fit enhances comfort, performance, and health benefits, making informed decisions crucial for optimal results.

10.2 Final Tips for Ensuring a Proper Fit

Ensure a proper fit by measuring calf and ankle circumference accurately, referencing size charts, and trying socks on in the morning. Avoid overly tight or loose socks, as this can compromise comfort and effectiveness. Check for fabric breathability, moisture-wicking properties, and seamless construction for enhanced comfort. Consider activity level and medical needs when selecting compression levels. Always follow manufacturer guidelines for sizing and care.