Categories
Manuals

nikon d810 instruction manual

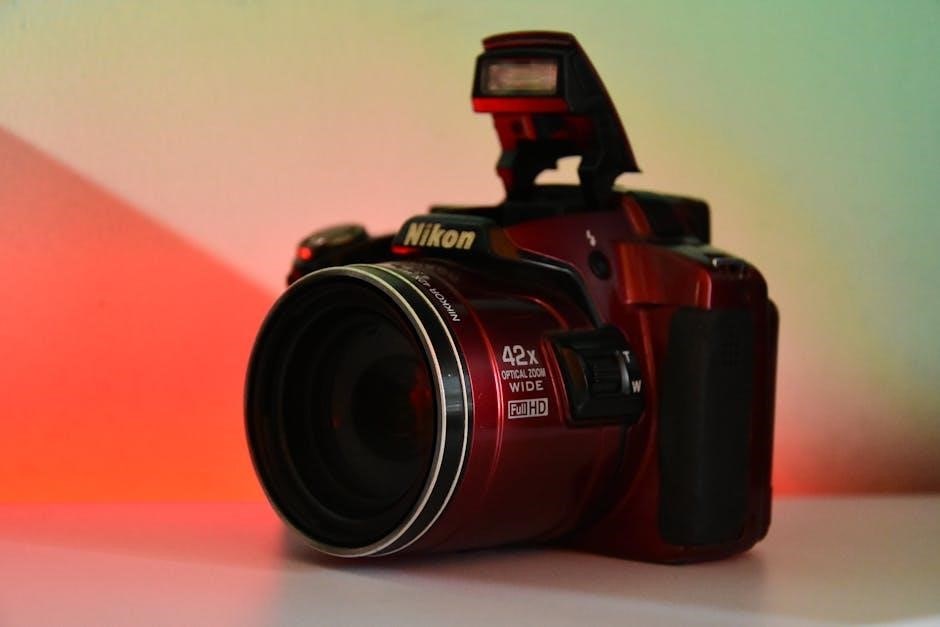
The Nikon D810 is a high-performance DSLR camera designed for professional photographers‚ offering a 36.3-megapixel FX-format CMOS sensor for exceptional image quality and versatility. Its comprehensive manual provides detailed guidance on mastering the camera’s advanced features‚ ensuring users can unlock its full potential for stunning photography.

Overview of the Nikon D810

The Nikon D810 is a professional-grade DSLR camera featuring a 36.3-megapixel FX-format CMOS sensor‚ designed to deliver exceptional image quality with detailed resolution and low noise. It supports an ISO range of 64-12‚800‚ extendable to 32-51‚200‚ ensuring versatility in various lighting conditions. The camera is equipped with a 3.2-inch LCD screen with adjustable color balance‚ allowing for precise image review. Its 51-point autofocus system provides fast and accurate subject tracking‚ while the continuous shooting mode captures up to 7 frames per second. The D810 also supports full HD video recording at 1080p‚ making it a versatile tool for both photographers and videographers. The comprehensive manual provides in-depth guidance on utilizing these features‚ ensuring users can maximize the camera’s capabilities for professional results.

Key Features of the Nikon D810

The Nikon D810 boasts a 36.3-megapixel FX-format CMOS sensor‚ ensuring high-resolution images with excellent detail and dynamic range. It features an ISO range of 64-12‚800‚ expandable to 32-51‚200‚ making it ideal for low-light photography. The camera includes a 51-point autofocus system with 15 cross-type sensors‚ providing precise subject tracking and focus acquisition. The EXPEED 4 image-processing engine enhances image quality and reduces noise. Video capabilities include full HD 1080p at 60/50/30/25/24p‚ with manual controls and external microphone support. The 3.2-inch color-tuned LCD monitor offers adjustable brightness and wide viewing angles. Additional features include a weather-sealed magnesium alloy body‚ dual memory card slots‚ and compatibility with Nikon’s extensive range of NIKKOR lenses. The included manual thoroughly explains how to utilize these features to achieve professional-grade results in both still photography and video production.

First Impressions and User Expectations

Upon first encountering the Nikon D810‚ users are often impressed by its robust build quality and professional-grade features. The camera’s solid magnesium alloy body conveys durability‚ while its intuitive controls and ergonomic design promise ease of use. New users typically expect exceptional image quality‚ given its 36.3-megapixel sensor‚ and are eager to explore its advanced capabilities. The detailed manual helps bridge the learning curve‚ guiding users through setup and customization. Many photographers migrating from other systems appreciate the comprehensive guidance‚ which simplifies the transition. The manual’s thorough explanations of features like autofocus‚ metering‚ and video modes instill confidence. While the camera’s complexity may seem daunting at first‚ the manual assures users they can master its tools and unlock its full potential. This balance of power and accessibility makes the D810 a favorite among both enthusiasts and professionals.

Setting Up Your Nikon D810

Setting up the Nikon D810 is a straightforward process‚ starting with unboxing and initial configuration. The manual guides users through charging the battery‚ attaching lenses‚ and navigating basic menu settings for optimal performance.

Unboxing and Initial Setup

Unboxing the Nikon D810 is an exciting experience‚ as it comes with essential accessories like the camera body‚ battery‚ charger‚ and strap. The manual guides users through initial setup‚ ensuring a smooth start; Begin by charging the battery fully‚ which typically takes about 2 hours. Next‚ insert a compatible memory card into the dual SD card slots‚ ensuring it’s formatted properly for use. Power on the camera and navigate through the initial menu setup‚ where you’ll set the language‚ time zone‚ and date. Familiarize yourself with the camera’s ergonomics and basic controls‚ such as the mode dial and AF buttons. The manual also recommends updating firmware if necessary for optimal performance. This initial setup lays the foundation for mastering the Nikon D810’s advanced features and capturing exceptional images.

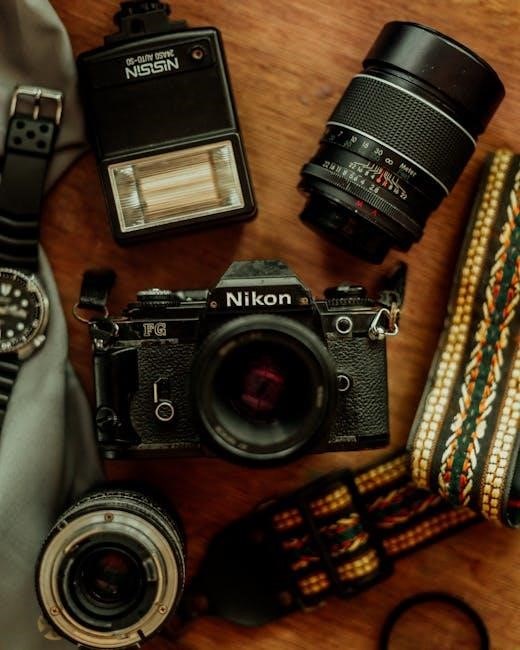
Attaching Lenses and Accessories

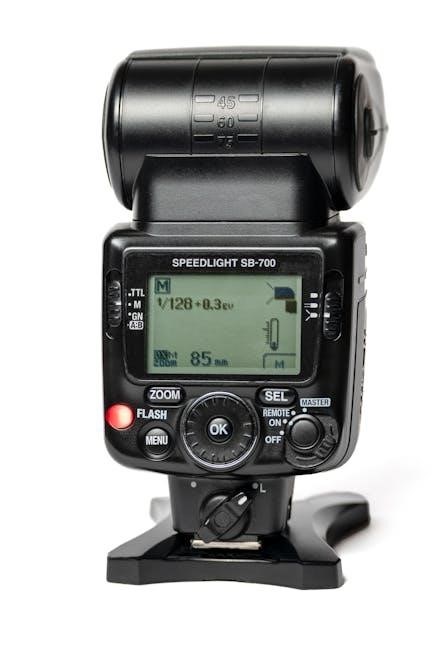
Attaching lenses and accessories to your Nikon D810 is straightforward‚ thanks to its intuitive design. Begin by aligning the lens mount index on the camera with the corresponding mark on the lens‚ ensuring a secure and proper fit. Gently twist the lens clockwise until it clicks into place. For accessories like the Speedlight or GPS unit‚ use the accessory shoe on top of the camera. The manual emphasizes the importance of using Nikon-compatible accessories to maintain optimal performance. When attaching external microphones or HDMI cables‚ refer to the manual for specific ports and connections. Always handle lenses and accessories with care to avoid damage. Properly securing these components ensures seamless functionality and enhances your photography experience with the Nikon D810.

Mounting the Camera and Basic Controls

Mounting the Nikon D810 on a tripod or rigs is made easy with its sturdy tripod socket‚ ensuring stability during shoots. Familiarize yourself with the basic controls‚ starting with the mode dial on top‚ which allows you to switch between shooting modes like Manual‚ Aperture Priority‚ and Shutter Priority. The shutter release button‚ located on the top-right‚ is ergonomically placed for easy access. Use the front and rear control dials to adjust aperture‚ shutter speed‚ and ISO. The LCD screen on the back provides a clear view of settings and images‚ while the viewfinder offers precise framing. The camera’s grip is designed for comfort‚ allowing intuitive access to buttons like AF-On and the multi-selector for navigating menus. Mastering these controls is essential for quick adjustments and seamless photography with the Nikon D810.

Mastering Shooting Modes

The Nikon D810 offers versatile shooting modes‚ including Aperture Priority‚ Shutter Priority‚ and Manual‚ allowing photographers to achieve precise control over exposure and creative expression in various lighting conditions.

Understanding Aperture Priority Mode

Aperture Priority Mode on the Nikon D810 allows photographers to set the desired aperture value‚ while the camera automatically adjusts the shutter speed to ensure proper exposure. This mode is ideal for controlling depth of field‚ making it perfect for portraits‚ landscapes‚ and macro photography. By adjusting the aperture‚ users can isolate subjects or ensure everything in the frame is sharp. The D810’s manual provides detailed guidance on how to use this mode effectively‚ including tips for achieving creative effects and balancing exposure in challenging lighting conditions. With practice‚ photographers can master Aperture Priority Mode to produce stunning‚ professional-quality images consistently.

Exploring Shutter Priority Mode

Shutter Priority Mode on the Nikon D810 allows photographers to set a specific shutter speed‚ with the camera automatically adjusting the aperture to maintain proper exposure. This mode is particularly useful for capturing motion‚ such as freezing fast-moving subjects or creating artistic blur effects. By controlling the shutter speed‚ users can emphasize dynamic action or create a sense of movement in their images. The D810’s manual provides insights into optimizing Shutter Priority Mode for various scenarios‚ including sports‚ wildlife‚ and low-light photography. It also offers tips for balancing exposure and achieving creative results. Whether you’re aiming for sharp‚ crisp images or subtle motion blur‚ Shutter Priority Mode empowers you to take control of your photography and express your vision effectively.

Manual Mode for Complete Control

Manual Mode on the Nikon D810 grants photographers full creative control by allowing adjustments to both aperture and shutter speed independently. This mode is ideal for those who want precise command over exposure settings to achieve specific artistic effects. The D810’s manual provides detailed guidance on using Manual Mode effectively‚ including how to balance aperture‚ shutter speed‚ and ISO for optimal results. It also covers techniques for fine-tuning exposure compensation and leveraging the camera’s metering systems. Additionally‚ the manual explains how to utilize the camera’s advanced features‚ such as the electronic front-curtain shutter‚ to minimize vibrations and ensure sharp images. By mastering Manual Mode‚ photographers can unlock the D810’s full potential and produce images that reflect their unique vision and style.

Customizing Your Camera

The Nikon D810 allows extensive customization through its Custom Settings menu‚ enabling photographers to tailor camera behavior to their preferences‚ including autofocus modes and back button focus configurations for enhanced control.

Navigating the Custom Settings Menu

Navigating the Custom Settings menu on the Nikon D810 is straightforward‚ allowing users to adjust camera behavior to suit their preferences. The menu is divided into categories such as autofocus‚ metering‚ and exposure‚ making it easy to locate specific settings. Each option is accompanied by a brief description‚ helping photographers understand its function. Users can modify settings like autofocus modes‚ ISO sensitivity‚ and custom controls to streamline their workflow. The menu also offers options for saving custom settings to memory cards‚ enabling quick recall of preferred configurations. This level of customization ensures that the D810 can be tailored to meet the needs of various shooting styles and conditions‚ enhancing creativity and efficiency behind the lens.

Autofocus Modes and Configuration

The Nikon D810 offers advanced autofocus capabilities‚ with multiple modes to suit different shooting scenarios. The camera features Single AF‚ Continuous AF‚ and Dynamic AF modes‚ each optimized for specific situations. Single AF is ideal for stationary subjects‚ while Continuous AF excels in tracking moving subjects. Dynamic AF allows for greater flexibility by expanding the focus area. The manual provides detailed guidance on configuring these modes‚ enabling precise control over autofocus behavior. Users can customize focus point selection‚ AF-area modes‚ and tracking sensitivity to match their creative vision. The D810 also supports custom settings for AF fine-tuning‚ ensuring sharp focus even with high-end lenses. By mastering these autofocus options‚ photographers can achieve professional-grade results in various lighting and compositional challenges. The comprehensive manual ensures users can fully utilize the D810’s autofocus system to its maximum potential‚ enhancing their overall photography experience.

Back Button Focus for Improved Control

Back Button Focus (BBF) on the Nikon D810 enhances shooting precision by separating autofocus activation from the shutter release. This technique allows photographers to focus on subjects without triggering the camera’s metering or shutter‚ reducing accidental focus shifts. By assigning autofocus control to a rear button (e.g.‚ AF-ON)‚ users gain greater control over focus acquisition‚ particularly in continuous shooting or dynamic compositions. The D810’s manual provides clear instructions on configuring BBF through the Custom Settings menu‚ enabling photographers to tailor focus behavior to their workflow. This method is especially beneficial for genres like sports‚ wildlife‚ and portrait photography‚ where precise focus is critical. Mastering BBF ensures sharper images and improved responsiveness‚ making it a valuable tool for professional-level photography with the D810.

Categories
Manuals

buick encore 2017 owners manual

The 2017 Buick Encore Owners Manual is your essential guide to understanding and maintaining your vehicle. This comprehensive resource covers features, maintenance, and safety tips, available as a free PDF download.

1.1 Overview of the 2017 Buick Encore

The 2017 Buick Encore is a subcompact SUV blending luxury and practicality. It features a 1.4-liter turbocharged engine, achieving up to 25 mpg city and 33 mpg highway. With advanced tech like Apple CarPlay, a panoramic sunroof, and safety features such as Forward Collision Alert, it offers a refined driving experience for urban drivers and small families.

1.2 Importance of the Owners Manual

The 2017 Buick Encore Owners Manual is crucial for ensuring a safe and optimal driving experience. It provides essential information about the vehicle’s features, maintenance requirements, and troubleshooting tips. It also helps owners understand and utilize the advanced technology features, enhancing the longevity and performance of their Encore for a responsible and efficient ownership experience.

1.3 How to Download the Manual

To download the 2017 Buick Encore Owners Manual, visit the official Buick website or trusted platforms like OwnersMan.com. Select your vehicle model, and access the PDF version for free. Ensure compatibility with your device for easy reference and printing, allowing you to stay informed about your vehicle’s features and maintenance requirements anytime, anywhere.

Key Features of the 2017 Buick Encore

The 2017 Buick Encore features a 1.4-liter turbocharged engine, available all-wheel drive, advanced infotainment with Apple CarPlay/Android Auto, and safety systems like Forward Collision Alert and Rear Cross Traffic Alert, ensuring a blend of performance, technology, and safety.

2.1 Engine and Performance Specifications

The 2017 Buick Encore is powered by a 1.4-liter turbocharged inline-4 engine, delivering 138 horsepower and 148 lb-ft of torque. It features a 6-speed automatic transmission and offers an optional all-wheel-drive system, providing efficient performance with an estimated 25 mpg city and 33 mpg highway.

2.2 Infotainment and Technology Features

The 2017 Buick Encore boasts an advanced infotainment system with Apple CarPlay and Android Auto integration, ensuring seamless smartphone connectivity. It also features a premium sound system, Bluetooth connectivity, and a high-resolution touchscreen display, providing an enhanced and user-friendly driving experience.

2.3 Safety Features and Driver Assistance Systems

The 2017 Buick Encore offers advanced safety features, including Forward Collision Alert (FCA), Rear Cross Traffic Alert (RCTA), and lane departure warning. Additional safety enhancements include rear parking sensors, traction control, and a comprehensive airbag system, ensuring enhanced protection and confidence for drivers and passengers.

Understanding the Owners Manual

The 2017 Buick Encore Owners Manual is a comprehensive guide, available as a free PDF download, detailing features, maintenance, and safety information for optimal vehicle operation.

3.1 Contents of the Manual

The 2017 Buick Encore Owners Manual includes detailed sections on vehicle controls, features, maintenance schedules, safety guidelines, and technical specifications. It covers engine performance, fluid recommendations, and troubleshooting tips, ensuring comprehensive understanding for optimal vehicle operation and care.

3.2 Navigation Tips for the Manual

Navigate the 2017 Buick Encore Owners Manual effortlessly using the table of contents and index. The manual is organized into clear sections, with detailed headings and subheadings. Use the search function in the PDF version to quickly locate specific topics, ensuring easy access to the information you need.

3.3 Differences Between Owners Manual and Service Manual

The Owners Manual focuses on vehicle operation, maintenance, and features for everyday use, while the Service Manual provides detailed technical information for repairs and diagnostics, intended for professional mechanics. The Owners Manual is user-friendly, whereas the Service Manual is more advanced and specialized.

Maintenance and Service Schedule

The 2017 Buick Encore Owners Manual outlines a detailed maintenance schedule, ensuring optimal vehicle performance and longevity. Regular servicing helps prevent issues and maintains warranty coverage, as specified in the manual.

4.1 Recommended Maintenance Intervals

The 2017 Buick Encore Owners Manual provides detailed maintenance schedules to ensure optimal performance. Regular oil changes, tire rotations, and fluid checks are recommended at specific intervals to maintain efficiency and prevent damage, ensuring your vehicle runs smoothly and safely over time.

4.2 Fluids, Lubricants, and Parts Specifications

The 2017 Buick Encore Owners Manual outlines specific fluids and lubricants required for optimal performance, including engine oil (SAE 5W-20) and coolant (Dex-Cool). It also provides parts specifications for tires, brakes, and other components, ensuring compatibility and safety. Always use genuine parts for reliability and warranty compliance.

4.3 Importance of Regular Servicing

Regular servicing ensures optimal performance, safety, and reliability of your 2017 Buick Encore. It helps prevent minor issues from becoming major repairs, maintains fuel efficiency, and extends the vehicle’s lifespan. Follow the recommended schedule in the manual to keep your Encore running smoothly and avoid unexpected breakdowns.

Safety and Driver Assistance Systems

The 2017 Buick Encore features advanced safety systems, including Forward Collision Alert and Rear Cross Traffic Alert, designed to enhance driver confidence and protect occupants. These technologies, combined with a robust airbag system, ensure a safer driving experience.

5.1 Forward Collision Alert (FCA) System

The Forward Collision Alert (FCA) system on the 2017 Buick Encore uses sensors to detect potential collisions. It alerts the driver with visual and audible warnings, helping to avoid or mitigate frontal crashes. This feature is a key part of the Encore’s advanced safety suite, enhancing driver awareness and safety.

5.2 Rear Cross Traffic Alert (RCTA) System

The Rear Cross Traffic Alert (RCTA) system on the 2017 Buick Encore detects vehicles approaching from either side when reversing. Sensors monitor blind spots, triggering visual and audible alerts to prevent collisions. This feature enhances safety, especially in busy parking lots, providing drivers with added confidence while backing up.

5.3 Child Restraint and Airbag Information

The 2017 Buick Encore Owners Manual provides detailed guidance on installing child restraints using the LATCH system and seat belts. It also explains how the airbag system operates, including precautions to ensure safe deployment and proper usage of child seats to maximize occupant protection.

Instrument Cluster and Warning Lights

The 2017 Buick Encore Owners Manual explains the instrument cluster, warning lights, and Driver Information Center (DIC). It details symbols, meanings, and actions to take for optimal vehicle monitoring and safety.

6.1 Warning Lights and Their Meanings

The 2017 Buick Encore Owners Manual details warning lights, such as Forward Collision Alert, Rear Cross Traffic Alert, ABS, Traction Control, and Malfunction Indicator Lamp. Each light signals specific system statuses or issues, ensuring drivers understand and address potential problems promptly for safe operation and maintenance of the vehicle.

6.2 Driver Information Center (DIC)

The Driver Information Center (DIC) in the 2017 Buick Encore provides real-time vehicle data, trip information, fuel economy, and warning messages. Available in base and uplevel versions, it enhances driver awareness and convenience, offering customizable displays to suit individual preferences for a safer and more informed driving experience.

6.3 Malfunction Indicator Lamp (MIL)

The Malfunction Indicator Lamp (MIL) illuminates when the engine computer detects an issue, such as problems with the emission control system or engine performance. This “check engine” light signals the driver to investigate and address potential issues, ensuring proper vehicle function and minimizing damage. Refer to the DIC for specific fault details.

Advanced Technology and Infotainment

The 2017 Buick Encore features an advanced infotainment system with Apple CarPlay and Android Auto integration, dual automatic climate control, premium sound, and a panoramic sunroof.

7.1 Apple CarPlay and Android Auto Integration

The 2017 Buick Encore offers seamless integration with Apple CarPlay and Android Auto, enabling voice command access to Siri and Google Assistant. Users can navigate, play music, and manage calls and texts via the touchscreen display, ensuring a connected and intuitive driving experience compatible with both iOS and Android devices.

7.2 Dual Automatic Climate Control System

The 2017 Buick Encore features a Dual Automatic Climate Control System, allowing driver and passenger to set individual temperatures. This advanced system ensures optimal cabin comfort by regulating airflow, humidity, and temperature, creating a personalized environment for all occupants. The controls are intuitively designed for easy adjustments, enhancing overall comfort and driving satisfaction.

7.3 Universal Remote System Programming

The Universal Remote System in the 2017 Buick Encore allows you to program compatible devices like garage doors or gates; Follow the manual’s step-by-step guide to sync your remote with these devices, ensuring seamless control and enhanced convenience for a personalized driving experience.

Convenience and Comfort Features

The 2017 Buick Encore offers a Remote Keyless Entry (RKE) system, panoramic sunroof, and versatile cargo capacity for enhanced comfort and convenience, ensuring a premium driving experience tailored to your needs.

8.1 Remote Keyless Entry (RKE) System

The Remote Keyless Entry (RKE) System enhances convenience and security, allowing drivers to lock, unlock, and start the vehicle remotely. This feature ensures easy access and operation, with programmable remotes that can be synchronized to your vehicle for added functionality and peace of mind while maintaining advanced security measures.

8.2 Panoramic Sunroof and Interior Comfort

The panoramic sunroof offers a spacious feel, allowing natural light and fresh air to enhance passenger comfort. The interior features premium materials and a refined design, ensuring a quiet and comfortable ride. Together, these elements create a sophisticated cabin environment tailored for both driver and passenger enjoyment and relaxation on the road.

8.3 Cargo Capacity and Versatility

The 2017 Buick Encore offers a spacious cargo area with up to 48.4 cubic feet of storage capacity when the rear seats are folded. Its versatile design includes foldable rear seats and additional storage compartments, ensuring practicality for both daily errands and long trips, making it ideal for diverse lifestyle needs and preferences.

Technical Specifications and Vehicle Identification

The 2017 Buick Encore features a 1.4-liter turbocharged engine, paired with a 6-speed automatic transmission. Built on the Gamma II platform, it shares underpinnings with the Chevrolet Trax, offering versatility and reliability in its design and performance.

9.1 Vehicle Identification Number (VIN)

The Vehicle Identification Number (VIN) is a unique 17-character code that identifies your 2017 Buick Encore. It can be found on the driver’s side dashboard or doorjamb and is essential for registration, insurance, and service purposes. Each VIN encodes specific details about the vehicle, including its make, model, and production details.

9.2 Engine and Transmission Specifications

The 2017 Buick Encore features a 1.4-liter turbocharged inline-4 engine, producing 138 horsepower and 148 lb-ft of torque. It is paired with a 6-speed automatic transmission and offers optional all-wheel drive for enhanced traction and control, ensuring a smooth and efficient driving experience across various conditions.

9.3 Tire Sizes and Recommendations

The 2017 Buick Encore is equipped with 215/55R18 all-season tires, ensuring optimal performance and traction. For replacement, use tires meeting GM specifications. Always maintain the recommended tire pressure for safety and efficiency, as outlined in the manual. Genuine GM accessories are recommended for compatibility and reliability.

Additional Resources and Support

Explore Buick Encore resources, including customer assistance, online forums, and service centers. Visit Buick.com for support or download the manual for detailed guidance and maintenance tips.

10.1 Buick Customer Assistance and Service Centers

Buick offers dedicated customer assistance and a network of service centers for support with your 2017 Encore. Visit Buick.com for contact details, maintenance scheduling, and repair services from certified technicians, ensuring your vehicle receives expert care and remains in optimal condition.

10.2 Online Communities and Forums for Encore Owners

Join online communities and forums dedicated to 2017 Buick Encore owners. Platforms like CarManualsOnline.info and OwnersMan.com offer free access to manuals, troubleshooting tips, and discussions. Engage with other owners to share experiences, ask questions, and find solutions to common issues, fostering a supportive and knowledgeable community for Encore enthusiasts.

10.3 Reporting Safety Defects and Recalls

If you identify a safety defect or need to report a recall, contact the NHTSA or Transport Canada. You can also notify General Motors directly through their customer service. The 2017 Buick Encore Owners Manual provides guidance on procedures and contact information to ensure your vehicle remains safe and compliant with regulations.

Categories
Manuals

dog care training collar manual pdf

Welcome to the Dog Care Training Collar Manual, your comprehensive guide to understanding and using the collar effectively. This manual provides detailed instructions, safety tips, and training techniques to help you use the collar responsibly and humanely. Discover how to set up, charge, and pair the device, along with essential tips for proper fitting and avoiding skin irritation. Learn effective training methods and how to combine the collar with positive reinforcement for the best results. This guide ensures a safe and successful experience for both you and your dog.

  • Safety guidelines for proper usage and fitting.
  • Effective training techniques to enhance your dog’s behavior.
  • Tips for combining the collar with positive reinforcement.

Overview of the Dog Care Training Collar

The Dog Care Training Collar is a modern, electronic device designed to assist in training dogs safely and effectively. It typically includes a remote control and a receiver collar, allowing owners to communicate with their pets remotely. The collar uses electronic stimulation, vibrations, or tone signals to help correct unwanted behaviors and reinforce positive actions. With adjustable intensity levels, it caters to dogs of different sizes and sensitivities. Many models come with features like an LCD display, rechargeable batteries, and waterproof design, making them versatile for various training environments. This tool is intended for training purposes, not punishment, and should be used responsibly to promote a healthy dog-owner relationship.

  • Remote control for easy communication with your dog.
  • Adjustable stimulation levels to suit your dog’s needs.
  • Waterproof and rechargeable for durability and convenience.

Importance of Using a Training Collar for Dog Care

Using a training collar is essential for effective dog care and behavior management. It helps owners communicate clearly with their pets, correcting unwanted behaviors like excessive barking or aggression. The collar provides a safe and humane way to reinforce positive actions, promoting a well-behaved and obedient companion. By offering consistent feedback, it accelerates the learning process, making training sessions more efficient. Additionally, it ensures the dog’s safety in off-leash situations, preventing potential dangers. When used responsibly, a training collar strengthens the bond between owner and dog, fostering trust and mutual understanding. Proper use requires adherence to guidelines to ensure the dog’s comfort and well-being.

  • Corrects unwanted behaviors effectively and humanely.
  • Enhances communication between owner and dog.
  • Ensures safety in off-leash environments.

Understanding the Components of the Dog Training Collar

The Dog Care Training Collar consists of a remote control, receiver, and adjustable strap. It features a battery-powered system with LED indicators for low battery alerts.

  • Remote Control for sending commands.
  • Receiver Unit with adjustable intensity levels.
  • Adjustable Strap for a comfortable fit.
  • Battery Life with charging indicators.
  • LED Display for easy command verification.

Key Features of the Dog Care Training Collar

The Dog Care Training Collar offers advanced features for effective dog training. It includes multiple stimulation modes such as vibration, tone, and static shock, adjustable up to 99 levels. The collar is waterproof, ensuring durability even in wet conditions. A long-range remote control allows training sessions in open spaces. The battery is rechargeable, providing extended usage. An LCD display on the remote shows real-time settings, and the collar fits dogs of various sizes. Additional features include a quick-swap battery system and a memory function to store settings for multiple dogs. These features make the collar versatile and user-friendly for efficient training.

  • Multiple Stimulation Modes for customizable training.
  • Waterproof Design for outdoor use.
  • Long-Range Remote for flexibility in training.
  • Adjustable Settings for different dog sizes.
  • Rechargeable Battery for cost-effective use.

Charging and Pairing the Collar and Remote Control

Charging the Dog Care Training Collar and remote control is straightforward. Plug in both devices using the provided USB chargers and allow them to charge for at least 2 hours. The collar and remote are paired during manufacturing, but if pairing is lost, press and hold the power button on both devices for 5 seconds until they sync. Ensure the collar is fully charged before first use. A green light on the remote indicates full charge. For optimal performance, recharge the battery when the low-battery indicator flashes red. Proper charging ensures seamless communication between the collar and remote, essential for effective training sessions.

  • Charge both devices for at least 2 hours initially.
  • Pairing is automatic, but can be reset if needed.
  • Check charge status via LED indicators.
  • Recharge promptly when the battery is low.

Safety Guidelines for Using the Training Collar

Always follow safety guidelines to ensure responsible use of the training collar. Avoid prolonged wear, reposition the collar every 1-2 hours, and never use it for punishment. Proper fitting and monitoring are essential to prevent skin irritation and ensure your dog’s comfort. Use the collar as a training tool, not for harm, and follow all instructions carefully to promote a safe and effective training experience for your dog.

  • Avoid prolonged wear and reposition regularly.
  • Monitor for skin irritation and adjust fit as needed.
  • Use responsibly and follow all safety instructions.

Proper Fitting and Usage Recommendations

Properly fitting the training collar is crucial for your dog’s comfort and safety. Ensure the collar is snug but not tight, allowing one finger to fit between the collar and your dog’s neck. Avoid leaving the collar on for more than 12 hours a day and reposition it every 1-2 hours to prevent skin irritation. The electrodes should touch your dog’s skin for effective communication. Never attach a leash to the training collar, as it may cause excessive pressure. Always follow the manual’s guidelines for proper usage and adjust the collar as needed to ensure your dog’s well-being.

  • Ensure a snug, comfortable fit with one finger spacing.
  • Limit collar wear to 12 hours per day.
  • Reposition the collar every 1-2 hours.
  • Never attach a leash to the training collar.

Avoiding Skin Irritation and Ensuring Comfort

To prevent skin irritation, ensure the training collar fits properly and is not too tight. Allow one finger of space between the collar and your dog’s neck. Monitor your dog’s skin regularly, especially where the electrodes touch. If redness or irritation occurs, discontinue use until the skin heals. Reposition the collar every 1-2 hours to avoid prolonged pressure on the same area. Never leave the collar on for more than 12 hours a day. Proper fitting and regular checks are essential to ensure your dog’s comfort and safety while using the training collar.

  • Ensure proper fit with one finger spacing for comfort.
  • Monitor skin condition and discontinue use if irritation occurs.
  • Reposition the collar every 1-2 hours to prevent pressure sores.
  • Limit collar wear to 12 hours per day for optimal comfort.

Training Tips Using the Shock Collar

Charge the collar and remote, pair them following manual instructions. Adjust static levels appropriately, use short stimulation for effectiveness. Reward desired behaviors for positive reinforcement.

  • Pair devices correctly for consistent operation.
  • Use short bursts of stimulation for training.
  • Reward good behavior to reinforce desired actions.

Effective Training Techniques with the Collar

Start by pairing the collar and remote control, ensuring proper connectivity for consistent training. Adjust the static stimulation levels based on your dog’s sensitivity to avoid discomfort. Use short bursts of stimulation to grab attention, followed by positive reinforcement like treats or praise to encourage desired behaviors. Focus on clear commands and consistent responses to build trust and understanding. Always monitor your dog’s reactions and adjust techniques as needed. Proper fitting of the collar is crucial to ensure effectiveness without causing skin irritation. Combine the collar with positive reinforcement methods for a balanced and humane training approach.

  • Pair devices correctly for consistent operation.
  • Adjust stimulation levels according to your dog’s sensitivity.
  • Use short bursts of stimulation for effective training.
  • Combine with positive reinforcement for best results.

Using Positive Reinforcement Alongside the Collar

Positive reinforcement is a powerful training method that complements the use of the Dog Care Training Collar. Reward your dog with treats, praise, or play immediately after desired behaviors to reinforce good actions. This approach builds trust and encourages voluntary compliance. Use the collar to draw attention, then follow up with rewards to associate the behavior with a positive outcome. Timing is crucial—deliver rewards the moment your dog responds correctly. Avoid overuse of the collar; instead, focus on consistency and clear communication. Combine the collar’s gentle reminders with positive reinforcement to create a balanced and effective training routine that fosters a strong bond with your dog.

  • Reward desired behaviors with treats or praise.
  • Use the collar to draw attention, then reinforce with rewards.
  • Timing is key for associating actions with outcomes.
  • Combine methods for a balanced training approach.

Maintenance and Care of the Training Collar

Regularly clean the collar with a soft cloth and avoid harsh chemicals. Store it in a dry place when not in use to prevent damage. Charge the battery as instructed and ensure proper pairing after charging. Replace worn-out parts promptly to maintain functionality.

  • Clean the collar gently to prevent damage.
  • Store in a dry, cool environment.
  • Charge and pair devices as directed.
  • Replace worn parts to ensure performance.

Cleaning and Storing the Collar Properly

To maintain your Dog Care Training Collar, clean it regularly with a soft, dry cloth. Avoid using harsh chemicals or abrasive materials, as they may damage the device. For tougher stains, lightly dampen the cloth with water, but ensure the collar is completely dry before storing. Store the collar in a cool, dry place away from direct sunlight to prevent overheating or battery degradation. Remove the battery if storing for an extended period to avoid leakage. Proper storage and cleaning ensure the collar remains functional and comfortable for your dog. Regular maintenance also prevents skin irritation and extends the product’s lifespan.

  • Clean with a soft, dry cloth.
  • Avoid harsh chemicals or abrasive materials.
  • Store in a cool, dry place.
  • Remove the battery for long-term storage.

Troubleshooting Common Issues with the Collar

If your Dog Care Training Collar isn’t functioning properly, start by checking the battery level and ensuring both the collar and remote are fully charged. If the remote control isn’t working, verify that it’s paired correctly with the collar. Refer to the manual for pairing instructions. For static stimulation issues, ensure the contact points are clean and properly positioned on your dog’s skin. If the collar isn’t responding, restart both devices and check for any software updates. Avoid using the collar near metal objects or other electronic devices, as interference may occur. Always follow the manual’s troubleshooting guide for specific solutions to common problems.

  • Check battery levels and charge if necessary.
  • Verify proper pairing between the collar and remote.
  • Clean contact points for optimal performance.
  • Restart devices to resolve connectivity issues.
  • Consult the manual for software updates and solutions.
Categories
Manuals

shark rocket user manual

Welcome to the Shark Rocket user manual! This guide provides essential information to help you understand, assemble, and maintain your Shark Rocket vacuum cleaner effectively․

1․1 Overview of the Shark Rocket Series

The Shark Rocket Series offers lightweight, versatile vacuum cleaners designed for efficient cleaning on various surfaces․ Known for advanced swivel steering, these models provide seamless maneuverability around furniture and tight spaces․ Convertible designs allow easy transformation into handheld vacuums for cleaning stairs, upholstery, and more․ Compact and ergonomic, they combine powerful suction with a range of attachments for enhanced cleaning versatility and convenience․

1․2 Importance of Reading the Manual

Reading the Shark Rocket manual is crucial for optimal performance and safety․ It provides detailed assembly instructions, maintenance tips, and troubleshooting solutions․ Understanding the features ensures efficient cleaning and prolongs the vacuum’s lifespan․ Familiarize yourself with safety guidelines to avoid hazards and maximize your cleaning experience․

Product Specifications

The Shark Rocket HV301 is a lightweight, compact vacuum with advanced swivel steering and a powerful motor for efficient cleaning on various surfaces, featuring a large dust cup and versatile attachments․

2․1 Key Features of the Shark Rocket HV301

The Shark Rocket HV301 boasts a lightweight and compact design, making it easy to maneuver․ It features advanced swivel steering for smooth navigation, a powerful motor for strong suction, and a detachable handheld option for versatile cleaning․ The vacuum includes a brush roll for deep carpet cleaning, a large dust cup, and washable filters for improved air quality․

2․2 Technical Details and Dimensions

The Shark Rocket HV301 features a 30-foot cord for extended reach and weighs approximately 8․2 pounds, making it lightweight and portable․ Its dimensions are 10․2 x 8․2 x 46․4 inches, allowing for easy storage․ The vacuum is equipped with a powerful motor, delivering strong suction for efficient cleaning on both hard floors and carpets․ It also includes washable filters and a large dust cup capacity for convenient maintenance․

Assembly and Initial Setup

Begin by unpacking all components and verifying their condition․ Attach the handle to the wand by aligning arrows and clicking into place․ Secure the floor nozzle to complete setup․

3․1 Unpacking and Identifying Components

Start by carefully unpacking the Shark Rocket vacuum cleaner․ Inside the box, you’ll find the main body, handle, motorized floor nozzle, wand, crevice tool, and dusting brush․ Ensure all components are included and free from damage․ Familiarize yourself with each part to understand their functions and how they connect․ This step ensures a smooth assembly process and proper usage․

3․2 Step-by-Step Assembly Instructions

Begin by attaching the handle to the wand, aligning the arrows and clicking them into place․ Next, secure the motorized floor nozzle to the wand by inserting and twisting until it locks․ Finally, attach your desired accessory, such as the crevice tool or dusting brush, to the wand’s end․ Ensure all connections are firm and click securely for proper operation․

Cleaning Modes and Techniques

Explore versatile cleaning modes tailored for carpets, hard floors, and pet hair․ Utilize advanced settings for customized cleaning, ensuring optimal performance across various surfaces with ease and precision․

4․1 Using the Shark Rocket on Different Surfaces

The Shark Rocket excels on various surfaces, including carpets, hard floors, and pet hair․ Adjust settings for optimal cleaning performance; Use the motorized floor nozzle for carpets and switch to hard floor mode for smooth surfaces․ Lightweight design ensures easy maneuverability, while advanced swivel steering navigates furniture effortlessly․ For hard-to-reach areas, utilize the handheld vacuum and included attachments for a seamless cleaning experience across all floor types․

4․2 Advanced Cleaning Features and Settings

Explore the Shark Rocket’s advanced features for tailored cleaning․ Use the variable suction control to adjust power, preserving battery life․ The brush roll can be turned on or off, optimizing cleaning for different surfaces․ Utilize the LED lights to spot hidden debris․ Additional settings like the Turbo mode boost suction for deep cleaning, while the silent mode reduces noise for quieter operation․ These features enhance versatility and efficiency in various cleaning scenarios, ensuring a superior clean every time with minimal effort and maximum precision․

Maintenance and Care

Regularly clean the filter and brush roll to maintain performance․ Empty the dust cup after each use and ensure all parts are secure for optimal functionality and longevity․

5․1 Cleaning the Filter and Brush Roll

Regularly remove and clean the brush roll by unscrewing the cover․ Use scissors or a brush to remove hair and debris․ The filter should be washed monthly and allowed to dry completely before reinstalling․ This ensures optimal suction power and prevents clogs․ Cleaning these components regularly will maintain your Shark Rocket’s performance and extend its lifespan effectively․ Always refer to the manual for specific instructions․

5․2 Emptying the Dust Cup and Washing Filters

To empty the dust cup, press the release latch and rinse it with water․ Ensure it’s completely dry before reattaching․ Washable filters should be cleaned monthly to maintain suction power․ Replace filters every 2-3 years or as needed․ Regular maintenance ensures your Shark Rocket operates efficiently and effectively, capturing allergens and particles for cleaner air quality in your home environment always․ Follow manual guidelines for best results․

Troubleshooting Common Issues

Identify and resolve common problems like clogs or reduced suction․ Check for blockages, ensure filters are clean, and verify proper assembly․ Consult the manual for detailed solutions to restore performance efficiently and maintain your Shark Rocket’s optimal functionality over time with proper care and attention to specific troubleshooting steps outlined within this guide․

6․1 Loss of Suction Power

A loss of suction power in your Shark Rocket can occur due to a full dust cup, clogged filters, or blockages in the hose or brush roll․ To resolve this, empty the dust cup, clean or replace filters, and check for debris in the vacuum’s components․ Regular maintenance, such as washing filters and ensuring all parts are securely connected, will help maintain optimal suction power and performance over time․

6․2 Clogs and Blockages

Clogs and blockages in your Shark Rocket can disrupt its performance․ Regularly inspect the hose, wand, and brush roll for debris․ To clear clogs, disconnect the hose and wand, then remove any obstructions manually or with tools․ Ensure all components are clean and free of hair or fibers․ Check for blockages in the vacuum’s intake or filters, as these can also restrict airflow and cause issues․

Accessories and Attachments

Your Shark Rocket comes with essential accessories like the crevice tool, upholstery brush, and motorized floor nozzle․ Optional attachments, such as the hardwood floor attachment, can be purchased for specialized cleaning tasks, enhancing versatility and performance․

7․1 Included Accessories

The Shark Rocket comes with essential accessories designed to enhance cleaning efficiency․ These include a crevice tool for tight spaces, a dusting brush for surfaces, and a motorized floor nozzle for deep cleaning․ Additionally, the handheld vacuum and wand provide versatility for above-floor cleaning․ These tools help tackle various cleaning tasks, ensuring comprehensive coverage and optimal performance in different areas of your home․

7․2 Optional Attachments for Enhanced Cleaning

Optional attachments, such as the hardwood floor attachment and upholstery tool, can be purchased to enhance your cleaning experience․ These accessories provide specialized cleaning solutions for delicate surfaces, pet hair, and tight spaces․ Additional tools like extended wands or pet hair brushes can also be acquired for tailored cleaning needs․ Visit the Shark website or authorized retailers to explore these options and optimize your vacuum’s performance․

Safety Precautions

Always follow safety guidelines to avoid accidents․ Keep children away while operating and ensure the area is clear of obstacles․ Avoid vacuuming water or flammable materials․

8․1 General Safety Guidelines

Always read and follow the safety instructions provided in this manual․ Ensure the vacuum is used only for its intended purpose and on surfaces recommended․ Keep children and pets away while operating․ Avoid vacuuming water, flammable materials, or hot objects․ Store the vacuum in a dry, cool place, and unplug it when not in use․ Never leave the vacuum unattended while it is running․ Regularly inspect the cord and accessories for damage․ If damaged, do not use the vacuum until it has been properly repaired․ Follow all warnings and precautions listed in this manual to ensure safe and effective operation․ If you are unsure about any aspect of the vacuum’s use, refer to the troubleshooting section or contact Shark customer support for assistance․

8․2 Avoiding Common Hazards

To ensure safe operation, avoid vacuuming water, flammable materials, or hot objects․ Keep loose clothing and long hair tied back while using the vacuum․ Never insert fingers or objects into the vacuum’s openings․ Avoid overfilling the dust cup, as this can cause spills or damage․ Store the vacuum in a dry, cool place to prevent damage․ Regularly inspect the cord and accessories for damage and ensure they are free from obstructions․ Do not use the vacuum near open flames or sparks․ Always turn off and unplug the vacuum before performing maintenance or cleaning․ Avoid vacuuming sharp objects, as they may damage the vacuum or cause injury․ Keep the vacuum out of reach of children and pets to prevent accidental starts or misuse․ By following these guidelines, you can minimize risks and ensure safe, effective cleaning․

Tips for Optimal Performance

Regularly clean the brush roll and filter to maintain suction power․ Adjust settings for different surfaces and use appropriate attachments for optimal cleaning results․ Store the vacuum upright to prevent damage and ensure accessibility for future use․

9․1 Regular Maintenance Schedule

Establish a routine to clean the filter monthly and replace it every 2․5 years․ Check for blockages weekly and empty the dust cup after each use․ Regularly inspect the brush roll for tangled hair and debris, cleaning it every month․ Schedule annual checks for worn parts like the felt strip․ Consistent maintenance ensures peak performance and longevity of your Shark Rocket․

9․2 Customizing Cleaning for Different Needs

Adapt your Shark Rocket to various cleaning tasks with adjustable settings․ Use the standard mode for daily cleaning and boost mode for deep carpet cleaning․ Switch to hard floor mode for gentle cleaning․ Attachments like the crevice tool, upholstery brush, and pet hair tool allow tailored cleaning for stairs, furniture, and tight spaces for optimal results․

Frequently Asked Questions

Find answers to common questions about the Shark Rocket, including troubleshooting, maintenance, and optimal usage tips to enhance your cleaning experience․

10․1 Common User Questions

Users often ask about filter replacements, attachment setup, and suction power issues․ They also inquire about serial number locations and troubleshooting clogs․ Additionally, questions arise regarding brush roll maintenance and dust cup capacity․ Many seek advice on hardwood floor attachments and vacuum standing stability․ These queries are addressed to ensure optimal performance․

10․2 Solutions to Frequently Encountered Problems

For loss of suction, clean filters and ensure the dust cup is empty․ Clear clogs by checking the hose and brush roll․ To resolve attachment issues, align connectors securely․ Regularly maintain the brush roll by removing hair and debris․ Ensure the vacuum stands upright by adjusting its balance․ Refer to the manual for detailed troubleshooting steps to restore performance and address common concerns effectively․

11․1 Final Tips for Maximizing Your Shark Rocket Experience

Regularly clean filters, check for blockages, and store your Shark Rocket properly to maintain performance․ Experiment with attachments for different surfaces and adjust suction settings for optimal cleaning․ Refer to the manual for troubleshooting and maintenance tips to ensure your vacuum runs efficiently for years to come․

Categories
Manuals

aprilaire 60 humidistat manual

The Aprilaire 60 Humidistat is an advanced digital control designed to regulate humidity levels in your home. It offers automatic and manual operation modes, ensuring precise moisture management. Installed in the cold air return duct, it provides accurate humidity readings and optimizes comfort year-round. This device is essential for maintaining a healthy indoor environment by preventing excessive dryness or moisture buildup.

1.1 Overview of the Aprilaire 60 Humidistat

The Aprilaire 60 Humidistat is a digital control system designed to manage humidity levels in residential spaces efficiently. It is installed in the cold air return duct and works in conjunction with the HVAC system to monitor and regulate indoor humidity. The device features a digital display that shows the current humidity level, ensuring accurate readings when the HVAC blower is operational. It offers both automatic and manual operation modes, allowing users to customize humidity control based on their preferences. The Aprilaire 60 is known for its reliability and ease of use, making it a popular choice for maintaining optimal indoor air quality and comfort year-round. Its advanced design ensures precise moisture management, preventing both dryness and excessive humidity in the home.

1.2 Importance of Proper Humidity Control

Proper humidity control is essential for maintaining a healthy and comfortable indoor environment. The Aprilaire 60 Humidistat plays a crucial role in regulating moisture levels, preventing excessive dryness or humidity. Balanced indoor humidity helps alleviate respiratory issues, reduces static electricity, and protects wood furniture and flooring from warping. Additionally, it prevents mold growth and dust mites, which thrive in overly humid conditions. By maintaining optimal humidity, the Aprilaire 60 contributes to energy efficiency, as it reduces the need for excessive heating or cooling. This ensures a comfortable living space while safeguarding your home’s structural integrity and promoting better indoor air quality year-round.

Installation Instructions for the Aprilaire 60

Install the Aprilaire 60 by removing the knob and cover, then wiring it according to the manual. Ensure proper connection to the HVAC system for accurate operation.

2.1 Step-by-Step Installation Guide

Begin by unpacking the Aprilaire 60 Humidistat and ensuring all components are included. Remove the knob and cover by pulling at the bottom and swinging it out. Mount the humidistat in the cold air return duct, ensuring proper alignment. Connect the wiring according to the manual, paying attention to the terminals for power and humidifier control. Secure all connections to avoid loose wires; Once installed, test the system by turning on the HVAC blower to ensure accurate humidity readings. Refer to the manual for specific wiring diagrams and installation tips to ensure a seamless setup. Proper installation guarantees optimal performance and accurate humidity control in your home.

2.2 Wiring Requirements for the Aprilaire 60

The Aprilaire 60 Humidistat requires a 24V power supply for operation. Connect the wires to the designated terminals, ensuring proper polarity to avoid damage. The control terminals are designed to interface with your HVAC system, enabling seamless communication. Use the provided wiring diagram to connect the humidifier and sensor wires accurately. If installed with a humidifier, the control is pre-set for optimal performance. Always follow safety guidelines and consult a licensed technician if unsure. Proper wiring ensures accurate humidity readings and reliable operation; Refer to the manual for detailed wiring instructions to avoid errors during setup.

Features of the Aprilaire 60 Humidistat

The Aprilaire 60 features automatic and manual operation modes, a digital display for precise humidity readings, and a built-in timer for water panel replacement reminders. It ensures optimal humidity control and comfort by adjusting to indoor conditions and outdoor temperatures. The device is designed for seamless integration with HVAC systems, providing accurate moisture management and energy efficiency. Its user-friendly interface and advanced sensors make it a reliable choice for maintaining a healthy indoor environment. Regular maintenance alerts and straightforward troubleshooting options enhance its functionality, ensuring long-term performance and reliability.

3.1 Automatic vs. Manual Mode Operation

The Aprilaire 60 Humidistat offers two operating modes: Automatic and Manual. In Automatic Mode, the device adjusts humidity levels based on outdoor temperatures, ensuring optimal indoor comfort without manual intervention. This mode is ideal for most homeowners, as it automatically optimizes moisture levels and reduces the need for frequent adjustments. Manual Mode, on the other hand, allows users to set a fixed humidity level, providing precise control for specific conditions. The digital display simplifies mode selection, and the device remembers the last set humidity level for seamless transitions. This dual-mode functionality ensures flexibility and customization, catering to different preferences and environmental needs. The Automatic Mode is recommended for energy efficiency and convenience, while Manual Mode is better suited for specialized humidity requirements.

3.2 Digital Display and Humidity Readings

The Aprilaire 60 Humidistat features a clear digital display that provides real-time humidity readings, ensuring accurate monitoring of indoor moisture levels. The display is easy to read and offers precise information about the current humidity percentage. It also indicates the outdoor temperature, which helps in making informed adjustments. The digital display updates continuously, reflecting changes in humidity levels as they occur. This feature is particularly useful in maintaining optimal indoor air quality and comfort. The display’s accuracy is enhanced when the HVAC blower is operational, as it measures humidity levels directly from the cold air return duct. This ensures that the readings are representative of the actual living space conditions. The digital interface is user-friendly, making it simple to monitor and adjust humidity settings as needed.

Maintenance and Troubleshooting

Regular maintenance ensures optimal performance. Replace the water panel every 1-2 months and clean the humidistat regularly. Troubleshooting involves checking humidity settings and HVAC operation.

4.1 Changing the Water Panel

Changing the water panel in your Aprilaire 60 humidistat is essential for maintaining optimal performance. The water panel should be replaced every 1-2 months, depending on usage. To do this, first, turn off the power to the humidifier at the circuit breaker. Next, locate the water panel, typically found in the humidifier unit. Open the panel by removing the screws or clips, then gently pull out the old water panel. Dispose of it properly and insert the new one, ensuring it is securely seated. Close the panel and restore power. The humidistat will automatically reset, but you may need to adjust settings if necessary. Regular replacement prevents mold growth and ensures efficient humidity control.

4.2 Common Issues and Solutions

Common issues with the Aprilaire 60 Humidistat include inaccurate humidity readings, failure to turn on, or persistent error lights. For inaccurate readings, ensure the sensor is clean and properly installed. If the humidifier fails to activate, check the wiring connections and verify that the water panel is clean and functional. A flashing error light often indicates a problem with the water panel or sensor. Replace the water panel if necessary and reset the unit. Low humidity levels may require adjusting the settings or ensuring proper airflow through the HVAC system. Regular maintenance, such as cleaning the sensor and replacing the water panel, can prevent many of these issues. Always refer to the manual for specific troubleshooting steps.

Optimal Humidity Settings

The Aprilaire 60 recommends maintaining indoor humidity levels between 40-60% during winter for comfort and health. Adjust settings based on outdoor temperature to avoid over-humidification.

5.1 Recommended Winter Humidity Levels (40-60%)

Maintaining winter humidity levels between 40-60% is ideal for comfort and health. This range prevents dry air, reducing respiratory issues and static electricity. The Aprilaire 60 Humidistat automatically adjusts to outdoor temperatures, ensuring optimal indoor conditions. Lower levels (30-40%) may be needed if condensation occurs on windows. Always refer to the manual for precise adjustments based on your home’s specific needs and climate.

5.2 Adjusting Settings Based on Outdoor Temperature

Adjusting the Aprilaire 60 Humidistat settings based on outdoor temperature ensures optimal indoor humidity. In colder weather, lower humidity levels (around 30-40%) are recommended to prevent window condensation. As temperatures rise, you can increase humidity to 40-60% for comfort. The humidistat automatically adjusts based on outdoor conditions when in automatic mode, but manual fine-tuning may be needed. Monitor indoor conditions and adjust settings to maintain a balanced environment. This ensures energy efficiency and prevents moisture-related issues. Regularly check and adapt settings to align with seasonal changes for consistent comfort and humidity control.

User Manual and Additional Resources

The Aprilaire 60 user manual provides detailed instructions for installation, operation, and troubleshooting. Additional resources include downloadable PDF manuals, online FAQs, and customer support for assistance.

6.1 Downloading the Aprilaire 60 PDF Manual

To access the Aprilaire 60 PDF manual, visit the official Aprilaire website or authorized distributors. Search for “Aprilaire 60 Humidistat Manual” to find the downloadable PDF. This manual provides comprehensive instructions for installation, operation, and troubleshooting. It includes detailed diagrams and step-by-step guides to ensure proper setup and maintenance. The PDF format allows easy viewing on computers, tablets, or smartphones. Downloading the manual is free and straightforward, ensuring you have all the necessary information at your fingertips. Refer to this guide for optimal performance and to resolve any issues quickly. It’s an essential resource for both new and experienced users of the Aprilaire 60 Humidistat.

6.2 Online Support and FAQs

Aprilaire offers extensive online support and FAQs to assist users with the Aprilaire 60 Humidistat. Visit their official website to access a dedicated support section, where you can find troubleshooting guides, installation tips, and answers to common questions. The FAQs cover topics like humidity settings, manual operation, and maintenance procedures. Additionally, Aprilaire provides video tutorials and downloadable resources to help users understand and resolve issues quickly. For more complex problems, users can contact customer support directly through the website. The online platform is user-friendly, ensuring easy navigation and quick access to the information you need to optimize your humidistat’s performance.

Categories
Manuals

lenze i550 protec manual

The Lenze i550 Protec manual provides essential guidance for safe and effective use of the inverter, ensuring optimal performance and compliance with safety standards.

Intended for users, installers, and maintainers, this manual covers technical specifications, installation procedures, and operational guidelines to maximize the device’s efficiency and longevity.

1.1 Overview of the Lenze i550 Protec Inverter

The Lenze i550 Protec inverter is a high-performance drive designed for motor protection and control, offering a power range up to 75 kW. It combines advanced vector control with robust design, ensuring precise speed regulation and energy efficiency. Featuring integrated safety functions, EMC compliance, and user-friendly interfaces, it is ideal for demanding industrial applications requiring reliable and dynamic motor control.

1.2 Importance of the Manual for Safe and Effective Use

The Lenze i550 Protec manual is crucial for ensuring safe and effective operation. It outlines essential safety precautions, installation guidelines, and operational procedures to prevent risks and material damage. Adhering to the manual minimizes hazards, optimizes performance, and ensures compliance with international standards, making it indispensable for users to achieve reliable and efficient motor control systems.

Safety Instructions and Precautions

Adhering to safety guidelines is critical to prevent risks and ensure safe operation. Always follow instructions to avoid hazards and comply with standards like EN 61000-3-2.

2.1 General Safety Guidelines

Always ensure the inverter is installed and operated in accordance with the manual. Compliance with EN 61000-3-2 and other safety standards is mandatory. Proper grounding, insulation, and adherence to residual hazard precautions are essential. Never operate the device with DC motors or exceed specified voltage limits. Follow shutdown procedures meticulously to avoid risks and ensure safe handling of electrical components.

2.2 Residual Hazards and User Responsibilities

The user must consider residual hazards, including mechanical and electrical risks, even after safety measures. Proper adherence to instructions is crucial to prevent damage and ensure safe operation. Users are responsible for avoiding foreseeable misuse, such as operating the inverter with DC motors, and must ensure the device is configured and used as intended.

2.3 Emergency Procedures and Safe Shutdown

In emergency situations, immediately disconnect the power supply and ensure the inverter and motor come to a safe standstill. Follow proper shutdown procedures, including ramping down the motor speed gradually. Always ensure the system is de-energized before performing any maintenance or repairs to avoid potential risks. Adhere to all safety guidelines for secure operation.

Technical Specifications and Features

The Lenze i550 Protec offers a power range up to 75 kW, compatible with various motor types, and features advanced communication, control, and diagnostic capabilities for high-performance applications.

3.1 Power Range and Motor Compatibility

The Lenze i550 Protec supports a power range up to 75 kW, ensuring compatibility with a variety of motor types, including standard induction and high-efficiency motors, for flexible application across different industrial systems, while maintaining optimal performance and energy efficiency. This versatility makes it suitable for diverse operational demands and environments.

3.2 Communication and Control Capabilities

The Lenze i550 Protec offers advanced communication interfaces, including RS485 and Ethernet, enabling seamless integration with industrial automation systems. These capabilities allow for real-time monitoring, precise control, and efficient data exchange, ensuring optimal performance and adaptability in various industrial applications while supporting remote diagnostics and configuration for enhanced operational efficiency.

3.3 Advanced Protection and Diagnostic Features

The Lenze i550 Protec incorporates advanced protection mechanisms, such as short-circuit protection and thermal monitoring, to ensure reliable operation. Its diagnostic capabilities include real-time monitoring of operational parameters and fault detection, enabling swift issue identification and resolution. These features enhance system uptime, reduce downtime, and simplify troubleshooting, ensuring optimal performance and longevity of the inverter.

Installation and Commissioning

The manual guides through pre-installation checks, step-by-step installation, and initial setup, ensuring compliance with safety and EMC standards for smooth commissioning and reliable operation.

4.1 Pre-Installation Checks and Requirements

Before installation, ensure the environment meets specified conditions, including mains voltage range, EMC compliance, and proper grounding. Verify the motor compatibility and cable requirements to prevent foreseeable misuse and ensure safe operation as per the Lenze i550 Protec manual guidelines.

4.2 Step-by-Step Installation Process

Mount the inverter on a suitable surface, ensuring proper alignment and ventilation. Connect the motor and power cables securely, following the manual’s wiring diagram. Ensure the grounding is correctly implemented to meet safety standards. Configure the basic settings using the control panel or Lenze software tools before powering up the device.

4.3 Initial Setup and Configuration

Power up the inverter and access the control panel or Lenze software tools to begin configuration. Set the motor data, speed, and torque requirements according to the application needs, referencing the manual for specific parameter settings.

Ensure all safety features are enabled and test the inverter at low load to verify proper operation before full deployment.

Configuration and Parameter Settings

Understand and set parameters for motor control, speed, and torque using Lenze software tools. Adjust settings to optimize performance and ensure compatibility with your application.

Refer to the manual for detailed guidance on configuring advanced features and safety protocols to achieve precise control and reliable operation.

5.1 Understanding Configuration Parameters

Understanding configuration parameters is crucial for optimizing the Lenze i550 Protec inverter. Parameters include motor speed, torque limits, and control modes, ensuring precise motor control. Proper setup enhances efficiency and prevents errors. Refer to the manual for detailed descriptions and adjustment guidelines to achieve optimal performance tailored to specific applications.

5.2 Using Lenze Software Tools for Configuration

Lenze software tools simplify configuration by enabling precise parameter adjustment and real-time monitoring. These tools are compatible with the i550 Protec, ensuring optimal setup and performance. The software streamlines the configuration process, allowing users to fine-tune settings efficiently. Refer to the manual for guidelines on software installation and operation to maximize functionality.

5.3 Fine-Tuning for Optimal Performance

Fine-tuning the Lenze i550 Protec involves adjusting parameters to match specific motor and application requirements. This ensures smooth operation and maximizes efficiency. The manual provides detailed steps for optimizing settings, such as torque control and speed regulation, to achieve precise motor performance and minimize wear on connected machinery.

Operation and Monitoring

The Lenze i550 Protec manual outlines procedures for starting, stopping, and monitoring the inverter. It emphasizes real-time parameter tracking and adjustments to ensure smooth and efficient operation.

6.1 Starting and Stopping the Inverter

Starting and stopping the Lenze i550 Protec inverter requires adherence to safety protocols, ensuring the device is deenergized before any work. The manual outlines procedures for power-up, ramp-down, and emergency stop. Proper shutdown ensures motor coasting to a standstill, preventing damage. Always follow the sequence to avoid residual risks and maintain operational integrity.

6.2 Monitoring Operational Parameters

Monitoring operational parameters of the Lenze i550 Protec ensures efficient performance and prevents overload. Users can track voltage, current, frequency, and temperature via the control interface or software tools. Real-time data helps maintain optimal conditions, prevent damage, and ensure compliance with safety standards. Regular checks enable proactive adjustments and troubleshooting, as outlined in the manual for reliable operation.

6.3 Adjusting Settings During Operation

Adjusting settings during operation ensures optimal performance and adaptability. Users can modify parameters like voltage, current, and frequency using Lenze software tools or the control interface. Real-time monitoring allows precise adjustments to match changing operational demands. The manual provides guidelines for safe modifications to prevent overload or damage, ensuring efficient and reliable operation.
Always refer to the manual for specific adjustment procedures.

Troubleshooting and Maintenance

This section outlines common issues, diagnostic steps, and routine maintenance tasks to ensure the Lenze i550 Protec operates efficiently and reliably, minimizing downtime and extending lifespan.

7.1 Common Issues and Solutions

Common issues with the Lenze i550 Protec include power supply fluctuations, motor overload, and communication errors. Solutions involve checking power connections, adjusting motor parameters, and verifying communication settings. Regular maintenance, such as updating firmware and inspecting cables, helps prevent these issues. Always refer to the manual for detailed troubleshooting steps and safe repair practices.

7.2 Scheduled Maintenance and Inspection

Regular maintenance ensures optimal performance and longevity of the Lenze i550 Protec. Schedule inspections of connections, fans, and filters to prevent dust buildup. Check for firmware updates and perform backups before updates. Inspect cables for wear and ensure proper torque on connections. Replace worn parts promptly and maintain a clean environment to prevent overheating and system downtime.

7.3 Diagnostics and Fault Analysis

The Lenze i550 Protec features advanced diagnostic tools to identify and resolve issues quickly. Error codes and status LEDs provide clear indications of faults. Use Lenze software tools for detailed analysis and logging. Regularly review fault history to prevent recurring issues and ensure optimal performance. This proactive approach minimizes downtime and enhances system reliability.

Compliance and Standards

The Lenze i550 Protec complies with EN 61000-3-2, ensuring electromagnetic compatibility and adherence to safety standards. It meets regulatory requirements for environmental and EMC compliance, guaranteeing reliable operation.

8.1 Compliance with EN 61000-3-2

The Lenze i550 Protec adheres to EN 61000-3-2 standards, ensuring electromagnetic compatibility and minimizing harmonic distortion in power systems. This compliance guarantees efficient and disturbance-free operation in industrial environments, aligning with global regulatory requirements for power quality and electromagnetic emissions.

8.2 Conformance to Safety and EMC Standards

The Lenze i550 Protec is designed to meet rigorous safety and EMC standards, ensuring reliable performance and protection against electromagnetic interference. Compliance with these standards guarantees user safety, system integrity, and adherence to international regulations, making it suitable for various industrial applications requiring high levels of reliability and safety.

8.3 Environmental and Regulatory Considerations

The Lenze i550 Protec is designed to meet global environmental and regulatory requirements, minimizing its ecological footprint while ensuring compliance with relevant standards. Its energy-efficient design supports sustainable operations.

Users must adhere to local regulations and ensure proper disposal of the device. Lenze emphasizes compliance with environmental laws and responsible use throughout the product’s lifecycle.

Advanced Features and Applications

The Lenze i550 Protec offers advanced features for industrial automation, enabling seamless integration with control systems and high-performance motor control, while supporting diverse applications in demanding environments.

9.1 Integration with Industrial Automation Systems

The Lenze i550 Protec seamlessly integrates with industrial automation systems, offering advanced communication capabilities and compatibility with standard protocols. This ensures efficient control and monitoring, enabling synchronized operations across complex industrial setups and enhancing overall system performance and reliability.

9.2 Use in Pneumatic and Hydraulic Systems

The Lenze i550 Protec is ideal for controlling solenoid valves in pneumatic systems, ensuring precise airflow regulation. It also supports hydraulic systems by providing smooth motor control, reducing mechanical stress, and optimizing fluid flow. Its advanced features enhance system efficiency and reliability, making it a versatile solution for both pneumatic and hydraulic applications.

9.3 Application in High-Performance Motor Control

The Lenze i550 Protec excels in high-performance motor control, offering precise speed regulation and real-time torque management. Its vector control technology ensures smooth operation, minimizing wear and tear. With a power range up to 75 kW, it is ideal for demanding applications requiring high accuracy and dynamic response, ensuring optimal motor performance in industrial environments.

User Responsibility and Liability

Users must adhere to guidelines, avoid foreseeable misuse, and ensure proper installation and operation. Lenze disclaims liability for damages resulting from improper use or non-compliance with instructions.

10.1 Proper Use and Adherence to Guidelines

Proper use of the Lenze i550 Protec requires strict adherence to safety guidelines and operational instructions. Users must ensure all installations and adjustments comply with provided specifications to avoid hazards. Compliance with EN standards and safety protocols is mandatory to guarantee safe and efficient operation, minimizing risks of material damage or operational failures.

10.2 Avoiding Foreseeable Misuse

Avoiding foreseeable misuse involves ensuring the Lenze i550 Protec is operated only within specified parameters. Users must not employ the inverter with DC motors or bypass safety features. Adherence to safety guidelines and proper installation practices is essential to prevent damage or unsafe conditions. Lenze disclaims liability for misuse or failure to follow instructions.

10.3 Lenze’s Disclaimer of Liability

Lenze assumes no liability for damages arising from improper use or failure to comply with the manual’s guidelines. Users are solely responsible for ensuring the i550 Protec is used as intended. Lenze disclaims liability for unforeseen misuse or operational errors, emphasizing adherence to safety and operational instructions to avoid liability issues.

Documentation and Support

Lenze provides comprehensive documentation, including manuals and resources, to ensure proper installation and operation of the i550 Protec. Technical support is available for troubleshooting and assistance.

Regular software and firmware updates are essential for optimal performance, ensuring compliance with safety and operational standards. Users are encouraged to stay informed through official channels.

11.1 Accessing the Full Manual and Resources

The full Lenze i550 Protec manual and additional resources are available online, ensuring easy access for users. Visit Lenze’s official website or authorized portals to download the complete documentation. These resources provide detailed instructions, technical specifications, and troubleshooting guides, essential for proper installation, configuration, and operation of the inverter.

11.2 Technical Support and Assistance

Lenze offers comprehensive technical support for the i550 Protec inverter, ensuring timely assistance for installation, configuration, and troubleshooting. Users can contact Lenze’s support team via phone, email, or through their official website. Additionally, regional service centers provide localized support, guaranteeing expert help to resolve issues efficiently and maintain optimal system performance.

11.3 Staying Updated with Software and Firmware

Regularly updating the Lenze i550 Protec’s software and firmware is crucial for optimal performance and security. Users can download the latest versions from Lenze’s official website or through dedicated software tools. Installing updates ensures access to new features, improved functionality, and enhanced compatibility, minimizing downtime and maintaining the inverter’s efficiency and reliability over time.

The Lenze i550 Protec manual ensures safe, efficient, and compliant operation of the inverter. By following guidelines, users can optimize performance and minimize risks, achieving reliable results.

12.1 Summary of Key Points

The Lenze i550 Protec manual emphasizes safety, proper installation, and configuration for optimal performance. It highlights compliance with standards like EN 61000-3-2 and provides guidelines for troubleshooting and maintenance. Users must adhere to safety instructions and avoid foreseeable misuse to ensure reliable operation and prevent damage or injury, aligning with Lenze’s focus on efficiency and user responsibility.

12.2 Final Reminders for Safe and Effective Use

Always adhere to safety guidelines and installation procedures outlined in the manual. Ensure compliance with standards like EN 61000-3-2 and avoid foreseeable misuse. Regular maintenance and proper shutdown procedures are essential. Users must verify compatibility and environmental compliance before operation. Refer to the manual for detailed instructions and support resources to ensure safe and efficient use of the Lenze i550 Protec inverter.

Categories
Manuals

jitterbug phone troubleshooting manual

The Jitterbug phone‚ designed for seniors‚ offers simplicity and accessibility‚ but occasional issues arise. Troubleshooting is key to maintaining functionality and ensuring user satisfaction.

1.1 Understanding the Jitterbug Phone Features

The Jitterbug phone is designed for simplicity‚ featuring large buttons‚ bright screens‚ and loud speakers. Models like the Flip2 offer flip designs‚ while the Smart3 includes smartphone capabilities. These devices emphasize ease of use‚ with voice typing‚ list-based menus‚ and assistive features‚ making them ideal for seniors seeking reliable communication tools.

1.2 Importance of Troubleshooting for Senior-Friendly Devices

Troubleshooting is crucial for senior-friendly devices like Jitterbug phones‚ as they are designed for ease of use. Issues like poor call quality or low volume can hinder communication‚ emphasizing the need for simple solutions to ensure independence and confidence in using the phone effectively every day.

Common Issues with Jitterbug Phones

Jitterbug phones‚ while user-friendly‚ often face issues like poor call quality‚ low volume‚ and voicemail or texting problems. These concerns are common and can affect usability‚ making troubleshooting essential.

2.1 Poor Call Quality and Connectivity Problems

Poor call quality and connectivity issues are frequent concerns with Jitterbug phones. Symptoms include dropped calls‚ static‚ and failed connections. These problems often stem from weak network signals or device settings. Checking network coverage and restarting the phone can resolve many issues. Persistent problems may require contacting customer support for further assistance.

2.2 Low Volume and Hearing Difficulties

Low volume and hearing difficulties are common issues for Jitterbug users‚ especially seniors. The phone’s loudspeaker may not always provide sufficient sound. Adjusting the volume settings or using hearing aid compatibility features can help. Additionally‚ ensuring the speaker is free from obstructions can improve sound quality significantly for clearer communication.

2.3 Voicemail and Texting Issues

Voicemail and texting problems on Jitterbug phones can stem from network connectivity or incorrect settings. Users may experience undelivered messages or voicemail notifications not appearing. Checking network coverage‚ ensuring correct voicemail setup‚ and restarting the phone often resolve these issues‚ restoring communication functionalities effectively for seamless usage.

Basic Troubleshooting Steps

Basic troubleshooting involves restarting the phone‚ checking network coverage‚ and adjusting volume settings. These simple steps often resolve common issues quickly and effectively.

3.1 Restarting the Phone

Restarting the Jitterbug phone is a simple process. Press and hold the Power button until the device shuts down‚ then turn it back on. This step often resolves minor issues like connectivity problems or slow performance without affecting saved data or settings.

3.2 Checking Network Coverage

Checking network coverage is crucial for maintaining clear calls and reliable connectivity. Ensure your Jitterbug phone has a strong signal by checking the signal bars. If coverage is weak‚ move to an open area or higher ground. If issues persist‚ contact Lively support for assistance.

3.3 Adjusting Volume Settings

Adjusting volume settings can resolve hearing difficulties. Use the volume buttons on the side of the Jitterbug phone to increase or decrease the level. Ensure the speaker is not blocked and check if the phone is in silent mode. Accessing the volume settings through the menu can also provide additional options for customization.

Advanced Troubleshooting Techniques

Advanced techniques like factory resets‚ software updates‚ and clearing cache/storage can resolve persistent issues. These steps require careful execution to avoid data loss and ensure optimal performance.

4.1 Performing a Factory Reset

A factory reset restores the Jitterbug phone to its default settings‚ resolving persistent issues. Press Vol Down and Power buttons simultaneously to access the menu‚ then select “wipe data/factory reset” using volume controls. This process erases all data‚ so ensure backups are done beforehand for data preservation.

4.2 Updating Phone Software

Regular software updates enhance performance and fix bugs. To update‚ go to Settings > About Phone > System Update. Ensure a stable internet connection and sufficient battery life. Follow on-screen instructions to download and install the latest version‚ improving functionality and security for a smoother user experience.

4.3 Clearing Cache and Storage

Clearing cache and storage helps optimize performance. Go to Settings > Storage > Internal Storage. Select “Clear cache” or “Free up space” to remove temporary files. Delete unused apps or data to ensure smooth functionality and prevent slow performance issues on your Jitterbug phone.

Utilizing Built-In Help and User Guides

Built-in help and user guides simplify troubleshooting. Access the user manual directly on your phone for step-by-step instructions. The list-based menu and voice typing features enhance ease of use and problem-solving for seniors.

5.1 Accessing the Phone’s User Manual

Access the Jitterbug phone’s user manual through the settings menu. It provides step-by-step guides for troubleshooting‚ optimizing device use‚ and resolving common issues. The manual is tailored for seniors‚ ensuring clarity and ease of understanding‚ helping users resolve issues independently and efficiently.

5.2 Navigating the List-Based Menu

Navigate the Jitterbug phone’s list-based menu using simple up and down buttons. Large text and clear options ensure ease of use. Selecting an option is straightforward‚ with voice assistance available for additional support. This intuitive design helps users quickly access settings‚ features‚ and troubleshooting guides without confusion.

5.3 Using Voice Typing and Assistive Features

Enhance usability with voice typing‚ enabling hands-free text and email composition. Assistive features like text-to-speech and adjustable font sizes further simplify tasks. These tools are designed to aid seniors in communicating effectively and accessing information effortlessly‚ ensuring a seamless experience with minimal effort required.

Contacting Customer Support

Contacting Lively (formerly GreatCall) support is essential for resolving network issues‚ account restrictions‚ and device malfunctions. Their team provides expert assistance tailored to senior-friendly solutions.

6.1 Reaching Lively (formerly GreatCall) Support

To reach Lively support‚ visit their website or call directly for assistance with Jitterbug phone issues. They offer expert help for network problems‚ account setup‚ and device troubleshooting‚ ensuring reliable solutions tailored for seniors and easy-to-understand guidance.

6.2 Preparing for Effective Communication

Before contacting support‚ ensure you have your phone’s make and model ready‚ along with the serial number or account details. Clearly describe the issue‚ including when it started and any error messages. Write down your questions and have a pen handy for notes. This preparation ensures efficient and effective communication.

6.3 Understanding Support Options

Lively offers various support options‚ including phone support‚ online resources‚ and user guides. Customers can access troubleshooting tips‚ video tutorials‚ and community forums. For severe issues‚ in-person assistance may be available. Understanding these options helps users choose the most effective method for resolving their Jitterbug phone issues promptly and efficiently.

Additional Resources and Tools

Jitterbug users can access online forums‚ video tutorials‚ and detailed user guides. These resources provide step-by-step solutions and tips to resolve common issues and optimize phone usage effectively.

7.1 Online Forums and Communities

Online forums and communities offer valuable support for Jitterbug phone users. Seniors and caregivers can find solutions‚ share experiences‚ and get tips from active members. These platforms often include troubleshooting guides‚ user discussions‚ and expert advice‚ making them a reliable resource for addressing common issues and optimizing device performance effectively.

7.2 Video Tutorials and How-To Guides

Video tutorials and how-to guides provide step-by-step instructions for troubleshooting and mastering Jitterbug phone features. These resources‚ often available on the phone or Lively’s website‚ help seniors and caregivers understand advanced functions and resolve issues through clear visual demonstrations‚ enhancing overall user experience and problem-solving confidence.

7.3 Third-Party Troubleshooting Apps

Third-party apps can aid in diagnosing and resolving Jitterbug phone issues‚ offering tools for system checks‚ cache clearing‚ and performance optimization. However‚ users should choose reputable apps to maintain device security and ensure compatibility with the Jitterbug’s senior-friendly operating system and features‚ avoiding potential conflicts or data risks.

Preventative Maintenance Tips

Regular software updates‚ managing phone storage‚ and using original accessories help maintain performance and reliability‚ ensuring the Jitterbug phone functions optimally for senior users.

8.1 Regularly Updating Software

Regular software updates enhance security‚ fix bugs‚ and improve performance. Users should enable automatic updates or check periodically in settings to ensure their Jitterbug phone runs smoothly with the latest features and optimizations.

8.2 Managing Phone Storage

Managing phone storage is essential for optimal performance. Regularly delete unused apps‚ photos‚ and files. Check storage in settings and consider expanding via external options if available‚ ensuring the device runs efficiently without slowdowns or data overload issues.

8.3 Using Original Accessories

Using original accessories ensures compatibility and optimal performance. They are designed specifically for your Jitterbug phone‚ providing reliable charging and functionality. Avoid third-party alternatives‚ as they may cause connectivity or charging issues‚ potentially damaging your device.

Jitterbug Flip and Smart Model-Specific Troubleshooting

The Jitterbug Flip and Smart models require tailored troubleshooting approaches due to their distinct features. Understanding each device’s unique characteristics helps address specific issues effectively.

9.1 Jitterbug Flip2: Unique Features and Solutions

The Jitterbug Flip2 features large buttons and a bright screen‚ designed for ease of use. Common issues include poor call quality and low volume‚ which can often be resolved by adjusting settings or restarting the phone. Its simplicity makes troubleshooting straightforward for users.

9.2 Jitterbug Smart3: Addressing Common Complaints

The Jitterbug Smart3 often experiences issues like poor call quality‚ disconnects‚ and low volume. Resetting the device or updating software can resolve these problems. Additionally‚ clearing cache and storage helps improve performance‚ ensuring the phone remains functional and user-friendly for seniors.

9.3 Differences in Troubleshooting Approaches

Troubleshooting approaches vary between Jitterbug Flip2 and Smart3. The Flip2 often requires physical button checks and simple restarts‚ while the Smart3 may need software updates‚ cache clearing‚ or app management. These differences cater to each model’s unique design and user needs‚ ensuring effective problem resolution.

Mastering Jitterbug phone troubleshooting empowers users to resolve issues efficiently. Continuous learning and proactive maintenance ensure optimal performance‚ making these devices reliable companions for seniors seeking simplicity and connectivity.

10.1 Recap of Key Troubleshooting Strategies

Effective troubleshooting involves restarting the phone‚ checking network coverage‚ and adjusting volume settings. Advanced steps like factory resets and software updates can resolve persistent issues‚ ensuring optimal performance and user satisfaction.

  • Restart the phone to clear temporary glitches.
  • Check network coverage for call and data issues.
  • Adjust volume settings for better audibility.
  • Perform factory resets for a fresh start.

10.2 Encouraging Continuous Learning

Continuous learning is crucial for mastering the Jitterbug phone. Explore its features‚ refer to the user manual‚ and utilize online resources like forums and video tutorials. Regularly updating software and staying informed about new tools ensures a seamless and adaptive user experience.

  • Explore phone features and settings regularly.
  • Utilize online forums and video tutorials.
  • Stay updated with the latest software updates.

10.3 Final Thoughts on Jitterbug Phone Reliability

The Jitterbug phone is a reliable option for seniors‚ offering simplicity and accessibility. While issues like poor call quality or low volume can occur‚ they are often resolved with basic troubleshooting. Regular updates and proper maintenance ensure optimal performance‚ making it a dependable choice for everyday use.

Categories
Manuals

nikon sb 700 flash manual

Welcome to the Nikon SB-700 Flash Manual, your comprehensive guide to mastering this versatile and high-performance Speedlight. Designed for both amateur and professional photographers, the SB-700 offers advanced lighting solutions, compatibility with Nikon DSLRs, and seamless integration with the Creative Lighting System. This manual will help you unlock its full potential, explore its features, and troubleshoot common issues to enhance your photography experience.

Key Features and Specifications

The Nikon SB-700 offers a guide number of 28 (ISO 100, 35mm), compact design (360g, 71×104.5x126mm), and versatile flash coverage (24-120mm in FX format). It features a tilting flash head (90° up, 7° down) and 180° horizontal rotation, enabling creative bounce flash techniques. Wireless functionality and compatibility with Nikon’s Creative Lighting System make it ideal for advanced lighting setups.

Guide Number and Power

The Nikon SB-700 boasts a guide number of 28 at ISO 100 and 35mm, ensuring powerful and consistent illumination. This capability allows photographers to cover a wide range of shooting scenarios, from portraits to event photography. The flash’s power is adjustable, offering a range of settings to suit different lighting needs. Whether you’re working in a studio or on-location, the SB-700 delivers reliable performance with precise control over light output. This makes it an excellent choice for photographers seeking a balance between portability and professional-grade lighting power.

Flash Coverage and Angle

The Nikon SB-700 offers exceptional flash coverage and flexibility, making it suitable for a variety of shooting situations. With a wide-angle coverage of 24mm to 120mm (FX-format), it ensures even illumination across the frame, reducing unwanted shadows and overexposure. The flash head is highly adjustable, tilting upward by 90 degrees and downward by 7 degrees, while also rotating 180 degrees to the left and right. This versatility allows for bounce flash techniques, enabling creative lighting setups. The SB-700 automatically adjusts its zoom to match the focal length of the lens, optimizing light distribution for precise results. Whether you’re capturing portraits or group shots, the flash’s coverage and angle adjustments provide consistent and professional-grade lighting. This feature-rich design ensures that photographers can adapt to different scenarios effortlessly, making the SB-700 a reliable companion for both amateur and professional photographers.

Compatibility with Nikon Cameras

The Nikon SB-700 Speedlight is designed to seamlessly integrate with a wide range of Nikon DSLR cameras, ensuring optimal performance and compatibility. It works flawlessly with both FX and DX-format DSLRs, making it a versatile choice for photographers using different camera formats. The SB-700 is fully compatible with Nikon’s Creative Lighting System (CLS), allowing for advanced wireless flash control and sophisticated lighting setups; It supports i-TTL (Intelligent Through-The-Lens) metering, providing accurate flash exposure in various shooting conditions. Additionally, the SB-700 is compatible with older Nikon cameras that support the standard iTTL flash protocol, making it a valuable accessory for photographers with legacy equipment. The flash also works with Nikon’s AF-assist illuminator, enhancing autofocus performance in low-light environments. Its compact and lightweight design ensures easy portability, while its compatibility with Nikon’s ecosystem makes it a reliable tool for both amateur and professional photographers seeking to expand their creative possibilities.

Understanding Flash Modes

The Nikon SB-700 Speedlight offers multiple flash modes to cater to various photography needs, providing flexibility and creative control. The primary modes include i-TTL (Intelligent Through-The-Lens) mode, which automatically adjusts flash output based on the scene’s lighting conditions for precise exposure. This mode is ideal for everyday shooting and ensures balanced results. Manual mode (M) allows photographers to set the flash output manually, offering complete control for advanced lighting setups. Additionally, the SB-700 features a Repeating Flash mode, which emits multiple flashes in rapid succession to create unique effects, such as capturing motion or adding texture to images.

The flash also utilizes a pre-flash system to measure ambient light and subject distance, ensuring accurate metering. This function is particularly useful in challenging lighting conditions. By understanding and utilizing these modes effectively, photographers can achieve professional-grade lighting results and enhance their creative expression.

Customization and Control

The Nikon SB-700 Speedlight offers extensive customization options, allowing photographers to tailor its performance to their specific needs. Users can adjust the flash output manually, selecting from a range of power levels to achieve the desired effect. This level of control is particularly useful in studio settings or when working with multiple light sources. Additionally, the SB-700 supports custom settings, enabling photographers to save their preferred configurations for quick access during shoots.

The flash head can be tilted upward by 90 degrees and downward by 7 degrees, as well as rotated 180 degrees to the left and right, providing flexibility in directing light. This versatility allows for creative lighting setups, including bounced flash and side lighting, to enhance depth and dimension in images. Furthermore, the SB-700’s intuitive interface and backlit LCD screen make it easy to navigate and adjust settings, even in low-light conditions. By leveraging these customization features, photographers can unlock the full creative potential of the SB-700 and achieve professional-quality results.

Wireless Functionality

The Nikon SB-700 Speedlight offers advanced wireless functionality, enabling photographers to create complex lighting setups with ease. It can function as both a master and slave unit, allowing for seamless communication between multiple flashes. When in master mode, the SB-700 can control up to three groups of wireless flash units, providing precise control over lighting ratios and output. This feature is particularly useful for achieving balanced illumination in studio or location shoots.

In slave mode, the SB-700 can be triggered by other compatible Nikon Speedlights or the SU-800 Wireless Commander, offering flexibility in off-camera flash setups. The flash also supports wireless multiple flash-unit functions, enabling photographers to create dynamic lighting effects. With a reliable wireless range and intuitive controls, the SB-700 makes it easy to experiment with creative lighting configurations. Its LCD panel provides clear visibility of wireless settings, ensuring adjustments can be made quickly and efficiently. This wireless capability enhances the versatility of the SB-700, making it an invaluable tool for photographers seeking advanced lighting solutions.

Maintenance and Troubleshooting

Proper maintenance and troubleshooting are essential to ensure the Nikon SB-700 Speedlight performs optimally. Regularly clean the flash head and battery compartment to prevent dust buildup, which can affect performance. Use a soft, dry cloth for cleaning, and avoid harsh chemicals. If the flash fails to fire, check the battery level and ensure it is turned on. Verify that the flash is properly mounted on the camera’s hot shoe and that the contacts are clean and free of corrosion.

For troubleshooting, refer to the manual for specific error solutions. If the AF-assist illuminator does not activate, ensure the camera’s autofocus is not locked. If the flash head misaligns, gently realign it without forcing it. For wireless issues, check the master/slave settings and ensure all units are on the same channel. Store the SB-700 in a protective case when not in use to prevent damage. Regularly update the firmware to access the latest features and improvements. By following these steps, you can maintain the SB-700’s performance and resolve common issues effectively.

Regular maintenance, such as cleaning the flash head and updating firmware, will ensure optimal performance. Troubleshooting common issues, like misalignment or wireless connectivity problems, can be efficiently resolved with the tips provided. Whether you’re capturing portraits, events, or studio shots, the SB-700 is a reliable companion to enhance your creative vision. Explore its features, experiment with different techniques, and unlock new possibilities in your photography journey.

Categories
Manuals

curbell medical tv remote manual

Overview of the CurBell Medical TV Remote

The CurBell Medical TV Remote is designed for heavy-duty use in hospital settings, offering durability and ease of operation. Its intuitive design ensures patient comfort and accessibility, featuring large buttons for simplicity. It integrates seamlessly with healthcare systems, providing reliable control over TV functions and enhancing patient entertainment experiences.

1.1 Key Features and Design

The CurBell Medical TV Remote boasts a durable, lightweight design with large, easy-to-press buttons for intuitive navigation. Its ergonomic layout ensures comfort and accessibility, particularly for patients with limited dexterity. The remote features a simplified control interface, reducing confusion and enhancing user experience. Designed for healthcare environments, it includes antimicrobial materials to support infection control. The device is also compatible with pillow speakers, offering seamless integration for patient entertainment.

1.2 Target Audience and Use Cases

The CurBell Medical TV Remote is primarily designed for patients in healthcare settings, particularly those with limited dexterity or cognitive impairments. It is ideal for hospitals, nursing homes, and rehabilitation centers where accessibility and simplicity are crucial. The remote’s large buttons and compatibility with pillow speakers make it easy for bedridden patients to control their entertainment, enhancing their comfort and overall experience during recovery.

Installation and Setup

The CurBell Medical TV Remote installation involves unboxing, battery insertion, and initial configuration. It is designed for straightforward setup in healthcare environments, ensuring quick deployment and ease of use.

2.1 Unboxing and Components

The CurBell Medical TV Remote comes with essential components for immediate use. Inside the box, you’ll find the remote control, batteries, and an instruction manual. The remote is pre-configured for compatibility with healthcare-grade TVs, ensuring seamless integration; Additional accessories, such as a pillow speaker, may be included for enhanced patient convenience. All components are designed for durability and ease of use in medical environments.

2.2 Battery Installation and Power Management

To power the CurBell Medical TV Remote, open the battery compartment and install the provided batteries. Ensure they are correctly aligned with the polarity indicators. The remote features a power-saving mode to extend battery life. Replace batteries when the remote’s functionality diminishes. Use high-quality alkaline batteries for optimal performance. Proper battery management ensures uninterrupted operation in healthcare settings. Always handle batteries safely to avoid damage or leakage.

2.3 Initial Configuration and Pairing

To configure the CurBell Medical TV Remote, first ensure the TV is turned on. Open the battery compartment, install the batteries, and close it securely. Press and hold the “Pair” button until the LED light blinks, indicating pairing mode. Point the remote at the TV and press the “Power” button. The remote will automatically sync with the TV. Once paired, test all buttons to ensure proper functionality. This process ensures smooth operation and compatibility with healthcare systems.

Programming the Remote

Programming the CurBell Medical TV Remote involves using brand codes to customize button functions, ensuring compatibility with specific devices and enhancing user control over TV operations.

3.1 Using Brand Codes for Programming

Using brand codes is a straightforward method to program the CurBell Medical TV Remote. Users can search and enter specific codes corresponding to their TV brand, ensuring proper functionality. The remote comes with a code list for reference, making it easy to input the correct sequence. Once the code is entered, test the remote to confirm it controls the TV as expected. This method ensures efficient and accurate programming tailored to the device.

3.2 Customizing Button Functions

The CurBell Medical TV Remote allows users to customize button functions for personalized control. By accessing the remote’s settings menu, healthcare staff can reassign buttons to perform specific actions, such as adjusting volume or changing channels. This feature enhances usability and ensures the remote meets individual patient needs, providing a tailored experience for ease of operation in medical settings.

Operating the Remote

The CurBell Medical TV Remote offers intuitive navigation with large, easy-to-press buttons, ensuring seamless control of TV functions and access to special features for enhanced patient comfort.

4.1 Navigating TV Controls

The CurBell Medical TV Remote features large, intuitive buttons for easy navigation of TV controls, ensuring patients can effortlessly switch channels, adjust volume, and access menus. Its simple layout minimizes confusion, while the ergonomic design provides comfortable operation. The remote is optimized for hospital settings, with clear labels and consistent functionality to meet the needs of diverse patient populations, including those with limited dexterity or cognitive impairments.

4.2 Accessing Special Features

The CurBell Medical TV Remote offers special features such as one-touch access to frequently used channels and volume control lock to prevent accidental adjustments. Patients can also utilize the pillow speaker integration for private listening. These features are designed to enhance patient comfort and convenience, ensuring an improved entertainment experience during their stay. The remote’s user-friendly interface makes it easy to navigate and access these advanced functions seamlessly.

Troubleshooting Common Issues

Common issues with the CurBell Medical TV Remote include connectivity problems and button malfunctions. Resetting the remote or replacing batteries often resolves these issues quickly.

5.1 Resetting the Remote

To reset the CurBell Medical TV Remote, press and hold the RESET button located at the back for 10 seconds. Release and wait for the LED light to blink twice, indicating the reset is complete. This process resolves issues like unresponsiveness or incorrect button functions. If the remote still malfunctions, check the batteries or ensure proper pairing with the TV. Resetting restores default settings without affecting programmed functions.

5.2 Addressing Connectivity Problems

If the CurBell Medical TV Remote fails to connect, ensure the batteries are properly installed and have sufficient charge. Check for physical obstructions between the remote and the TV. Verify that the remote is correctly paired with the TV by following the initial pairing process. If issues persist, reset the remote or consult the TV’s compatibility settings. A slowly blinking LED indicates pairing mode; press and hold the DELAY button to resolve connectivity.

Maintenance and Repair

Regular maintenance ensures optimal performance. Clean the remote with a mild detergent and water, avoiding harsh chemicals. Inspect batteries and contacts for corrosion. Replace worn or damaged parts promptly to maintain functionality and safety.

6.1 Cleaning and Sanitizing

Cleaning and sanitizing the CurBell Medical TV Remote are crucial for maintaining hygiene in healthcare settings. Use a mild detergent and water to wipe down the remote, paying attention to high-touch areas. Avoid harsh chemicals or submerging the device in water. Sanitize with disposable wipes safe for electronics. Regular cleaning schedules should be implemented to prevent germ spread and ensure optimal functionality. This process extends the remote’s lifespan and maintains patient safety.

6.2 Replacing Batteries and Parts

To replace the batteries, open the compartment, install new ones, and ensure the delay switch is set correctly. For damaged parts, contact authorized suppliers for genuine replacements. Always power off the remote before servicing. Proper disposal of old batteries and parts is essential. Follow manufacturer guidelines to maintain functionality and safety standards. Regular checks can prevent operational issues, ensuring reliable performance for patient use.

Compliance and Safety Standards

The CurBell Medical TV Remote meets stringent medical-grade certifications, ensuring safe and reliable operation in healthcare environments. It adheres to safety standards, protecting against interference and ensuring durability for heavy-duty use.

7.1 Medical Grade Certification

The CurBell Medical TV Remote is certified for use in healthcare settings, ensuring compliance with medical safety standards. Its design prioritizes patient safety, durability, and reliability. The remote meets stringent regulations for electromagnetic compatibility and infection control, making it suitable for hospital environments. Regular testing ensures it maintains high standards for performance and safety, providing peace of mind for both patients and healthcare staff.

7.2 Safety Precautions

To ensure safe use, the CurBell Medical TV Remote should be handled with care. Avoid exposing it to liquids or extreme temperatures. Regularly clean and sanitize the remote to prevent infection spread. Replace batteries properly to avoid leaks. Keep it out of reach of children and ensure it is used only for its intended purpose. Follow hospital protocols for device maintenance and disposal.

Integration with Healthcare Systems

The CurBell Medical TV Remote seamlessly integrates with healthcare systems, ensuring compatibility with hospital TVs and enhancing patient entertainment experiences while maintaining clinical efficiency and safety standards.

8.1 Compatibility with Hospital TVs

The CurBell Medical TV Remote is specifically designed to be compatible with hospital TVs, ensuring seamless operation in healthcare environments. It supports various TV models and brands, allowing for easy integration into existing hospital systems. The remote’s programming features, such as brand code entry, enable it to work with multiple devices, making it a versatile solution for patient entertainment. Its robust design and intuitive interface cater to diverse patient needs.

8.2 Managing Multiple Remotes

Managing multiple CurBell Medical TV Remotes is streamlined through centralized systems, ensuring efficient operation in healthcare settings. Each remote can be programmed with specific brand codes, allowing seamless control of various devices. This feature minimizes confusion and enhances patient care by enabling staff to manage multiple units effectively. The design supports synchronization, reducing operational challenges and ensuring reliable performance across different hospital rooms.

Accessories and Enhancements

The CurBell Medical TV Remote supports various accessories, such as pillow speakers, for enhanced patient comfort. These accessories are designed to integrate seamlessly with the remote, providing intuitive control and improving the overall user experience in healthcare settings.

9.1 Pillow Speakers

Pillow speakers are designed to enhance patient comfort, allowing easy TV navigation without holding the remote. They feature large, easy-to-press buttons for intuitive control, ensuring accessibility for all users. These speakers integrate seamlessly with the CurBell Medical TV Remote, providing a convenient and hygienic solution for patient entertainment in healthcare settings. Their design promotes relaxation and ease of use, making them an essential accessory for improving patient care experiences.

9.2 Additional Control Options

The CurBell Medical TV Remote offers programmable buttons for custom functions, allowing users to tailor controls to their preferences. Additional control options include compatibility with auxiliary devices and systems, enhancing flexibility in healthcare environments. These features ensure seamless integration with existing hospital technology, providing staff and patients with a comprehensive control solution that prioritizes ease of use and efficiency.

User Feedback and Improvements

Patients and staff praise the CurBell remote for its accessibility and durability. Feedback has led to design improvements, simplifying controls for easier use in healthcare settings.

10.1 Patient and Staff Reviews

Patients and staff have praised the CurBell Medical TV Remote for its ease of use and durability. Many find the large buttons intuitive, making it accessible for all users. Staff appreciate its reliability in high-traffic healthcare environments. Feedback highlights improved patient satisfaction due to seamless TV control. Some suggestions for enhancement include additional customization options, but overall, it is well-received as a practical solution for medical settings.

10.2 Manufacturer Updates

The manufacturer regularly releases firmware updates to enhance the CurBell Medical TV Remote’s performance. Recent updates include improved battery life, enhanced button responsiveness, and new customization options. These updates ensure the remote remains compatible with evolving healthcare systems. The manufacturer also prioritizes patient feedback, incorporating suggestions to improve accessibility and usability. Regular software updates are essential for maintaining optimal functionality and ensuring a seamless user experience in medical settings.

The CurBell Medical TV Remote is a robust solution designed to enhance patient entertainment and comfort in healthcare settings. Its intuitive design, durability, and compatibility with medical systems make it an essential tool for hospitals. Regular manufacturer updates ensure optimal performance and address user feedback, maintaining its reliability. This remote continues to improve, providing a seamless and satisfying experience for both patients and staff, ensuring it remains a vital component in modern healthcare environments.

Categories
Manuals

honeywell programmable thermostat owner’s manual

Welcome to the Honeywell Programmable Thermostat Owner’s Manual! This guide provides essential information to help you understand, install, and operate your thermostat effectively. It includes troubleshooting tips and maintenance advice to ensure optimal performance and energy efficiency.

Overview of the Manual’s Purpose and Structure

This manual is designed to guide you through the installation, operation, and maintenance of your Honeywell programmable thermostat. It provides clear instructions and troubleshooting tips to ensure optimal performance. The manual is structured into sections, starting with an introduction, followed by model-specific details, installation steps, programming guides, and advanced features. It also includes energy-saving tips and technical support information. By following this manual, you can maximize your thermostat’s efficiency and enjoy a comfortable, energy-efficient home environment.

Importance of Reading the Manual for Optimal Thermostat Performance

Reading the Honeywell programmable thermostat manual is crucial for achieving optimal performance. It provides step-by-step guidance, ensuring you understand how to install, program, and maintain your thermostat. Proper setup helps maximize energy efficiency, reducing utility bills. The manual also troubleshoots common issues, saving time and preventing unnecessary repairs. By following the instructions, you can unlock advanced features and ensure your thermostat operates smoothly, delivering consistent comfort and energy savings throughout the year. Regular updates and maintenance tips are also included for long-term functionality.

Understanding Your Honeywell Programmable Thermostat Models

Explore Honeywell’s diverse programmable thermostat models, each designed for simplicity and efficiency. From basic single-stage to advanced smart thermostats, find the perfect fit for your home needs.

Popular Models and Their Key Features

Honeywell offers a range of programmable thermostats with unique features. The TH4110B model is known for its simplicity and pre-programmed settings, while the RTH7600 features a touchscreen interface. The VisionPRO TH8000 series boasts advanced touchscreen functionality and wireless capabilities. The T6 Pro model integrates seamlessly with smart home systems, offering remote access and energy-saving options. Each model is designed to enhance comfort and efficiency, catering to various user preferences and home systems.

Differences Between Single-Stage, Multi-Stage, and Smart Thermostats

Single-stage thermostats regulate temperature in one stage, offering basic functionality. Multi-stage models handle multiple heating or cooling stages, improving efficiency and comfort. Smart thermostats, like the T6 Pro, integrate wireless connectivity and advanced features such as remote access, voice control, and energy usage tracking. They adapt to user preferences and optimize energy savings. Each type caters to different needs, from simplicity to advanced automation, ensuring a tailored solution for any home.

Installation and Setup Instructions

This section provides a step-by-step guide for installing and setting up your Honeywell programmable thermostat, ensuring proper wiring and system compatibility for optimal performance.

Step-by-Step Guide to Installing Your Honeywell Thermostat

Follow these steps to install your Honeywell thermostat:
Turn off the power at the circuit breaker.
Remove the old thermostat and note the wiring.
Mount the new thermostat base to the wall.
Connect the wires to the appropriate terminals.
Install the battery or connect the power wire.
Attach the thermostat to the base.
Turn the power back on and test the system.
Set the time and date, then check settings.
This ensures a safe and proper installation.

Wiring Requirements and Compatibility with Existing Systems

Ensure your Honeywell thermostat is compatible with your HVAC system. Check the wiring configuration in your manual to match your system type. Most models require a C wire for power, while others may use batteries. Verify compatibility with single-stage, multi-stage, or smart systems. Proper wiring ensures safe and efficient operation. Refer to the manual for specific wiring diagrams and guidelines. If unsure, contact Honeywell support for assistance. Correct wiring is crucial for optimal performance and energy efficiency.

Programming Your Honeywell Programmable Thermostat

Programming your Honeywell thermostat allows you to set custom schedules and temperature preferences, optimizing comfort and energy efficiency. Easily override settings manually when needed.

Setting Up Daily Schedules and Temperature Preferences

To optimize comfort and energy efficiency, program your Honeywell thermostat with daily schedules and temperature preferences. Start by setting the time and date, then customize temperature settings for different times of the day. Most models allow you to program four periods daily, adjusting temperatures for waking, leaving, sleeping, and returning. Use the touchscreen or buttons to input your preferences. Ensure settings align with your routine to maximize energy savings. Regularly review and adjust schedules as needed for optimal performance.

How to Override the Program Schedule Manually

To manually override your Honeywell programmable thermostat’s schedule, press the “Hold” button or adjust the temperature using the touchscreen or buttons. This action temporarily overrides the programmed settings until the next scheduled time. You can set a specific temperature, which will remain until the next programmed period begins. Refer to pages 13-14 in the manual for detailed steps. This feature allows flexibility without altering your daily schedule.

Advanced Features of Honeywell Programmable Thermostats

Honeywell programmable thermostats offer advanced features like touchscreen functionality, one-touch temperature control, and wireless or remote access, enhancing convenience and energy management.

Touchscreen Functionality and One-Touch Temp Control

The Honeywell programmable thermostat features an intuitive touchscreen interface, allowing easy navigation and settings adjustment. One-touch temperature control enables quick overrides of the programmed schedule, providing immediate comfort without altering the entire program. This functionality ensures seamless interaction and flexibility, making it simple to customize your home’s temperature settings to suit your preferences. The touchscreen remains lit for 45 seconds after changes, ensuring clarity and convenience.

Wireless and Remote Access Capabilities

Honeywell programmable thermostats offer advanced wireless and remote access features, enabling seamless control through smart home systems. By integrating with platforms like Honeywell Home, users can adjust settings, monitor energy usage, and receive alerts via the Honeywell Home app. This connectivity allows for convenient temperature management from anywhere, enhancing comfort and efficiency. Wireless capabilities also support voice control through smart speakers, further simplifying thermostat operation.

Maintenance and Troubleshooting

Regularly clean the thermostat screen and sensors to ensure accurate temperature readings. Refer to the manual for troubleshooting common issues like display errors or connectivity problems.

Regular Maintenance Tips for Your Thermostat

To ensure optimal performance, clean the thermostat’s screen and sensors regularly. Replace batteries annually if applicable. Check and tighten all wiring connections. Update software periodically for smart models. Inspect the HVAC system for dust buildup. Maintain a stable power supply, especially for touchscreens. Refer to the user manual for specific maintenance schedules and procedures tailored to your Honeywell model. These steps help prevent malfunctions and ensure energy efficiency.

Common Issues and How to Resolve Them

Common issues include unresponsive screens, incorrect temperatures, or lost programming. Restart the thermostat by turning power off and on. Check wiring connections and ensure the C wire is properly connected. For temperature discrepancies, recalibrate the thermostat. If issues persist, consult the user manual or contact Honeywell support. Regular updates and maintenance can prevent these problems, ensuring your thermostat operates smoothly and efficiently year-round.

Energy-Saving Tips with Honeywell Programmable Thermostats

Maximize energy efficiency with Honeywell programmable thermostats by setting optimal schedules and temperatures. Utilize features like one-touch controls and wireless access to monitor usage and adjust settings for maximum savings.

Optimizing Your Settings for Maximum Energy Efficiency

To maximize energy efficiency with your Honeywell programmable thermostat, set a consistent schedule that aligns with your daily routine. Lower the temperature when you’re asleep or away and raise it when you’re home. Use the programmable features to maintain optimal temperatures, reducing unnecessary heating or cooling. Regularly review and adjust settings to match seasonal changes and ensure your system operates efficiently. This approach will help you save energy and lower utility bills while maintaining comfort.

Understanding Energy Usage Reports and Analytics

Energy usage reports and analytics provide insights into your heating and cooling patterns, helping you identify trends and opportunities to save energy. The Honeywell Home app generates detailed reports, showing your energy consumption over time. By analyzing this data, you can adjust your settings to optimize efficiency. These reports highlight periods of high usage, enabling you to make informed decisions and reduce unnecessary energy waste. Regularly reviewing these analytics ensures your thermostat operates efficiently and aligns with your energy-saving goals.

Mobile App Integration and Smart Home Compatibility

The Honeywell Home app allows seamless control of your thermostat from anywhere. Compatible with smart home systems, it integrates effortlessly, enhancing convenience and energy management through remote access and automation.

Connecting Your Thermostat to Smart Home Systems

To connect your Honeywell programmable thermostat to your smart home system, follow these steps. First, ensure your thermostat is compatible with your smart home hub or platform. Open the Honeywell Home app and navigate to the settings menu. Select the option to pair your thermostat with your smart home system. If using a hub, ensure it is powered on and within range. Follow the in-app instructions to complete the pairing process. Once connected, you can control your thermostat using voice commands or through the smart home app. This integration allows for seamless automation and enhanced energy management.

Using the Honeywell Home App for Remote Control

The Honeywell Home app allows you to control your programmable thermostat remotely. Download the app from the App Store or Google Play and create an account. Once your thermostat is connected to Wi-Fi, link it to your account through the app. You can adjust temperatures, view schedules, and receive energy usage reports. The app also enables geofencing, learning your schedule to optimize heating and cooling. Use voice commands with smart assistants like Alexa or Google Assistant for added convenience. This seamless integration enhances comfort and energy efficiency.

Troubleshooting and Technical Support

Troubleshoot common issues like display errors or connectivity problems using the manual. Visit Honeywell’s official website for detailed guides or contact their support team for assistance.

Identifying and Fixing Common Errors

Common issues include blank displays, temperature inaccuracies, or lost programming. Check power sources and wiring connections. Ensure the C wire is properly installed if required. For display errors, restart the thermostat. If problems persist, refer to the troubleshooting section in the manual or Honeywell’s online support for step-by-step solutions. Regularly updating software and ensuring correct settings can prevent many issues. Always refer to the user guide for specific error codes and resolutions.

How to Contact Honeywell Support for Assistance

For assistance, visit Honeywell’s official website and navigate to the support section. You can also call their customer service hotline for direct help. Additionally, the Honeywell Home app provides resources and troubleshooting guides. Refer to your thermostat’s manual for contact details and online support links. Ensure you have your model number ready for quicker assistance. Honeywell’s support team is available to address installation, operation, or technical issues.