Categories
Manuals

frigidaire dehumidifier fad704dwd manual

The Frigidaire FAD704DWD Dehumidifier Manual provides essential guidance for optimal use of this ENERGY STAR certified appliance. It covers setup‚ operation‚ and safety‚ ensuring efficient moisture removal and proper maintenance.

1.1 Overview of the Frigidaire FAD704DWD Dehumidifier

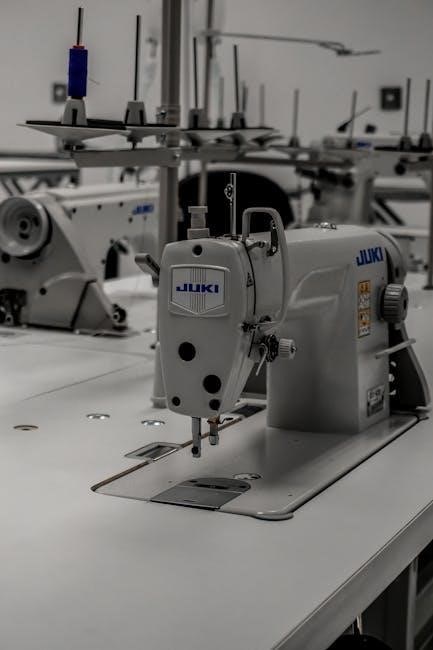
The Frigidaire FAD704DWD is a 70-pint capacity dehumidifier designed for efficient moisture removal in indoor spaces. It features a relative humidity range of 35-85% and a 16.3-pint container capacity. With a noise level of 53.4 dB on high‚ it offers a quiet operation. The unit includes a digital humidity readout‚ multiple fan speeds‚ and a washable filter‚ making it a reliable choice for maintaining comfortable indoor air quality.

1.2 Importance of the Manual for Proper Usage

The Frigidaire FAD704DWD Manual is crucial for proper setup‚ operation‚ and maintenance; It provides detailed instructions on features like the digital humidity readout‚ fan speed settings‚ and filter cleaning. Adhering to the manual ensures optimal performance‚ energy efficiency‚ and safety‚ while preventing potential damage to the unit. Regular maintenance‚ as outlined‚ prolongs the dehumidifier’s lifespan and effectiveness in reducing humidity levels.

Key Features and Specifications of the Frigidaire FAD704DWD

The Frigidaire FAD704DWD is an ENERGY STAR certified dehumidifier with a 70-pint capacity‚ ideal for large spaces. It features a digital humidity readout‚ adjustable fan speed‚ and a washable filter‚ ensuring efficient moisture removal and easy maintenance. Its compact design and quiet operation make it suitable for home use‚ while its energy efficiency reduces utility costs.

2.1 Capacity and Energy Efficiency

The Frigidaire FAD704DWD has a 70-pint capacity‚ making it suitable for large spaces. Its ENERGY STAR certification ensures energy efficiency‚ reducing power consumption and lowering utility bills. With an extraction rate of 1.375 liters per hour‚ it efficiently removes moisture while maintaining a quiet operation and eco-friendly performance.

2.2 Noise Level and Operational Modes

The Frigidaire FAD704DWD operates at a noise level of 53.4 dB on its highest setting‚ ensuring quiet performance. It features multiple fan speeds and operational modes‚ including automatic and manual settings‚ to customize humidity control. This ENERGY STAR certified dehumidifier balances efficiency and quiet operation‚ making it ideal for both residential and commercial spaces requiring consistent moisture management.

2.3 Digital Humidity Readout and Fan Speed

The Frigidaire FAD704DWD features a digital humidity readout for precise moisture level monitoring. Users can adjust the fan speed to two different settings‚ optimizing airflow and noise levels. This functionality ensures accurate humidity control‚ enhancing comfort and efficiency in managing indoor air quality effectively with minimal user intervention required for optimal performance.

Product Specifications and Manual Details

The Frigidaire FAD704DWD is an ENERGY STAR certified dehumidifier with a 70-pint capacity. It features a relative humidity range of 35-85% and a noise level of 53.4 dB on high. The unit includes a digital humidity readout‚ a 16.3-pint container capacity‚ and a washable filter for efficient moisture removal and easy maintenance.

3.1 Model Number and Product Category

The Frigidaire FAD704DWD is a 70-pint dehumidifier designed for efficient moisture removal. It falls under the category of home appliances‚ specifically dehumidifiers‚ and is ENERGY STAR certified. The model number FAD704DWD is crucial for identifying the unit for manual downloads‚ parts‚ and customer support. This ensures users access the correct resources for their specific dehumidifier model.

3.2 Relative Humidity Range and Container Capacity

The Frigidaire FAD704DWD operates with a relative humidity range of 35-85%‚ ensuring optimal moisture control. Its container capacity is 16.3 pints‚ providing ample storage for collected water. This combination allows for efficient dehumidification in various indoor spaces‚ maintaining a comfortable environment while minimizing frequent water drainage needs.

3.4 Extraction Rate and Filter Type

The Frigidaire FAD704DWD features an extraction rate of 1.375 liters per hour‚ ensuring efficient moisture removal. It includes a washable filter‚ which helps improve air quality by capturing dust and allergens. Regular cleaning of the filter is recommended to maintain optimal performance and extend the life of the dehumidifier‚ making it a reliable choice for long-term use.

Installation and Setup Guide

Unpack and place the dehumidifier on a level surface. Connect to a nearby power outlet and follow initial setup instructions for proper operation and efficiency.

4.1 Unpacking and Placement Recommendations

Unpack the dehumidifier carefully and place it on a level‚ stable surface. Ensure it is positioned away from direct sunlight and moisture-sensitive areas. For optimal performance‚ locate it near a power outlet and drain source. Maintain adequate space around the unit for proper airflow. Avoid placing it in enclosed spaces to ensure efficient operation and safety.

4.2 Connecting to Power and Initial Setup

Plug the dehumidifier into a grounded 115V electrical outlet. Ensure the voltage matches the unit’s requirements. Before operation‚ check the washable filter for cleanliness. Position the drain bucket securely or connect a drain hose if using continuous drainage. Power on the unit and set your desired humidity level using the control panel. Refer to the manual for initial setup guidance and optimal performance.

Operating Instructions for the Frigidaire FAD704DWD

This section provides guidance on operating the Frigidaire FAD704DWD‚ including using the control panel‚ setting humidity levels‚ and adjusting fan speed for optimal performance.

5.1 Understanding the Control Panel

The control panel of the Frigidaire FAD704DWD features a digital humidity readout‚ allowing precise adjustments. It includes buttons for setting the desired humidity level‚ selecting fan speed‚ and enabling operational modes. The interface is user-friendly‚ ensuring seamless navigation and customization of settings to achieve optimal dehumidification in your space.

5.2 Setting the Humidity Level and Fan Speed

Use the digital controls to adjust the humidity level between 35-85%. Press the humidity button to cycle through settings. Select from low‚ medium‚ or high fan speeds based on noise preference and airflow needs. The dehumidifier will automatically maintain the set humidity level‚ ensuring optimal performance and comfort in your space.

Maintenance and Care Tips

Regular cleaning of the washable filter and checking the water bucket ensure optimal performance. Ensure proper ventilation to prevent mold and mildew buildup. Follow guidelines for filter maintenance and drainage to keep your Frigidaire FAD704DWD running efficiently;

6.1 Cleaning the Washable Filter

To maintain efficiency‚ clean the washable filter regularly. Turn off the dehumidifier‚ remove the filter‚ and rinse it with warm water. Gently scrub any debris with a soft brush or cloth. Allow it to air dry before reinstalling. This ensures optimal airflow and prevents mold buildup.

Regular filter cleaning is crucial for consistent performance and air quality. Follow these steps to keep your Frigidaire FAD704DWD operating at its best.

6.2 Draining the Water Bucket

Regularly drain the water bucket to ensure proper function. Turn off and unplug the dehumidifier before removing the bucket. Carefully lift and empty the water into a sink. For convenience‚ some models allow for optional continuous drainage using a hose; Always check the bucket’s water level and clean it periodically to prevent mold growth.

Troubleshooting Common Issues

Identify and resolve issues like improper drainage or unusual noise. Check power connections‚ ensure the filter is clean‚ and verify proper installation for optimal performance.

7.1 Identifying and Resolving Common Problems

Common issues include the dehumidifier not turning on‚ excessive noise‚ or poor performance. Check power connections‚ ensure the filter is clean‚ and verify proper drainage. If the unit freezes‚ check temperatures and ensure proper airflow. For persistent issues‚ consult the manual or contact Frigidaire support for assistance.

7.2 Resetting the Dehumidifier

To reset the Frigidaire FAD704DWD‚ unplug it from power‚ wait 30 seconds‚ and plug it back in. This resolves issues like error codes or malfunctioning controls. Ensure the unit is on a level surface and properly ventilated. If problems persist‚ refer to the manual for advanced troubleshooting steps.

Safety Precautions and Guidelines

Ensure proper placement away from flammable materials and water sources. Keep the area clear for ventilation. Avoid exposure to extreme temperatures. Place on a level surface.

8.1 Placement and Electrical Safety

Place the dehumidifier on a level surface‚ away from direct sunlight and flammable materials. Ensure it is positioned at least 6 inches from any walls or obstructions. Install on a non-carpeted floor to prevent damage. Use a grounded electrical outlet and avoid extension cords to maintain safety. Keep the power cord away from water to prevent electrical hazards.

8.2 Child Safety and Usage Restrictions

Ensure children are kept away from the dehumidifier to avoid accidental injury or tampering. Never allow children to play with the unit or its controls. Keep the water bucket out of reach to prevent spills or drowning hazards. Supervise children in areas where the dehumidifier is operating and ensure they understand the risks of touching hot or moving parts.

Warranty and Customer Support Information

The Frigidaire FAD704DWD is backed by a comprehensive warranty. For inquiries or assistance‚ contact Frigidaire customer service at 1-800-944-9044 or visit their official website for support.

9.1 Warranty Period and Coverage

The Frigidaire FAD704DWD dehumidifier is covered by a one-year limited warranty on parts and labor. Major components‚ such as the compressor‚ may be covered for up to five years. The warranty ensures defective parts are repaired or replaced free of charge during the specified period. For full details‚ refer to the manual or contact Frigidaire customer support.

9.2 Contacting Frigidaire Customer Service

For inquiries or assistance with your Frigidaire FAD704DWD‚ contact customer service at 1-800-944-9044 (USA) or 1-800-265-8352 (Canada). Visit www.frigidaire.com for support resources‚ troubleshooting guides‚ or to submit a service request. Representatives are available to address warranty claims‚ repair needs‚ or general questions about your dehumidifier.

Categories
Manuals

singer featherweight manual

Welcome to the Singer Featherweight 221 manual, a comprehensive guide for understanding and operating this iconic sewing machine. Designed for both beginners and experienced users, the manual covers operation, maintenance, and troubleshooting, ensuring optimal performance of your Singer Featherweight 221 or 222K model. Available as a free PDF download, it provides detailed instructions to help you master your machine.

Overview of the Singer Featherweight 221 Sewing Machine

The Singer Featherweight 221 is a portable electric sewing machine renowned for its durability and versatility. Designed for both home and professional use, it features a rotary sewing hook and lock stitch functionality, enabling precise stitching. Its compact design and lightweight construction make it ideal for quilting, sewing, and crafting. The machine includes a reverse feeding mechanism and an electric Singerlight for enhanced visibility. Popular among sewists and quilters, the Featherweight 221 is a timeless tool for creating high-quality sewing projects with ease.

Importance of the Manual for Proper Operation

The Singer Featherweight 221 manual is essential for understanding and utilizing your sewing machine effectively. It provides detailed instructions for operation, maintenance, and troubleshooting, ensuring optimal performance. The manual includes parts diagrams, maintenance schedules, and step-by-step guides for threading, stitching, and servicing. By following the manual, users can avoid common mistakes, extend the machine’s lifespan, and achieve professional-quality results. It is a comprehensive resource designed to help sewists of all skill levels maximize their Featherweight 221’s potential.

Types of Singer Featherweight Manuals

The Singer Featherweight 221 manuals include Operator, Service, and Adjusters versions. Each provides specific guidance for operation, maintenance, and specialized adjustments, ensuring comprehensive support for users.

Operator Manuals

The Operator Manual for the Singer Featherweight 221 provides detailed instructions for everyday use, including threading, bobbin winding, and stitch selection. It covers basic maintenance and troubleshooting, ensuring smooth operation. Available for various models like the 221K, 222K, and others, these manuals are essential for understanding machine functions. They are accessible as free PDF downloads, offering clear guidance for users to maximize their sewing experience and maintain the machine’s performance effectively over time.

Service Manuals

The Service Manual for the Singer Featherweight 221 offers in-depth technical guidance for maintenance and repair. It includes detailed procedures for oiling, adjusting parts, and servicing components. Available for models like the 221K and 222K, these manuals are crucial for ensuring the machine’s longevity. As free PDF downloads, they provide advanced instructions for users to perform complex tasks, such as replacing parts or adjusting mechanisms, to keep their Singer Featherweight running efficiently and effectively.

Adjusters Manual

The Singer Featherweight 221 Adjusters Manual is tailored for professionals and advanced users, focusing on precise adjustments and fine-tuning. Available as a PDF, it details technical specifications, calibration processes, and diagnostic techniques. This manual is essential for optimizing the machine’s performance, ensuring stitches, tension, and mechanisms function flawlessly. It complements the Service Manual, offering specialized guidance for those who need to make detailed adjustments to their Singer Featherweight sewing machine.

Downloading and Accessing the Manual

The Singer Featherweight 221 manual is easily accessible online as a free PDF download. Various platforms offer digital versions, ensuring quick access to operation guides and service manuals, making it simple for users to find and download the necessary resources.

Free PDF Downloads Available Online

The Singer Featherweight 221 manual is widely available as a free PDF download. Websites like ManualsDir.com and Singer’s official resources offer comprehensive guides, including operator, service, and adjusters’ manuals. These PDFs cover models such as the 221K, 221J, and 222K, providing detailed instructions for operation, maintenance, and troubleshooting. Users can easily access these files, ensuring they have all the information needed to keep their machine running smoothly and efficiently.

Platforms for Manual Distribution

Various online platforms provide easy access to Singer Featherweight 221 manuals. Websites like ManualsDir.com and Singer’s official resources offer free PDF downloads. Additionally, community forums and sewing enthusiast groups share these manuals, ensuring widespread availability. Platforms like Scribd and Google Drive also host these documents, catering to users seeking convenient access. Whether you’re looking for operator, service, or adjusters’ manuals, these platforms make it simple to download and reference the guides for your Singer Featherweight 221 or 222K model.

Key Features of the Singer Featherweight 221

The Singer Featherweight 221 features a rotary sewing hook for smooth lock stitching, a reverse feeding mechanism, and an Electric Singerlight for enhanced visibility during sewing.

Rotary Sewing Hook and Lock Stitch Functionality

The Singer Featherweight 221’s rotary sewing hook ensures smooth, consistent stitching with minimal thread tangling. Its lock stitch functionality provides strong, durable seams, ideal for various fabrics. The machine’s design allows for easy thread flow and precise control, making it suitable for both delicate and heavy-duty sewing projects. This feature enhances overall sewing efficiency and reliability, ensuring professional-quality results every time.

Reverse Feeding Mechanism

The Singer Featherweight 221 features a reverse feeding mechanism, enabling the machine to stitch backward effortlessly. This functionality is controlled manually, allowing users to reinforce seams or sew in reverse when needed. The reverse feed is particularly useful for securing the start and end of seams, preventing unraveling. It enhances stitching control, especially when working with delicate or thick fabrics, ensuring professional-grade results and versatility in various sewing projects.

Electric Singerlight for Improved Visibility

The Singer Featherweight 221 features an integrated Electric Singerlight, providing enhanced visibility while sewing; This built-in light illuminates the work area, reducing eye strain and improving precision, especially in low-light conditions. The Singerlight is a convenient feature that allows users to focus on their stitching without needing additional lighting. The bulb is easily replaceable using a bayonet-style socket, ensuring uninterrupted sewing sessions. This feature highlights the machine’s thoughtful design, catering to user comfort and efficiency during operation.

Maintenance and Troubleshooting

Regular maintenance is essential for the Singer Featherweight 221. Clean and oil parts routinely to ensure smooth operation. Check for wear and tear to prevent issues.

Oil and Maintenance Requirements

Regular oiling is crucial for the Singer Featherweight 221 to ensure smooth operation. Use high-quality sewing machine oil to lubricate moving parts, such as the rotary hook and bobbin area. Clean the machine frequently, paying attention to the feed dogs and bobbin winder, to prevent dust buildup. Refer to the manual for specific oiling points and maintenance schedules. Proper care extends the machine’s lifespan and maintains its performance. Always unplug the machine before servicing to ensure safety.

Common Issues and Solutions

The Singer Featherweight 221 may face issues like thread breaking or uneven stitches. Check for proper thread tension and ensure the needle is correctly threaded. If the machine jams, inspect for tangled threads or debris. Lubrication issues can cause noise; oiling key parts often resolves this. For persistent problems, consult the service manual or contact a professional. Regular maintenance, as outlined in the manual, helps prevent these issues and keeps your machine running smoothly.

Understanding the Parts and Accessories

The Singer Featherweight 221 manual includes a detailed parts diagram, helping users identify components like the rotary hook, bobbin, and stitch regulator. Compatible accessories enhance functionality, ensuring optimal sewing performance.

Parts Diagram and Components

The Singer Featherweight 221 manual features a detailed parts diagram, identifying key components such as the rotary hook, bobbin case, and stitch regulator. This visual guide helps users understand the machine’s structure and locate parts easily. The diagram is essential for maintenance, troubleshooting, and repairs, ensuring users can identify and replace components correctly. It also highlights the machine’s portable design and essential features like the electric Singerlight for improved visibility during sewing projects.

Compatible Accessories

The Singer Featherweight 221 manual highlights a range of compatible accessories to enhance your sewing experience. These include the electric Singerlight for improved visibility, bobbin cases, and specialized presser feet like the zipper foot and hemming foot. Additional accessories such as carrying cases and extension tables are also available to complement the machine’s portability and functionality. These tools ensure optimal performance and versatility, making your sewing projects easier and more efficient. Accessories can be found online or through Singer-authorized dealers.

Operation Guide

The Singer Featherweight 221 manual provides clear instructions for threading, bobbin winding, and stitch selection. It ensures smooth operation with features like the rotary sewing hook and lock stitch functionality, guiding users to achieve precise stitching and versatility in their sewing projects.

Threading and Bobbin Winding

The Singer Featherweight 221 manual provides detailed step-by-step instructions for threading the machine and winding the bobbin. Proper threading is essential for smooth operation, and the manual guides users through the process, ensuring the thread flows correctly through the tension discs and take-up lever. Bobbin winding instructions emphasize the importance of evenly filling the bobbin to maintain consistent stitch quality. Clear diagrams and descriptions help users master these fundamental tasks, ensuring their sewing projects are trouble-free and professional in appearance.

Stitch Selection and Adjustment

The Singer Featherweight 221 manual details how to select and adjust stitches for various sewing tasks. Users can choose from straight stitch or reverse feeding for reinforced seams. The stitch length regulator allows customization, while the feed dog height ensures fabric moves smoothly. Adjusting the tension is straightforward, enabling perfect stitch balance. Clear instructions guide users on optimizing settings for different fabrics and techniques, ensuring professional results in every project. Proper adjustment enhances seam quality and machine performance, making it ideal for both simple and intricate sewing tasks.

Tips for Optimal Performance

Regularly oil the machine, use the correct needle type, and ensure proper threading. Maintain even fabric tension and clean the hook area for smooth operation and consistent results.

Best Practices for Sewing

For optimal results, ensure proper threading and use the correct needle type for your fabric. Maintain even fabric tension and backstitch at the beginning and end of seams for security. Clean the machine regularly, especially the rotary hook area, to prevent thread jams. Always refer to the manual for specific settings and techniques. Use the reverse feed mechanism for reinforced stitching when needed. Keep the Singerlight clean for better visibility, and store the machine in a dry, cool place to preserve its condition. Explore additional tips in the manual for troubleshooting and enhancing your sewing experience.

Regular Servicing Recommendations

Regular servicing ensures your Singer Featherweight 221 operates smoothly and lasts longer. Clean the rotary hook and feed dogs weekly, and oil internal components as specified in the manual. Check and replace the bobbin winder belt if worn. Service the motor yearly to maintain consistent speed and performance. Refer to the service manual for detailed instructions on oiling, belt replacement, and other maintenance tasks. A well-maintained machine guarantees reliable stitching and extends its lifespan. Follow the manual’s guidelines for professional-grade care.

The Singer Featherweight 221 manual is an essential resource for optimal sewing machine performance. Downloading and following the guide ensures proper operation, maintenance, and troubleshooting, extending its lifespan and functionality for years of reliable use.

Importance of Following the Manual

Adhering to the Singer Featherweight 221 manual ensures optimal performance and longevity of your machine. Proper operation, maintenance, and troubleshooting steps outlined in the guide prevent damage and enhance sewing quality. By following the manual, users can avoid common issues, maintain the machine’s functionality, and enjoy consistent results. Regular servicing, oiling, and correct usage practices extend the machine’s lifespan, making it a reliable companion for all sewing needs.

Resources for Further Learning

For deeper understanding, numerous resources are available online, including official Singer websites, community forums, and video tutorials. These resources offer detailed guides, troubleshooting tips, and maintenance advice. Additionally, specialized sewing groups and blogs provide hands-on experiences and expert insights. Many platforms like ManualsDir.com host comprehensive manuals and parts diagrams, ensuring users have access to extensive learning materials. These resources are regularly updated, making them invaluable for mastering the Singer Featherweight 221 and resolving any operational queries effectively.

Categories
Manuals

singer patchwork sewing machine manual

The Singer Patchwork Sewing Machine, model 7285Q, is a versatile sewing and quilting machine designed for crafters and sewists. It features 100 built-in stitches, automatic threading, and a built-in thread cutter, making it ideal for patchwork, quilting, and embroidery projects. Perfect for both beginners and experienced sewers, this machine offers advanced capabilities while maintaining ease of use.

Overview of the Singer Patchwork Series

The Singer Patchwork Series, including models like the 7285Q, C5950, and C5980Q, offers advanced sewing and quilting machines designed for patchwork enthusiasts. These machines feature multiple built-in stitches, automatic threading, and quilting capabilities, making them ideal for both beginners and experienced sewists. The series emphasizes versatility, catering to projects from basic sewing to intricate quilting and embroidery. Singer’s commitment to innovation and user-friendly design ensures these machines meet the needs of modern crafters, while their digital manuals provide easy access to guided instructions and troubleshooting.

Key Features of the Singer Patchwork Sewing Machine

The Singer Patchwork Sewing Machine stands out with its 100 built-in stitches, including decorative and quilting options. It features automatic threading, a built-in thread cutter, and a large detachable extension table for quilting projects. The machine’s electronic controls allow for precise stitch customization, while its heavy-duty frame ensures stability during operation. Additionally, it supports free-arm sewing, making it versatile for various tasks. These features, combined with Singer’s reliable construction, make it a top choice for both home sewers and professional quilters seeking efficiency and creativity in their projects.

Downloading and Accessing the Singer Patchwork Sewing Machine Manual

Singer offers free digital manuals for the Patchwork series on their official website. Visit Singer’s support page to download the manual for your specific model easily online.

Steps to Download the Manual from Official Sources

To download the Singer Patchwork Sewing Machine manual, visit Singer’s official website and navigate to the support or manuals section. Enter your machine’s model number, such as 7285Q or C5980Q, in the search bar. Select the correct model from the results to access the manual. Click the download link to save the PDF file. Ensure you have a PDF reader installed to view the document. For convenience, Singer provides free access to all manuals, aligning with their Green Initiative to reduce environmental impact.

Importance of Using the Official Manual

Using the official Singer Patchwork Sewing Machine manual is crucial for ensuring proper operation, safety, and troubleshooting. It provides detailed instructions tailored to your specific model, helping you understand its features and capabilities fully. The manual includes safety guidelines to prevent accidents and damage, as well as maintenance tips to extend the machine’s lifespan. Additionally, it offers troubleshooting solutions for common issues, ensuring you can resolve problems efficiently. Singer’s official manual is the most reliable source for accurate information, and it aligns with their Green Initiative, reducing environmental impact by being exclusively digital.

Understanding the Machine Components

Understanding the Singer Patchwork Sewing Machine components, such as the bobbin, tension controls, and sewing speed, is essential for effective operation and troubleshooting.

Parts Diagram and Identification

The Singer Patchwork Sewing Machine manual includes a detailed parts diagram to help users identify components like the bobbin winding tension disk, thread take-up, and thread tension control. Key parts include the face cover, thread cutter, removable extension table, bobbin winder shaft, and sewing speed control. Understanding these components ensures proper operation and maintenance. The diagram also highlights the location of the bobbin case, needle plate, and presser foot, which are essential for threading and stitch selection. Refer to the manual or Singer’s official website for a visual guide to these parts;

Machine Dimensions and Weight

The Singer Patchwork Sewing Machine measures 380 millimeters in width, 200 millimeters in depth, and 300 millimeters in height, with a total weight of 6770 grams. These dimensions make it compact and portable, suitable for home use. The machine’s weight ensures stability during operation, reducing vibrations and allowing for smooth stitching. Understanding its size and weight helps in planning workspace and transportation. Refer to the manual for precise measurements and specifications to ensure proper placement and handling of the machine.

Safety Precautions and Maintenance

Ensure safe operation by avoiding damaged cords, water exposure, and improper use. Regularly clean and oil the machine to maintain optimal performance and extend its lifespan.

General Safety Guidelines for Operation

Always use the Singer Patchwork Sewing Machine as intended and follow safety precautions. Avoid operating with damaged cords or plugs, and keep children away. Never use near water or expose it to extreme temperatures. Wear loose clothing and long hair tied back to prevent accidents. Ensure the machine is placed on a stable, flat surface. Turn off and unplug during maintenance or when not in use. Use only Singer-recommended attachments and follow manual instructions for proper operation. Regularly inspect for wear and tear to maintain safety and performance.

Regular Maintenance Tips

Regular maintenance ensures optimal performance of your Singer Patchwork Sewing Machine. Clean the machine frequently using a soft brush to remove lint and debris from the bobbin area and tension discs. Oil the mechanical parts as recommended in the manual to keep them running smoothly. Check for loose screws and tighten them if necessary. Avoid using harsh chemicals, as they may damage the finish. Store the machine in a dry place to prevent rust. Refer to the manual for specific maintenance schedules and follow Singer’s guidelines for the best results. Regular upkeep extends the machine’s lifespan and ensures reliable operation.

Setting Up Your Singer Patchwork Sewing Machine

Unbox and inspect the machine, then follow the setup guide for initial assembly. Threading is straightforward, and the machine is ready for use.

Unboxing and Initial Setup

Begin by carefully unboxing the Singer Patchwork Sewing Machine and inspecting for any damage. Remove packaging materials and ensure all accessories, such as the power cord, presser feet, and bobbins, are included. Place the machine on a stable, flat surface and plug it in. Familiarize yourself with the machine’s components using the provided parts diagram. Follow the quick-start guide to set up the machine, ensuring proper alignment and securing all parts. Before use, review the manual to understand setup requirements fully, ensuring optimal performance for your sewing projects.

Threading the Machine

Threading the Singer Patchwork Sewing Machine is a straightforward process. Start by placing the spool on the spool pin and guide the thread through the machine’s tension discs. Follow the threading path outlined in the manual or parts diagram. Pull the thread gently to ensure it’s seated properly and not loose. Trim any excess thread and test the machine by sewing a few stitches at a slow speed to ensure smooth operation. Proper threading is essential for consistent stitch quality and machine performance.

Basic Sewing Operations

The Singer Patchwork Sewing Machine enables straightforward sewing operations, including straight stitching, reverse sewing, and adjustable stitch length. Its intuitive controls make basic sewing tasks user-friendly.

Bobbin Setup and Threading

Setting up the bobbin on the Singer Patchwork Sewing Machine involves winding thread onto the bobbin using the built-in winder. Ensure the bobbin is seated correctly in the bobbin case. Thread the machine by guiding the thread through the tension discs and take-up lever. Properly insert the bobbin into the machine’s bobbin area, ensuring it rotates smoothly. Always use Singer-recommended bobbins to maintain optimal performance and avoid stitching issues. Refer to the manual for detailed steps to ensure accurate bobbin setup and threading for consistent stitching quality.

Selecting the Right Stitch for Your Project

The Singer Patchwork Sewing Machine offers 100 built-in stitches, including straight, zigzag, decorative, and quilting stitches. Choose the straight stitch for basic seams, while the zigzag stitch is ideal for preventing fraying. Decorative stitches add embellishments, perfect for patchwork designs. For quilting, use the specialized quilting stitches to achieve professional results. Always select the appropriate stitch based on fabric type and project requirements. Adjust stitch length and width as needed for optimal results. Refer to the stitch guide in the manual to explore all options and ensure the best outcome for your sewing or quilting project.

Troubleshooting Common Issues

Address thread tension problems by adjusting the dials. Clear jams by removing debris and rethreading. Ensure proper machine setup and use compatible Singer needles for smooth operation.

Resolving Thread Tension Problems

Thread tension issues are common but can be easily resolved. Start by checking the top and bobbin thread for proper seating in the tension disks. If stitches are uneven, adjust the top thread tension dial—tighten if loose on the fabric side or loosen if puckering occurs. Ensure the bobbin is correctly wound and seated. Use Singer-recommended needles to prevent thread breakage. Refer to the manual for specific tension settings based on fabric type. If problems persist, consult the Singer support page for additional troubleshooting guides or contact a professional technician for assistance.

Dealing with Machine Jamming

If your Singer Patchwork sewing machine jams, stop operation immediately to avoid damage. Turn off the machine and unplug it for safety. Gently remove the fabric, checking for tangled threads or debris. Inspect the bobbin area and ensure it is clean and free from lint. Rethread the machine, ensuring proper thread placement in the tension disks. If the issue persists, consult the manual for specific troubleshooting steps or contact Singer customer support for assistance. Regular maintenance, like cleaning and oiling, can help prevent jams and ensure smooth operation.

Advanced Features of the Singer Patchwork Series

The Singer Patchwork Series offers advanced features like 100 built-in stitches, automatic threading, and a built-in thread cutter, ideal for quilting, embroidery, and complex sewing projects.

Using Decorative Stitches for Patchwork

The Singer Patchwork Sewing Machine offers a wide variety of decorative stitches, including scallops, flowers, and geometric patterns, to enhance your patchwork projects. These stitches add visual interest and professionalism to your quilts and home decor items. The machine allows you to easily select and customize stitches using the LCD screen. For patchwork, the Hand-Look Quilting stitch is particularly popular, simulating the appearance of hand-stitching. Always refer to the manual for guidance on selecting the right stitch for your fabric type and adjusting stitch length and width for optimal results. Experimenting with different decorative stitches can elevate your patchwork creations to new levels of creativity and detail.

Quilting and Embroidery Capabilities

The Singer Patchwork Sewing Machine excels in quilting and embroidery, offering advanced features for intricate designs. With 100 built-in stitches, including decorative and quilting patterns, it allows for creative freedom. The large sewing space accommodates bulky quilts, while the automatic needle threader and tension control ensure precision. For embroidery, the machine supports custom stitch combinations, enabling personalized designs. The included quilting feet and adjustable stitch settings further enhance your ability to create professional-looking quilts and embroidered projects. This machine is a versatile tool for crafting beautiful, detailed quilts and embroidery work with ease and efficiency.

Compatible Accessories and Attachments

The Singer Patchwork Sewing Machine supports various accessories, including quilting feet, embroidery hoops, and specialized presser feet, enhancing its versatility for diverse sewing projects. Additional attachments are available online.

Recommended Accessories for Patchwork Sewing

For optimal patchwork sewing, the Singer Patchwork Sewing Machine supports essential accessories like the walking foot, 1/4-inch foot, and quilting attachment. The walking foot ensures smooth handling of thick fabrics, while the 1/4-inch foot provides precise seam allowances. The quilting attachment allows for consistent stitching on large projects. Additional accessories, such as embroidery hoops and specialized presser feet, can enhance creativity and efficiency. These accessories are available on Singer’s official website or authorized retailers, ensuring compatibility and performance for your sewing needs.

Using Optional Presser Feet

The Singer Patchwork Sewing Machine supports various optional presser feet to enhance sewing projects. The 1/4-inch foot is ideal for precise piecing, while the walking foot handles thick fabrics like quilts. A zipper foot is perfect for installing zippers and sewing close to edges. To use these, simply snap them onto the machine’s presser foot holder, ensuring they click securely. Always choose the right foot for your project to maintain accuracy and control. Refer to the manual for specific installation and usage guidelines for each presser foot type.

Categories
Manuals

watts premier wp-4v manual

Product Overview

The Watts Premier WP-4V is a reverse osmosis (RO) water treatment system designed to provide clean and safe drinking water by reducing harmful contaminants.

1.2 Key Features of the WP-4V Reverse Osmosis System

It features a VOC post-filter‚ NSF/ANSI 58 certification for VOC reduction‚ and a storage tank for convenient access to filtered water.

The Watts Premier WP-4V is a reverse osmosis (RO) water treatment system designed to reduce harmful contaminants‚ including volatile organic chemicals (VOCs). It features a VOC post-filter and meets NSF/ANSI 58 standards for effective VOC reduction‚ ensuring cleaner and safer drinking water. The system includes a storage tank for convenient access to filtered water‚ making it a reliable solution for home use.

The WP-4V system is NSF/ANSI 58 certified for VOC reduction‚ ensuring effective removal of harmful contaminants like MTBEs‚ Atrazine‚ and Benzene. It features a VOC post-filter‚ multiple filtration stages‚ and a storage tank for clean water access. Regular filter replacements are essential for maintaining performance‚ with a recommended annual replacement schedule for optimal results.

Installation Guide

Follow step-by-step instructions to install the WP-4V system‚ ensuring proper connections of tubes and components. Position the tank upright or on its side for optimal performance.

2.1 Pre-Installation Requirements

Before installing the WP-4V system‚ ensure you have the complete installation kit‚ read the manual thoroughly‚ and confirm your water supply meets the system’s specifications. Prepare necessary tools and ensure the installation area is clear. Familiarize yourself with the components and their connections to avoid errors during setup. Proper preparation ensures a smooth and successful installation process.

2.2 Step-by-Step Installation Instructions

Connect the RO module to your water supply‚ ensuring all fittings are secure.
Install the storage tank in a desired location‚ either upright or on its side using the provided stand.
Mount the RO module on a wall or place it near the tank for stability.
Attach the blue tube from the TANK port on the RO module to the tank’s inlet.
Plug in the system and check for leaks at all connections.
Allow the tank to fill and test the system by dispensing water to ensure proper function.

Operation and Maintenance

The WP-4V system operates automatically‚ filtering water as needed. Regular maintenance includes checking filters‚ monitoring water quality‚ and ensuring all connections are secure and leak-free.

3.1 Daily Operation of the WP-4V System

The WP-4V system operates automatically‚ filtering water as needed. It fills the storage tank and stops when full. Monitor the tank level‚ check for leaks‚ and ensure all connections are secure. Regularly test water quality to confirm proper function. The system is designed for low maintenance‚ providing clean water with minimal user intervention. Follow the manual for optimal performance and longevity.

3.2 Regular Maintenance Tasks

Regular maintenance ensures optimal performance of the WP-4V system. Replace the VOC post-filter annually and sediment filters every 6-12 months‚ depending on usage. Check for leaks‚ sanitize the system periodically‚ and monitor water quality. Refer to the manual for detailed instructions and recommendations to maintain efficiency and extend the system’s lifespan. Proper upkeep ensures consistent access to clean and safe drinking water.

Filter Replacement

The WP-4V system requires regular filter replacements to maintain efficiency. Replace the VOC post-filter annually and sediment filters every 6-12 months‚ depending on usage. Use the 500124 VOC annual filter kit for optimal performance. Always refer to the manual for specific instructions and recommendations to ensure proper system function and water quality.

4.1 Recommended Filter Replacement Schedule

The Watts Premier WP-4V system recommends replacing the VOC post-filter annually and sediment filters every 6-12 months. Use the 500124 VOC annual filter kit‚ which includes two sediment filters. Regular replacements ensure optimal performance and water quality. Monitor usage and filter performance to adjust the schedule as needed. Always refer to the manual for specific instructions.

4.2 How to Replace Filters in the WP-4V System

To replace filters in the WP-4V system‚ turn off the water supply and relieve system pressure. Open the filter housings‚ remove the old filters‚ and install the new ones. Ensure proper seating and alignment to avoid leaks. Close the housings securely and restore water supply. Check for leaks and flush the system. Refer to the manual for detailed steps and safety precautions.

Troubleshooting

The WP-4V system may experience issues like low water flow or slow performance. Check for clogged filters‚ improper installation‚ or worn-out parts. Addressing these promptly ensures optimal functionality.

5.1 Common Issues and Solutions

Common issues with the WP-4V include low water flow‚ slow performance‚ or leaks. Check for clogged filters‚ improper installation‚ or worn-out parts. Replace filters annually‚ inspect connections for tightness‚ and ensure the system is installed correctly. Regular maintenance and filter replacements can prevent these issues. Refer to the manual for diagnostic techniques and solutions to restore optimal performance.

5.2 Diagnostic Techniques for the WP-4V System

Diagnose issues by inspecting system components‚ checking water flow‚ and monitoring pressure. Look for visible leaks‚ worn-out seals‚ or clogged filters. Test the water output pressure and flow rate. Listen for unusual noises indicating malfunctioning parts. Refer to the manual for detailed troubleshooting steps to identify and resolve problems effectively‚ ensuring optimal system performance and water quality.

Technical Specifications

The Watts Premier WP-4V meets NSF/ANSI 58 certification for VOC reduction‚ offering a reliable reverse osmosis system with a built-in storage tank for clean water access.

6.1 NSF/ANSI 58 Certification for VOC Reduction

The Watts Premier WP-4V system is NSF/ANSI 58 certified‚ ensuring its ability to reduce volatile organic compounds (VOCs) like MTBEs‚ Atrazine‚ Benzene‚ and Lindane. This certification validates the system’s effectiveness in removing harmful contaminants‚ providing safe drinking water. The VOC post-filter plays a crucial role in achieving this standard‚ making the WP-4V a reliable choice for clean water solutions.

6.2 System Components and Compatibility

The Watts Premier WP-4V system includes a reverse osmosis module‚ VOC post-filter‚ sediment filters‚ and a storage tank. It is compatible with standard plumbing connections and operates effectively under normal water pressure. The system’s components are designed for easy replacement and maintenance‚ ensuring long-term performance and compatibility with various water supply conditions.

Where to Find the Manual

The Watts Premier WP-4V manual is available for free download on Watts Premier’s official website and other online databases in PDF format for easy access.

7.1 Downloading the WP-4V Manual Online

The Watts Premier WP-4V manual can be downloaded from the official Watts Premier website or trusted online databases. Visit their site‚ navigate to the support section‚ and search for the WP-4V model. Select the PDF version to download and save it for easy access. This manual provides detailed installation‚ operation‚ and maintenance instructions‚ ensuring optimal system performance and user understanding.

7.2 Sources for Additional Guides and Specifications

Additional guides and specifications for the Watts Premier WP-4V can be found on the official Watts Premier website‚ retail platforms like Amazon‚ or home improvement stores like Home Depot. These sources provide detailed product descriptions‚ technical specs‚ and troubleshooting tips. Customers can also contact Watts Premier customer support for further assistance or clarification on any documentation needs.

Warranty Information

The Watts Premier WP-4V system is backed by a limited warranty covering manufacturing defects in materials and workmanship for a specified period from the date of purchase.

8.1 Warranty Coverage for the WP-4V System

The warranty covers manufacturing defects in materials and workmanship for the WP-4V system. It ensures replacement or repair of faulty components within the specified period‚ providing peace of mind for users. Coverage details are outlined in the manual to help users understand what is included and how to claim warranty benefits effectively.

8.2 Exclusions and Limitations

The warranty excludes damages from misuse‚ neglect‚ or improper installation. It does not cover consequential or incidental damages. Users must adhere to specified guidelines for warranty validity. Failure to follow maintenance or installation instructions may void coverage. Refer to the enclosed warranty document for full details on exclusions and limitations. This ensures proper understanding of what is not covered under the warranty terms.

Safety Precautions

Always turn off the water supply before installation or maintenance. Avoid exposing the system to extreme temperatures or physical damage. Keep the system upright during operation. Follow all safety guidelines to ensure proper function and water quality.

9.1 Important Safety Notes for Installation and Use

Always turn off the water supply before installation or maintenance. Avoid exposing the system to extreme temperatures or physical damage. Ensure the system is securely installed to prevent leaks or movement. Read the manual thoroughly before starting any work. Keep the surrounding area clean and dry to prevent accidents. Follow all safety guidelines to ensure proper function and water quality. Adhere to these precautions to maintain optimal performance and safety.

9.2 Handling and Storage Guidelines

To ensure the longevity and performance of the Watts Premier WP-4V‚ store it in a cool‚ dry place away from direct sunlight and chemicals. Avoid exposing the system to extreme temperatures‚ humidity‚ or physical stress. Keep the unit upright and secure during transportation or storage. Always handle components with care to prevent damage. Use original packaging for storage to protect against dust and moisture. Ensure all parts are tightly sealed before use.

Accessories and Parts

10.1 Compatible Accessories for the WP-4V System

The Watts Premier WP-4V supports various accessories‚ including replacement filters‚ membranes‚ and storage tanks‚ ensuring optimal performance and longevity.

10.2 Ordering Replacement Parts

Genuine replacement parts can be ordered directly from Watts Premier or authorized distributors to maintain system efficiency and warranty validity.

The Watts Premier WP-4V system offers a range of compatible accessories‚ including replacement filters‚ membranes‚ and storage tanks. Additional components like tubing‚ fittings‚ and mounting brackets are also available. These accessories ensure optimal performance and extend the system’s lifespan. For convenience‚ they can be purchased directly from Watts Premier or authorized distributors.

Replacement parts for the Watts Premier WP-4V system can be ordered directly from Watts Premier or authorized distributors. The system offers a VOC annual filter kit (500124)‚ which includes two sediment filters‚ ensuring optimal performance. For convenience‚ parts can also be purchased online through the official Watts Premier website or trusted retailers‚ guaranteeing compatibility and maintaining system efficiency.

Customer Support

Watts Premier offers dedicated customer support for the WP-4V system. Contact their team at 800-752-5582 or visit www.wattspremier.com for assistance and online resources.

11.1 Contact Information for Watts Premier

For assistance with the WP-4V system‚ contact Watts Premier at 800-752-5582 or visit their official website at www.wattspremier.com. Their office is located at 8716 W Ludlow Drive‚ Suite 1‚ Peoria‚ AZ 85381. Fax inquiries can be sent to 623-866-5666; Customer support is available to address questions‚ troubleshooting‚ and provide guidance on system maintenance and filter replacement.

11.2 Online Resources for Troubleshooting and FAQs

For troubleshooting and FAQs‚ visit the official Watts Premier website at www.wattspremier.com. Download the WP-4V manual or view it online for detailed guidance. Additional resources‚ including FAQs and troubleshooting guides‚ are available on their support page. You can also access instructional guides and filter replacement information to resolve common issues and maintain optimal system performance;

12.1 Summary of Key Points

The Watts Premier WP-4V is a reliable reverse osmosis system with NSF/ANSI 58 certification‚ designed to reduce VOCs and provide clean drinking water efficiently.

12.2 Final Tips for Optimal System Performance

Regular maintenance‚ timely filter replacement‚ and adherence to installation guidelines ensure the WP-4V operates at its best‚ delivering high-quality water consistently.

The Watts Premier WP-4V is a reverse osmosis system certified to NSF/ANSI 58 for VOC reduction‚ ensuring clean drinking water. It features a VOC post-filter‚ storage tank‚ and user-friendly design. Regular maintenance‚ filter replacement‚ and proper installation are essential for optimal performance. The system is supported by a comprehensive manual and customer service from Watts Premier‚ ensuring longevity and reliability.

To ensure peak performance‚ replace filters annually‚ check for leaks regularly‚ and follow the manual’s maintenance schedule. Monitor water quality and flow rate. Keep the system clean and store it properly when not in use. Refer to the manual for troubleshooting common issues promptly. Always use genuine Watts Premier replacement parts for reliability and longevity.

Categories
Manuals

2015 chevy traverse owners manual

The 2015 Chevy Traverse Owner’s Manual is your comprehensive guide to understanding and maintaining your vehicle. This user-friendly manual covers key features, safety tips, and maintenance schedules to ensure optimal performance and longevity. Designed to help you make the most of your ownership experience, it provides clear instructions and essential information to keep your Traverse running smoothly.

Overview of the 2015 Chevy Traverse

The 2015 Chevy Traverse is a mid-size SUV designed for families and adventure seekers alike. Known for its spacious interior, it offers seating for up to eight passengers and ample cargo space. With a powerful 3.6L V6 engine and smooth handling, the Traverse combines comfort and versatility. Available in multiple trim levels, it caters to various preferences, from the budget-friendly LS to the feature-rich LTZ. Whether for daily commutes or road trips, the Traverse delivers reliability, style, and functionality. Understanding its features and capabilities is essential for maximizing your driving experience, and the owner’s manual serves as your key guide.

Understanding the 2015 Chevy Traverse Owner’s Manual

This manual is designed to help you understand your 2015 Chevy Traverse inside and out, covering features, operation, and troubleshooting. It ensures safe and effective use of your vehicle.

Importance of Reading the Manual

Reading the 2015 Chevy Traverse Owner’s Manual is essential for maximizing safety, performance, and longevity. It provides critical information about features, operation, and troubleshooting, helping you avoid costly repairs. By understanding proper usage and maintenance, you can ensure optimal functionality and prevent potential issues. The manual also highlights safety precautions and best practices, reducing risks while driving or servicing the vehicle. Familiarizing yourself with the content empowers you to make informed decisions, enhancing your overall ownership experience and keeping your Traverse in peak condition for years to come.

Navigating the Manual’s Structure

The 2015 Chevy Traverse Owner’s Manual is organized into clear, logical sections to help you find information quickly. The table of contents provides an overview of key topics, while the index allows for fast lookup of specific terms. Each section is divided into subsections, covering everything from safety features to maintenance schedules. Symbols and icons are used to highlight important notes, warnings, and cautions. Cross-references guide you to related topics, and visual aids like diagrams and charts simplify complex information. By familiarizing yourself with this structure, you can efficiently access the information you need to operate and maintain your vehicle effectively.

Safety Features and Precautions

The 2015 Chevy Traverse is equipped with advanced safety features to protect occupants. These include multiple airbags, electronic stability control, and anti-lock brakes. Precautions such as proper seatbelt use and adherence to weight limits are crucial for maximizing safety. Regular maintenance of safety systems ensures optimal performance. Always follow recommended guidelines to maintain vehicle safety and reliability.

Key Safety Features of the 2015 Chevy Traverse

The 2015 Chevy Traverse is equipped with a range of advanced safety features designed to protect occupants and prevent accidents. These include a comprehensive airbag system with dual-stage frontal, side-impact, and side-curtain airbags. Electronic stability control and anti-lock braking systems enhance traction and control. A rearview camera provides improved visibility when reversing, while the OnStar Emergency Services system offers rapid assistance in critical situations. The Traverse also features a robust body structure engineered to absorb and distribute crash forces. These features work together to create a safe and secure driving environment, giving you peace of mind on the road.

Precautions for Safe Operation

To ensure safe operation of your 2015 Chevy Traverse, always wear a seatbelt and ensure all passengers are properly restrained. Avoid distractions like texting or using electronic devices while driving. Keep your eyes on the road and maintain a safe following distance. Regularly check tire pressure and ensure all vehicle lights are functioning properly. Be aware of weather conditions and adjust your driving accordingly. Never disable safety features like airbags or stability control. Keep loose items secured to prevent them from becoming projectiles in sudden stops. Follow all traffic laws and drive defensively to minimize risks on the road.

Operating the 2015 Chevy Traverse

Operating the 2015 Chevy Traverse involves understanding its controls, starting the engine, and adjusting settings for a comfortable drive. Ensure smooth acceleration and adherence to traffic laws. Always consult the manual for specific guidance on features and functions.

Getting Familiar with Controls and Instruments

Familiarizing yourself with the 2015 Chevy Traverse’s controls and instruments is essential for a safe and enjoyable driving experience. The steering wheel features audio and cruise controls for convenience. The center stack houses the climate controls, infotainment system, and navigation if equipped. The instrument cluster displays vital information, including speed, fuel level, and warning indicators. Take time to adjust the mirrors, seats, and steering wheel to your preference. Understanding the location and function of each control ensures easy operation and enhances driver confidence. Refer to the manual for detailed descriptions of buttons, knobs, and digital displays.

Understanding the Instrument Cluster

The instrument cluster in your 2015 Chevy Traverse provides crucial information at a glance. It features a speedometer, tachometer, fuel gauge, and temperature gauge, along with warning lights for system status. The cluster also includes a driver information center, displaying trip data, fuel economy, and alerts. Pay attention to warning lights, as they indicate potential issues like low oil pressure or overheating. Familiarize yourself with the symbols and their meanings, as detailed in the manual, to ensure safe and efficient driving. Regularly monitoring the instrument cluster helps maintain your vehicle’s health and prevents unnecessary repairs.

Maintenance and Care

Regular maintenance is crucial for extending the lifespan of your 2015 Chevy Traverse, ensuring safety, performance, and preventing costly repairs. Proper care enhances reliability and overall driving experience.

Scheduled Maintenance Services

The 2015 Chevy Traverse requires regular scheduled maintenance to ensure optimal performance and longevity. Follow the recommended maintenance schedule outlined in your owner’s manual, typically every 5,000 to 7,500 miles. Services include oil changes, tire rotations, and inspections of brakes, belts, and fluids. Adhering to these intervals helps prevent mechanical issues, maintains fuel efficiency, and ensures safety; Neglecting scheduled maintenance may lead to premature wear and costly repairs. Stay on track with Chevrolet’s recommended plan to keep your Traverse running smoothly and reliably for years to come. Proper upkeep is key to preserving its value and performance.

DIY Maintenance Tips

Performing DIY maintenance on your 2015 Chevy Traverse can save time and money while fostering a deeper connection with your vehicle. Start with regular oil changes using the recommended grade specified in your manual. Check and maintain proper tire pressure, as underinflated tires can reduce fuel efficiency and increase wear. Inspect and replace the air filter every 15,000 to 30,000 miles to improve engine performance. Additionally, monitor fluid levels, such as windshield washer, coolant, and transmission fluids, and top them off as needed. Always use genuine Chevrolet parts or approved equivalents to ensure compatibility. For safety, consult your manual before attempting any DIY task, and work in a well-ventilated area. Regular DIY checks can help identify issues early and keep your Traverse in peak condition. By taking an active role in maintenance, you’ll extend the life of your vehicle and enhance its reliability.

Troubleshooting Common Issues

Troubleshooting common issues in your 2015 Chevy Traverse is made easier with the owner’s manual. It guides you through identifying problems, using diagnostic tools, and understanding error codes. By addressing issues early, you can prevent minor problems from becoming major repairs. Regular checks and timely fixes ensure your vehicle runs smoothly and maintains its performance over time.

Identifying and Addressing Common Problems

The 2015 Chevy Traverse Owner’s Manual provides detailed guidance for identifying and resolving common issues. From warning lights on the dashboard to unusual noises, the manual helps you pinpoint problems. It explains how to use diagnostic tools and interpret error codes to address issues promptly. Regular checks and timely repairs can prevent minor problems from escalating. Whether it’s a malfunctioning feature or performance concerns, the manual offers practical solutions. For complex issues, it advises consulting a certified technician to ensure proper repairs. By following the manual’s troubleshooting tips, you can maintain your Traverse’s reliability and performance over time.

Using Diagnostic Tools and Codes

The 2015 Chevy Traverse Owner’s Manual provides guidance on using diagnostic tools and codes to identify and address vehicle issues. The Driver Information Center displays warning lights and codes, such as “Check Engine” alerts. These codes help pinpoint problems like emission system faults or sensor malfunctions. The manual explains how to interpret codes using an OBD-II scanner or by visiting a certified technician. It also covers resetting codes after repairs and understanding common code meanings. This section empowers owners to diagnose issues promptly, ensuring timely fixes and preventing potential damage. By leveraging diagnostic tools and codes, you can maintain your Traverse’s health and performance effectively.

Final Tips for Optimizing Your Ownership Experience

To maximize your satisfaction with the 2015 Chevy Traverse, prioritize regular maintenance, proper tire pressure, and timely repairs. Avoid aggressive driving to reduce wear and tear. Use genuine Chevrolet parts for replacements to ensure compatibility and longevity. Keep the owner’s manual handy for quick reference. Stay updated on software and recalls through Chevrolet’s website or your dealership. By following these tips, you’ll enjoy a safer, more efficient, and enjoyable driving experience. Happy motoring with your 2015 Chevy Traverse!

Where to Find Additional Information

For further details about your 2015 Chevy Traverse, visit Chevrolet’s official website or consult your local dealership. The website offers downloadable resources, including the full owner’s manual, technical bulletins, and service guides. Additionally, Chevrolet’s customer assistance hotline provides personalized support for any questions or concerns. Online forums and enthusiast communities also share valuable insights and tips from experienced Traverse owners. Always refer to trusted sources to ensure accuracy and reliability of the information. Staying informed will help you enjoy a seamless ownership experience with your 2015 Chevy Traverse.

Categories
Manuals

powerflex 755 user manual

Welcome to the PowerFlex 755 user manual, your comprehensive guide to installing, configuring, and operating Rockwell Automation’s advanced AC drive system․ This manual provides essential information for safe and effective use of the PowerFlex 755 drive, ensuring optimal performance in various industrial applications․ Explore detailed instructions, troubleshooting tips, and safety guidelines to maximize your experience with this powerful automation solution․

1․1 Overview of the PowerFlex 755 Drive

The PowerFlex 755 Drive is a high-performance AC drive designed for industrial applications, part of the PowerFlex 755T family, which includes 755TL, 755TR, and 755TM models․ This manual uses the PowerFlex 755 as an example, highlighting its advanced features and capabilities․ It supports SIL 3 and PL e safety levels, ensuring reliability in demanding environments․ With an embedded EtherNet/IP adapter, it facilitates seamless network communication․ The drive offers real-time monitoring and adheres to industry standards, making it a robust solution for diverse industrial needs․

1․2 Key Features and Applications

The PowerFlex 755 Drive offers versatility with multiple control and hardware options, optional embedded safety features, and real-time diagnostic capabilities․ It supports SIL 3 and PL e safety levels, ensuring reliable operation in critical applications․ Ideal for industrial machinery, pumps, fans, and conveyors, this drive provides harmonic mitigation and regenerative solutions․ With energy-efficient performance, it optimizes productivity while reducing costs․ Configurable via Studio 5000, it integrates seamlessly with EtherNet/IP networks, making it a robust choice for diverse industrial automation needs․

Installation and Setup

Ensure proper installation and setup of the PowerFlex 755 drive by following system requirements and preinstallation checks․ This section guides you through mechanical and electrical installation, safety precautions, and initial start-up procedures to ensure a smooth and safe setup process․

2․1 System Requirements and Preinstallation Checks

Before installing the PowerFlex 755 drive, ensure your system meets specific requirements․ Verify power supply compatibility, environmental conditions, and network specifications․ Conduct safety checks, including proper grounding and insulation․ Ensure compliance with local regulations and standards․ Familiarize yourself with the drive’s dimensions and mounting options․ Check for compatible software and firmware versions․ Review the manual for detailed preinstallation guidelines to guarantee a safe and efficient setup process․

2․2 Step-by-Step Installation Instructions

Begin by carefully unpacking the PowerFlex 755 drive and verifying all components․ Mount the drive in a well-ventilated area, ensuring proper alignment and secure fastening․ Connect the power supply according to the specified voltage and phase requirements․ Install and configure the control terminal connections, including EtherNet/IP for network communication․ Follow the manual’s wiring diagrams to avoid errors․ Perform a final inspection to ensure all connections are secure and meet safety standards before powering on the device․

2․3 Initial Configuration and Start-Up

After installation, power on the PowerFlex 755 drive and verify the display shows no fault codes․ Use Studio 5000 software to load the configuration file and set motor and drive parameters․ Configure network settings, such as EtherNet/IP, for communication with other devices․ Perform a self-test to ensure proper operation․ Enable the drive output and gradually ramp up the motor speed to confirm smooth operation․ Refer to the manual for specific startup sequences and parameter validation to ensure safe and efficient initialization;

Configuration and Programming

Configure and program your PowerFlex 755 drive using Studio 5000 software․ Set parameters, integrate with networks, and optimize performance for seamless automation and enhanced productivity․

3․1 Using Studio 5000 for Drive Configuration

Studio 5000 software provides a comprehensive environment for configuring your PowerFlex 755 drive․ With an intuitive interface, you can easily set drive parameters, monitor performance, and integrate motion instructions․ The software supports advanced features like real-time data analysis and network communication setup․ Use Studio 5000 to optimize your drive’s performance, ensuring seamless operation in various industrial applications․ This tool streamlines configuration and enhances productivity, making it essential for maximizing the capabilities of your PowerFlex 755 drive․

3․2 Setting Up Network Communication (EtherNet/IP)

The PowerFlex 755 drive supports EtherNet/IP for seamless network communication, enabling real-time data exchange and remote monitoring․ Configure the drive’s IP address and network settings using Studio 5000 software․ Ensure proper network infrastructure and device connections for optimal performance․ This setup allows integration with Rockwell Automation controllers and other compatible devices, enhancing industrial automation capabilities․ Follow the manual’s guidelines for secure and reliable network configuration to avoid communication errors and ensure efficient operation․

3․3 Configuring Safety Features and Parameters

The PowerFlex 755 drive offers advanced safety features to ensure safe operation in industrial environments․ Configure parameters such as Safe Torque Off (STO) and Safe Speed Monitor (SSM) using Studio 5000 software․ These features comply with Safety Integrity Level (SIL) 3 and Performance Level (PL) e standards․ Properly set safety parameters to prevent unauthorized operation and protect personnel and equipment․ Refer to the manual for detailed instructions and ensure compliance with industry regulations․ Always test safety functions after configuration to verify correct operation․

Maintenance and Troubleshooting

Regular maintenance ensures optimal drive performance․ Schedule service intervals, utilize diagnostic tools, and monitor operations in real-time to resolve faults efficiently․

4․1 Scheduled Maintenance and Service Intervals

Regular maintenance is critical to ensure the PowerFlex 755 drive operates efficiently and reliably․ Schedule routine inspections of fans, filters, and connections to prevent overheating and contamination․ Replace worn or damaged components promptly․ Follow Rockwell Automation’s recommended service intervals for optimal performance․ Environmental factors, such as temperature and humidity, may require more frequent checks․ Always refer to the official manual for specific guidelines tailored to your application․ Proper maintenance extends the lifespan of the drive and minimizes downtime in industrial operations․

4․2 Common Issues and Diagnostic Tools

The PowerFlex 755 drive may encounter issues such as error codes, communication faults, or overload conditions․ Use Studio 5000 software to monitor real-time data and diagnose problems․ The drive’s display panel provides status indicators and fault codes for quick identification․ Regularly check network connections and parameter settings to prevent communication errors․ For detailed troubleshooting, refer to the diagnostic tools section in the manual, which offers step-by-step solutions for common faults and ensures efficient resolution to minimize downtime․

4․3 Real-Time Monitoring and Fault Resolution

The PowerFlex 755 drive supports real-time monitoring through Studio 5000 software, enabling users to track performance metrics and detect anomalies swiftly․ The drive’s embedded EtherNet/IP adapter facilitates seamless network communication, allowing for remote monitoring and diagnostics․ Real-time data analysis helps identify faults early, minimizing downtime․ The manual provides detailed guidance on using diagnostic tools and interpreting fault codes, ensuring efficient troubleshooting and resolution․ This capability enhances system reliability and optimizes operational efficiency in industrial applications․

Advanced Features and Capabilities

The PowerFlex 755 drive offers advanced features like harmonic mitigation, regenerative solutions, and energy efficiency optimization․ It also supports seamless integration with other Rockwell Automation products for enhanced performance․

5․1 Harmonic Mitigation and Regenerative Solutions

The PowerFlex 755 drive offers advanced harmonic mitigation and regenerative solutions to optimize energy efficiency and reduce operational costs․ These features enable the drive to handle regenerative and non-regenerative applications effectively, ensuring smooth operation in demanding environments․ With built-in harmonic mitigation capabilities, the drive minimizes distortion in power systems, while regenerative solutions allow energy to be fed back into the grid or used elsewhere, enhancing overall system performance and productivity․

5․2 Energy Efficiency and Performance Optimization

The PowerFlex 755 drive is designed to deliver exceptional energy efficiency and performance optimization․ By leveraging advanced control algorithms and adaptive motor control techniques, the drive ensures minimal energy consumption while maintaining high operational efficiency․ Features like real-time monitoring and adaptive tuning allow users to optimize motor performance dynamically, reducing energy waste and extending equipment lifespan․ This combination of efficiency and performance makes the PowerFlex 755 an ideal choice for applications requiring precise control and sustainable operation․

5․3 Integration with Other Rockwell Automation Products

The PowerFlex 755 drive seamlessly integrates with other Rockwell Automation products, enhancing system functionality and performance․ Studio 5000 software enables unified configuration and control, while EtherNet/IP connectivity ensures real-time data sharing across devices․ Integration with Kinetix servo drives and other Rockwell Automation solutions allows for synchronized operations and optimized performance․ This interoperability simplifies system management, reduces complexity, and maximizes productivity, making the PowerFlex 755 a key component in integrated automation solutions․

Safety and Compliance

The PowerFlex 755 drive meets Safety Integrity Level (SIL) 3 and Performance Level (PL) e standards, ensuring reliable operation in critical applications․ It complies with global industry regulations․

6․1 Safety Integrity Level (SIL) 3 and Performance Level (PL) e

The PowerFlex 755 drive is designed to meet Safety Integrity Level (SIL) 3 and Performance Level (PL) e standards, ensuring high reliability in safety-critical applications․ These ratings confirm the drive’s ability to perform safety functions effectively, minimizing risks in industrial environments․ Compliance with these standards is achieved through rigorous testing and adherence to international safety regulations, making the PowerFlex 755 suitable for applications requiring advanced safety controls․ The drive’s embedded safety features and real-time monitoring capabilities further enhance its performance in maintaining operational safety and integrity․

6․2 Compliance with Industry Standards and Regulations

The PowerFlex 755 drive complies with global industry standards and regulations, ensuring safe and reliable operation across diverse applications․ It meets stringent requirements outlined in IEC 61508 (SIL 3) and EN ISO 13849-1 (PL e), guaranteeing adherence to international safety and performance benchmarks․ The drive is also designed to align with regional certifications, making it suitable for installation in various global markets․ Compliance with these standards underscores Rockwell Automation’s commitment to delivering products that meet rigorous safety and operational expectations, ensuring user confidence and system integrity․

Resources and Support

Access official Rockwell Automation documentation, training materials, and technical support for the PowerFlex 755 drive․ Utilize online resources, tutorials, and direct support for optimal system performance and troubleshooting․

7․1 Accessing Official Documentation and Guides

Rockwell Automation provides comprehensive documentation for the PowerFlex 755 drive, including user manuals, installation guides, and configuration instructions․ Visit the official Rockwell Automation website to download PDF versions of the PowerFlex 755 User Manual, Embedded EtherNet/IP Adapter Manual, and Studio 5000 Configuration Guide․ These resources offer detailed insights into drive setup, safety features, and advanced functionalities․ Additionally, explore diagrams, videos, and technical notes for troubleshooting and optimization․ Ensure you refer to the latest versions for accurate and up-to-date information․

7․2 Training and Technical Assistance Options

Rockwell Automation offers extensive training programs and technical support to help users master the PowerFlex 755 drive․ Enroll in instructor-led or online courses to gain hands-on experience with configuration, troubleshooting, and advanced features․ For technical assistance, contact Rockwell Automation’s support team or access their online forums and knowledge bases․ Additionally, webinars and tutorials are available to stay updated on the latest features and best practices for optimizing your PowerFlex 755 drive’s performance․

Categories
Manuals

baofeng f8hp manual

The Baofeng F8HP is a dual-band‚ dual-display‚ dual-watch radio offering secure and reliable communications. As an upgraded version of the UV-5R‚ it ensures peak efficiency. The comprehensive 86-page user manual covers initial setup‚ safety‚ and operation‚ making it ideal for amateur radio operators and professionals seeking a portable‚ efficient communication solution.

1.1 Overview of the Radio

The Baofeng F8HP is a VHF/UHF dual-band transceiver designed for reliable communication. With an 8-watt output‚ it supports narrow and wide band coverage‚ making it suitable for both amateur and professional use. The radio features VFO and channel modes‚ CTCSS/DCS tone codes‚ DTMF encoder‚ and an FM radio function. Its built-in flashlight‚ ANI code‚ and emergency tone burst add to its versatility. The F8HP is an upgraded version of the UV-5R‚ offering improved performance and efficiency for secure and instant communication needs.

1.2 Key Features and Benefits

The Baofeng F8HP boasts dual-band operation‚ allowing communication on both VHF and UHF frequencies‚ with an 8-watt output for extended range. It supports narrow and wide band coverage‚ catering to various transmission needs. Features like VFO and channel modes offer operational flexibility‚ while CTCSS/DCS codes enhance privacy by filtering communications. The DTMF encoder enables tone-based operations‚ and the built-in flashlight and emergency tone burst provide practicality and safety. Designed for both amateur and professional use‚ the F8HP is a versatile and reliable communication tool.

Initial Setup and Safety Information

Proper setup ensures optimal performance and safety. Read the manual carefully‚ follow safety guidelines‚ and assemble the radio correctly. Avoid modifications and use only approved accessories to maintain reliability and compliance with safety standards.

2.1 Safety Precautions

The Baofeng F8HP requires adherence to specific safety guidelines. Only qualified technicians should service the radio‚ and modifications are strictly prohibited. Use solely BAOFENG-approved batteries and chargers to prevent damage. Ensure compliance with RF exposure limits and read the included safety guide thoroughly. Proper handling and setup are crucial for safe operation and reliability.

2.2 Unboxing and Assembly

Upon unboxing the Baofeng F8HP‚ you’ll find the radio‚ antenna‚ battery pack‚ charger‚ belt clip‚ and user manual. Begin by attaching the battery pack securely to the radio. Next‚ screw the antenna into the SMA-Female connector on top. Ensure all accessories are properly fitted. Charge the battery fully before first use‚ using only the provided or approved chargers. Familiarize yourself with the manual to understand each component’s function. Proper assembly ensures optimal performance and longevity of your device.

Basic Operation

Power on the radio using the side button. Adjust volume with the up/down keys and set squelch to minimize background noise. Use the PTT button for transmissions‚ ensuring clear communication. Refer to the manual for detailed steps on basic functions and settings to optimize your experience.

3.1 Turning the Radio On/Off

To power on the Baofeng F8HP‚ locate the power button on the side of the radio. Press and hold it until the LCD display lights up‚ indicating the radio is active. The device will automatically perform a self-test and display the current channel or frequency. To turn it off‚ press and hold the same button until the display turns off. Always ensure the battery is properly installed and charged before use. Improper handling of the battery may cause damage. Refer to the manual for detailed instructions.

3.2 Adjusting Volume and Squelch

The Baofeng F8HP allows easy adjustment of volume and squelch for optimal communication. Use the volume knob on the top of the radio to increase or decrease the speaker’s loudness. The squelch knob‚ typically located near the volume control‚ adjusts the threshold for signal reception‚ silencing weak or unwanted signals. Turn the squelch counterclockwise to reduce interference and clockwise to tighten the squelch. Ensure the squelch is set appropriately to balance noise reduction and signal clarity for clear communication.

3.3 Basic Communication Techniques

Mastering basic communication on the Baofeng F8HP involves key steps. Press and hold the PTT button to transmit‚ ensuring clear speech into the microphone. Release the PTT to receive. Use call signs for identification and maintain a structured format for messages. Monitor the channel before transmitting to avoid interference. Adjust volume and squelch for clarity. Keep conversations concise and use standard radio etiquette‚ such as “over” and “out‚” to facilitate smooth communication. Proper techniques ensure effective and clear interactions.

Advanced Features

The Baofeng F8HP offers advanced features like channel programming‚ CTCSS/DCS codes‚ and scanning modes. It supports high-power output‚ VFO and channel modes‚ and built-in tools like flashlight and FM radio‚ enhancing versatility and efficiency for users.

4.1 Channel Programming

The Baofeng F8HP supports programming of up to 128 channels across VHF and UHF frequencies. Users can manually program channels using the radio’s menu system or via external software. Each channel can be customized with specific frequencies‚ bandwidths‚ and tone codes (CTCSS/DCS). The radio also allows setting squelch levels and scanning options for each channel. This feature enables personalized communication setups‚ ensuring efficient and organized use of available frequencies. Proper channel programming is essential for optimal performance and interference-free communication.

4.2 Using CTCSS/DCS Codes

The Baofeng F8HP supports CTCSS (Continuous Tone-Coded Squelch System) and DCS (Digital Code Squelch) codes to filter radio communications. These codes allow users to only receive transmissions from specific groups or individuals‚ reducing unwanted interference. CTCSS offers 38 tone options‚ while DCS provides 104 digital codes. Codes can be set manually via the menu or through programming software. Properly configuring these codes ensures secure and efficient communication‚ minimizing unwanted chatter and enhancing privacy in group operations.

4.3 Scanning Modes

The Baofeng F8HP offers versatile scanning modes to monitor multiple frequencies efficiently. In VFO mode‚ it scans frequencies in predefined steps‚ while Channel mode scans saved channels. Priority scanning allows monitoring of a primary channel while scanning others. The radio supports both wide and narrow bandwidths‚ enhancing signal clarity. Users can customize scan lists and set scan intervals for optimal performance. These features make the F8HP ideal for monitoring multiple frequencies‚ ensuring rapid access to critical communications in dynamic environments.

Troubleshooting

Common issues include poor reception‚ low volume‚ or no power. Resetting the radio‚ checking battery connections‚ and ensuring proper antenna use often resolve these problems quickly.

5.1 Common Issues and Solutions

Common issues with the Baofeng F8HP include low volume‚ static‚ or no power. To resolve these‚ ensure the battery is fully charged‚ check antenna connections‚ and adjust squelch settings. For programming issues‚ reset the radio or re-program channels using the manual. If the radio fails to turn on‚ verify battery installation and charger functionality. Refer to the troubleshooting guide in the manual for detailed solutions and maintenance tips to ensure optimal performance and extend the device’s lifespan.

5.2 Resetting the Radio

To reset the Baofeng F8HP‚ locate the reset button on the rear of the radio. Use a small tool like a paperclip to press and hold the button while powering on the device. Release the button when the LED lights up. This restores factory settings‚ erasing all custom channels and configurations. Resetting is useful for resolving software-related issues but does not fix hardware problems. After resetting‚ reprogram the radio and restore your settings as needed.

Accessories and Maintenance

Essential accessories include the battery‚ charger‚ and antenna for optimal performance. Regularly clean the radio and store it in a dry place to prevent damage.

6.1 Recommended Accessories

Key accessories for the Baofeng F8HP include a high-capacity 3600mAh battery for extended use‚ a desktop charger for convenient charging‚ and a high-gain antenna for improved signal reception. A programmable cable is essential for software updates and channel customization. Additionally‚ a Nagoya NA-771 antenna enhances performance‚ while a tactical earpiece provides discreet communication. A car adapter ensures mobile use‚ and a protective case safeguards the radio during transport. These accessories enhance functionality and ensure optimal performance in various operating conditions.

6.2 Battery Care and Charging

Proper care and charging are essential for maintaining the Baofeng F8HP battery’s performance and longevity. Use only Baofeng-approved batteries and chargers to prevent damage. Avoid overcharging‚ as it can degrade battery life. Store batteries in a cool‚ dry place when not in use. Charge the battery to 50-80% for long-term storage. Ensure the battery is fully charged before prolonged use. Clean contacts regularly to maintain optimal conductivity. Follow the manual’s guidelines for charging cycles to preserve battery health and ensure reliable operation.

Technical Specifications

The Baofeng F8HP is a dual-band VHF/UHF radio with selectable 8-Watt output‚ offering narrow and wide band coverage. It supports VFO and Channel modes‚ CTCSS/DCS tone codes‚ DTMF encoding‚ and features an FM radio‚ built-in flashlight‚ ANI code‚ and emergency tone burst functionality for enhanced communication capabilities.

7.1 Frequency Range

The Baofeng F8HP operates on dual-band frequencies‚ covering VHF (136-174 MHz) and UHF (400-520 MHz). It supports wide and narrow band coverage for versatility in communication. The radio ensures compatibility with standard amateur radio frequencies‚ making it suitable for both personal and professional use. Its frequency range allows for reliable performance across various environments‚ adhering to FCC standards for amateur radio operations. This range ensures clear and efficient communication in diverse settings‚ from urban to outdoor applications.

7.2 Output Power

The Baofeng F8HP offers selectable output power of 1W‚ 4W‚ and 8W‚ ensuring flexibility for various communication needs. The adjustable power settings allow users to optimize battery life and signal strength. High power (8W) is ideal for long-distance communication‚ while lower settings conserve energy. This feature enhances the radio’s efficiency and adaptability in different environments‚ making it suitable for both amateur and professional use. The variable output power ensures reliable performance without compromising portability or convenience.

Categories
Manuals

2jz manual gearbox

The 2JZ engine is renowned for its durability and power‚ making it a popular choice for enthusiasts. Pairing it with a manual gearbox enhances driving engagement and performance‚ offering precise control and a more connected experience behind the wheel.

1.1. Overview of the 2JZ Engine and Its Popularity

The 2JZ engine is a highly regarded inline-6 powerplant known for its exceptional durability‚ smooth power delivery‚ and versatility. Available in both naturally aspirated (2JZ-GE) and turbocharged (2JZ-GTE) variants‚ it has become a favorite among automotive enthusiasts and tuners. Its robust construction and high revving capabilities make it ideal for both street and track applications. The engine’s popularity stems from its wide availability in Toyota and Lexus models‚ such as the Supra and Soarer‚ as well as its ease of modification for increased performance. This has cemented its status as a legendary engine in the automotive community.

1.2. Why a Manual Gearbox is Preferred for the 2JZ

The 2JZ engine pairs exceptionally well with a manual gearbox‚ offering drivers greater control and a more engaging driving experience. Manual transmissions are often preferred for their precision and responsiveness‚ particularly in high-performance applications. The ability to manually shift gears allows for better modulation of power delivery‚ making it ideal for both racing and spirited driving. Additionally‚ manual gearboxes are generally lighter and more durable than automatics‚ which is advantageous for handling and overall performance. This combination of driver engagement and enhanced capabilities makes a manual gearbox the preferred choice for many 2JZ enthusiasts.

Compatible Manual Transmissions for the 2JZ

The 2JZ engine is compatible with several manual transmissions‚ including the W58‚ R154‚ and V160/V161. These transmissions are popular among enthusiasts for their durability and performance capabilities.

2.1. W58 Transmission: Features and Compatibility

The W58 transmission is a popular choice for the 2JZ engine‚ known for its strength and reliability. It features a five-speed manual setup‚ making it ideal for both street and light racing applications. The W58 is highly compatible with the 2JZ-GTE and 2JZ-GE engines‚ requiring minimal modifications for installation. Its durable construction and smooth shifting characteristics make it a favorite among tuners and enthusiasts. Additionally‚ the W58 is lightweight‚ enhancing overall vehicle handling and performance.

2.2. R154 Transmission: Pros and Cons

The R154 transmission is another viable option for the 2JZ engine‚ offering a five-speed manual setup. It is known for its robustness and ability to handle higher torque levels compared to the W58. However‚ the R154 is heavier and often criticized for its less refined shifting quality. Installation typically requires additional modifications‚ such as custom mounts and drivetrain components. While it provides durability for high-performance applications‚ its weight and shifting characteristics may not appeal to all drivers seeking a balanced driving experience.

2.3. V160/V161 Transmission: The MKIV Supra Option

The V160/V161 transmission‚ exclusively featured in the MKIV Supra‚ is a six-speed manual gearbox designed for the 2JZ-GTE. It offers smooth shifting and exceptional performance‚ making it a top choice for enthusiasts. However‚ its availability is limited‚ and sourcing one can be challenging and costly. Additionally‚ the V160/V161 is specific to the Supra platform‚ requiring precise alignment and modifications for installation in other vehicles. Despite these drawbacks‚ its refined operation and high performance capabilities make it a sought-after component for 2JZ manual swaps.

Manual Transmission Swap Considerations

When considering a manual transmission swap for your 2JZ engine‚ evaluating key factors such as custom bellhousing‚ clutch system compatibility‚ and drivetrain modifications is essential for a smooth transition.

3.1. Key Factors to Evaluate Before the Swap

Evaluating mechanical compatibility is crucial. Ensure the chosen manual transmission aligns with your 2JZ engine specifications and power output. Consider custom bellhousing requirements‚ clutch system compatibility‚ and drivetrain modifications. Assess the need for adapter plates‚ flywheel upgrades‚ and propshaft adjustments. Additionally‚ evaluate weight distribution changes and their impact on handling. Budget for potential custom fabrication and labor costs. Finally‚ confirm the transmission’s compatibility with your vehicle’s chassis and electrical systems to ensure a seamless integration and optimal performance post-swap.

3.2. Common Platforms for 2JZ Manual Swaps

The 2JZ engine is frequently swapped into platforms like the Toyota Supra‚ Nissan S-Chassis‚ and Mazda RX-7‚ due to their rear-wheel-drive layouts and performance potential. The Lexus IS/GS and Toyota Chaser/JZX series are also popular for their drivetrain compatibility. Enthusiasts often choose these platforms for their proven track records‚ extensive aftermarket support‚ and ease of integration with manual transmissions like the W58 or V160. Such swaps enable drivers to maximize the engine’s capabilities while maintaining a balanced and responsive driving experience.

Clutch System and Flywheel Setup

The clutch system and flywheel are critical for smooth gear transitions and efficient power transfer. A Stage 6 twin-disc setup is often recommended for high-performance applications.

4.1. Components of the Clutch System

The clutch system for a 2JZ manual gearbox includes a clutch kit‚ flywheel‚ slave cylinder‚ and spacer. The clutch kit comprises a clutch disc‚ pressure plate‚ and release bearing. These components work together to engage and disengage the engine from the transmission smoothly. A twin-disc setup‚ such as the Stage 6‚ is popular for high-power applications‚ offering improved heat resistance and durability. Proper alignment and installation are crucial to ensure optimal performance and prevent wear. Upgrading these components can enhance the vehicle’s shifting quality and overall drivability‚ making it essential to choose parts that match the engine’s power output and driving style.

4.2. Choosing the Right Clutch for Your 2JZ

Selecting the right clutch for your 2JZ depends on power output‚ driving style‚ and application. For stock to mildly modified engines‚ a single-disc clutch suffices‚ offering smooth engagement. High-performance builds benefit from dual-disc setups like the Stage 6 Twin Disc‚ which handles increased torque and heat. Consider the engine’s specifications‚ such as NA or turbocharged‚ to match the clutch’s capacity. Proper alignment during installation is crucial for smooth operation. Upgrading ensures optimal performance‚ durability‚ and driver satisfaction‚ making the clutch a critical component for a seamless manual driving experience.

Crossmember and Shifter Setup

Proper crossmember alignment ensures drivetrain stability‚ while shifter placement optimizes driver control. Components like slave cylinder spacers and mounts are crucial for precise shifting and longevity.

5.1. Importance of Crossmember Alignment

The crossmember plays a critical role in maintaining drivetrain stability by securely holding the transmission in place. Proper alignment ensures even weight distribution‚ preventing uneven wear on mounts and components. Misalignment can lead to vibration‚ noise‚ and premature wear on the transmission and engine mounts. Additionally‚ accurate crossmember positioning is essential for maintaining correct driveshaft angles‚ which directly impacts power delivery and overall vehicle performance. Therefore‚ precise alignment is vital for a smooth and durable manual gearbox setup in a 2JZ-powered vehicle.

5.2. Shifter Configuration for Optimal Performance

Proper shifter configuration is essential for achieving precise gear engagement and smooth shifting in a 2JZ manual gearbox. The shifter’s positioning and alignment directly impact shift quality‚ with even slight misalignments potentially causing poor engagement or difficulty in selecting gears. A well-configured shifter ensures optimal driver feel‚ reducing fatigue and enhancing overall control. Additionally‚ correct shifter setup contributes to better mechanical efficiency‚ minimizing wear on transmission components. Accurate adjustments and high-quality shifter components are crucial for maximizing performance and reliability in both street and track applications.

Key Considerations for a Successful Manual Gearbox Installation

Ensure proper alignment of the bellhousing‚ clutch system‚ and crossmember. Custom adapters and precise shifter configuration are often required for optimal performance and reliability in 2JZ manual swaps.

6.1. Weight Distribution and Handling

Weight distribution is critical when installing a manual gearbox in a 2JZ-powered vehicle. The added weight of the transmission and components can affect handling‚ requiring suspension adjustments. Ensuring proper balance is key to maintaining stability and responsiveness. Lighter transmissions‚ like the W58‚ are often preferred for better agility‚ while heavier options such as the R154 may compromise handling but offer durability. Careful planning and component selection help optimize the vehicle’s overall performance and driver experience.

6.2. Cost and Availability of Components

The cost of components for a 2JZ manual gearbox swap varies widely‚ depending on the transmission model and condition. The W58 is often the most affordable and readily available‚ while the R154 and V160/V161 can be more expensive due to their rarity. Additional components like the bellhousing‚ clutch system‚ and crossmember can add significant costs. Availability may vary by region‚ with some parts requiring import or custom fabrication. Sourcing from reputable suppliers or enthusiast communities can help mitigate costs and ensure compatibility. Proper budgeting and research are essential for a successful installation.

6.3. Shifting Quality and Driver Experience

The shifting quality of a 2JZ manual gearbox significantly impacts the driving experience. Transmissions like the W58 are known for smooth‚ light shifts‚ making them ideal for everyday driving. In contrast‚ the R154 offers a heavier shift weight‚ which some drivers prefer for its durability and precision. The V160/V161‚ found in the MKIV Supra‚ provides a sporty‚ crisp shifting experience. Each transmission’s characteristics cater to different driving preferences‚ ensuring a more engaging and connected feel behind the wheel. The right gearbox choice can elevate the overall satisfaction of driving a 2JZ-powered vehicle.

Categories
Manuals

anvil foundry manual

Welcome to the Anvil Foundry Manual! This guide provides comprehensive instructions for assembling‚ operating‚ and maintaining your Anvil Foundry brewing system․ Designed for both beginners and experienced brewers‚ this manual ensures safe and efficient use of your equipment․ Inside‚ you’ll find detailed safety guidelines‚ step-by-step assembly instructions‚ and tips for troubleshooting common issues․ Whether you’re brewing all-grain or extract‚ this manual will help you achieve professional-quality results․ Read thoroughly before starting to ensure a seamless brewing experience․

Overview of the Anvil Foundry System

The Anvil Foundry is a versatile all-in-one brewing system designed for homebrewers‚ offering efficiency and precision․ Available in sizes like 6․5‚ 10․5‚ and 18 gallons‚ it features triple-element heaters for fast heating‚ a high-flow grain basket‚ and digital controls․ The system supports both no-sparge and sparge mashing methods‚ catering to various brewing techniques․ Its compact design and user-friendly interface make it ideal for brewers of all skill levels․ With safety features like scalding temperature warnings and level surface requirements‚ the Foundry ensures a safe and enjoyable brewing experience․ This system is a perfect blend of innovation and practicality for crafting high-quality beer․

Importance of Following the Manual

The Anvil Foundry manual is essential for safe and effective use of your brewing system․ It provides critical safety guidelines‚ such as avoiding movement during operation and ensuring installation on a level surface․ Proper assembly and maintenance procedures prevent equipment damage and ensure optimal performance․ The manual also details troubleshooting steps to address common issues‚ minimizing downtime and ensuring consistent brewing results․ Adhering to the manual’s instructions helps prevent accidents‚ extends the system’s lifespan‚ and guarantees the best brewing outcomes․ By following the manual‚ you can fully harness the Anvil Foundry’s capabilities while maintaining safety and efficiency throughout the brewing process․

Assembly and Installation

This section guides you through unboxing‚ inventorying components‚ and step-by-step assembly of your Anvil Foundry․ Ensure correct placement on a level surface and follow instructions carefully to guarantee safe and efficient operation․ Essential tools and initial setup procedures are detailed to help you get started․

Unboxing and Inventory of Components

Upon receiving your Anvil Foundry‚ carefully unbox and inspect all components for damage․ Ensure the package includes the main brewing vessel‚ heating elements‚ grain basket‚ control panel‚ hoses‚ connectors‚ and this manual․ Familiarize yourself with each part to ensure nothing is missing or damaged․ Take note of any specific tools or accessories required for assembly‚ as outlined in the manual․ Properly organizing and verifying your components now will streamline the assembly process later․ If any items are missing or damaged‚ contact the retailer immediately to resolve the issue before proceeding․

Step-by-Step Assembly Instructions

Begin by carefully positioning the Anvil Foundry on a level‚ stable surface․ Install the knob washer on the lid‚ ensuring proper alignment․ Attach the screw to secure the knob without over-tightening․ Next‚ insert the valve through the designated hole in the Foundry and connect all hoses and connectors as per the diagram; Ensure the grain basket is properly seated and aligned․ Follow the manual’s sequence for connecting electrical components‚ ensuring all wires are securely fastened․ Double-check each connection to avoid leaks or electrical issues․ If unsure‚ consult the manual or contact support for clarification before proceeding․

Installation Requirements and Safety Precautions

Always install the Anvil Foundry on a level‚ solid surface such as concrete to ensure stability․ Keep the unit away from flammable materials and heat sources․ Ensure proper ventilation in the brewing area to prevent vapor buildup․ Never touch hot surfaces or handles without protection․ Install a ground fault circuit interrupter-protected outlet to meet electrical safety standards․ Regularly inspect all connections and hoses for wear or damage․ Keep children and pets away during operation․ Follow all local electrical codes and manufacturer guidelines to ensure safe and efficient brewing․ Refer to the manual for specific installation details and safety protocols․

Operating the Anvil Foundry

Master the Anvil Foundry’s intuitive control panel to precisely manage temperature‚ timing‚ and flow․ Choose between no-sparge and sparge mashing methods for tailored brewing experiences․ Always follow safety guidelines and pre-brew checks to ensure smooth‚ efficient operation․ The Foundry’s advanced features‚ like rapid heating and recirculation‚ make brewing easier and more consistent․ Refer to the manual for detailed instructions on optimizing your brewing process and achieving professional-quality results․

Pre-Brewing Checklist and Safety Measures

Before brewing‚ ensure the Anvil Foundry is installed on a level‚ heat-resistant surface like concrete․ Verify all connections are secure and free from leaks․ Always use a ground fault circuit interrupter (GFCI) outlet for electrical safety․ Preheat the system according to the manual’s instructions and double-check water chemistry levels․ Wear heat-resistant gloves and eyewear when handling hot liquids․ Ensure the grain basket is properly seated and the pump is primed․ Never leave the system unattended during operation․ Keep children and pets away․ Familiarize yourself with emergency shutdown procedures to prevent accidents․ Follow these steps to ensure a safe and successful brew day․

Understanding the Control Panel and Features

The Anvil Foundry’s control panel is designed for intuitive operation․ It features a digital touchscreen display for precise temperature control and monitoring․ Navigate through menus to set mash temperatures‚ boil times‚ and pump operation․ The system includes a linear digital power controller for consistent heating․ Safety features like overheating protection and automatic shutoff ensure safe brewing․ Familiarize yourself with the control panel layout‚ including the power button‚ temperature adjustment‚ and mode selection․ Use the built-in timer to track brewing stages․ The control panel also provides real-time feedback‚ helping you monitor your brew’s progress efficiently․ Consult the manual for advanced features and customization options․

Brewing Methods: No-Sparge vs․ Sparge Mashing

The Anvil Foundry supports two primary brewing methods: no-sparge and sparge mashing․ No-sparge mashing simplifies the process by using a single water addition‚ ideal for most recipes․ Sparge mashing involves rinsing the grains with hot water to extract additional sugars‚ suitable for higher gravity beers․ Both methods are efficient and supported by the Foundry’s design‚ ensuring optimal results․ Choose based on your recipe and preference for a perfect brew every time․

Maintenance and Cleaning

Regular maintenance and thorough cleaning are essential for optimal performance and longevity of the Anvil Foundry․ Post-brew cleaning prevents residue buildup‚ while routine checks ensure functionality․ Refer to the manual for detailed procedures to keep your system in top condition․

Post-Brew Cleaning Procedures

After each brew‚ thoroughly clean the Anvil Foundry to prevent residue buildup and maintain performance․ Start by draining all liquids and rinsing with warm water․ Use a non-chlorine cleaner like PBW to soak and scrub all components‚ especially heating elements and pumps․ Avoid abrasive materials to prevent damage․ Rinse thoroughly to remove any cleaning solution residue․ Regular descaling is also recommended to remove mineral deposits․ Follow the manual’s cleaning guidelines to ensure optimal functionality and longevity of your brewing system․ Proper post-brew cleaning ensures your Anvil Foundry remains in top condition for future brewing sessions․

Regular Maintenance Tasks

Regular maintenance is crucial to ensure the longevity and efficiency of your Anvil Foundry․ Check and clean the heating elements every 1-2 months to prevent mineral buildup․ Descale the system periodically‚ especially in hard water areas‚ using a food-safe descaler․ Inspect and replace worn gaskets and seals to maintain a tight seal․ Lubricate moving parts‚ such as pump bearings‚ every 3-6 months․ Check electrical connections for tightness and inspect the exterior for damage․ Regularly review and follow the manual’s maintenance schedule to keep your Anvil Foundry in optimal working condition and ensure consistent brewing results․

Troubleshooting Common Issues

Identify and resolve common issues with your Anvil Foundry to ensure uninterrupted brewing․ If the heating element isn’t working‚ check for loose connections or mineral buildup․ Slow heating may indicate scaling; descale as needed․ For pump failure‚ inspect for blockages or worn impellers․ Leaks often occur due to worn gaskets; replace them promptly․ If temperature readings are inaccurate‚ recalibrate the sensor․ Refer to the manual for detailed diagnostic steps․ Regular maintenance can prevent many issues‚ but if problems persist‚ contact Anvil Brewing support for assistance․ Proper care ensures optimal performance and extends the lifespan of your brewing system․

Advanced Features and Accessories

Explore the Anvil Foundry’s advanced features‚ including the Recirculation Kit for enhanced efficiency and consistency․ Customize your system with optional upgrades and integrate seamlessly with other brewing tools for a tailored experience․

Using the Recirculation Kit

The Recirculation Kit enhances your Anvil Foundry’s performance by improving mash efficiency and clarity․ It allows for continuous recirculation of wort during mashing‚ ensuring even heating and sugar extraction․ To install‚ connect the pump and hoses according to the manual․ For operation‚ set the pump to low speed and monitor flow․ This kit is ideal for advanced brewers seeking consistent results․ Always follow safety guidelines to prevent overheating or pump damage․ Regular cleaning of the kit is essential to maintain proper function and prevent contamination․ This accessory elevates your brewing process‚ making it more precise and efficient․

Integrating with Other Brewing Equipment

The Anvil Foundry seamlessly integrates with various brewing accessories and equipment‚ enhancing your overall brewing experience․ Compatible with pumps‚ fermenters‚ and chillers‚ it allows for a streamlined setup․ For example‚ connecting a Blichmann Engineering pump simplifies recirculation and transfer processes․ Additionally‚ the Foundry works well with external temperature control systems for precise monitoring․ When integrating‚ ensure all connections are secure and compatible to avoid leaks or damage․ Regularly inspect hoses and fittings for wear․ This versatility makes the Foundry a central component of a comprehensive brewing system‚ enabling efficient and professional-level brewing setups for both novice and experienced brewers alike․

Upgrading and Customizing Your Foundry

Upgrading and customizing your Anvil Foundry allows you to tailor the system to your brewing preferences․ Popular upgrades include adding a recirculation kit for improved mash efficiency or installing a temperature control system for precise monitoring․ You can also customize the grain basket or add a custom mash colander for specific brewing techniques․ Ensure all upgrades are compatible with the Foundry’s design and electrical specifications․ Always follow the manual’s guidelines when modifying your system to maintain safety and functionality․ These enhancements can significantly improve your brewing experience‚ offering greater flexibility and efficiency for both novice and advanced brewers․

Safety Guidelines and Precautions

Always wear protective gear like gloves and goggles when operating the Anvil Foundry․ Ensure the system is installed on a level‚ heat-resistant surface․ Keep the area dry to prevent electrical shocks and avoid touching hot components․ Never leave the Foundry unattended during operation․ Follow all safety guidelines in the manual to ensure a secure brewing experience and prevent accidents․

Electrical Safety and Installation Tips

Ensure the Anvil Foundry is installed on a level‚ solid surface like concrete to prevent instability․ Keep the area dry to avoid electrical hazards․ Avoid overloading circuits and use a GFCI-protected outlet․ Install the system in a well-ventilated area to prevent moisture buildup․ Never modify the electrical components without professional assistance․ Follow the manual’s wiring diagrams and safety guidelines to ensure proper installation․ Regularly inspect cords and plugs for damage․ Always unplug the unit before cleaning or servicing․ Proper electrical setup is crucial for safe and efficient brewing․

Handling Hot Liquids and Surfaces

Always exercise extreme caution when handling hot liquids and surfaces on the Anvil Foundry․ The system’s components‚ including the kettle and heating elements‚ can reach scalding temperatures during operation․ Never touch the exterior or internal parts without proper protection‚ such as heat-resistant gloves or tongs․ Allow all components to cool completely before cleaning or maintenance․ When transferring hot liquids‚ use food-grade‚ heat-resistant equipment to prevent spills and burns․ Avoid moving the system while it contains hot liquids․ Keep children and pets away from the brewing area to ensure safety․ Proper handling practices are essential to prevent accidents and ensure a safe brewing experience․

Emergency Shutdown Procedures

In case of an emergency‚ immediately switch off the power to the Anvil Foundry using the main power switch․ Turn off all heating elements and close the valve to stop liquid flow․ Do not attempt to move the system while it contains hot liquids or is in operation․ If a spill occurs‚ allow the liquids to cool before cleaning․ Never submerge hot components in water to avoid thermal shock․ Keep a fire extinguisher nearby and ensure all users are aware of these procedures․ Following these steps will help prevent accidents and ensure safe operation of your Anvil Foundry brewing system․

Categories
Manuals

agilent 1290 infinity ii manual

The Agilent 1290 Infinity II Manual provides comprehensive guidance for operating, installing, and maintaining the system. It covers advanced features, troubleshooting, and essential safety protocols for optimal performance.

1.1 Overview of the Agilent 1290 Infinity II System

The Agilent 1290 Infinity II is a high-performance UHPLC system designed for advanced chromatographic applications. It offers ultra-high pressure, rapid separation, and precise flow control, ensuring exceptional accuracy and efficiency. Compatible with various columns and detectors, it supports diverse analytical needs in research and industrial settings, delivering reliable results across multiple workflows.

1.2 Importance of the User Manual

The user manual is essential for understanding the Agilent 1290 Infinity II system’s operation, installation, and maintenance. It provides detailed instructions for optimizing performance, troubleshooting issues, and ensuring safety. The manual is a critical resource for users to unlock the system’s full potential and comply with operational guidelines effectively.

Key Features of the Agilent 1290 Infinity II

The Agilent 1290 Infinity II features high-pressure pumps, advanced detectors, and compatibility with various chromatography columns. It offers superior performance, precision, and flexibility for demanding analytical applications in modern laboratories.

2.1 High-Pressure Pump Capabilities

The Agilent 1290 Infinity II features a high-pressure pump capable of delivering up to 1300 bar, enabling efficient separation and analysis. Its advanced design supports high flow rates and compatibility with various chromatography columns, including 1.8 µm particles, ideal for UHPLC, reducing runtime and enhancing performance.

2.2 Advanced Detectors and Their Configurations

The Agilent 1290 Infinity II offers advanced detectors, including the Evaporative Light Scattering Detector (ELSD), Diode Array Detector (DAD), and Fluorescence Detector (FLD). These detectors provide high sensitivity and flexibility for various analytes. The DAD features a deuterium lamp for UV detection, while ELSD excels for non-chromophoric compounds, and FLD optimizes fluorescent molecule analysis.

2.3 Compatibility with Various Chromatography Columns

The Agilent 1290 Infinity II supports a wide range of chromatography columns, including 1.8 µm particle size columns for high-resolution separations. It is compatible with various column types, such as reverse-phase, normal-phase, and HILIC, enabling flexibility for diverse analytical applications and ensuring optimal chromatographic performance across different workflows.

System Components and Accessories

The Agilent 1290 Infinity II system comprises key components such as the Flexible Pump Module, Multisampler, and Inline Filters, ensuring high-performance chromatography and system protection;

3.1 Flexible Pump Module

The Flexible Pump Module delivers high-pressure capabilities up to 1300 bar and flow rates up to 5 mL/min, ensuring precise solvent delivery. Its advanced design supports a wide range of chromatographic methods, from analytical to preparative scales, with exceptional accuracy and reliability for optimal performance.

3.2 Multisampler and Its Capabilities

The Multisampler efficiently handles both vials and microtiter plates, supporting up to 1300 bar system pressure. It ensures precise sample injection and optimal chromatographic performance, making it ideal for high-throughput and versatile laboratory workflows. Its design enhances productivity while maintaining accuracy in various analytical applications.

3.4 Inline Filters and Their Role

Inline filters protect the UHPLC column from particulate matter, ensuring optimal system performance. Made from durable materials like stainless steel or PEEK, they effectively prevent clogging. Regular replacement is crucial for maintaining chromatographic efficiency and extending column lifespan, minimizing downtime in high-throughput workflows.

Installation and Setup Guidelines

Proper installation involves unpacking, inventorying components, and connecting modules. Initial calibration ensures system accuracy and prepares the instrument for operation, following detailed manual instructions.

4.1 Unpacking and Inventory of Components

Carefully unpack the Agilent 1290 Infinity II system, ensuring all components are accounted for. Verify the integrity of each part, checking for damage. Organize components systematically, referencing the manual for identification. This step ensures a smooth installation process and prevents missing or damaged items.

4.2 Connecting System Modules

Connect system modules carefully, aligning ports and securing connections firmly. Use the provided adapters for compatibility. Ensure all tubes and fittings are tightly sealed. Refer to the manual for torque specifications. After connecting, perform a leak test to verify system integrity before proceeding with calibration.

4.3 Initial System Calibration

Calibrate the system by priming the pump, checking detector settings, and verifying pressure and flow rate accuracy. Use the holmium oxide filter for wavelength verification. Follow the manual’s step-by-step guide to ensure precise instrument setup and optimal performance before starting analysis.

Operating the Agilent 1290 Infinity II

Operate the system by initializing the pump, setting up chromatographic methods, and running samples. Ensure proper parameter configuration and monitor performance metrics for precise and reliable analysis.

5.1 Basic Operation Steps

Power on the system and initialize the pump. Set method parameters, including flow rate and pressure. Load samples into the autosampler. Start the chromatographic run and monitor real-time data. Ensure all components function within specified limits for precise and accurate results.

5.2 Setting Up a Chromatographic Method

Access the system software to create and configure a chromatographic method. Define parameters like mobile phase composition, flow rate, and gradient. Set injection volume and sample tray configuration. Configure detector settings based on type (DAD, ELSD, FLD) and save the method. Ensure proper communication between software and hardware, and verify with a test run before sample analysis.

5.3 Monitoring System Performance

Monitor real-time system performance through the software interface, tracking pressure, flow rate, and detector signals. Use built-in diagnostics to identify potential issues like leaks or worn parts. Regularly check chromatograms for consistency and reproducibility. Address any anomalies promptly to ensure optimal operation and prevent downtime, maintaining high reliability and accuracy in your analyses.

Maintenance and Troubleshooting

Regular maintenance ensures optimal performance. Clean or replace worn parts, check for leaks, and address error messages promptly. Troubleshooting guides help resolve common issues efficiently.

6.1 Regular Maintenance Procedures

Regular maintenance involves replacing inline filters, cleaning components, and checking seals for wear. Perform leak tests and calibrate detectors as specified. Follow recommended schedules to ensure system longevity and prevent downtime. Use genuine Agilent parts for replacements to maintain performance and warranty compliance.

6.2 Common Issues and Solutions

Common issues include high-pressure leaks, detector malfunctions, and system connection errors. Solutions involve checking O-rings, recalibrating detectors, and verifying tubing connections. Regular maintenance and using genuine Agilent parts help prevent these issues. Refer to the troubleshooting guide for detailed diagnostic steps and repairs to ensure optimal system performance.

6.3 Leak Testing and System Sealing

Regular leak testing ensures system integrity and performance. Inspect connections, O-rings, and sealing components. Address leaks promptly to prevent fluid loss and damage. Use Agilent-approved tools and follow manual guidelines for sealing. Proper sealing maintains high pressure and precision, ensuring reliable chromatographic results and extending system lifespan.

Advanced Features and Customization

The Agilent 1290 Infinity II offers advanced customization options, including the Flexible Cube Module for multi-dimensional chromatography and seamless integration with MS systems for enhanced analytical capabilities.

7.1 Using the Flexible Cube Module

The Flexible Cube Module in the Agilent 1290 Infinity II enables multi-dimensional chromatography by allowing the use of multiple detectors and columns. It enhances separation efficiency and workflow flexibility, accommodating various analytical needs with its modular design and high-pressure capability up to 1300 bar.

7.2 Integrating with MS Systems

The Agilent 1290 Infinity II seamlessly integrates with MS systems, enhancing analytical sensitivity and workflow efficiency. Modules like the MS Flow Modulator (G7170B) optimize coupling, ensuring precise solvent delivery and compatibility with various mass spectrometers for advanced chromatographic and mass analysis applications.

7.3 Optimizing Chromatographic Performance

The Agilent 1290 Infinity II offers advanced features to enhance chromatographic performance. High-pressure capabilities and precise flow rates enable sharp peak resolution. Additionally, compatibility with columns of varying particle sizes, including 1.8 μm, allows for rapid separations and improved sensitivity, ensuring optimal results in diverse analytical workflows.

Safety Precautions and Compliance

Agilent 1290 Infinity II requires careful handling of high-pressure components and use of protective gear. Adherence to regulatory standards and proper waste disposal ensures safe and compliant operation.

8.1 Handling High-Pressure Components

Handling high-pressure components on the Agilent 1290 Infinity II requires extreme caution. Always wear protective gear, avoid direct contact with pressurized parts, and ensure proper inspection of connections. Follow manufacturer guidelines to prevent accidents and maintain system integrity. Never exceed the maximum pressure rating of 1300 bar. Proper handling ensures safe and reliable operation of the system.

8.2 Compliance with Regulatory Standards

The Agilent 1290 Infinity II adheres to international regulatory standards, ensuring compliance with safety and performance requirements. It meets FDA, ISO, and GMP guidelines, making it suitable for global use. Always verify local regulations and follow manufacturer guidelines to maintain compliance during operation and maintenance.

8.3 Proper Disposal of Waste Materials

Proper disposal of waste materials from the Agilent 1290 Infinity II is crucial. Always follow local regulations and guidelines for handling hazardous waste. Recycle materials when possible and ensure safe disposal to minimize environmental impact. Check the manual for specific disposal instructions, especially for contaminated items.

Detectors and Their Configuration

The Agilent 1290 Infinity II features advanced detectors, including ELSD, DAD, and FLD, each offering unique capabilities for precise and versatile chromatographic analysis.

9.1 Evaporative Light Scattering Detector (ELSD)

The Evaporative Light Scattering Detector (ELSD) is a universal detector for non-chromophoric compounds. It operates by nebulizing the eluent, evaporating the solvent, and measuring scattered light. This detector is ideal for high-pressure systems, offering sensitivity and compatibility with a wide range of chromatographic methods.

9.2 Diode Array Detector (DAD)

The Diode Array Detector (DAD) offers high sensitivity and versatility for UV-Vis detection. It features a deuterium lamp for broad wavelength coverage and rapid scanning capabilities. Ideal for chromatographic analysis, the DAD provides accurate spectral data, enabling compound identification and quantification with precision.

9.3 Fluorescence Detector (FLD)

The Fluorescence Detector (FLD) excels in detecting fluorescent compounds with high sensitivity. It is ideal for analyzing samples with natural fluorescence or those requiring derivatization. The FLD offers superior selectivity and is widely used for trace analysis, making it a versatile tool for advanced chromatographic applications.

Accessories and Consumables

The Agilent 1290 Infinity II system requires specific accessories like columns, guard columns, and inline filters to ensure optimal performance and longevity. Spare parts and replacement kits are also available for maintenance and upgrades.

10.1 Columns and Guard Columns

The Agilent 1290 Infinity II supports a wide range of chromatography columns, including those filled with 1.8 µm particles for rapid separation. Guard columns are essential for protecting the main column from contaminants, ensuring extended lifespan and consistent performance. They are specifically designed to withstand high pressure and maintain chromatographic efficiency.

10.2 Inline Filters and Fittings

Inline filters are essential for protecting the Agilent 1290 Infinity II system from particulate matter in samples. Properly fitted, they prevent column clogging and maintain optimal chromatographic performance. Regular inspection and replacement of these components ensure extended system lifespan and reliability;

10.3 Spare Parts and Replacement Kits

Spare parts and replacement kits for the Agilent 1290 Infinity II are designed to maintain system performance and longevity. Genuine Agilent components ensure compatibility and reliability, while replacement kits provide essential items for routine maintenance, preventing downtime and ensuring optimal chromatographic results. Always use authorized parts for system integrity.

Resources and References

The Agilent 1290 Infinity II manual provides access to official Agilent resources, including downloadable PDFs, technical guides, and customer support contacts for troubleshooting and maintenance assistance.

11.1 Downloading the User Manual

The Agilent 1290 Infinity II manual is available for download as a PDF from official Agilent resources or platforms like ManualsLib; Ensure to access the correct version (e.g., G7102A) for accurate system operation and maintenance guidance.

11.2 Agilent Technologies Support

Agilent Technologies offers comprehensive support for the 1290 Infinity II system, including troubleshooting, maintenance, and training. Users can access technical assistance, online resources, and detailed documentation through Agilent’s official website or contact their support team for personalized help.

11.3 Additional Technical Documentation

Additional technical documentation for the Agilent 1290 Infinity II includes user manuals, quick reference guides, and technical notes. These resources cover installation, operation, and troubleshooting, ensuring comprehensive support. They are available online, providing detailed insights into system features, detectors, and advanced customization options.

Warranty and Legal Information

The Agilent 1290 Infinity II is covered by a limited warranty, with terms and conditions outlined in the manual. Legal disclaimers and liability limitations are also detailed.

12.1 Warranty Terms and Conditions

The Agilent 1290 Infinity II is covered under a limited warranty, as detailed in Document No: SD-29000230 Rev. G, effective 10/2024. This warranty outlines specific terms, conditions, and exclusions. Agilent disclaims all other warranties, express or implied. The manual’s contents are proprietary and protected under copyright laws.

12.2 Disclaimer and Limitation of Liability

Agilent disclaims all warranties, express or implied, regarding the 1290 Infinity II manual and its content. The company is not liable for damages arising from improper use, unauthorized modifications, or reliance on the information provided in this document. Liability is strictly limited to terms outlined in the warranty agreement.

12.3 Software License Agreement

The Agilent 1290 Infinity II manual software is protected by Agilent Technologies’ standard commercial license terms. Use, duplication, or disclosure of the software is subject to these terms. Unauthorized modifications or reproductions are prohibited. The software is protected by copyright laws, and all rights are reserved by Agilent Technologies.

The Agilent 1290 Infinity II manual ensures optimal system performance and compliance. By following its guidelines, users can maximize efficiency, safety, and chromatographic results, investing in cutting-edge technology for future analytical needs.

13.1 Summary of Key Points

The Agilent 1290 Infinity II manual highlights advanced features like high-pressure pumps, versatile detectors, and compatibility with various columns. It emphasizes proper installation, operation, and maintenance for optimal performance. Adhering to safety protocols and utilizing resources ensures efficient chromatographic analysis and compliance with regulatory standards, maximizing system longevity and analytical results.

13.2 Final Tips for Effective Use

Regular maintenance ensures optimal performance. Proper calibration enhances accuracy. Utilize the flexible cube module for advanced customization. Adhere to safety guidelines for secure operation. Leverage Agilent’s support resources for troubleshooting. Follow manual instructions carefully to maximize system potential and longevity.