The Honeywell T6 Thermostat is a smart, Wi-Fi-enabled device offering energy efficiency and adaptive learning to optimize temperature settings. It requires a C wire and is compatible with most HVAC systems, integrating seamlessly with smart home systems for enhanced control.
1.1 Key Features and Benefits
The Honeywell T6 Thermostat features geofencing, smart home integration, and energy-saving modes. It offers a user-friendly interface, adaptive learning, and remote control via the Honeywell Home app. Compatible with most HVAC systems, it provides precise temperature control and scheduling options, ensuring comfort and energy efficiency.
System Requirements and Compatibility
The Honeywell T6 Thermostat requires 24VAC power (C wire) and is compatible with most heating, cooling, and heat pump systems but not electric baseboard heating.
2.1 Compatibility with Heating, Cooling, and Heat Pump Systems
The Honeywell T6 Thermostat is designed to work with various HVAC systems, including forced air, hydronic, and heat pump configurations. It supports 2-stage heating and cooling systems, ensuring compatibility with standard setups. However, it is not compatible with electric baseboard heating systems that require 120/240V power. Proper system compatibility ensures optimal performance and energy efficiency.
2.2 Required: 24 VAC Power (C Wire)
The Honeywell T6 Thermostat requires a 24 VAC power supply, which is typically provided through a C wire connection. A common wire (C wire) ensures continuous power to the thermostat, enabling Wi-Fi connectivity and advanced features. Systems without a C wire may need a compatible adapter to maintain proper functionality and avoid power interruptions during operation.
2.3 Incompatibility with Electric Baseboard Heat
The Honeywell T6 Thermostat is incompatible with 120/240V electric baseboard heating systems. This incompatibility stems from voltage requirements, as the T6 operates on 24 VAC power. Users relying on electric baseboard heat should verify compatibility before installation to ensure proper system functionality and avoid potential operational issues.

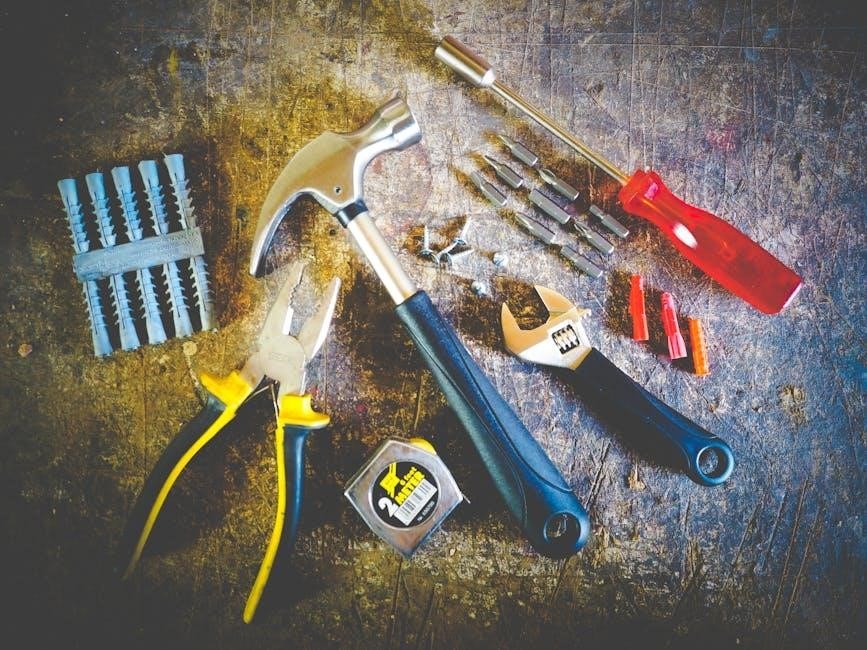
Tools and Materials Needed for Installation
Essential tools include a screwdriver, wire strippers, and drill bits. Materials like screws, anchors, and the C wire adapter are provided or required for installation.
3.1 List of Required Tools
A screwdriver, wire strippers, and drill bits are essential. Additionally, a ladder, voltage tester, and marker may be needed. Ensure all tools are readily available before starting the installation process to avoid delays and ensure safety.
3.2 Understanding the C Wire Requirement
The Honeywell T6 Thermostat requires a 24VAC power source, typically provided by a C wire. This wire ensures continuous power for advanced features like Wi-Fi connectivity and smart functionality. Without it, the thermostat may not function properly, necessitating a C wire adapter if your system lacks one.
UWP Mounting System Installation
The UWP Mounting System simplifies installation with pre-drilled holes and included screws. It ensures secure thermostat mounting, accommodating various wall types for a seamless setup experience.
4.1 Overview of the UWP Mounting System
The UWP Mounting System provides a universal and flexible solution for installing the Honeywell T6 Thermostat. Designed for compatibility with various wall types, it includes screws and anchors to ensure secure and level mounting. The system allows for easy adjustments, making it ideal for both new installations and upgrades from existing thermostats. It enhances installation efficiency and reliability.
4.2 Step-by-Step Mounting Instructions
Turn off power to the HVAC system. 2. Attach the UWP mounting plate to the wall using provided screws and anchors. 3. Ensure the plate is level and secure. 4. Align the thermostat with the mounting plate and snap it into place. 5. Tighten the thermostat firmly. 6. Use the optional cover plate to conceal any paint gaps for a polished look.
Wiring and Terminal Designations
The Honeywell T6 requires a C wire for 24VAC power. Connect wires to designated terminals (R, C, W, Y, G, etc.) following standard HVAC conventions for proper functionality.
5.1 Understanding Wiring Conventions
Wiring conventions for the Honeywell T6 involve connecting terminals like R, C, W, Y, and G according to standard HVAC practices. The C wire provides 24VAC power, essential for operation. Properly label and connect wires to avoid system malfunctions. Refer to the terminal designations in the manual to ensure correct connections. Incorrect wiring can damage the thermostat or HVAC system, so careful attention is required during installation.
5.2 Connecting Wires to Terminals
Connect wires to the terminals according to the system type and wiring diagram in the manual. Ensure R and C wires are securely connected for 24VAC power. W, Y, and G terminals control heating, cooling, and fan functions, respectively. Double-check connections to avoid errors. Incorrect wiring can damage the thermostat or HVAC system, so follow the terminal designations carefully.
Thermostat Mounting and Placement
Mount the Honeywell T6 thermostat away from direct sunlight, heat sources, and drafts. Install it at a height of 1;2 to 1.5 meters above the floor for accurate temperature sensing.
6.1 Ideal Locations for Thermostat Placement
The Honeywell T6 thermostat should be placed in a central location, away from direct sunlight, drafts, and heat sources; Ensure it is at least 1.2 to 1.5 meters above the floor to avoid furniture interference and provide accurate temperature readings. This placement ensures optimal performance and energy efficiency by maintaining consistent room conditions;
6.2 Optional Cover Plate Installation
The optional cover plate is used to cover gaps left by previous thermostats or when mounting directly to an electrical junction box. It ensures a clean, professional appearance and is easy to install with provided screws. Use it for a seamless look or to hide paint marks, enhancing the overall aesthetic of your Honeywell T6 setup.

System Setup and Configuration
Configure your Honeywell T6 Thermostat using the Honeywell Home app for initial settings, temperature set points, and smart features. The system learns your preferences for optimal performance.
7.1 Initial System Settings
Begin by setting the Honeywell T6’s system mode, choosing between heating, cooling, or heat pump. Select the temperature scale (°F or °C) and configure the clock format. Ensure the location settings are accurate for proper operation. These initial settings lay the foundation for efficient temperature control and smart home integration.
7.2 Configuring the Thermostat Using the Honeywell Home App
Download and install the Honeywell Home app, then create an account or log in. Connect your T6 thermostat to the app by following in-app instructions. Configure settings like temperature set points, scheduling, and geofencing. Enable features such as smart home integration and energy-saving modes to optimize performance and convenience.
7.3 Setting Temperature Set Points
Access the temperature settings through the Honeywell Home app or thermostat interface. Set your preferred heating and cooling ranges, ensuring optimal comfort and energy efficiency. The T6 learns your system’s behavior to pre-heat or cool, maintaining consistent temperatures. Adjust set points manually or schedule them for automated control, leveraging features like geofencing for smart, adaptive temperature management.

Installer System Test
The Installer System Test verifies heating, cooling, and Wi-Fi connectivity. It ensures the thermostat responds correctly to temperature adjustments, providing a smooth and efficient system operation.
8.1 Testing Heating and Cooling Systems
Test the heating system by setting the thermostat to a higher temperature and ensuring it activates. For cooling, set a lower temperature and verify the AC starts. Check system responsiveness and temperature accuracy to ensure proper functionality. This step confirms the thermostat’s ability to control both heating and cooling effectively and efficiently.
8.2 Verifying Thermostat Response
After installation, test the thermostat’s response by adjusting the temperature and observing if the system activates accordingly. Ensure the display reflects the set temperature and that heating or cooling starts as expected. Verify smooth transitions between modes and confirm the thermostat accurately responds to manual adjustments and scheduled settings.
8.3 Checking Wi-Fi Connectivity
Open the Honeywell Home app to ensure the thermostat is connected to Wi-Fi. Navigate to device settings and verify the connection status. Check for a stable network signal and test remote control functionality to confirm proper connectivity. Ensure the thermostat’s LED indicates a successful Wi-Fi connection for seamless smart home integration and remote operation.

Troubleshooting Common Issues
This section addresses common issues like display malfunctions and connectivity problems. Resetting the thermostat and checking power connections are often effective solutions. Consult the user guide for detailed troubleshooting steps.
9.1 Common Installation Problems and Solutions
Common issues include incorrect wiring, lack of C wire power, and improper mounting. Solutions involve verifying connections, ensuring 24VAC power, and leveling the thermostat. Resetting the device or consulting the manual often resolves these problems effectively, ensuring proper system functionality and user comfort.
9.2 Resetting the Thermostat
To reset the Honeywell T6 Thermostat, remove the batteries and press the reset button located on the backplate; Wait 30 seconds before reinstalling the batteries. This process resolves system glitches and restores default settings. For further assistance, download the Honeywell Home app or consult the user guide for detailed instructions.
Maintenance and Care
Regularly clean the thermostat with a soft cloth and avoid harsh chemicals. Ensure proper functionality by checking batteries and updating software as needed for optimal performance.
10.1 Cleaning the Thermostat
Use a soft, dry cloth to gently wipe down the Honeywell T6 thermostat. Avoid harsh chemicals or abrasive materials that could damage the screen or casing. Regular cleaning ensures optimal performance and maintains the device’s aesthetic appearance while preventing dust buildup that might interfere with temperature sensing or touch functionality.
10.2 Updating Software and Firmware
Regular software and firmware updates are essential for optimal performance. Use the Honeywell Home app to check for updates and install them automatically. Ensure the thermostat is connected to Wi-Fi before starting the process. Updates may add new features, improve functionality, or fix bugs, keeping your system efficient and secure. Always follow on-screen instructions carefully.
Advanced Features and Settings
The Honeywell T6 offers smart home integration, geofencing, and energy-saving modes. It adapts to your schedule and preferences, optimizing comfort and energy efficiency seamlessly through the Honeywell Home app.
11.1 Smart Home Integration
The Honeywell T6 Thermostat seamlessly integrates with popular smart home systems like Amazon Alexa and Google Home. Through the Honeywell Home app, users can control temperatures remotely and create custom scenes. This integration allows for voice control and enhanced automation, ensuring optimal comfort and energy efficiency while simplifying home management.
11.2 Geofencing and Scheduling
The Honeywell T6 Thermostat supports geofencing, using your smartphone’s location to automatically adjust temperatures when you leave or arrive home. Scheduling features allow users to set personalized temperature plans, optimizing comfort and energy efficiency. These features are easily configured through the Honeywell Home app, ensuring a seamless and tailored heating and cooling experience.
11.3 Energy-Saving Features
The Honeywell T6 Thermostat offers advanced energy-saving features, including geofencing and smart scheduling. It learns your heating and cooling patterns to optimize energy use and reduce waste. The thermostat also supports energy-efficient settings and integrates with the Honeywell Home app for remote monitoring, ensuring you save energy without compromising comfort.

Safety Precautions
Ensure safe installation by avoiding heat sources and direct sunlight. Install by a qualified technician, handle electrical components carefully, and comply with local regulations to prevent hazards effectively.
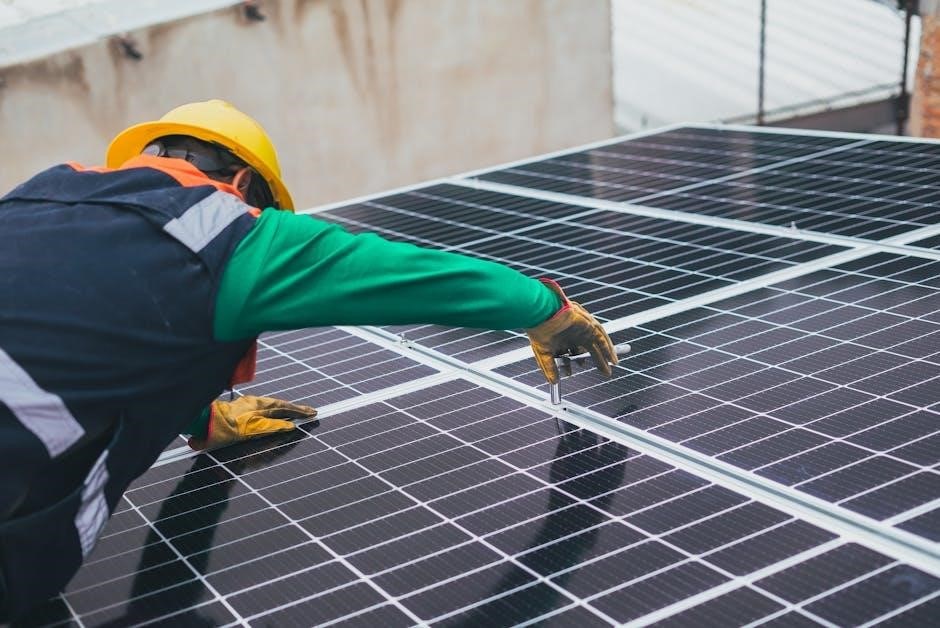
12.1 Importance of Professional Installation
Professional installation is crucial for ensuring safety and proper functionality of the Honeywell T6 Thermostat. Improper installation can lead to electrical hazards, system damage, or inaccurate temperature control. Trained technicians have the expertise to handle wiring, compatibility checks, and system configuration, minimizing risks and ensuring compliance with safety standards for optimal performance and user safety.
12.2 Avoiding Placement Near Heat Sources
The Honeywell T6 Thermostat should not be placed near direct sunlight, drafts, or heat sources like radiators or fireplaces. Such locations can cause inaccurate temperature readings, leading to inefficient heating or cooling. It should be installed at least 1.2 meters above the floor for reliable performance and optimal system regulation.
12.3 Ensuring Proper Power Handling
The Honeywell T6 Thermostat requires a stable 24 VAC power supply, necessitating a C wire connection. It is incompatible with high-voltage systems like electric baseboard heating (120/240V). Proper power handling ensures reliable operation, prevents malfunctions, and avoids damage. Always follow installation guidelines to maintain electrical safety and system integrity.
Thank you for following the Honeywell T6 installation guide. Proper installation ensures optimal performance. Double-check all connections, settings, and system functionality before finalizing. Refer to the Honeywell Home app for additional support and troubleshooting.
13.1 Summary of Key Installation Steps
Mount the UWP system, connect wires to designated terminals, and ensure proper C-wire installation. Configure settings using the Honeywell Home app, set temperature points, and test HVAC functionality. Verify Wi-Fi connectivity and thermostat response. Double-check all connections and settings for optimal performance and smart home integration. Ensure compliance with safety guidelines and manufacturer recommendations.
13.2 Final System Verification
After installation, verify heating, cooling, and heat pump systems operate correctly. Test thermostat response and Wi-Fi connectivity. Ensure temperature set points and scheduling function as configured. Check for proper power handling and system safety. Confirm all features, including smart home integration, are operational. Address any issues promptly to ensure optimal performance and user satisfaction.