Gather Necessary Tools and Materials
To assemble your Intex pool‚ you’ll need the following essential items:
- Intex pool kit (includes liner‚ pump‚ ladder‚ and filter).
- Ground cloth or tarp to protect the liner from debris.
- Measuring tape for marking the pool location.
- Leveling tools (e.g.‚ shovel‚ spirit level) for ensuring even ground.
Essential Components of the Intex Pool Kit
The Intex pool kit is a comprehensive package designed to provide everything you need for setup. It typically includes:
- Pool liner: The main container that holds the water‚ made of durable‚ puncture-resistant material.
- Pump and filter: Essential for circulating and cleaning the water to keep it safe and clear.
- Ladder: A sturdy‚ adjustable ladder for safe entry and exit from the pool.
- Ground cloth: A protective layer to shield the liner from sharp objects and uneven ground.
- Hardware and connectors: Includes frames‚ bolts‚ and joints to assemble the pool’s structure.
These components are specifically designed to work together‚ ensuring a secure and functional setup. Always verify that all parts are included and in good condition before starting assembly.
Prepare the Ground
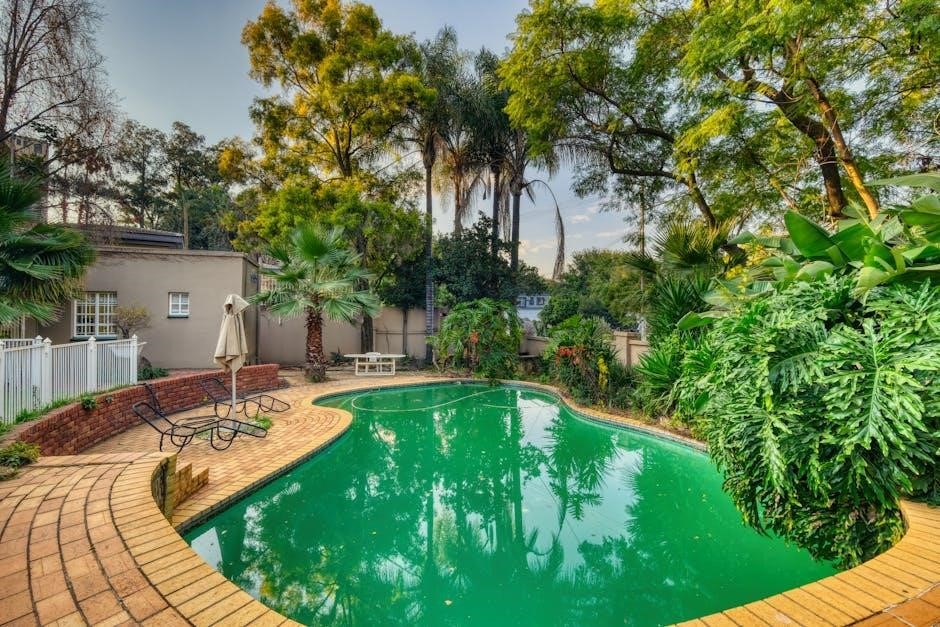
Clear the area of debris‚ rocks‚ and vegetation. Level the ground using a shovel and spirit level to ensure an even surface. Lay a ground cloth or tarp to protect the pool liner from punctures and damage.
Ensuring a Level Surface
Ensuring a level surface is critical for proper Intex pool installation. Uneven ground can cause water to shift‚ putting stress on the pool frame and potentially leading to collapse. Start by clearing the area of debris‚ rocks‚ and vegetation. Use a shovel to dig down to the dirt and level the ground. A spirit level tool is essential for verifying evenness. If necessary‚ fill in low areas with soil and pack it firmly to create a stable base. Once the ground is level‚ lay a ground cloth or tarp to protect the pool liner from punctures and debris. Avoid setting up the pool on sand‚ as it can shift and destabilize the structure. Finally‚ double-check the surface with a level to ensure it is flat and even before proceeding with the pool assembly. A level surface ensures safety‚ proper water distribution‚ and a sturdy pool frame.
Laying the Ground Cloth
Laying a ground cloth is a crucial step in protecting your Intex pool liner from punctures and debris. Begin by unfolding the tarp or ground cloth on the leveled surface‚ ensuring it is large enough to cover the entire area where the pool will sit. Center the cloth and smooth out any wrinkles or creases. If setting up on grass‚ trim the area to prevent uneven surfaces. For added protection‚ ensure the cloth extends slightly beyond the pool’s perimeter to prevent weeds or sharp objects from penetrating the liner.
Secure the edges of the ground cloth with rocks or sand to prevent it from shifting during installation or use. Avoid folding the cloth‚ as this can create sharp creases that might damage the liner. If setting up on concrete‚ a thick ground cloth is still recommended to cushion the liner and prevent abrasions. Once the cloth is in place‚ proceed with unfolding and positioning the pool liner. Ensure the surface is smooth and free of wrinkles before assembling the pool frame. This step ensures a safe and durable setup for your Intex pool. Always prioritize the integrity of the ground cloth to extend the life of your pool.
Assemble the Pool Frame
Attach the metal frame parts to the pool liner‚ ensuring all connections are secure. Follow the manual to connect horizontal beams and T-joints; Insert vertical support legs into the liner’s pockets and tighten firmly. Tight spaces may require an extra pair of hands for proper alignment. Always refer to the specific instructions provided with your Intex pool kit for accurate assembly. Ensure all parts are tightly fitted to maintain the pool’s stability and structural integrity. Proper assembly is crucial for safe and enjoyable use of your Intex pool. If unsure‚ consult the manual or seek assistance to avoid any potential issues during assembly. This step is vital for the overall durability and safety of the pool. Make sure all connections are secure before moving on to the next step. Avoid over-tightening‚ as this could damage the frame or liner. Take your time to ensure each part is correctly fitted and aligned. This will ensure a sturdy and reliable pool structure. Finally‚ double-check all connections to ensure everything is secure and properly assembled. This will provide a safe and enjoyable experience for everyone using the pool.
Attaching the Metal Frame
Start by inserting the horizontal beams into the sleeves of the pool liner‚ ensuring they are fully seated. Connect the beams to the T-joints‚ making sure they are secure and evenly spaced. Avoid placing T-joints directly on the liner‚ as this could cause damage. Once the horizontal frame is in place‚ attach the vertical support legs to the corners and around the perimeter of the pool. These legs provide stability and help maintain the pool’s shape. Tighten all connections firmly‚ but avoid over-tightening‚ which could warp the frame or damage the liner. If you encounter difficulty‚ especially with the last T-joint‚ an extra pair of hands can be helpful. Always refer to the provided manual for specific guidance‚ as the assembly process may vary slightly depending on the pool model. Ensure all metal parts are securely locked and aligned properly to maintain the pool’s structural integrity. Properly attaching the metal frame is crucial for the pool’s stability and safety‚ especially when filled with water. Double-check all connections before moving on to the next step. This ensures the frame can withstand the weight of the water and users. A well-assembled frame guarantees a safe and enjoyable swimming experience. Always prioritize precision and patience during this step to avoid future issues. Following these steps carefully will result in a sturdy and reliable pool structure. Ensure all parts are tightly fitted and properly aligned for optimal performance. This step is critical for the overall durability and safety of the pool. If unsure‚ consult the manual or seek assistance to ensure everything is correctly assembled. This will ensure a secure and stable pool frame‚ ready for the next steps in the setup process. Proper assembly of the metal frame is essential for the pool’s longevity and performance. Make sure all connections are secure and properly aligned before proceeding. This step is vital for the pool’s stability and safety‚ so take your time to ensure everything is correctly assembled. A well-constructed frame will provide years of reliable service and enjoyable swimming experiences. Always follow the manufacturer’s instructions for the best results. This will ensure the pool is safe‚ stable‚ and ready for use. Properly attaching the metal frame is a key part of the assembly process‚ so it’s important to get it right. With careful attention to detail‚ you’ll have a secure and durable pool frame in no time. This step is essential for the pool’s structural integrity‚ so take the time to ensure all parts are properly connected and aligned. A sturdy frame will support the pool’s walls and ensure safe swimming conditions. Always double-check your work to avoid any potential issues down the line. This will give you peace of mind and ensure the pool remains safe and functional for years to come. By carefully following the instructions and taking the time to secure each part‚ you’ll achieve a professional-level assembly. This will result in a pool that is both safe and enjoyable for everyone. Properly assembling the metal frame is a crucial step in the overall setup process‚ so it’s worth taking the extra time to ensure it’s done correctly. With patience and attention to detail‚ you’ll have a secure and stable pool frame that will withstand the elements and heavy use. Always prioritize safety and structural integrity when assembling the metal frame‚ as this is the foundation of your pool’s stability. By following the manufacturer’s instructions and taking the necessary precautions‚ you’ll achieve a professional-quality assembly. This will ensure your pool is safe‚ durable‚ and ready for years of enjoyment. Properly attaching the metal frame is a key part of the assembly process‚ so it’s important to get it right. With careful attention to detail‚ you’ll have a secure and durable pool frame in no time. This step is essential for the pool’s structural integrity‚ so take the time to ensure all parts are properly connected and aligned. A sturdy frame will support the pool’s walls and ensure safe swimming conditions. Always double-check your work to avoid any potential issues down the line. This will give you peace of mind and ensure the pool remains safe and functional for years to come. By carefully following the instructions and taking the time to secure each part‚ you’ll achieve a professional-level assembly. This will result in a pool that is both safe and enjoyable for everyone. Properly assembling the metal frame is a crucial step in the overall setup process‚ so it’s worth taking the extra time to ensure it’s done correctly. With patience and attention to detail‚ you’ll have a secure and stable pool frame that will withstand the elements and heavy use. Always prioritize safety and structural integrity when assembling the metal frame‚ as this is the foundation of your pool’s stability. By following the manufacturer’s instructions and taking the necessary precautions‚ you’ll achieve a professional-quality assembly. This will ensure your pool is safe‚ durable‚ and ready for years of enjoyment. Properly attaching the metal frame is a key part of the assembly process‚ so it’s important to get it right. With careful attention to detail‚ you’ll have a secure and durable pool frame in no time. This step is essential for the pool’s structural integrity‚ so take the time to ensure all parts are properly connected and aligned. A sturdy frame will support the pool’s walls and ensure safe swimming conditions. Always double-check your work to avoid any potential issues down the line. This will give you peace of mind and ensure the pool remains safe and functional for years to come. By carefully following the instructions and taking the time to secure each part‚ you’ll achieve a professional-level assembly. This will result in a pool that is both safe and enjoyable for everyone. Properly assembling the metal frame is a crucial step in the overall setup process‚ so it’s worth taking the extra time to ensure it’s done correctly. With patience and attention to detail‚ you’ll have a secure and stable pool frame that will withstand the elements and heavy use. Always prioritize safety and structural integrity when assembling the metal frame‚ as this is the foundation of your pool’s stability. By following the manufacturer’s instructions and taking the necessary precautions‚ you’ll achieve a professional-quality assembly. This will ensure your pool is safe‚ durable‚ and ready for years of enjoyment. Properly attaching the metal frame is a key part of the assembly process‚ so it’s important to get it right. With careful attention to detail‚ you’ll have a secure and durable pool frame in no time. This step is essential for the pool’s structural integrity‚ so take the time to ensure all parts are properly connected and aligned. A sturdy frame will support the pool’s walls and ensure safe swimming conditions. Always double-check your work to avoid any potential issues down the line. This will give you peace of mind and ensure the pool remains safe and functional for years to come. By carefully following the instructions and taking the time to secure each part‚ you’ll achieve a professional-level assembly. This will result in a pool that is both safe and enjoyable for everyone. Properly assembling the metal frame is a crucial step in the overall setup process‚ so it’s worth taking the extra time to ensure it’s done correctly. With patience and attention to detail‚ you’ll have a secure and stable pool frame that will withstand the elements and heavy use. Always prioritize safety and structural integrity when assembling the metal frame‚ as this is the foundation of your pool’s stability. By following the manufacturer’s instructions and taking the necessary precautions‚ you’ll achieve a professional-quality assembly. This will ensure your pool is safe‚ durable‚ and ready for years of enjoyment. Properly attaching the metal frame is a key part of the assembly process‚ so it’s important to get it right. With careful attention to detail‚ you’ll have a secure and durable pool frame in no time. This step is essential for the pool’s structural integrity‚ so take the time to ensure all parts are properly connected and aligned. A sturdy frame will support the pool’s walls and ensure safe swimming conditions. Always double-check your work to avoid any potential issues down the line. This will give you peace of mind and ensure the pool remains safe and functional for years to come. By carefully following the
Connect the Pump and Filter
To connect the pump and filter‚ position the pump near the pool and ensure it’s on a level surface. Attach the hoses securely to the pool and pump‚ then plug it into a GFCI-protected outlet. Turn it on and check for proper water circulation. This ensures clean and safe water. Regularly maintain the filter to keep the pool clean and extend its lifespan.
Setting Up the Filtration System
Setting up the filtration system is crucial for maintaining clean and safe water. Start by connecting the hoses from the pool to the pump and filter‚ ensuring all connections are secure and watertight. Locate the pump on a level‚ stable surface near the pool and plug it into a GFCI-protected outlet for safety. Turn on the pump and allow it to cycle through the water‚ checking for any leaks or improper connections. The filter should be primed before use by filling it with water‚ and the system should run continuously for at least 24 hours initially to clear any debris. Regularly clean or replace the filter cartridge as recommended by the manufacturer to maintain optimal performance. Proper filtration ensures clear water‚ prevents algae growth‚ and keeps the pool safe for swimming. Always refer to the Intex manual for specific instructions tailored to your pool model.

Fill and Test the Pool
Fill the pool slowly with a hose‚ ensuring the water level reaches just below the top rim. Once full‚ turn on the pump and filter to circulate the water. Check for leaks and proper operation of the system.
Final Adjustments and Maintenance
Filling the Pool Safely
Filling your Intex pool requires careful attention to ensure safety and proper function. Begin by attaching a garden hose to a nearby water source‚ preferably using a hose filter to prevent sediment from entering the pool. Place the hose in the pool and allow it to fill slowly. Monitor the water level closely‚ ensuring it does not exceed the recommended fill line‚ usually about 2 inches below the top rim. Overfilling can cause stress on the frame and potentially lead to collapse. As the pool fills‚ smooth out any wrinkles in the liner‚ especially on the bottom‚ to ensure even water distribution and comfort for swimmers. Keep children and pets away during this process‚ and avoid leaving the pool unattended to prevent accidents. Once filled‚ inspect the pump and filter connections to ensure they are secure and functioning properly before turning on the filtration system.


